
1. Introduction
This manual provides comprehensive instructions for the installation, operation, maintenance, and troubleshooting of your BOYO VTC701AHD Digital Wireless 7-inch Monitor and Camera System. Please read this manual thoroughly before using the product to ensure proper function and safety.
2. Safety Precautions
- Ensure all connections are secure and properly insulated to prevent short circuits.
- Do not attempt to disassemble or modify the system components. This may void the warranty and cause damage.
- Install the monitor in a location that does not obstruct the driver's view or interfere with vehicle safety features.
- Always adhere to local traffic laws and regulations regarding the use of vehicle camera systems.
- Keep the system away from extreme temperatures, direct sunlight, and moisture.
3. Package Contents
Verify that all items are present in the package:
- 7-inch Digital Wireless Monitor
- Digital Wireless Camera
- Monitor Power Cable
- Camera Power Cable
- Monitor Mounting Bracket
- Antennas (for monitor and camera)
- User Manual (this document)
4. Product Components

Figure 4.1: Overview of the BOYO VTC701AHD system, showing the 7-inch digital wireless monitor on the left and the wireless camera on the right, both equipped with antennas.
4.1. 7-inch Digital Wireless Monitor
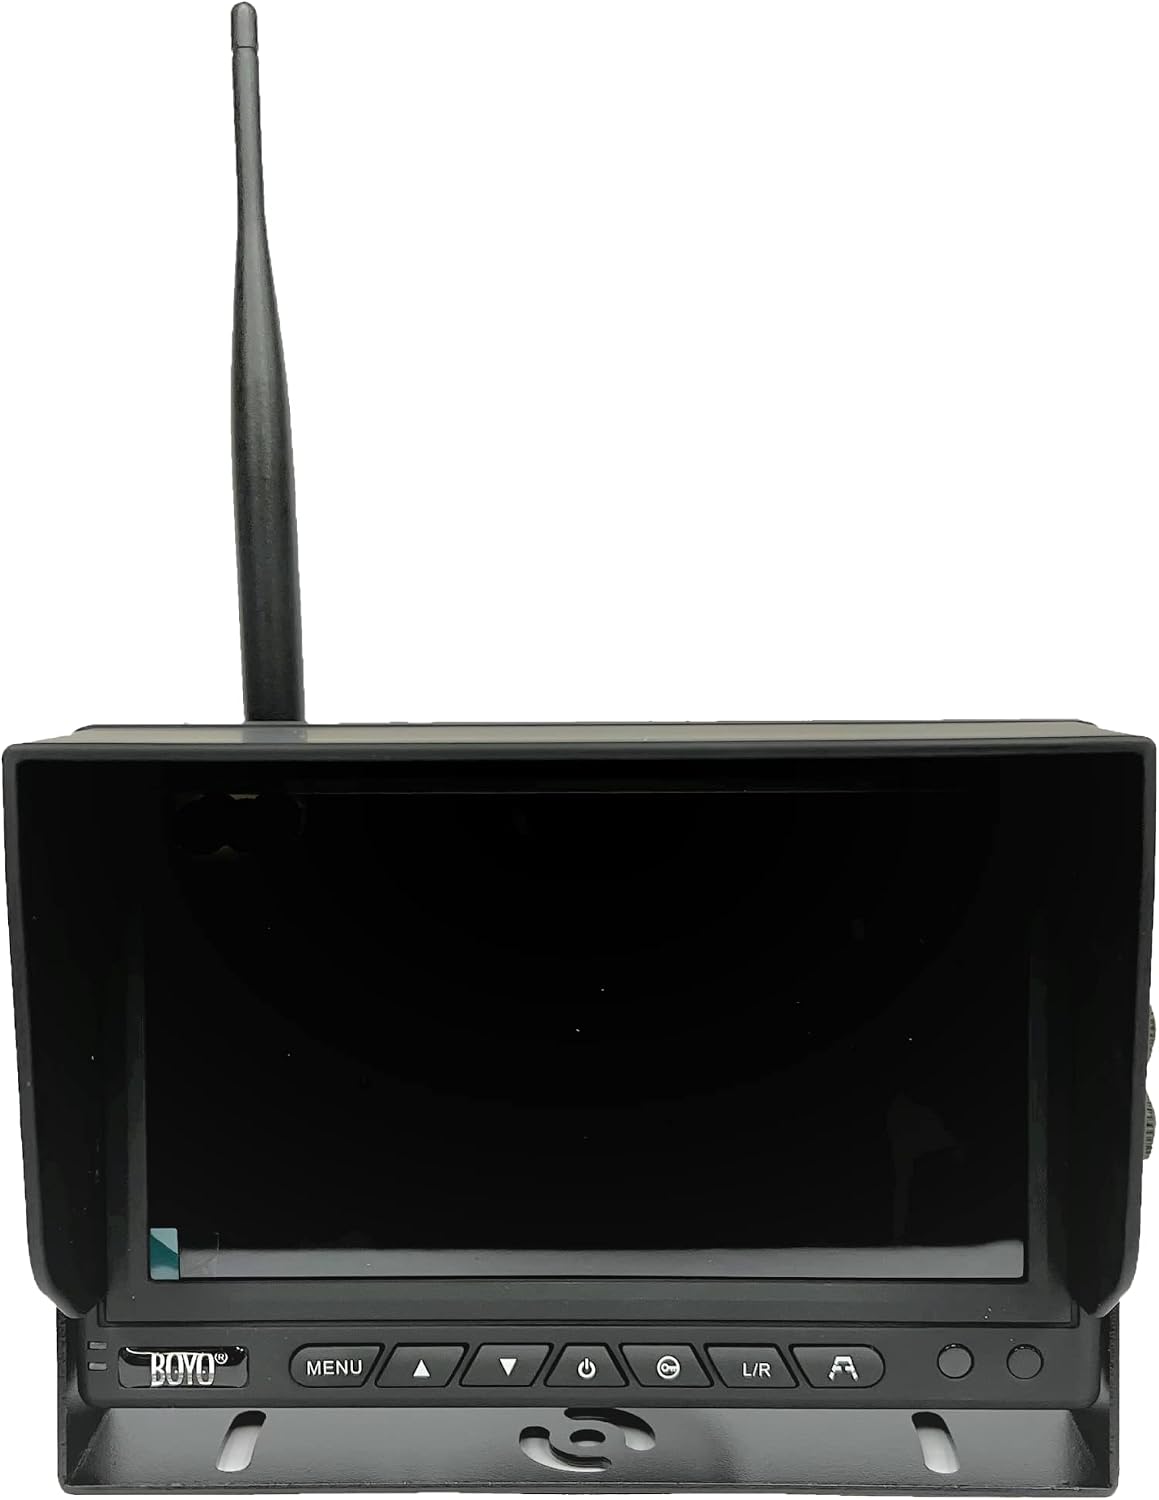
Figure 4.2: Front view of the 7-inch monitor, displaying control buttons for menu navigation, power, and image adjustments.
The monitor features a 7-inch TFT LCD display with 1080P resolution. It includes control buttons for power, menu access, navigation (up/down), and image adjustments (L/R for mirror/flip). An antenna port is located on the top for wireless signal reception.
4.2. Digital Wireless Camera

Figure 4.3: Close-up view of the wireless camera, highlighting the lens, infrared LEDs for night vision, and the antenna.
The camera utilizes a CMOS sensor and offers a 170-degree wide viewing angle. It is equipped with an antenna for wireless transmission to the monitor and includes infrared LEDs for enhanced visibility in low-light conditions.
5. Installation Guide
5.1. Monitor Installation
- Choose a Location: Select a suitable location on your vehicle's dashboard or windshield that provides a clear view for the driver without obstructing visibility or airbags.
- Attach Mounting Bracket: Secure the monitor mounting bracket to the chosen surface. Ensure it is firmly attached.
- Mount Monitor: Attach the monitor to the mounting bracket. Adjust the angle for optimal viewing.
- Connect Power: Connect the monitor's power cable to a 12V DC power source in your vehicle (e.g., cigarette lighter adapter or direct wiring to an ignition-switched power source).
- Attach Antenna: Screw the antenna onto the designated port on the monitor.
5.2. Camera Installation
- Select Mounting Position: Install the camera at the rear of your vehicle, typically above the license plate or on the bumper, ensuring a clear view of the area behind the vehicle.
- Secure Camera: Use the provided hardware to securely mount the camera.
- Connect Power: Connect the camera's power cable to a 12V DC power source. For backup camera functionality, it is recommended to connect the power to the vehicle's reverse light circuit so the camera activates automatically when the vehicle is in reverse.
- Attach Antenna: Screw the antenna onto the designated port on the camera.
5.3. Pairing (If Necessary)
The monitor and camera are typically pre-paired from the factory. If pairing is lost or you are adding an additional camera (if supported by your specific model), follow these steps:
- Power on both the monitor and the camera.
- Access the monitor's menu and navigate to the 'Pairing' or 'Channel' option.
- Follow the on-screen prompts to initiate the pairing process. The camera usually has a pairing button that needs to be pressed within a specific timeframe.
- Once successfully paired, the camera's image will appear on the monitor.
6. Operation Instructions
6.1. Powering On/Off
Press the Power button on the monitor to turn the system on or off. If wired to an ignition-switched power source, the system will power on/off with the vehicle's ignition.
6.2. Basic Monitor Functions

Figure 6.1: The monitor displaying a clear road view, indicating proper operation of the camera system.
- MENU Button: Press to access the main menu for settings adjustments.
- Up/Down Buttons: Use these to navigate through menu options or adjust values.
- L/R (Mirror/Flip) Button: Toggles the image horizontally (mirror) or vertically (flip) to suit installation orientation or preference.
- Brightness/Contrast/Color: These settings can typically be adjusted within the menu to optimize image quality.
7. Maintenance and Care
- Cleaning: Use a soft, dry cloth to clean the monitor screen and camera lens. For stubborn dirt, a slightly damp cloth with mild cleaning solution can be used, but avoid harsh chemicals.
- Cable Inspection: Periodically check all cables and connections for wear, damage, or loose contacts.
- Storage: If the system will not be used for an extended period, store it in a cool, dry place away from direct sunlight.
8. Troubleshooting
| Problem | Possible Cause | Solution |
|---|---|---|
| No image on monitor | No power to monitor or camera; Unpaired devices; Loose connections. | Check power connections; Re-pair monitor and camera; Ensure all cables are securely connected. |
| Flickering or distorted image | Weak wireless signal; Electrical interference; Damaged antenna. | Ensure antennas are properly attached and unobstructed; Check for sources of electrical interference; Inspect antennas for damage. |
| Monitor not turning on | No power; Faulty power cable. | Verify power source is active; Check power cable for damage and replace if necessary. |
| Camera not activating in reverse | Incorrect wiring to reverse light circuit. | Verify camera power is correctly connected to the reverse light circuit. |
9. Technical Specifications
| Feature | Specification |
|---|---|
| Model Number | VTC701AHD |
| Monitor Screen Size | 7 Inches |
| Display Type | TFT LCD |
| Resolution | 1080P |
| Video System | NTSC/PAL Compatible |
| Camera Sensor Type | CMOS |
| Camera Viewing Angle | 170 Degrees |
| Power Input | 12 Volts DC |
| Connectivity | Wireless |
| Item Weight | 2.67 pounds (system total) |
| Product Dimensions | 12.2 x 8.9 x 3.5 inches |
10. Warranty Information
This product is covered by a manufacturer's warranty against defects in materials and workmanship. The specific terms and duration of the warranty may vary. Please refer to the warranty card included with your product or contact customer support for detailed information.
11. Customer Support
For technical assistance, troubleshooting beyond this manual, or warranty inquiries, please contact BOYO VISION customer support. Contact information can typically be found on the manufacturer's website or on the product packaging.


