1. Introduction
The Bril UV-C Toothbrush Sanitizer is designed to provide a clean environment for your toothbrush bristles. Utilizing UV-C light technology, this portable device aims to reduce bacteria on your toothbrush, contributing to improved oral hygiene. It features a compact design, making it suitable for both home use and travel.
2. Key Features
- UV-C Light Technology: Employs UV-C light to sanitize toothbrush bristles.
- 99.9% Sanitization Rate: Designed to eliminate 99.9% of bacteria on the toothbrush surface.
- Automatic Operation: Activates automatically when the case is closed.
- Quick Cycle: Completes a sanitization cycle in approximately three minutes.
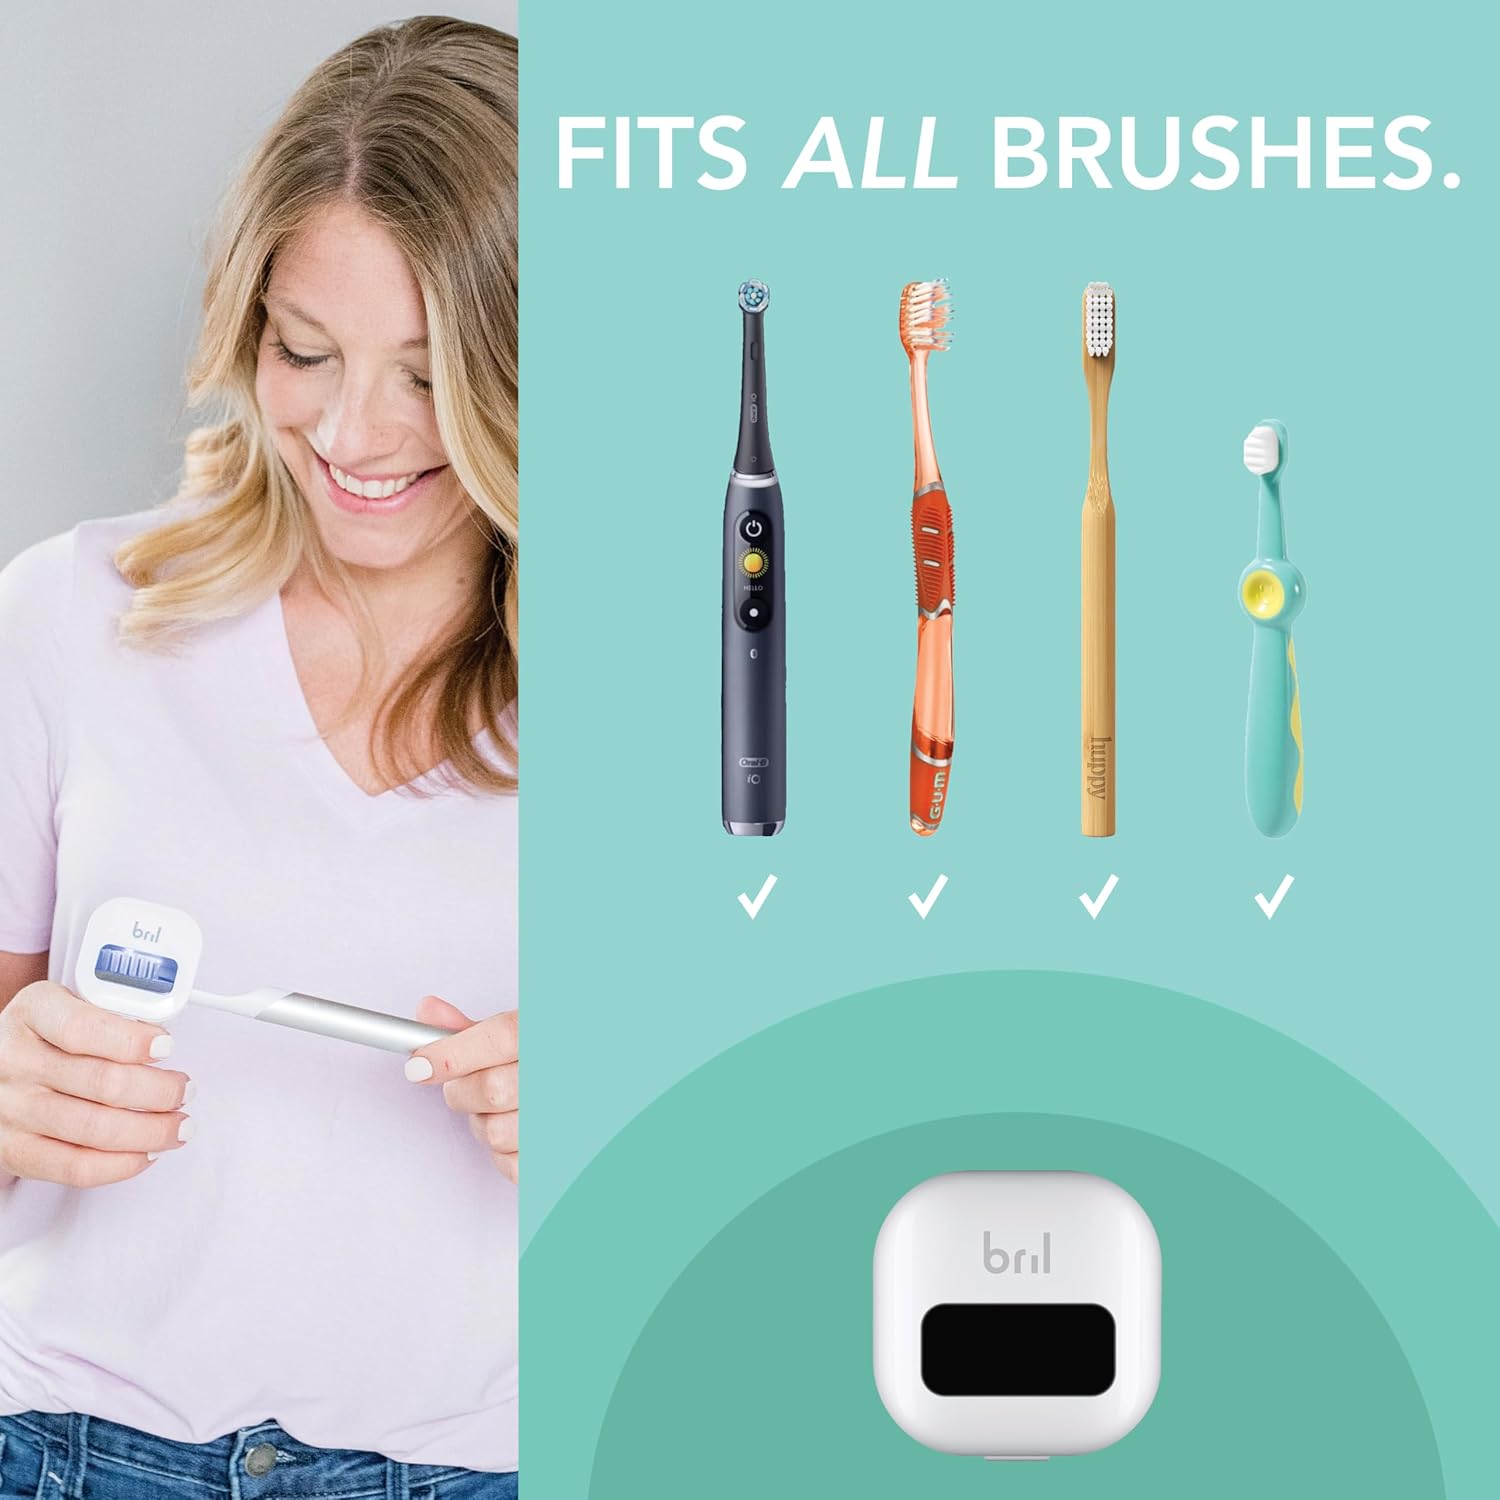
- Universal Fit: Accommodates various toothbrush sizes, including manual and electric brush heads.
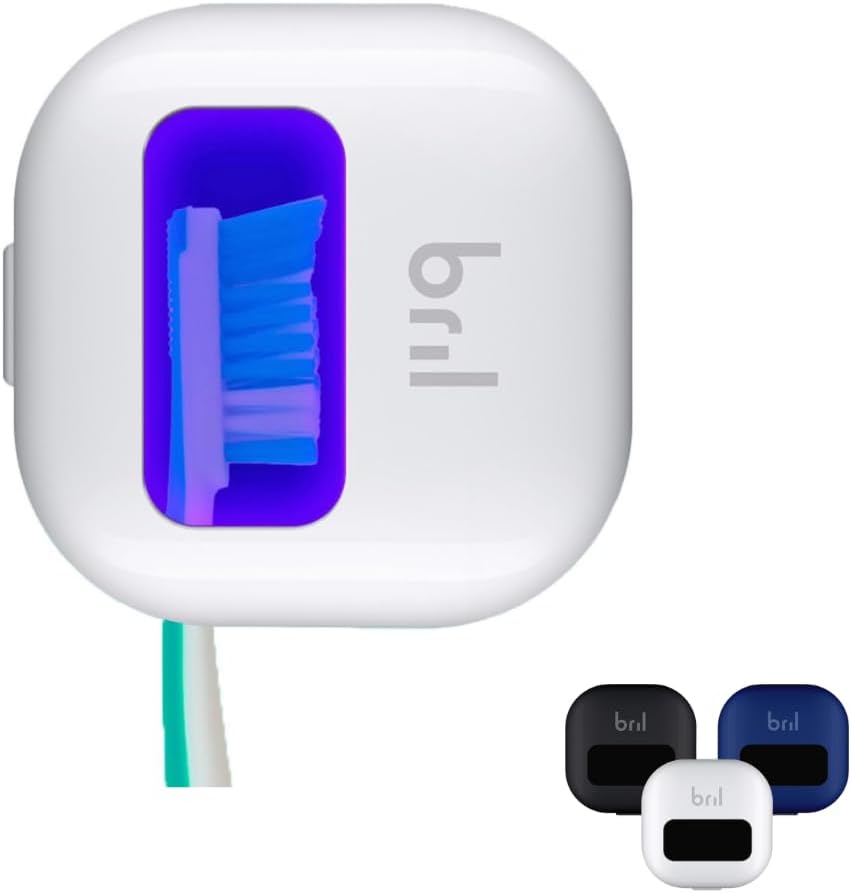
- Magnetic Mounting: Includes a built-in magnet for convenient storage on mirrors or walls.
- USB Rechargeable: Features a rechargeable battery for portability and extended use.
- Portable Design: Compact and lightweight, ideal for travel.

3. What's Included
Your Bril UV-C Toothbrush Sanitizer package typically includes:
- Bril UV-C Toothbrush Sanitizer Unit(s)
- USB-C Charging Cable
- Magnetic Mount(s) with adhesive backing
- User Manual
4. Setup
4.1 Initial Charging
Before first use, fully charge your Bril UV-C Toothbrush Sanitizer. Connect the provided USB-C cable to the charging port on the device and plug the other end into a compatible USB power source. A green light will illuminate inside the unit to indicate charging. A full charge typically takes approximately two hours and can last for up to one month of regular use.
4.2 Mounting (Optional)
The Bril sanitizer includes a magnetic mount for convenient storage. Peel off the adhesive backing from the magnetic disc and attach it to a clean, dry surface such as a bathroom mirror or wall. The sanitizer unit can then be magnetically attached to this disc.

5. Operating Instructions
5.1 Inserting Your Toothbrush
Open the Bril sanitizer case. Insert the head of your toothbrush into the designated slot, ensuring the bristles are facing the UV-C light source. The flexible rubberized grips are designed to accommodate various toothbrush handle sizes.
5.2 Activating the Sanitization Cycle
Close the lid of the Bril sanitizer. The UV-C light will automatically activate, indicated by a blue light visible through the transparent window. The sanitization cycle lasts for approximately three minutes.
5.3 Cycle Completion
After three minutes, the UV-C light will automatically turn off, indicating the completion of the sanitization cycle. The device is designed to prevent UV-C exposure by automatically deactivating the light if the lid is opened during a cycle.
6. Maintenance
6.1 Cleaning
To clean the Bril sanitizer, wipe the exterior with a soft, damp cloth. Do not submerge the device in water or use harsh chemical cleaners. Ensure the device is dry before closing the lid or charging.
6.2 Battery Care
Recharge the device when the battery is low. Avoid prolonged exposure to extreme temperatures. If storing for an extended period, ensure the battery is partially charged.
7. Troubleshooting
- Device not turning on: Ensure the device is charged. Verify the lid is fully closed to activate the UV-C light.
- Red light blinking: This indicates a low battery. Recharge the device using the provided USB-C cable.
8. Specifications
| Feature | Detail |
|---|---|
| Product Dimensions | 2 x 2 x 1 inches |
| Item Weight | 2.39 ounces |
| Item Model Number | B09JRTFMH2 |
| Batteries | 1 Lithium Ion battery (included) |
| Manufacturer | Bril |
9. Safety Information
- Do not expose eyes or skin directly to UV-C light. The device is designed with a safety mechanism that turns off the UV-C light when the lid is open.
- Keep out of reach of children.
- Use only the provided charging cable or a compatible USB-C cable.
- Do not attempt to disassemble or repair the device. Contact customer support for assistance.
10. Warranty & Support
The Bril UV-C Toothbrush Sanitizer comes with a one-calendar-year warranty from the date of purchase. For warranty claims, technical support, or any product-related inquiries, please contact Bril customer service directly. Refer to the contact information provided on the product packaging or the official Bril website.