Introduction
This manual provides detailed instructions for the LENVII CW888 Bluetooth Wireless 1D/2D QR Barcode Scanner. Please read this manual carefully before using the device to ensure proper operation and to maximize its performance and lifespan. This scanner supports multiple connection methods and is designed for efficient barcode data collection.
Setup
1. Package Contents
Verify that all components are present:
- LENVII CW888 Barcode Scanner
- Charging Base
- USB Cable
- User Manual (this document)
2. Charging the Scanner
The scanner is equipped with a 2200 mAh built-in battery. Before initial use, fully charge the scanner.
- Charging with Base: Place the scanner onto the charging base. Ensure the scanner is properly seated.
- Charging with USB Cable: Connect the USB cable directly to the scanner and a power source (e.g., computer USB port, USB wall adapter).
A full charge takes approximately 5 hours. The scanner will emit five short beeps (low frequency) and stop scanning when the battery is low. Connect the USB cable for charging when this occurs.
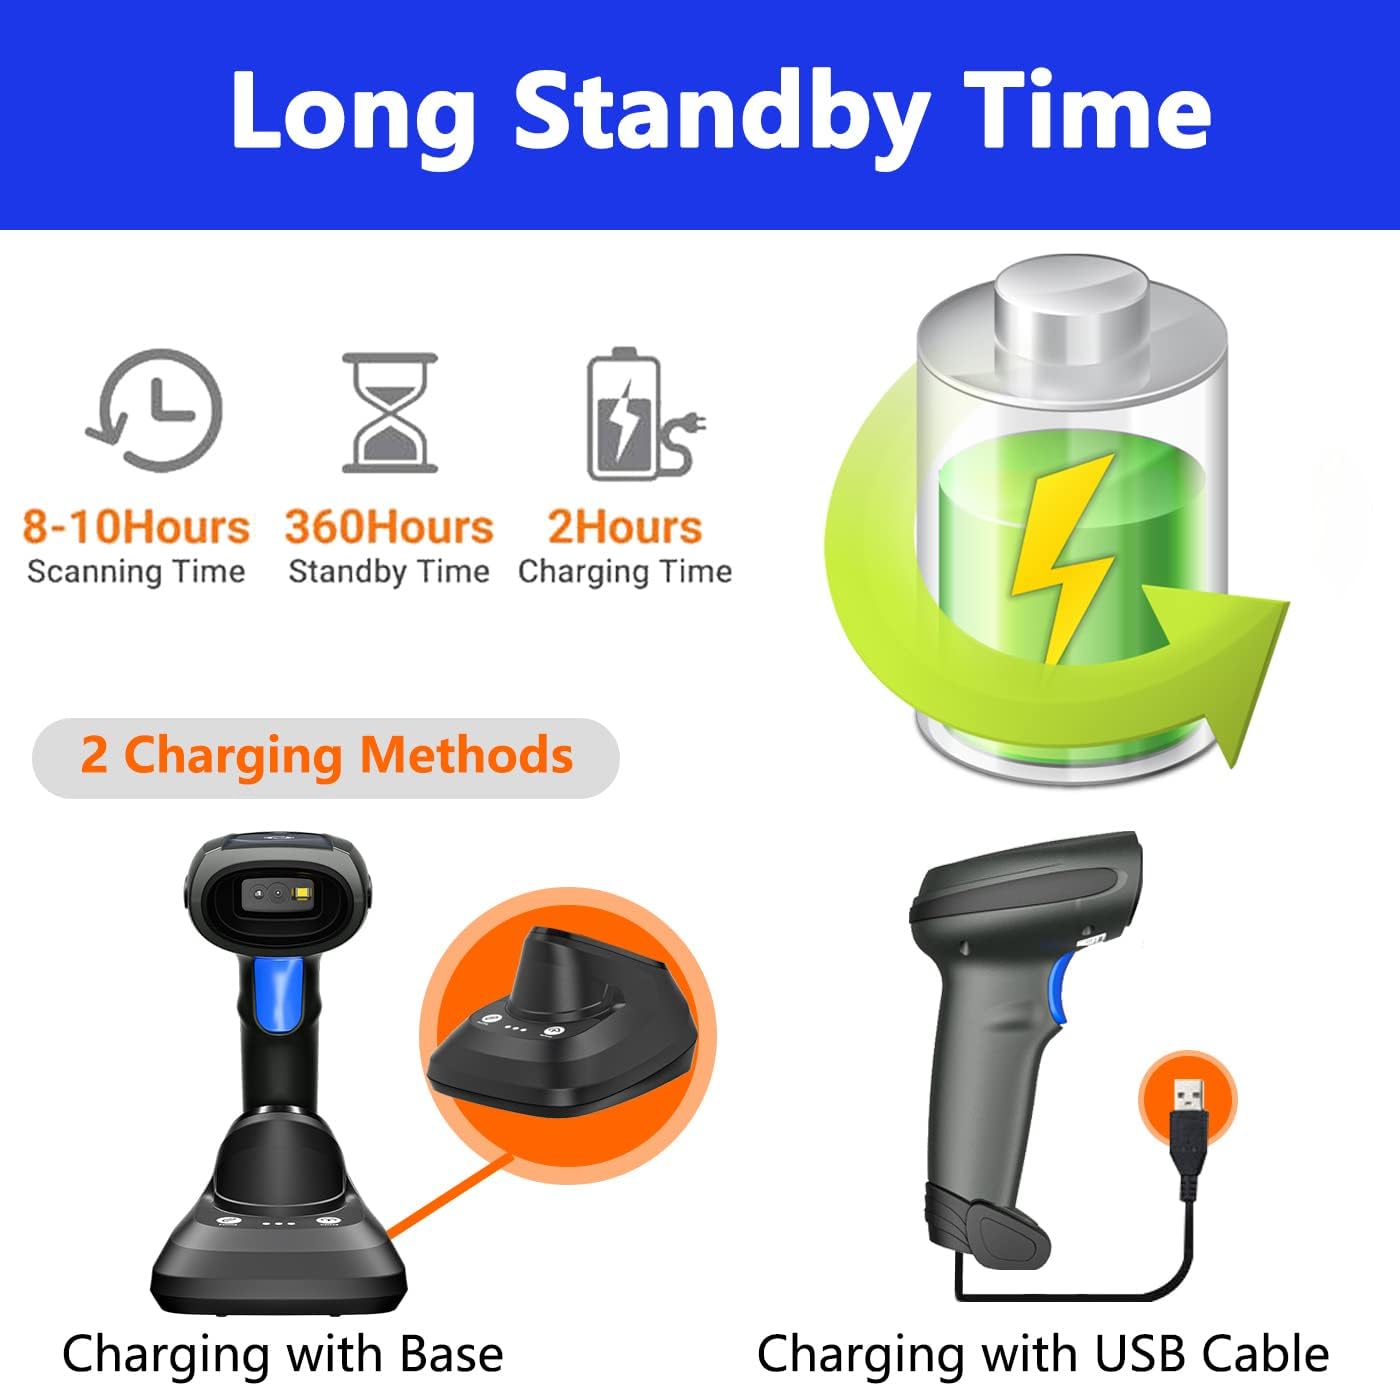
Image: Two charging methods for the LENVII CW888 barcode scanner: using the charging base or directly via USB cable.
3. Connection Methods
The LENVII CW888 scanner offers three connection options:
3.1. Bluetooth Connection
Connect the scanner wirelessly to Bluetooth-enabled devices such as smartphones, tablets, or computers.
- Ensure the scanner is powered on.
- Activate Bluetooth on your host device (e.g., smartphone, tablet, computer).
- Scan the Bluetooth pairing barcode (usually found in the quick start guide or by scanning a specific configuration code).
- On your device, search for available Bluetooth devices and select "LENVII CW888" (or similar name) to pair.
- A successful connection will be indicated by a specific sound or light on the scanner.
3.2. 2.4G Wireless Connection (via Charging Base)
Use the charging base as a wireless receiver for a 2.4G connection to your computer.
- Connect the charging base to your computer via the USB cable.
- The computer should automatically recognize the base as a HID keyboard device.
- Ensure the scanner is powered on and within range of the base.
- The scanner and base should automatically establish a 2.4G wireless connection.
3.3. USB Wired Connection
Connect the scanner directly to your computer using the USB cable for a wired connection.
- Connect the USB cable from the scanner to an available USB port on your computer.
- The computer will recognize the scanner as a plug-and-play device, requiring no additional drivers.
- The scanner is ready for use once recognized.

Image: Illustration of the three connection types: Bluetooth, 2.4G wireless via charging base, and USB wired, along with compatible operating systems.
4. Compatibility
The LENVII CW888 barcode scanner is compatible with various operating systems and devices:
- Operating Systems: Windows (7/8/10/XP), Linux, Mac OS
- Devices: Laptops, Tablets, Smartphones, PCs
Operating Instructions
1. Scanning Barcodes
The scanner supports both 1D and 2D barcode types, including those on screens (mobile phones, computers).

Image: Examples of supported 1D and 2D barcode types, including QR codes, Data Matrix, and various linear barcodes.
Supported Barcode Types:
- 1D: UPC / EAN / JAN, UPC-A and UPC-E, EAN-8 and EAN-13, JAN-8 and JAN-13, ISBN / ISSN, Code 39 (with full ASCII), Codabar (NW7), Code 128 and EAN 128, Code 93, etc.
- 2D: QR Code, Data Matrix, PDF417, Aztec, Maxicode.
The scanner features an advanced decoding chip capable of recognizing colorful, blurry, distorted, and reflective barcodes, improving efficiency for mobile payments and various scanning environments.
2. Scanning Modes
The scanner offers two primary scanning modes:
- Key Trigger Mode: Press the trigger button to scan each barcode individually.
- Continuous Scanning Mode: The scanner continuously emits a scanning beam, allowing for hands-free operation when placed on the charging base.

Image: Comparison of Key Trigger Mode, where the user presses a button for each scan, and Continuous Scanning Mode, which allows hands-free operation with the scanner on its base.
3. Data Upload Modes
The scanner supports two data upload methods:
- Instant Upload Mode: Barcode data is synchronously uploaded to your connected device immediately after scanning.
- Storage Mode: The scanner can store up to 1,500,000 barcodes in its internal 16MB memory. Data can be collected and stored, then uploaded to the computer together at a later time. This is useful for inventory management or when out of range.

Image: Visual representation of Instant Upload Mode, where scanned data is immediately sent to the device, and Storage Mode, where data is saved internally (16MB capacity) for batch upload.
4. Transmission Distance
The effective transmission range varies based on the environment:
- Obstacle Environment (Bluetooth): Up to 49 feet (15 meters).
- Obstacle Environment (2.4G Wireless): Up to 98 feet (30 meters).
- Barrier-Free Environment: Up to 262 feet (80 meters).

Image: Diagram illustrating the effective transmission distances for the scanner under different conditions and connection types.
5. Cradle Functionality
The charging base (cradle) provides additional functionality beyond charging:
- One-Click Pairing: Simplifies the pairing process with the scanner.
- One-Click Upload: Facilitates quick data upload from the scanner's storage memory to the connected device.
- Data Logging: The base also supports data logging functions.

Image: Close-up of the charging cradle, highlighting the "One click pairing" and "One click upload" buttons, along with LED indicators for pairing status, data upload, and power.
6. Adding Prefix/Suffix
The scanner can be configured to add custom prefixes or suffixes to scanned barcode data. This feature is typically enabled by scanning specific configuration barcodes found in the full user manual or quick start guide.

Image: Illustration of how prefixes and suffixes can be added to barcode data after scanning.
Maintenance
1. Battery Care
- The scanner has a 2200 mAh battery, providing approximately 9 hours of continuous operation on a full charge.
- Charging time is about 5 hours.
- When the battery is low, the scanner will emit five short beeps. Connect it to a power source immediately.
- Avoid fully discharging the battery frequently to prolong its lifespan.
- Store the scanner in a cool, dry place when not in use for extended periods.

Image: Information on the scanner's battery performance, including scanning time, standby time, and charging duration.
2. Cleaning
- Use a soft, dry cloth to clean the scanner's exterior.
- For the scanning window, use a lens cleaning cloth or a soft cloth lightly dampened with a mild, non-abrasive cleaner.
- Do not use harsh chemicals or abrasive materials, as they can damage the device.
- Ensure the device is powered off before cleaning.
Troubleshooting
1. Scanner Not Connecting
- Check Power: Ensure the scanner is powered on and has sufficient battery charge.
- Bluetooth Connection: Verify Bluetooth is enabled on your host device and the scanner is in pairing mode. Re-pair if necessary.
- 2.4G Wireless Connection: Ensure the charging base is properly connected to the computer via USB and the scanner is within range.
- USB Wired Connection: Try a different USB port or cable. Ensure the cable is securely connected.
- Drivers: The scanner is plug-and-play; no specific drivers are usually needed. If issues persist, restart your computer.
2. Unable to Scan Barcodes
- Barcode Type: Confirm the barcode type is supported by the scanner (refer to "Supported Barcode Types" section).
- Barcode Condition: Ensure the barcode is not severely damaged, smudged, or too small/large. While the scanner can read blurry/distorted codes, extreme cases may fail.
- Distance and Angle: Adjust the distance and angle between the scanner and the barcode.
- Lighting: Ensure adequate lighting, but avoid direct glare on the barcode.
- Scanning Mode: Verify the scanner is in the correct scanning mode (Key Trigger or Continuous).
3. Data Not Uploading
- Connection: Ensure the scanner is properly connected to your device (Bluetooth, 2.4G, or USB).
- Upload Mode: If in Storage Mode, ensure you have initiated the "One-Click Upload" process from the charging base or via a specific command barcode.
- Application Focus: Ensure the target application (e.g., text editor, POS software) on your device is active and ready to receive input.
Specifications
| Feature | Detail |
|---|---|
| Model Number | CW888 |
| Dimensions (L x W x H) | 19 cm x 8 cm x 10 cm |
| Weight | 210 grams |
| Battery Type | 1 Lithium Ion (included) |
| Battery Capacity | 2200 mAh |
| Operating Time | Approx. 9 hours (continuous use) |
| Charging Time | Approx. 5 hours |
| Connectivity Technology | Bluetooth, 2.4G Wireless, USB Cable |
| Compatible Devices | Laptop, Tablet, Smartphone, PC |
| Compatible OS | Windows (7/8/10/XP), Linux, Mac OS, Android, iOS |
| Image Sensor (Pixels) | 640 pixels (H) * 480 pixels (V) |
| Light Source | Aiming: 617 nm LED; Illumination: 6500K LED |
| Decoding Capability (1D) | UPC / EAN / JAN, UPC-A and UPC-E, EAN-8 and EAN-13, JAN-8 and JAN-13, ISBN / ISSN, Code 39 (with full ASCII), Codabar (NW7), Code 128 and EAN 128, Code 93, etc. |
| Decoding Capability (2D) | QR Code, Data Matrix, PDF417, Aztec, Maxicode |
| Scanning Distance | 40-200 mm @ UPC / EAN 13mil PCS = 90%; 20-250 mm @ QR 20mil PZ = 100% |
| Scanning Angle | 65° elevation / 30° / 55° |
| Reading Precision | ≥4mil |
| Data Storage Capacity | 16MB (up to 1,500,000 barcodes) |
| Operating Voltage | 5 Volts (DC) |
| Maximum Storage Temperature | 60 Degrees Celsius |
| Origin | China |
Warranty and Support
1. Warranty Information
LENVII stands behind the quality of this wireless handheld scanner. Specific warranty terms and duration may vary by region and retailer. Please retain your proof of purchase for warranty claims.
2. Customer Support
If you encounter any issues or have questions regarding the LENVII CW888 barcode scanner, please contact LENVII customer support. We are committed to providing satisfactory assistance.
For support, please refer to the contact information provided with your product packaging or visit the official LENVII website.


