DSF LRH01A
DSF Rotary Hammer User Manual
Model: LRH01A
1. Introduction
This manual provides essential information for the safe and effective operation, maintenance, and troubleshooting of your DSF Rotary Hammer. Please read this manual thoroughly before using the tool and keep it for future reference.
The DSF Rotary Hammer is a versatile power tool designed for drilling into masonry materials such as concrete, brick, and stone, and can also function as a demolition hammer. It features a 7.0Amp motor, 2.8J impact energy, and SDS Plus chuck for various applications.
2. Safety Instructions
Always follow basic safety precautions to reduce the risk of fire, electric shock, and personal injury.
- Personal Safety: Always wear appropriate personal protective equipment (PPE) including safety glasses, hearing protection, and gloves.
- Work Area Safety: Keep the work area clean and well-lit. Do not operate power tools in explosive atmospheres, such as in the presence of flammable liquids, gases, or dust.
- Electrical Safety: Ensure the power cord is intact and avoid contact with grounded surfaces. Do not expose power tools to rain or wet conditions.
- Tool Use and Care: Do not force the tool. Use the correct tool for your application. Disconnect the plug from the power source before making any adjustments, changing accessories, or storing power tools.
- Safety Clutch: The integrated safety clutch is designed to protect the user in case of bit jamming. If the bit jams, the clutch will disengage the drive, preventing sudden torque reaction.
3. Package Contents
Verify that all items listed below are present in your package:
- 1 x DSF Rotary Hammer
- 3 x Drill Bits (6mm, 8mm, 10mm)
- 1 x Flat Chisel
- 1 x Pointed Chisel
- 1 x SDS Plus Chuck Adapter
- 2 x Carbon Brushes
- 1 x Metal Depth Gauge
- 1 x Dust Cover
- 1 x Portable Case
- 1 x User Manual (this document)
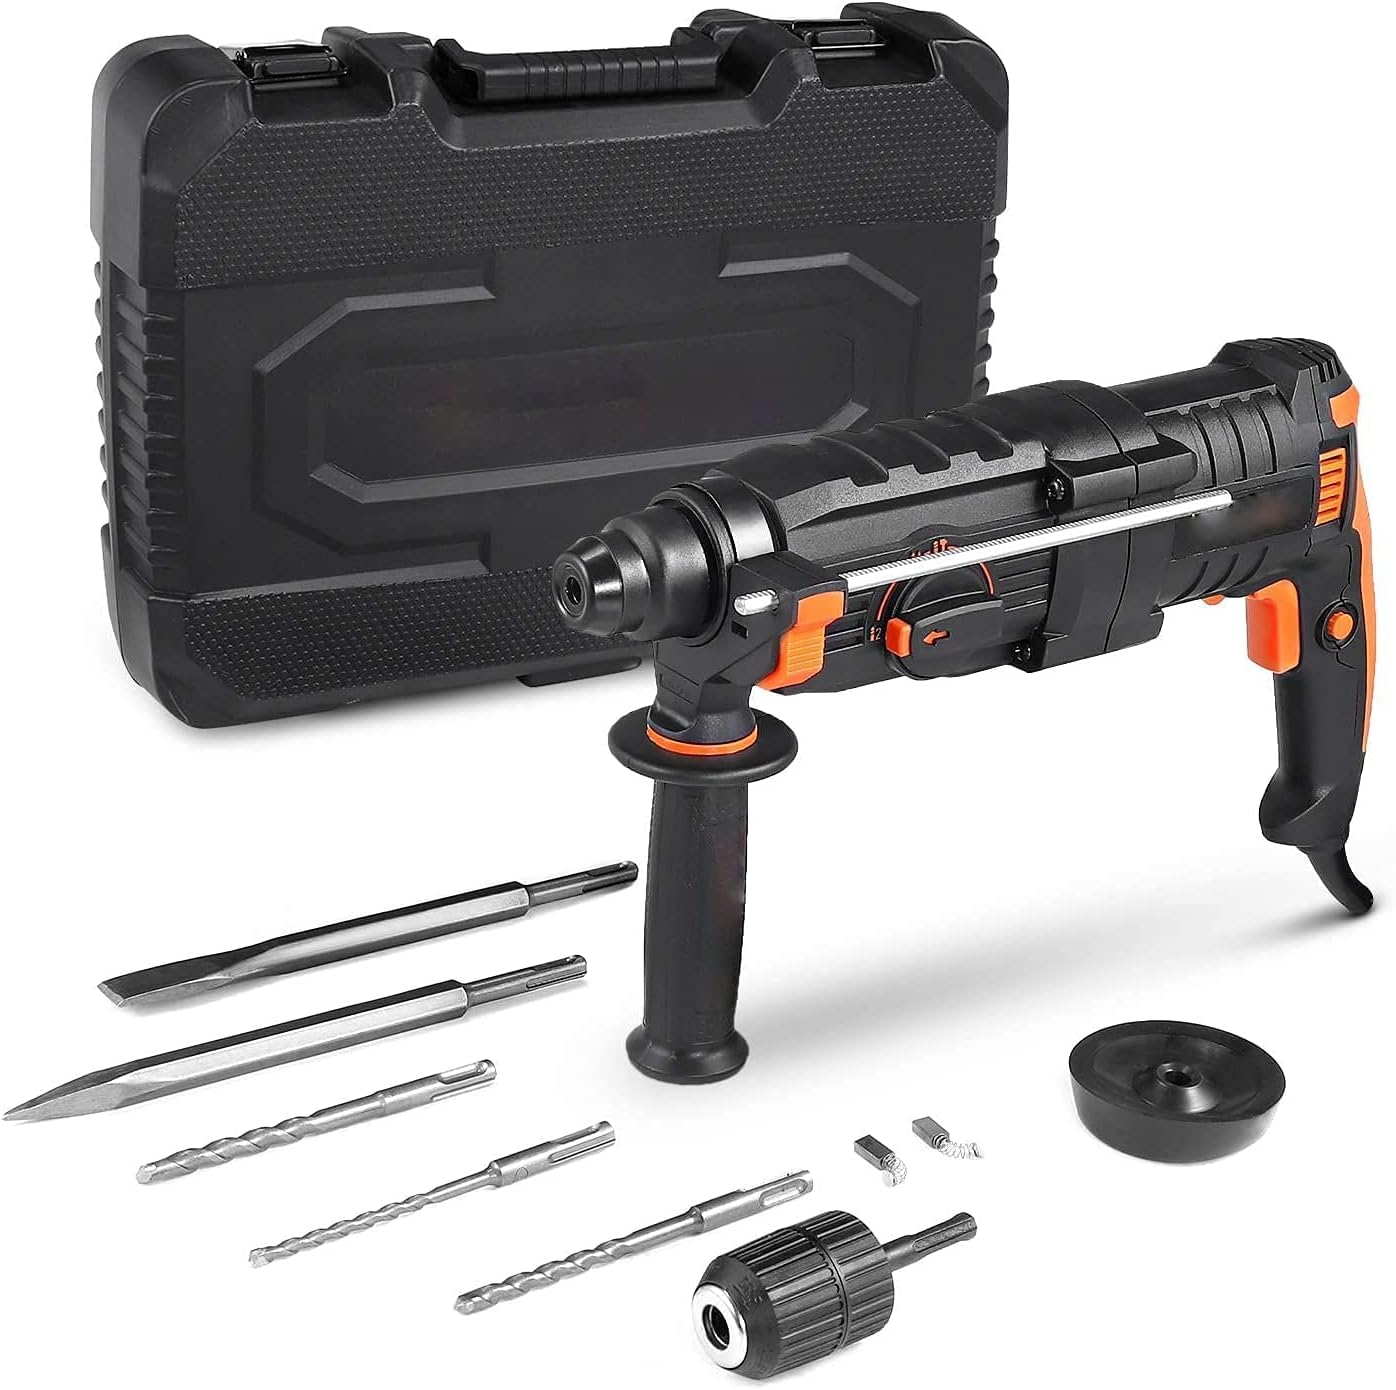
Figure 3.1: Complete package contents including the rotary hammer, various bits, and carrying case.
4. Product Overview
Familiarize yourself with the main components of the rotary hammer:

Figure 4.1: Key components of the DSF Rotary Hammer.
- SDS Plus Chuck: For quick and secure bit changes.
- Multifunction Selector: Allows selection between different operating modes.
- Replaceable Carbon Brush Cover: Provides access for carbon brush replacement.
- Forward & Reverse Switch: Changes the direction of rotation.
- Speed Control Switch: Trigger for variable speed control.
- 360° Rotatable Handle: Adjustable auxiliary handle for improved control and comfort.
- Lock-on Button: For continuous operation without holding the trigger.
5. Setup
5.1 Attaching the Auxiliary Handle
Loosen the auxiliary handle by twisting it counter-clockwise. Slide it onto the tool body and rotate it to the desired position. Tighten by twisting clockwise until secure.
5.2 Installing SDS Plus Bits
Clean the shank of the SDS Plus bit. Insert the bit into the SDS Plus chuck until it clicks into place. Pull on the bit to ensure it is securely locked. A slight axial play is normal for SDS Plus systems.

Figure 5.1: Installing an SDS Plus chuck adapter, which allows use of regular drill bits.
5.3 Installing the Depth Gauge
Insert the metal depth gauge into the hole on the auxiliary handle. Adjust the depth gauge to the desired drilling depth by sliding it in or out, then tighten the auxiliary handle to secure it.
6. Operating Modes and Functions
The DSF Rotary Hammer features a 5-function selector for various applications. Ensure the tool is unplugged before changing modes.

Figure 6.1: Multifunction selector dial.
- Rotation Only Mode (Drilling without Hammering): Ideal for drilling in wood, metal, or plastic. Use with appropriate drill bits.
- Hammer Drill Mode (Rotation with Hammering): For drilling in concrete, masonry, and stone. This mode combines rotation and impact for efficient material removal.
- Hammer Only Mode (Chiseling/Demolition): For chiseling, chipping, or light demolition work in concrete or masonry. Use with chisel bits.
- Chisel Position Adjustment: Allows the user to rotate the chisel to the desired angle without rotation or hammering.
- Drilling (Larger Hole in Wood): This mode is typically a variation of rotation-only mode, optimized for larger diameter wood drilling, often implying higher torque or specific speed range.
Note: For safety reasons, ensure the selector is fully engaged in the desired mode before operation. Do not attempt to switch modes while the tool is running.
7. Operation
7.1 General Operation
Connect the tool to a 110V power outlet. Hold the tool firmly with both hands, using the main handle and the auxiliary handle. Press the speed control switch to start the tool. The speed is variable depending on the pressure applied to the switch. For continuous operation, press the lock-on button while the trigger is depressed.

Figure 7.1: Demonstrating overhead drilling with the rotary hammer.
7.2 Drilling Concrete/Masonry
Select the Hammer Drill mode. Apply steady, firm pressure. Do not force the tool; allow the hammer action to do the work. Periodically withdraw the bit to clear dust and debris from the hole.

Figure 7.2: The rotary hammer can also be used for drilling into wood with the appropriate chuck adapter and bit.
7.3 Chiseling/Demolition
Select the Hammer Only mode. Insert the appropriate chisel bit. Apply consistent pressure and guide the tool along the desired line of breakage. Use the chisel position adjustment to orient the chisel as needed.

Figure 7.3: Using the rotary hammer for chiseling applications.
8. Maintenance
8.1 Cleaning
Regularly clean the ventilation openings of the tool to prevent overheating. Use a soft, damp cloth to wipe down the exterior. Do not use harsh chemicals or abrasive cleaners.
8.2 Carbon Brush Replacement
The carbon brushes are wear parts and should be inspected periodically. When they are worn down, the tool's performance may decrease or it may stop working. To replace, unscrew the carbon brush covers on the sides of the motor housing, remove the old brushes, and insert new ones. Ensure the brushes are seated correctly before replacing the covers.
8.3 Storage
Store the rotary hammer and its accessories in the provided portable case in a dry, secure location, out of reach of children.
9. Troubleshooting
| Problem | Possible Cause | Solution |
|---|---|---|
| Tool does not start | No power supply; Worn carbon brushes; Faulty power cord. | Check power connection; Replace carbon brushes; Inspect power cord for damage. |
| Reduced power/performance | Worn carbon brushes; Overheating; Incorrect mode selection. | Replace carbon brushes; Allow tool to cool down; Verify correct mode is selected. |
| Bit not rotating/hammering | Incorrect mode selected; Bit not properly inserted; Safety clutch engaged. | Check mode selector; Reinsert bit firmly; Reduce pressure if safety clutch engages. |
10. Specifications
| Feature | Value |
|---|---|
| Model | LRH01A |
| Power | 7.0 Amp |
| Voltage | 110 Volts |
| Impact Energy | 2.8 J |
| No-Load Speed | 0-1350 RPM (Drill), 0-3200 RPM (Hammer Drill) |
| Impact Rate | 6000 BPM |
| Chuck Type | SDS Plus |
| Weight (tool only) | 7.72 lbs |
| Cord Length | 10 feet |
11. Warranty and Support
For warranty information or technical support, please contact DSF customer service. Refer to your purchase documentation for specific warranty terms and contact details.
Manufacturer: DSF
ASIN: B09JNH8KHH
UPC: 700721633579
Ask a question about this manual
Ask about setup, troubleshooting, compatibility, parts, safety, or missing instructions. Manuals+ will review the question and use this page’s manual context to help answer it.