1. Product Overview
The Rosieres TRV60NOIN/1 is a versatile integrated appliance featuring a vitroceramic hob, a 38-liter convection oven, and a 6-place setting dishwasher. This compact unit is designed for efficiency and convenience in modern kitchens, offering an Energy Class A rating for both the cooker and the dishwasher.
Key Features:
- Trio appliance: Oven, Hob, and Dishwasher
- Ceramic hob for efficient cooking
- 38-liter multifunction convection oven
- Integrated 6-place setting dishwasher
- Energy Efficiency Class A for both oven and dishwasher
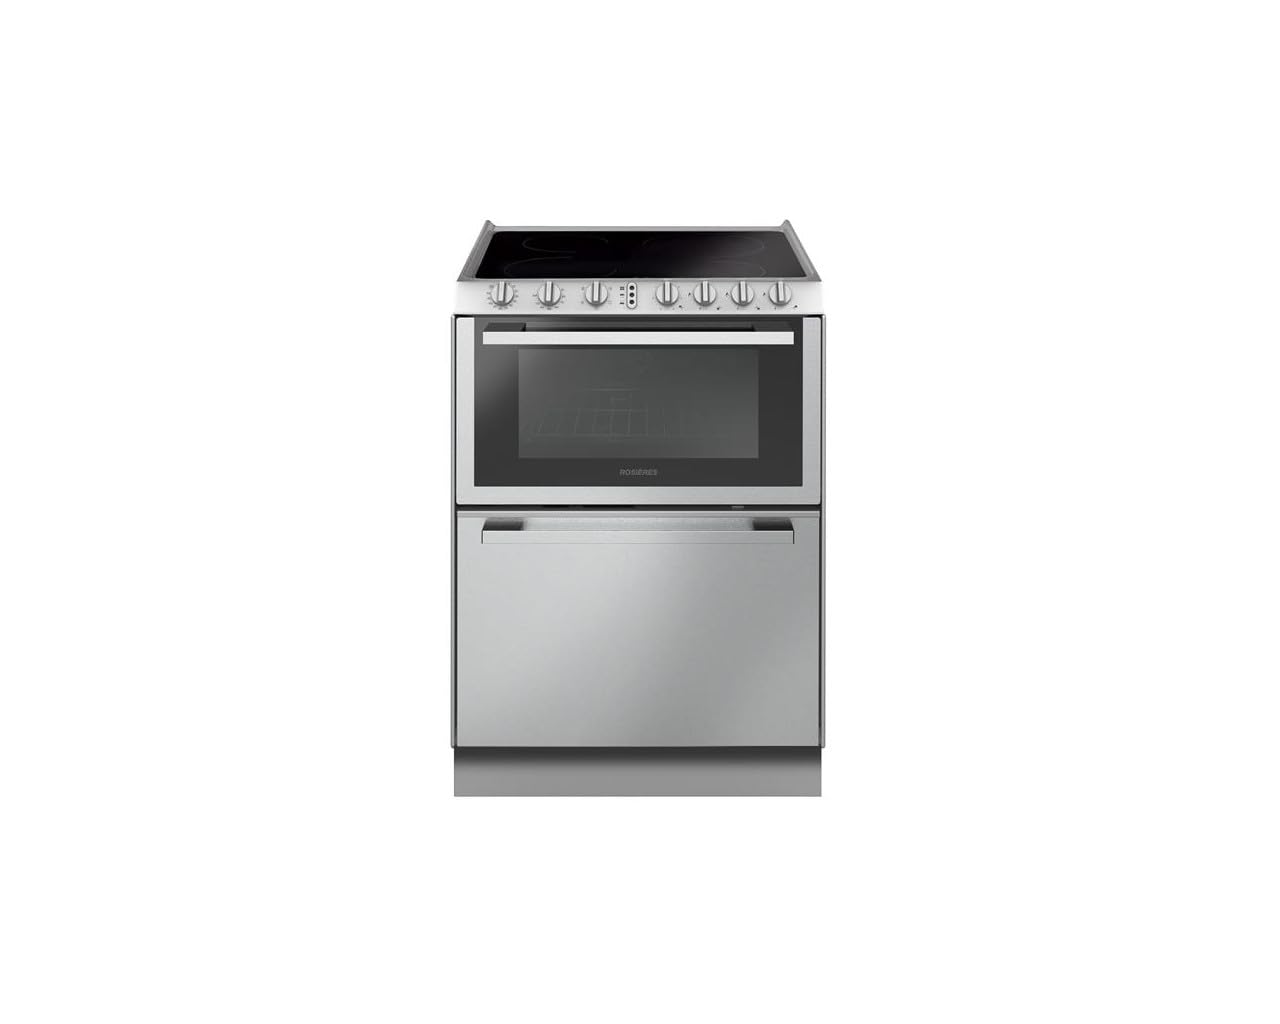
Figure 1: Front view of the Rosieres TRV60NOIN/1 Vitroceramic Hob Combi Dishwasher.
2. Safety Information
Read all instructions carefully before using the appliance. Keep this manual for future reference. Improper installation, adjustment, alteration, service, or maintenance can cause injury or property damage. Refer to this manual. For assistance or additional information, consult a qualified installer, service agency, or the gas supplier.
General Safety Precautions:
- Ensure the appliance is properly grounded.
- Do not store flammable materials in or near the appliance.
- Keep children away from the appliance during operation.
- Always use oven mitts when handling hot items from the oven or hob.
- Do not use abrasive cleaners or sharp objects on the ceramic hob surface.
- Disconnect the appliance from the power supply before cleaning or maintenance.
- Ensure proper ventilation in the kitchen area.
3. Setup and Installation
The Rosieres TRV60NOIN/1 is a freestanding appliance. Proper installation is crucial for safe and efficient operation. It is recommended that installation be performed by a qualified technician.
Installation Steps:
- Unpacking: Carefully remove all packaging materials. Inspect the appliance for any damage.
- Positioning: Place the appliance on a stable, level surface. Ensure adequate clearance from walls and other cabinets as specified in the installation guide (not provided in this manual).
- Electrical Connection: Connect the appliance to a suitable grounded electrical outlet. Ensure the voltage and frequency match the appliance's requirements (230V, 50Hz).
- Water Connection (Dishwasher): Connect the water inlet hose to a cold water supply with a minimum pressure of 0.04 MPa and a maximum of 1 MPa. Connect the drain hose to a suitable drain pipe.
- Leveling: Adjust the appliance's feet to ensure it is perfectly level. This is important for proper dishwasher operation and hob stability.
- First Use Preparation: Before first use, clean the interior of the oven and dishwasher with a damp cloth. Run an empty wash cycle in the dishwasher to flush out any manufacturing residues.
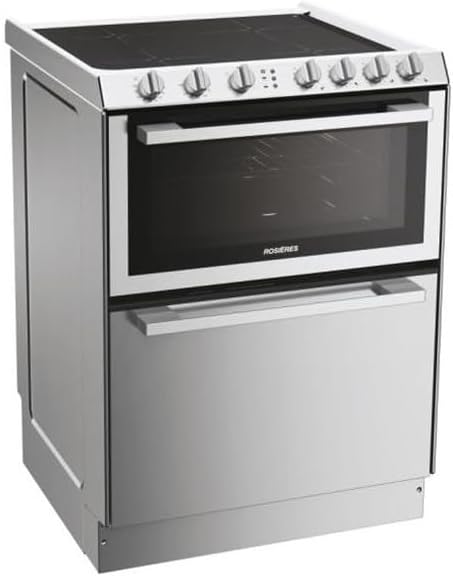
Figure 2: Side view of the Rosieres TRV60NOIN/1, showing its compact design.
4. Operating Instructions
This section provides general guidance on operating the hob, oven, and dishwasher functions of your Rosieres TRV60NOIN/1 appliance. Specific cooking times and settings will vary based on food type and personal preference.
4.1. Vitroceramic Hob Operation
The ceramic hob features multiple heating elements controlled by rotary knobs. Each knob corresponds to a specific cooking zone.
- Turning On: Turn the desired hob control knob clockwise to the desired heat setting. The indicator light for that zone will illuminate.
- Heat Settings: The knobs typically offer a range from 1 (low) to 6 or 9 (high). Start with a higher setting for boiling and reduce for simmering.
- Residual Heat Indicator: After turning off a cooking zone, a residual heat indicator (if present) will remain lit until the surface has cooled down to a safe temperature.
- Turning Off: Turn the control knob counter-clockwise back to the '0' position.
4.2. Oven Operation
The 38-liter convection oven offers various cooking functions controlled by dedicated knobs.
- Function Selection: Use the function selector knob to choose the desired cooking mode (e.g., convection, grill, defrost).
- Temperature Setting: Use the temperature control knob to set the desired oven temperature.
- Preheating: Allow the oven to preheat to the set temperature before placing food inside. An indicator light will typically turn off when the oven reaches the set temperature.
- Timer: Use the timer function (if available) to set cooking duration.
- Turning Off: Turn both the function and temperature knobs to the '0' or 'Off' position after cooking.
4.3. Dishwasher Operation
The integrated 6-place setting dishwasher simplifies cleanup. Refer to the specific program guide for detailed cycle information.
- Loading: Load dishes, ensuring they do not block the spray arms. Scrape off large food particles before loading.
- Detergent Dispenser: Add the appropriate amount of dishwasher detergent to the dispenser.
- Rinse Aid: Check and refill the rinse aid dispenser as needed for optimal drying results.
- Program Selection: Select the desired wash program using the program selector knob or buttons.
- Starting the Cycle: Close the dishwasher door firmly. Press the start button (if applicable) to begin the cycle.
- Unloading: Once the cycle is complete, allow dishes to cool before unloading.
5. Maintenance and Cleaning
Regular cleaning and maintenance will ensure the longevity and optimal performance of your appliance.
General Cleaning:
- Exterior: Wipe the exterior surfaces with a soft, damp cloth and mild detergent. Avoid abrasive cleaners.
- Ceramic Hob: Clean the hob surface after each use once it has cooled down. Use a ceramic hob scraper for stubborn residues and a specialized ceramic hob cleaner for best results.
- Oven Interior: Clean the oven interior regularly. For stubborn grease, use an oven cleaner according to the product instructions. Remove oven racks and clean separately.
- Dishwasher Interior: Periodically clean the dishwasher interior, including the spray arms and filters.
Dishwasher Filter Maintenance:
The dishwasher filters should be cleaned regularly to prevent blockages and ensure efficient washing.
- Access Filters: Locate and remove the filter assembly at the bottom of the dishwasher tub.
- Clean Filters: Rinse the filters under running water to remove food particles. Use a soft brush if necessary.
- Reassemble: Reinsert the clean filters, ensuring they are correctly seated and locked into place.
6. Troubleshooting
Before contacting customer service, refer to the following troubleshooting guide for common issues.
| Problem | Possible Cause | Solution |
|---|---|---|
| Hob not heating | No power; incorrect knob setting | Check power supply; ensure knob is turned to a heat setting. |
| Oven not heating | No power; incorrect function/temperature setting | Check power supply; ensure both function and temperature knobs are set. |
| Dishwasher not starting | Door not closed properly; no power; program not selected | Ensure door is latched; check power; select a wash program. |
| Dishes not clean | Improper loading; clogged filters; insufficient detergent | Reload dishes correctly; clean filters; use adequate detergent. |
| Water not draining from dishwasher | Clogged drain hose or filter | Check and clear drain hose and filters. |
7. Specifications
Detailed technical specifications for the Rosieres TRV60NOIN/1 appliance.
| Specification | Value |
|---|---|
| Brand | Rosieres |
| Model Name | TRV60NOIN/1 |
| Product Dimensions | 1 x 1 x 1 cm; 61 kg (Note: These dimensions appear to be placeholder values and should be verified with the manufacturer's official specifications.) |
| Manufacturer | ROSIERES |
| Material | Stainless Steel |
| Finish Type | Polished |
| Form Factor | Slide-in / Freestanding |
| Control Type | Knob |
| Oven Capacity | 38 Liters |
| Energy Efficiency (Oven, Dishwasher) | A, A |
| Fuel Type | Electric |
| Number of Heating Elements (Hob) | 6 |
| Edge Color | White Pink |
| Smart Home Compatibility | Not compatible with smart home |
| Number of Racks (Oven) | 3 |
| Availability of Spare Parts in EU | 2 Years |

Figure 3: Energy label for the Rosieres TRV60NOIN/1, indicating A-class efficiency for both oven and dishwasher.
8. Warranty and Support
For warranty information and customer support, please refer to the warranty card included with your appliance or visit the official Rosieres website. Keep your purchase receipt as proof of purchase for warranty claims.
The availability of spare parts in the EU is guaranteed for 2 years from the date of first availability (January 11, 2022).