1. Introduction
This manual provides detailed instructions for the Zostuic Digital Camera, Model DC302-4FEN. This compact camera is designed for ease of use, featuring a 44.0MP photo resolution and 2.7K high-definition video recording capabilities. It includes functions such as 16X digital zoom, webcam mode, self-timer, and anti-shake, making it suitable for various photography and videography needs for beginners and enthusiasts.
2. Safety Information
Please read and understand the following safety precautions before using the camera to ensure safe and optimal performance.
- Do not expose the camera to water or moisture. This product is Not Water Resistant.
- Avoid dropping the camera or subjecting it to strong impacts.
- Keep the camera away from direct sunlight and high temperatures.
- Use only the specified batteries and charging accessories.
- Do not attempt to disassemble or modify the camera.
- Keep out of reach of small children due to small parts.
3. Package Contents
Verify that all items listed below are included in your package:

Zostuic Digital Camera (Pink)

Included Accessories: 2 Li-ion Batteries, USB Cable, Adapter, Lanyard, Camera Bag, User Manual
- Zostuic Digital Camera (Model DC302-4FEN)
- 2 x Rechargeable Lithium Batteries
- USB Cable
- Power Adapter
- Lanyard
- Camera Bag
- User Manual (this document)
4. Product Overview
Familiarize yourself with the camera's main components and controls.
Image: Front and back view of the Zostuic Digital Camera, showing the lens, flash, LCD screen, and control buttons.

Image: Visual representation of key camera features: 2.88" LCD Screen, Beauty Face mode, 44.0 Mega Pixels resolution, Self-Timer function, and inclusion of 2 Batteries.
4.1. Camera Components
- Front: Lens, Flash, Microphone.
- Top: Power Button, Shutter Button, Zoom Lever.
- Back: 2.4-inch LCD Display, Mode Dial/Buttons (Menu, Playback, Delete, Navigation), Speaker.
- Side: USB Port (for charging and data transfer).
- Bottom: Battery/SD Card Compartment, Tripod Mount (1/4 inch standard screw port).
5. Setup
5.1. Installing the Battery
- Open the battery compartment cover located at the bottom of the camera.
- Insert the lithium battery (NP-6L) into the compartment, ensuring the correct orientation as indicated inside the compartment.
- Close the battery compartment cover until it clicks securely.
5.2. Installing the Memory Card (SD Card)
The camera supports Class 10 or above SD memory cards from 4GB to 128GB (SD card is not included).
- Open the battery compartment cover.
- Locate the SD card slot next to the battery.
- Insert the SD card with the metal contacts facing the front of the camera until it clicks into place.
- Close the battery compartment cover.

Image: Visual guide showing how to open the battery/SD card compartment, insert the battery, and insert the SD card.
5.3. Charging the Battery
- Connect the camera to the power adapter using the provided USB cable.
- Plug the adapter into a power outlet.
- The charging indicator light will illuminate. It will turn off or change color once charging is complete.
- A full charge allows for a long time of continuous shooting.
6. Operating Instructions
6.1. Power On/Off
Press and hold the Power Button on the top of the camera to turn it on or off.
6.2. Taking Photos (44MP)
- Turn on the camera.
- Frame your shot using the LCD screen.
- Press the Shutter Button halfway down to focus.
- Press the Shutter Button completely down to capture the photo.
6.3. Recording Videos (2.7K)
- Turn on the camera.
- Press the Mode Button (if available, or navigate through menu) to switch to video recording mode.
- Press the Shutter Button to start recording.
- Press the Shutter Button again to stop recording.
- The camera supports pausing during video recording.
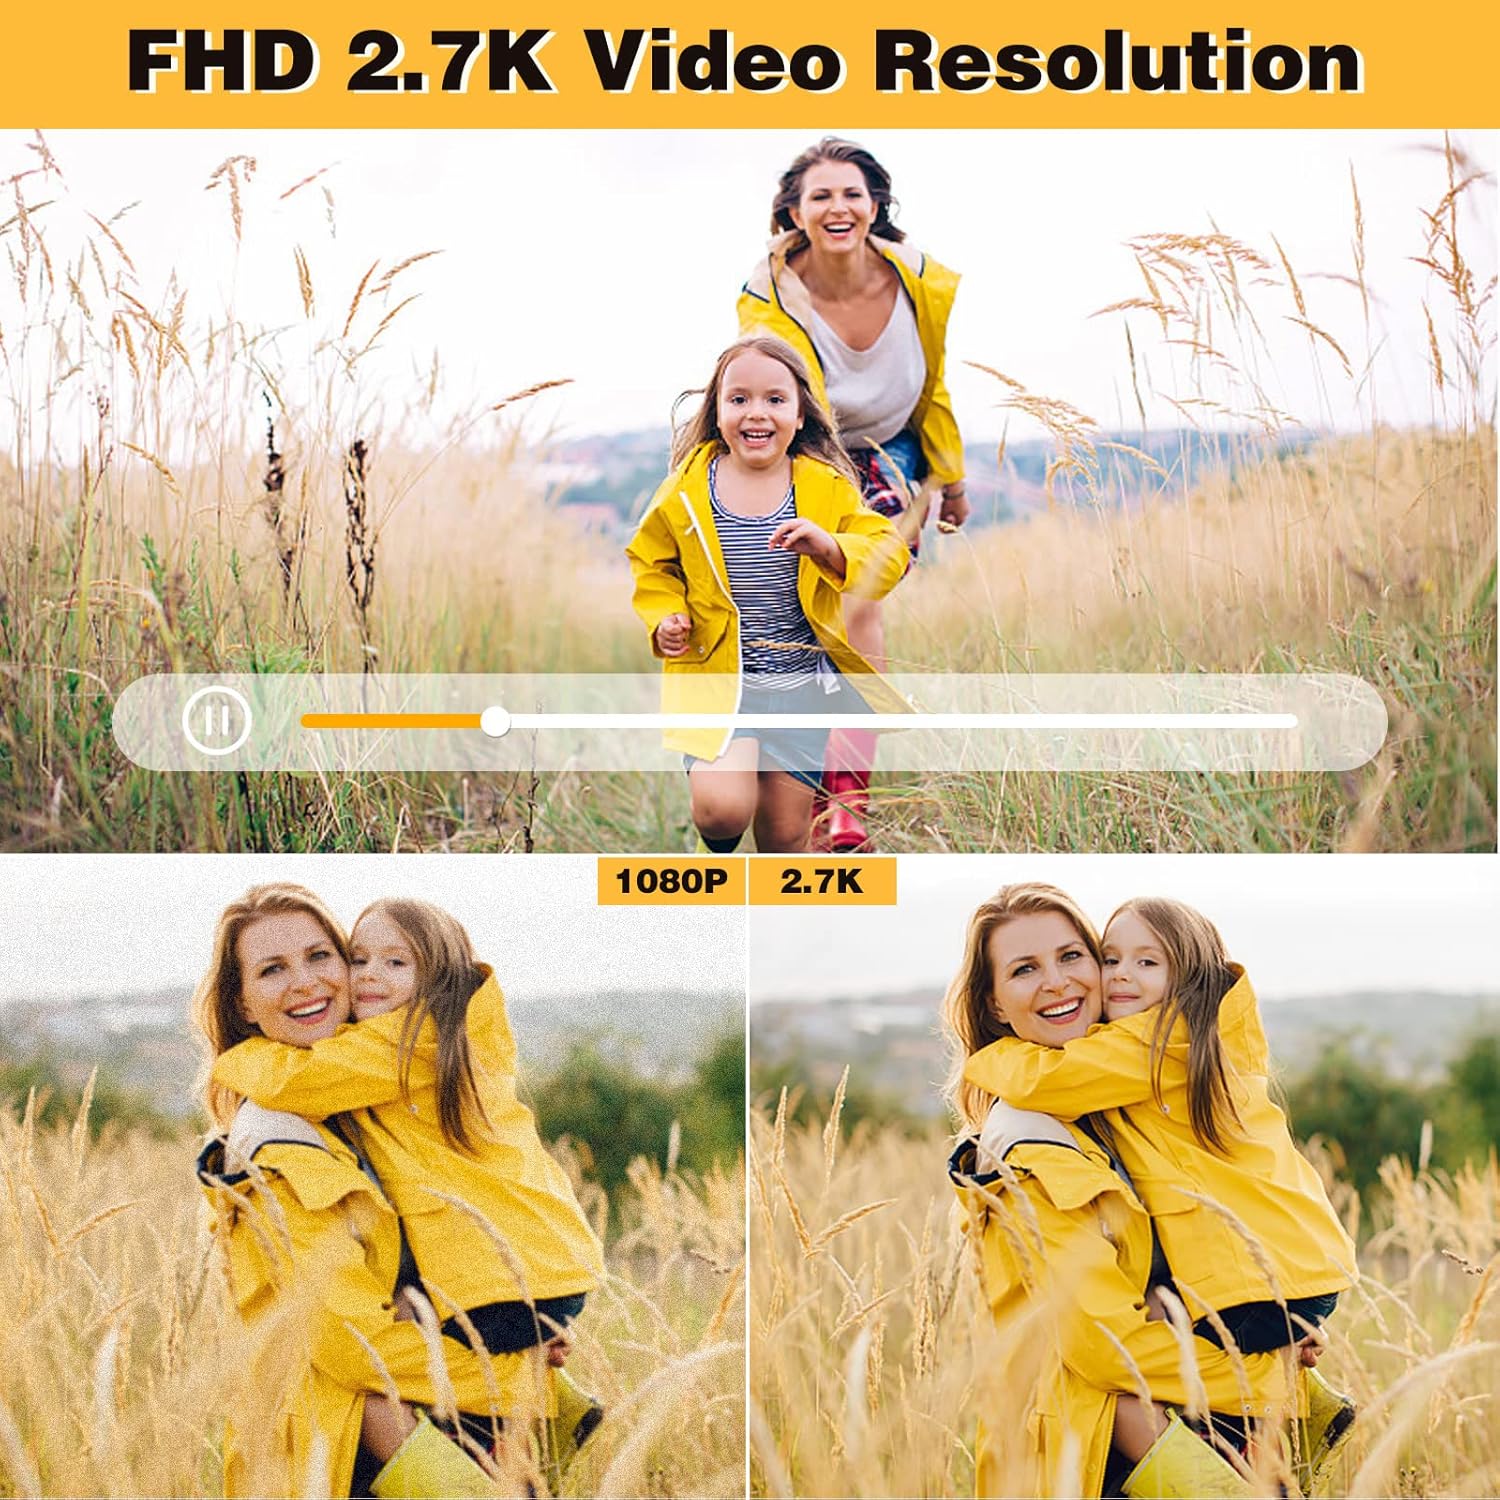
Image: Demonstrates the superior clarity of 2.7K video resolution compared to 1080P, highlighting the camera's high-definition video capability.
6.4. Zoom Function (16X Digital Zoom)
Use the Zoom Lever (often around the shutter button) to zoom in or out digitally. The camera features a 16X digital zoom.

Image: Illustrates the effect of 16X digital zoom, showing a subject appearing closer.

Image: A series of three images demonstrating the visual effect of 4X, 8X, and 16X digital zoom on a running dog.
6.5. Webcam Function
The camera can be used as a webcam for live streaming or video calls.
- Ensure the camera is turned off.
- Connect the camera to your computer using the USB cable.
- The camera should be recognized as a webcam by your computer's operating system.
- You can now use it with video conferencing software or live streaming platforms.

Image: Depicts the camera connected to a laptop, illustrating its use for video calls and live streaming on various social media platforms.
6.6. Self-Timer
The self-timer function allows you to delay the shutter release by a few seconds.
- Access the menu and navigate to the self-timer setting.
- Select your desired delay (e.g., 2 seconds, 5 seconds, 10 seconds).
- Press the Shutter Button. The camera will count down before taking the photo.
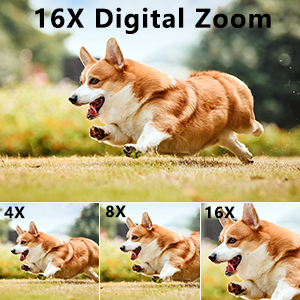
Image: Shows the self-timer options (2, 5, 10 seconds) with a camera set up on a tripod, ready for a timed shot.
6.7. Flash Light
The built-in flash can be used in low-light conditions.
- Access the flash settings in the menu.
- Select from modes such as Auto Flash, Fill-in Flash (On), or Flash Off.
6.8. Anti-Shake Function
This function helps reduce blur caused by camera movement.
- Enable or disable the anti-shake function through the camera's settings menu.
6.9. Face Detection
The camera can detect faces in the frame to optimize focus and exposure.
- Enable or disable face detection in the camera's settings.
6.10. Continuous Shooting
Capture a rapid sequence of photos by holding down the shutter button.
- Select continuous shooting mode from the camera's menu.
- Press and hold the Shutter Button to capture multiple images in quick succession.

Image: Illustrates continuous shooting by showing a sequence of images of dogs running, captured rapidly.

Image: Composite image demonstrating various camera functions: Flash Light in use, Continuous Shooting capturing multiple moments, Anti-Shaking (ON vs OFF), and Face Detection highlighting faces.
6.11. Playback
View your captured photos and videos.
- Press the Playback Button (often indicated by a play icon).
- Use the navigation buttons to scroll through your media.
- Press the Delete Button to remove unwanted files.
7. Maintenance
7.1. Cleaning the Camera
- Use a soft, dry cloth to clean the camera body.
- For the lens, use a specialized lens cleaning cloth and solution. Do not use abrasive materials.
- Avoid using chemical cleaners or solvents.
7.2. Storage
- Store the camera in a cool, dry place away from direct sunlight and extreme temperatures.
- If storing for an extended period, remove the battery to prevent leakage.
- Use the provided camera bag for protection during transport.
8. Troubleshooting
| Problem | Possible Cause | Solution |
|---|---|---|
| Camera does not turn on. | Battery is dead or not inserted correctly. | Charge the battery. Reinsert the battery correctly. |
| Cannot take photos/videos. | Memory card is full, not inserted, or corrupted. | Delete unnecessary files. Insert a valid SD card. Format the SD card (this will erase all data). |
| Images are blurry. | Camera shake, dirty lens, or out of focus. | Enable anti-shake. Clean the lens. Ensure proper focus before shooting. |
| Camera freezes on "Welcome" screen. | Software glitch or battery issue. | Remove and reinsert the battery. If the issue persists, contact customer support. |
| Webcam function not working. | Incorrect connection or driver issue. | Ensure camera is off before connecting to PC. Try a different USB port. Check PC device manager for drivers. |
9. Specifications
| Feature | Detail |
|---|---|
| Model Name | DC302-4FEN |
| Photo Resolution | 44.0 MP (Maximum Webcam Image Resolution) |
| Video Resolution | 2.7K |
| Digital Zoom | 16X |
| Screen Size | 2.4 Inches (LCD Display) |
| Image Sensor | CMOS |
| Image Stabilization | Digital |
| Storage Media | SD Card (Class 10 or above, 4GB to 128GB, not included) |
| Battery Type | Rechargeable Lithium Ion (NP-6L) |
| Connectivity | USB |
| Special Features | Webcam Function, Self-Timer, Face Detection, Continuous Shooting, Flash Light, Anti-Shake |
| Water Resistance Level | Not Water Resistant |
| Dimensions | Ultracompact form factor (specific dimensions not provided in input) |
10. Warranty and Support
Zostuic provides a 1-year quality guarantee for this product. For any issues or inquiries, please do not hesitate to contact Zostuic customer support.
For further assistance, please visit the official Zostuic store or contact their customer service channels.
Note: Warranty terms and conditions may vary. Please refer to the official Zostuic website or contact customer service for the most up-to-date information.
