1. Introduction
The Godox MF12 is a compact and professional macro flash designed for illuminating small subjects at close distances. It features 2.4G wireless control, TTL and Manual modes, and a built-in lithium battery, making it suitable for various macro photography applications including plants, insects, jewelry, and more. This manual provides detailed instructions for the proper setup, operation, and maintenance of your MF12 macro flash.
2. Package Contents
Please check to ensure all items listed below are included in your package. If any items are missing or damaged, contact your retailer.
- 1x Godox MF12 Macro Flash
- 1x Flash Stand
- 1x Carry Case
- 1x Cold Shoe Adapter
- 1x Color Filter Holder
- 1x Soft Case for Color Filter Set
- 1x USB Type-C Cable
- 1x Extreme Close-up Positioning Adapter
- 1x Godox MF-11C Color Effects Set for MF12 Macro Flash
- 1x Godox MF-11T Color Temperature Adjustment Set for MF12 Macro Flash
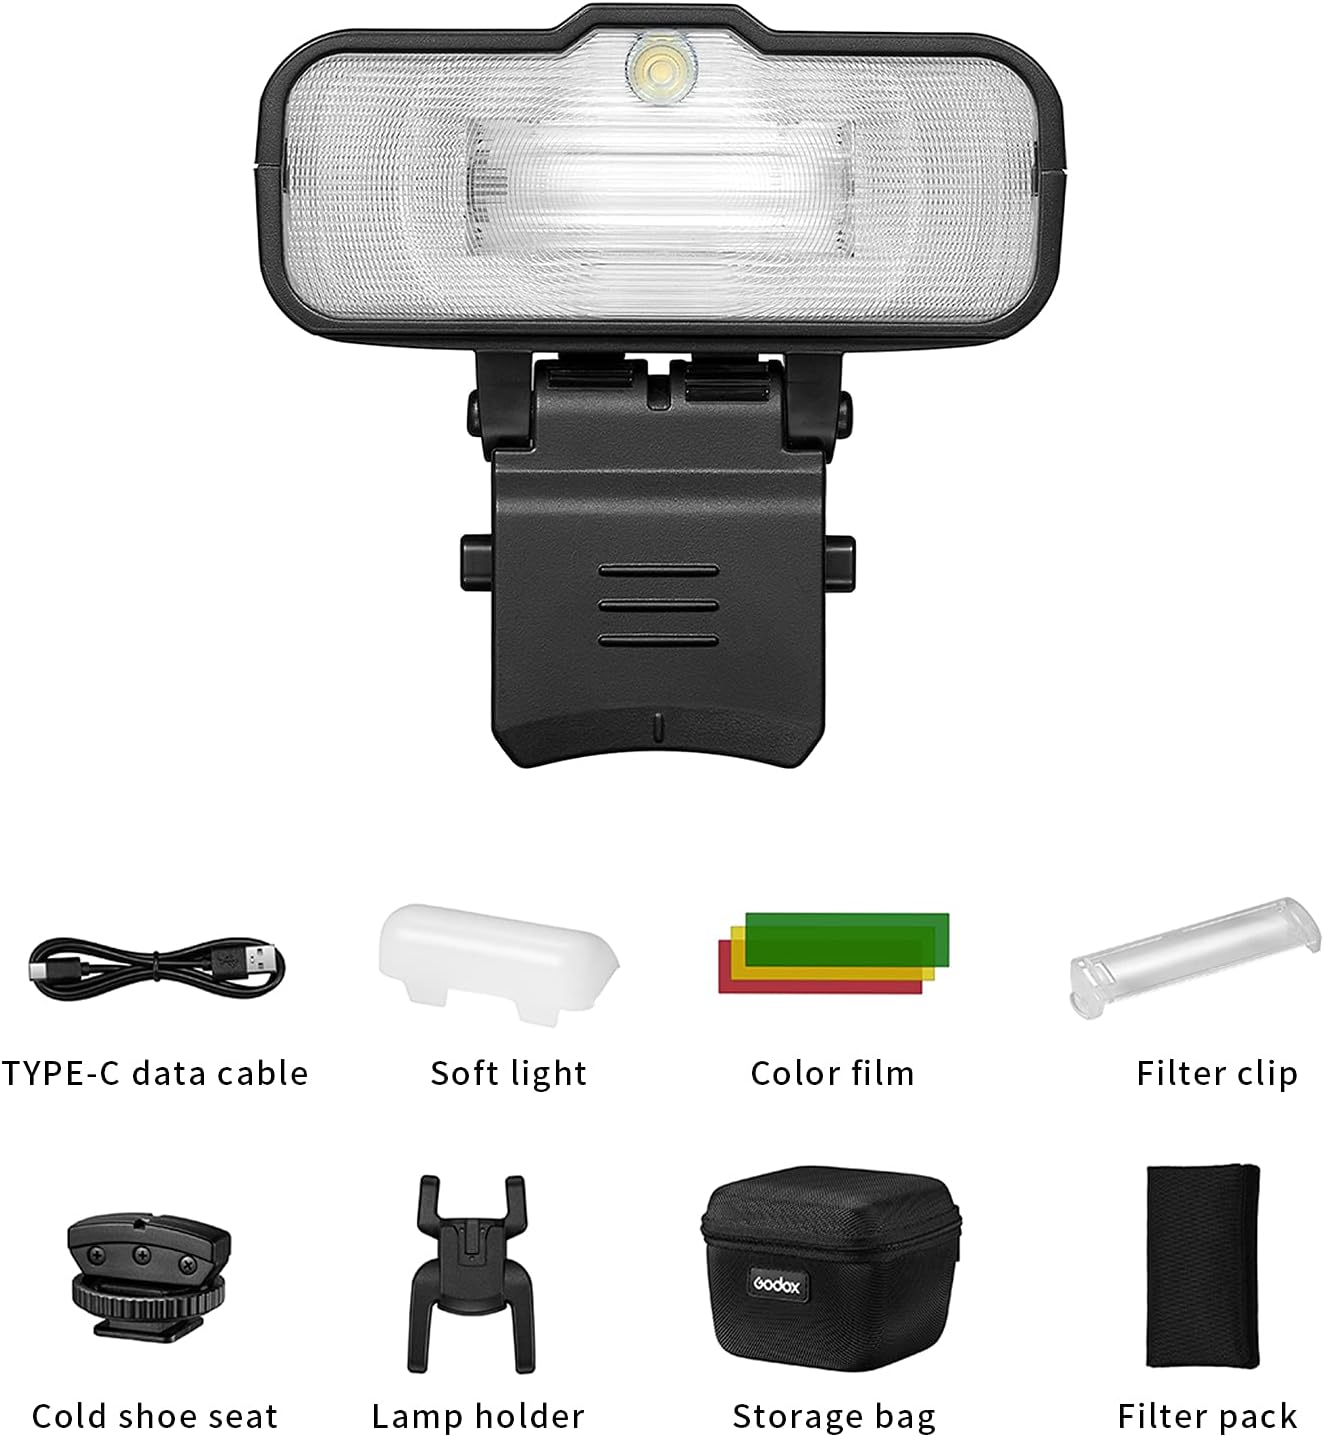
Image 2.1: Godox MF12 Macro Flash and included accessories.
3. Product Overview
The Godox MF12 features an intuitive control panel for easy operation. Familiarize yourself with the main components and controls:
- Display: Shows current settings, mode, and battery status.
- Menu Button: Accesses flash settings and options.
- Select Dial: Navigates menus and adjusts values.
- Set Button: Confirms selections.
- Power Button: Turns the unit on/off.
- Test Button: Fires a test flash.
- Modeling Light Button: Activates/deactivates the modeling light.
- USB Type-C Port: For charging the built-in lithium battery.

Image 3.1: Godox MF12 Macro Flash with control panel visible.
Video 3.1: An overview of the Godox MF12 Macro Flash, demonstrating its controls and basic operation.
4. Setup and Installation
The MF12 offers flexible mounting options for various macro photography scenarios.
4.1 Standalone Use
For off-camera lighting, attach the MF12 to the included flash stand or cold shoe adapter. This allows for precise positioning of the flash unit.
4.2 Multi-Flash Setup with Mounting Ring (Optional)
To create a circular macro setup, you can combine multiple MF12 units using an optional mounting ring (e.g., Godox MF-AR). This ring attaches to your camera lens via an adapter ring (AR-R kit, sold separately, available in various sizes: 49mm, 52mm, 55mm, 58mm, 62mm, 67mm, 72mm, 77mm).
- Screw the appropriate adapter ring onto your camera lens.
- Install the mounting ring onto the adapter ring.
- Attach the MF12 flashes to the mounting ring. Ensure the arrow on the adjustable bracket of the flash aligns with the arrow on the mounting ring, then press the push buttons for secure positioning.
- Mount a compatible Godox XPro, XProii, X1, X2, or X3 trigger onto your camera's hot shoe for wireless control.

Image 4.1: Attaching the MF12 to the mounting ring.

Image 4.2: MF12 flashes mounted on a camera lens via the mounting ring.

Image 4.3: Example of a multi-flash setup with six MF12 units.
5. Operating Modes
The Godox MF12 supports both TTL (Through-The-Lens) and Manual (M) flash modes, along with 2.4G wireless control.
5.1 TTL Mode
In TTL mode, the flash automatically adjusts its output based on the camera's metering system, providing accurate exposure for your subject. This mode is ideal for fast-paced shooting or when lighting conditions change frequently.
5.2 Manual Mode (M)
Manual mode allows you to precisely control the flash power output from 1/1 to 1/128 in 1/3 stop increments. This mode is suitable for consistent lighting setups and when you require specific creative control over your light.
5.3 2.4G Wireless Control
The MF12 integrates with Godox's 2.4G wireless X system, allowing it to be controlled remotely by compatible Godox triggers (XPro, XProii, X1, X2, X3). This enables off-camera flash setups and multi-flash configurations with ease.
- Ensure both the MF12 and your Godox trigger are powered on.
- Set the MF12 and the trigger to the same channel and group. Refer to your trigger's manual for specific instructions on setting channels and groups.
- Once paired, you can adjust flash settings directly from your trigger.
Video 5.1: Demonstration of 2.4G wireless pairing between the Godox MF12 and a compatible trigger.
6. Advanced Features
6.1 Color Effects and Temperature Adjustment
The MF12 includes MF-11C Color Effects and MF-11T Color Temperature Adjustment sets. These gel filters allow you to:
- Color Effects: Add creative colored lighting to your subjects.
- Color Temperature Adjustment: Match the flash output to ambient light conditions for natural-looking results, or create specific color shifts.
To use, insert the desired gel filter into the color filter holder and attach it to the front of the MF12 flash head.

Image 6.1: MF12 flashes demonstrating color effects.

Image 6.2: Color gel filters for the MF12.
7. Charging and Battery
The Godox MF12 is powered by a built-in 3.7V lithium battery. To charge the unit:
- Connect the included USB Type-C cable to the charging port on the MF12.
- Connect the other end of the cable to a USB power source (e.g., computer, USB wall adapter).
- The charging indicator on the flash will show the charging status.
A full charge provides approximately 500 full-power flashes. The flash also boasts a fast recycle time of 0.01 to 1.7 seconds.

Image 7.1: USB Type-C charging port on the MF12.
8. Specifications
| Feature | Specification |
|---|---|
| Brand | GODOX |
| Model Name | MF12 |
| Camera Flash Type | Macro |
| Exposure Control Type | TTL, Manual |
| Guide Number | 16 |
| Flash Sync Speed | 1/200 |
| Wireless Technology | RF (2.4G) |
| Mount Type | Hot Shoe Mount (via adapter), Mounting Ring |
| Compatible Mountings | Canon, Nikon, Sony, Fuji, Olympus, Panasonic (with compatible trigger) |
| Battery Type | Built-in 3.7V Lithium Ion |
| Flashes per Charge | Up to 500 (full power) |
| Recycle Time | 0.01-1.7 seconds |
| Charging Port | USB Type-C |
| Item Weight | 5.1 Ounces |
| Item Dimensions (D x W x H) | 3.2"D x 2.5"W x 3"H |
| Color | Black |
9. Troubleshooting
If you encounter issues with your Godox MF12, refer to the following common solutions:
- Flash not firing:
- Ensure the flash is powered on and fully charged.
- Verify that the flash and trigger (if used) are set to the same channel and group.
- Check the connection between the trigger and the camera's hot shoe.
- Confirm the camera's flash settings are correctly configured.
- Inconsistent exposure:
- In TTL mode, ensure your camera's metering mode is appropriate for the scene.
- In Manual mode, adjust the flash power output as needed.
- Check for obstructions between the flash and the subject.
- Ensure the flash head is clean and free from debris.
- Flash not recycling:
- The battery may be low; recharge the flash.
- Allow a brief cool-down period if the flash has been used continuously at high power.
- Wireless connection issues:
- Ensure there are no strong interference sources nearby.
- Check the distance between the flash and the trigger; ensure it's within the operational range.
- Try changing the wireless channel.
For further assistance, please contact Godox customer support or your retailer.
10. Warranty and Support
The Godox MF12 Macro Flash comes with a 2-Year Manufacturer Warranty. Please retain your proof of purchase for warranty claims.
For technical support, service, or warranty inquiries, please contact Godox customer service or visit the official Godox website. If purchased through a distributor like CONXTRUE, they may offer additional support and extended warranty options.
Manufacturer: Godox


