1. Introduction
Thank you for choosing the zhiroad A15 Dual Dash Cam. This manual provides detailed instructions for the installation, operation, and maintenance of your new dash camera system. Designed to capture high-definition video footage from both the front and rear of your vehicle, this device offers enhanced security and peace of mind on the road. Please read this manual thoroughly before use to ensure proper functionality and to maximize your experience.
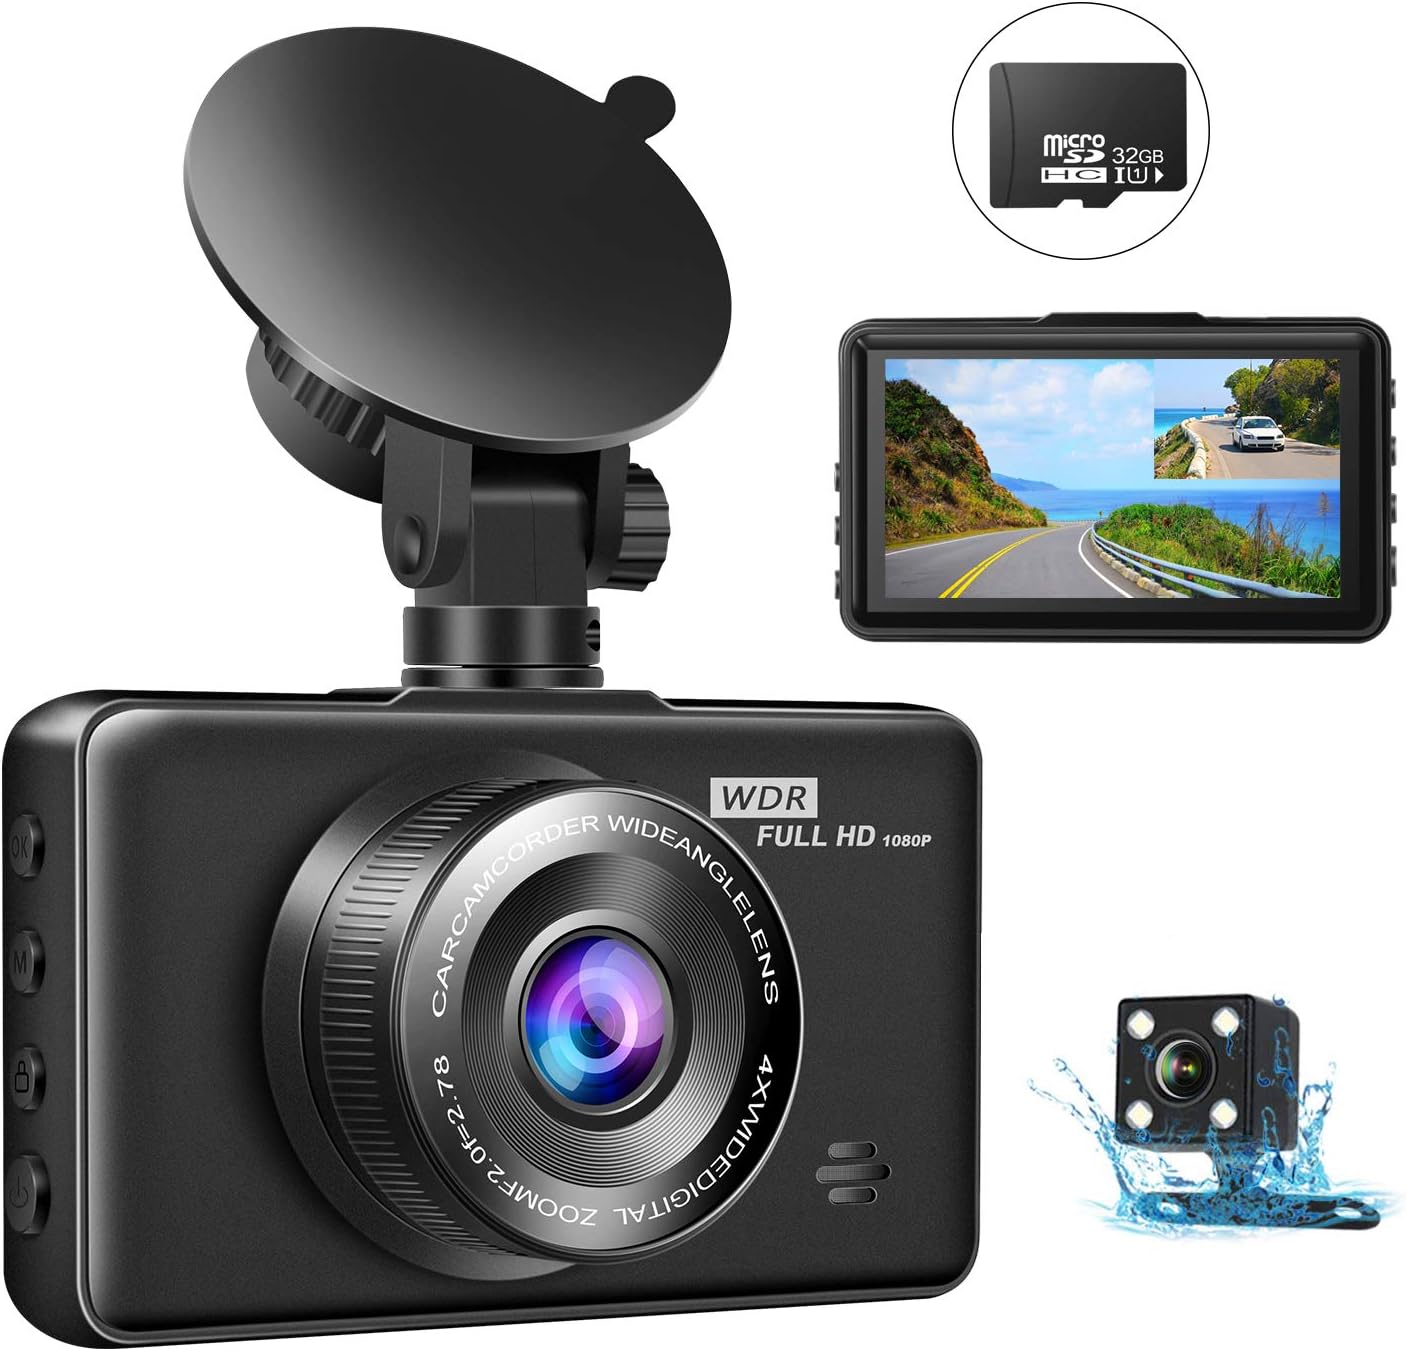
Image: Overview of the zhiroad A15 Dual Dash Cam system, including the main unit, rear camera, and included 32GB SD card.
2. Package Contents
Please check the package contents carefully upon unboxing. If any items are missing or damaged, please contact customer support.
- zhiroad A15 Front Dash Cam
- Rear Camera
- 32GB Micro SD Card
- Car Charger
- USB Cable
- Suction Cup Mount
- Rear Camera Cable
- User Manual

Image: All components included in the zhiroad A15 Dash Cam package.
3. Product Features
The zhiroad A15 Dash Cam is equipped with a range of features to provide comprehensive vehicle surveillance:
- 1080P Full HD Recording: Captures clear, high-definition video footage from the front camera.
- Dual Camera System: Records simultaneously from both front (170° wide angle) and rear (120° wide angle) cameras, eliminating blind spots.
- Super Night Vision: Advanced sensor and 6 IR LEDs on the rear camera ensure clear recording in low-light conditions.
- 24-Hour Parking Monitoring: Automatically starts recording when motion or collision is detected while the vehicle is parked.
- Loop Recording: Overwrites the oldest unlocked footage when the memory card is full, ensuring continuous recording.
- G-Sensor (Emergency Lock): Automatically detects sudden shakes or collisions and locks the current video file to prevent it from being overwritten.
- 3-Inch LCD Display: Provides a clear view for real-time monitoring, playback, and menu navigation.

Image: Visual representation of key features.

Image: Demonstration of superior night vision.
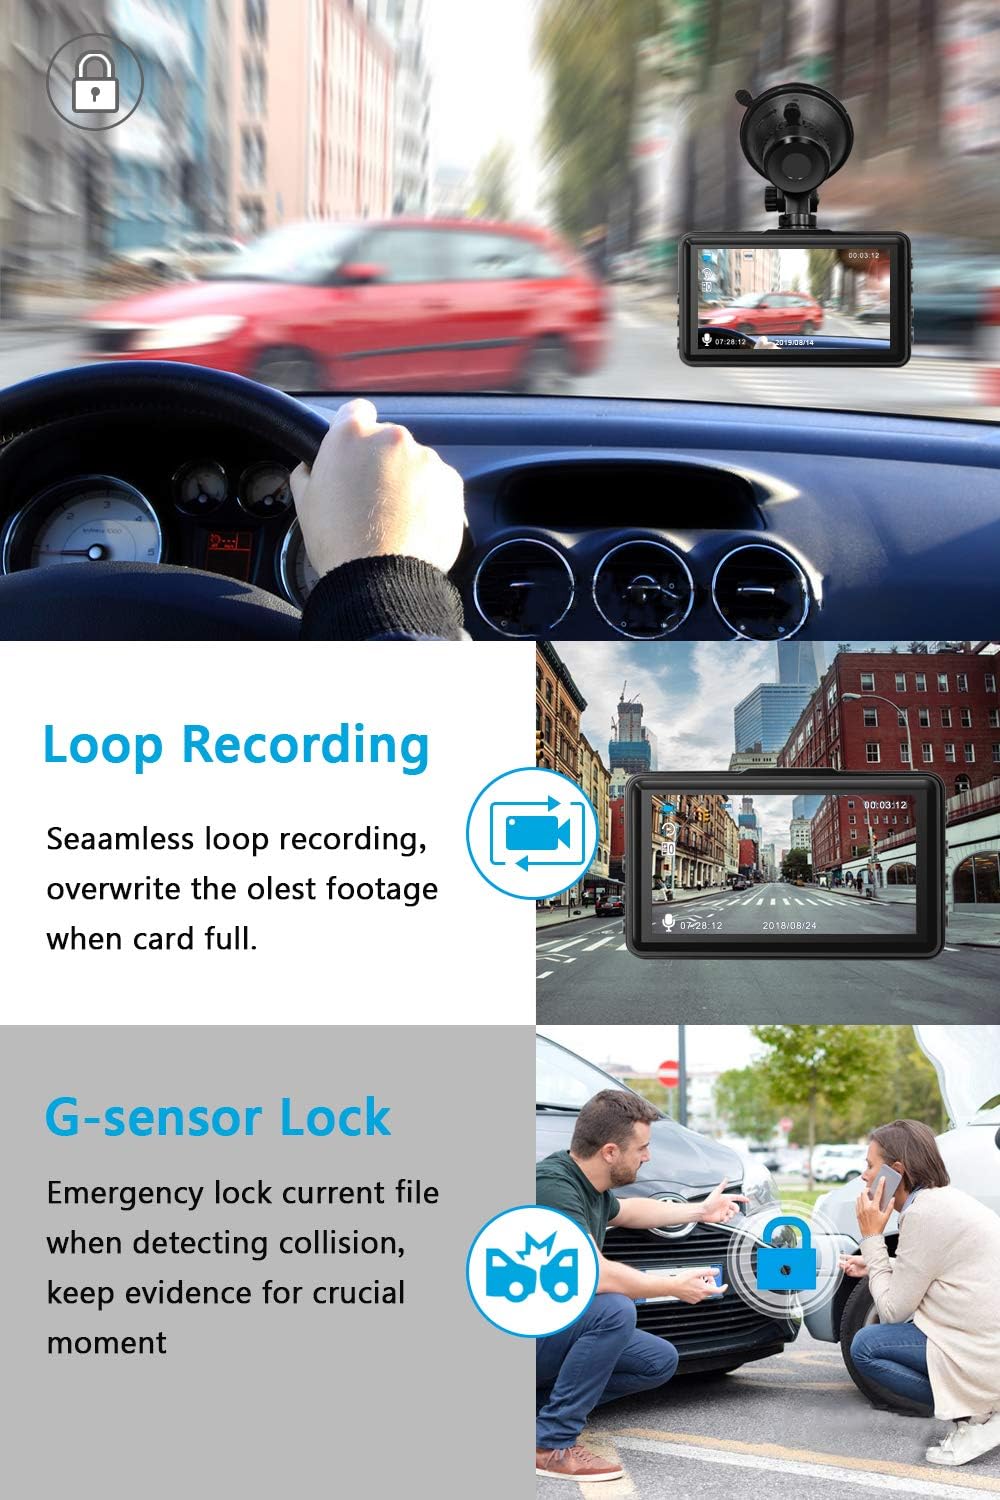
Image: Loop Recording and G-Sensor in action.

Image: Parking Mode monitoring.
4. Setup and Installation
Follow these steps to properly install your zhiroad A15 Dual Dash Cam:
4.1. Insert Micro SD Card
- Ensure the dash cam is powered off.
- Locate the Micro SD card slot on the side of the dash cam.
- Insert the provided 32GB Micro SD card into the slot until it clicks into place. Ensure the card is inserted in the correct orientation.
- Note: For optimal performance, format the SD card within the dash cam's settings before first use and periodically thereafter.

Image: Correct insertion of the Micro SD card.
4.2. Mount the Front Dash Cam
- Clean the area on your windshield where you intend to mount the dash cam.
- Attach the suction cup mount to the dash cam.
- Press the suction cup firmly against the windshield, ideally near the rearview mirror, and flip the lever to secure it.
- Adjust the angle of the front camera to ensure it captures the road ahead clearly, avoiding obstruction from the rearview mirror or sun visor.
4.3. Install the Rear Camera
- Identify a suitable location for the rear camera, typically on the rear windshield or above the license plate (if external mounting is preferred and supported).
- Connect the rear camera to the main dash cam unit using the provided rear camera cable.
- Route the cable neatly along the vehicle's interior trim to avoid interference with driving.
- Secure the rear camera using its adhesive or screws, ensuring it has a clear view of the rear.
4.4. Power Connection
- Connect the car charger to the dash cam's power input port.
- Plug the other end of the car charger into your vehicle's cigarette lighter socket.
- Route the power cable neatly to avoid obstructing your view or interfering with vehicle controls.

Image: Easy setup and cable routing diagram.
5. Operating Instructions
Familiarize yourself with the basic operations of your dash cam:
5.1. Power On/Off
- The dash cam will automatically power on and begin recording when connected to power and the vehicle ignition is turned on.
- It will automatically power off a few seconds after the vehicle ignition is turned off.
- To manually power on/off, press and hold the Power button.
5.2. Recording Modes
- Normal Recording: Continuous recording when the vehicle is in motion. Videos are saved in segments (e.g., 1, 3, or 5 minutes) and loop recorded.
- Emergency Recording (G-Sensor): When a collision is detected, the current video segment is automatically locked and saved to a protected folder, preventing it from being overwritten by loop recording.
- Parking Monitoring: When enabled, the dash cam will automatically start recording if it detects a vibration or motion while the vehicle is parked and the engine is off. This requires a continuous power supply (e.g., hardwire kit, not included).
5.3. Menu Navigation
- Press the Menu button to access settings.
- Use the Up/Down buttons to navigate through options.
- Press the OK button to confirm a selection.
- Press the Menu button again to exit the menu.
5.4. Playback
- In standby mode, press the Mode button to switch to playback mode.
- Use the Up/Down buttons to select the desired video file.
- Press the OK button to start playback.
- Press the Mode button again to return to recording mode.
6. Maintenance
Proper maintenance ensures the longevity and optimal performance of your dash cam:
- Cleaning: Use a soft, dry cloth to clean the camera lens and screen. Avoid using abrasive cleaners or solvents.
- SD Card Management: Periodically format the Micro SD card (at least once a month) to prevent data corruption and ensure smooth recording. Back up any important footage before formatting.
- Temperature: Avoid exposing the dash cam to extreme temperatures (hot or cold) for extended periods, as this can affect battery life and component integrity.
- Firmware Updates: Check the zhiroad official website periodically for any available firmware updates to improve performance and add new features.
7. Troubleshooting
If you encounter issues with your dash cam, refer to the following common problems and solutions:
| Problem | Possible Cause | Solution |
|---|---|---|
| Dash cam does not power on. | No power supply; faulty car charger; loose connection. | Check car charger connection and vehicle's cigarette lighter socket. Try a different power source. Ensure the car charger is working. |
| Rear camera not working / black screen. | Loose cable connection; faulty rear camera or cable. | Ensure the rear camera cable is securely connected to both the main unit and the rear camera. Inspect the cable for damage. If the issue persists, contact support. |
| Video footage is blurry or unclear. | Dirty lens; protective film still on lens; incorrect focus. | Clean the camera lens with a soft cloth. Remove any protective film. Ensure the camera is securely mounted and not vibrating. |
| SD card error / cannot format. | SD card is full, corrupted, or incompatible. | Format the SD card using the dash cam's menu. If formatting fails, try formatting on a computer. If the issue persists, try a new, high-quality Micro SD card (Class 10 or higher, up to 32GB). |
| Dash cam freezes or crashes. | SD card issue; firmware issue; power instability. | Press the reset button (if available). Format the SD card. Ensure stable power supply. Check for firmware updates. |
8. Specifications
Key technical specifications for the zhiroad A15 Dual Dash Cam:
- Brand: zhiroad
- Model: A15
- Display Size: 3 Inches (LED)
- Video Capture Resolution: 1080p (Front)
- Front Camera Angle: 170° Wide Angle
- Rear Camera Angle: 120° Wide Angle
- Flash Memory Type: SD (Supports up to 32GB Micro SD Card)
- Special Features: Loop Recording, G-Sensor, Parking Monitoring, Night Vision
- Mounting Type: Suction Mount
- Connector Type: USB
- Batteries Included: Yes (Internal for G-Sensor/Parking Monitor)
- Parcel Dimensions: 14.6 x 11.5 x 9.2 cm; 380 g
9. Warranty and Support
zhiroad offers a comprehensive warranty and dedicated customer support for your product:
- Warranty: We offer a 3-year warranty with 100% satisfaction guarantee for this Car dash camera.
- Customer Service: If you have any queries or require assistance with your zhiroad A15 Dash Cam, please contact our customer service team. We aim to reply within 24 hours and provide the best possible solution.
- For support, please refer to the contact information provided on the product packaging or the official zhiroad website.