
1. Introduction
This instruction manual provides essential information for the proper installation, maintenance, and troubleshooting of your Odashen Left Wheel Assembly. This replacement part is specifically designed for compatibility with SilverCrest SSRA, ILIFE A10S, and ILIFE L100 robotic vacuum cleaners. Please read this manual thoroughly before proceeding with installation to ensure correct procedure and optimal performance.
2. Safety Information
Always observe the following safety precautions:
- Ensure the robotic vacuum cleaner is powered off and unplugged from its charging base before attempting any installation or maintenance.
- Use appropriate tools for disassembly and assembly to prevent damage to the vacuum cleaner or injury.
- Keep small parts away from children and pets.
- If you are unsure about any step, consult a qualified technician or the vacuum cleaner's original manual.
- Do not force parts into place. If a part does not fit, recheck the instructions and compatibility.
3. Package Contents
Verify that all items are present in the package:
- 1 x Odashen Left Wheel Assembly
4. Installation Instructions
Follow these steps to replace the left wheel assembly:
- Prepare the Vacuum Cleaner: Power off your robotic vacuum cleaner and disconnect it from any power source or charging station. Place the vacuum cleaner upside down on a clean, soft surface to prevent scratches.
- Locate the Left Wheel: Identify the left wheel assembly that needs replacement.
- Remove the Old Wheel Assembly: Depending on your specific vacuum model (SilverCrest SSRA, ILIFE A10S, or ILIFE L100), you may need to remove screws or release clips to detach the old wheel assembly. Refer to your vacuum cleaner's original service manual for precise disassembly instructions if needed. Carefully disconnect any wiring connected to the old wheel assembly.
- Connect the New Wheel Assembly: Connect the wiring from the new Odashen Left Wheel Assembly to the corresponding port on the vacuum cleaner. Ensure the connection is secure and correctly oriented.
- Install the New Wheel Assembly: Position the new wheel assembly into its designated slot. Secure it using the screws or clips that were removed in step 3. Ensure the wheel moves freely and is properly seated.
- Inspect and Test: Once the new wheel assembly is installed, carefully turn the vacuum cleaner right-side up. Power on the vacuum cleaner and perform a test run to ensure the new wheel functions correctly and the robot moves as expected.
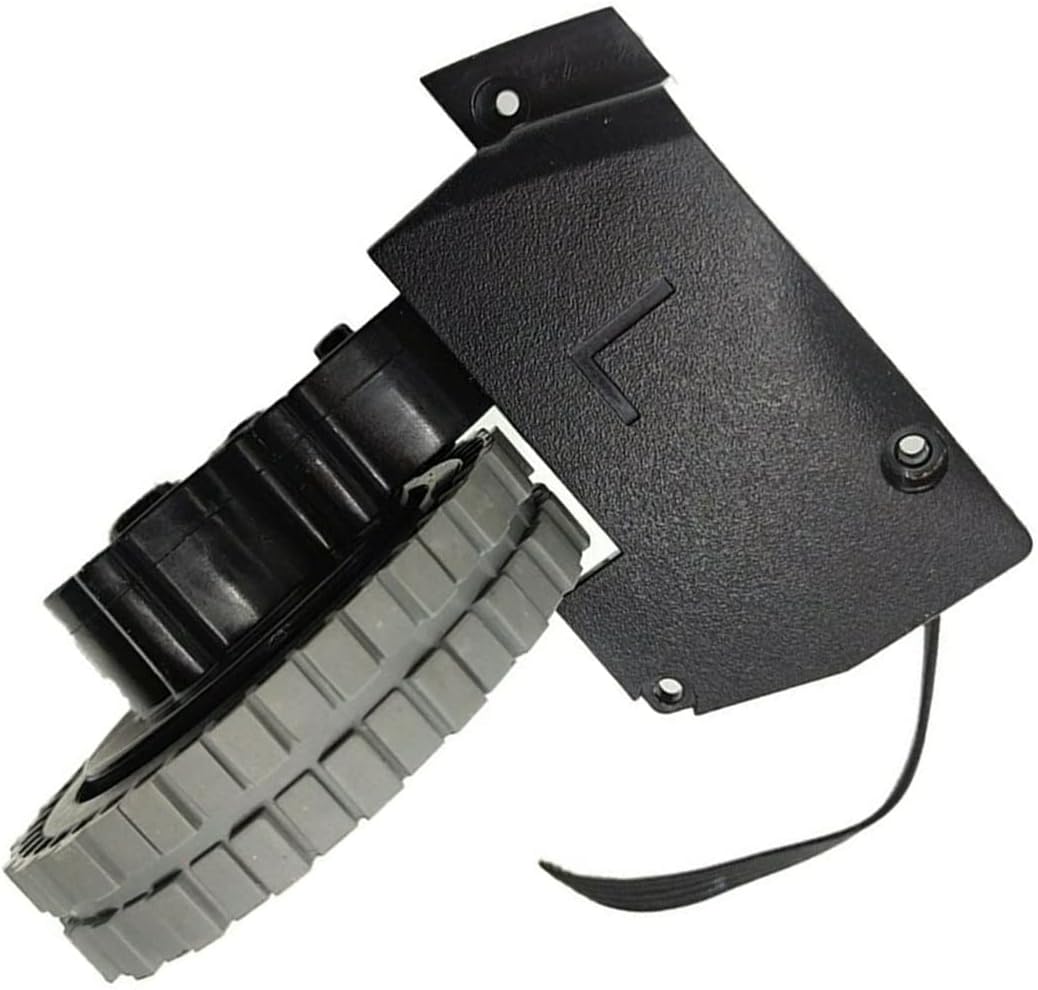
Image 1: Side view of the Odashen Left Wheel Assembly. This image displays the wheel with its grey rubberized treads and the black plastic housing, along with a visible connecting wire.
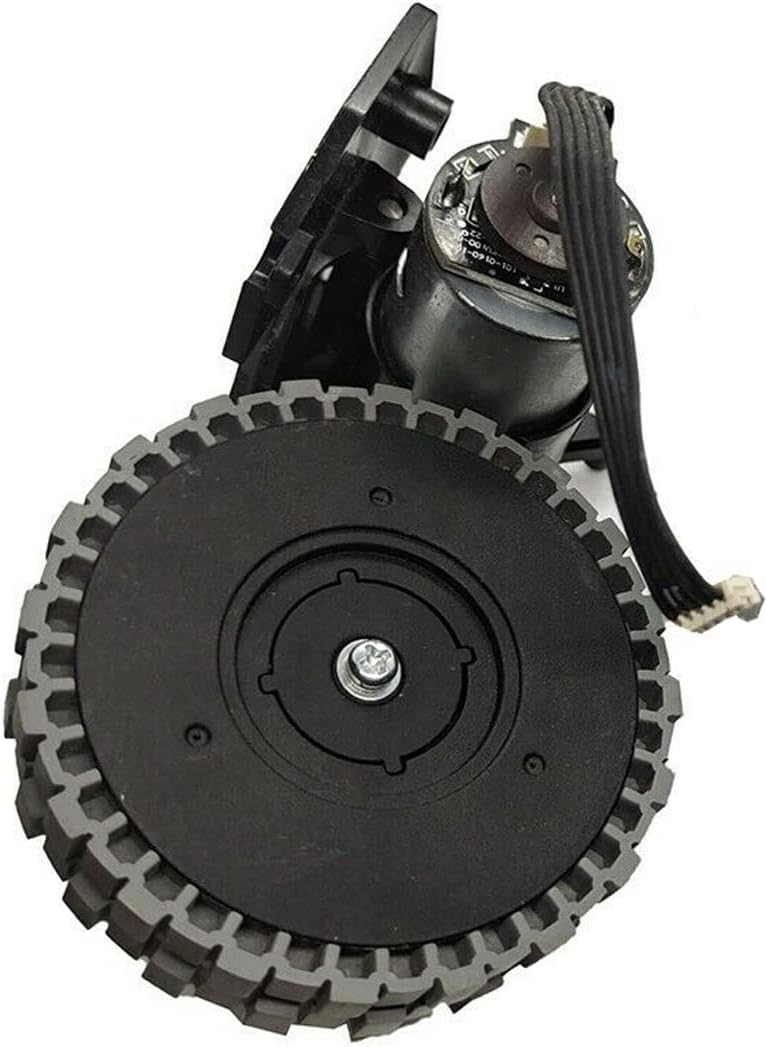
Image 2: Top-down view of the Odashen Left Wheel Assembly. This image provides a clear view of the motor component and the wiring connections, crucial for proper installation.

Image 3: Alternative side view of the Odashen Left Wheel Assembly. This perspective emphasizes the mounting points on the black housing and the overall structural design of the replacement part.
5. Usage Considerations
The Odashen Left Wheel Assembly is a direct replacement part. Once correctly installed, its operation is integrated with the robotic vacuum cleaner's existing system. No separate operational controls are required for the wheel itself. Ensure the vacuum cleaner's software is up-to-date for optimal performance of all components.
6. Maintenance
Regular maintenance of the wheel assembly helps ensure the longevity and efficient operation of your robotic vacuum cleaner:
- Regular Cleaning: Periodically inspect the wheel and its housing for tangled hair, dust, or debris. Use a small brush or cloth to gently remove any obstructions.
- Axle Inspection: Check the wheel's axle for any signs of wear or damage. Ensure it rotates smoothly without excessive resistance.
- Tread Condition: Examine the wheel's rubber treads for wear or damage. Worn treads can affect the vacuum's traction and movement.
- Avoid Liquids: Do not immerse the wheel assembly in water or cleaning solutions. Clean with a dry or slightly damp cloth only.
7. Troubleshooting
If you encounter issues after installing the new wheel assembly, consider the following:
| Problem | Possible Cause | Solution |
|---|---|---|
| Wheel not turning or moving slowly. | Debris caught in the wheel mechanism; incorrect installation; faulty connection. | Clean any debris from around the wheel. Recheck installation steps, ensuring all connections are secure. If the issue persists, the wheel assembly may be faulty. |
| Unusual noise from the wheel. | Debris in the axle; worn components. | Inspect and clean the wheel and axle area for any foreign objects. If noise persists, the internal components may be worn. |
| Vacuum cleaner moves erratically or in circles. | Wheel not properly installed; sensor issue (not related to wheel itself). | Ensure the wheel is fully seated and secured. If other wheels are also affected, consult your vacuum's original manual for sensor troubleshooting. |
If troubleshooting steps do not resolve the issue, please contact customer support.
8. Specifications
- Product Name: Left Wheel Assembly Engine
- Brand: Odashen
- Compatibility: SilverCrest SSRA, ILIFE A10S, ILIFE L100 Robotic Vacuum Cleaners
- Part Type: Replacement Wheel Assembly
- ASIN: B09J83HH65
- Date First Available: October 12, 2021
9. Warranty Information
Specific warranty details for the Odashen Left Wheel Assembly are not provided in this manual. For information regarding warranty coverage, terms, and conditions, please refer to the product listing on the retailer's website or contact the seller directly.
10. Customer Support
If you have any questions, require assistance with installation, or need further troubleshooting, please contact the seller through the platform where the product was purchased. Provide your order number and a detailed description of the issue for prompt support.
You can also visit the Odashen Store on Amazon for more products and information.