1. Introduction
Thank you for choosing the Appizz Compatible Ice Maker. This product is designed as a direct replacement for the original ice maker in specific Whirlpool refrigerator models, including WRX735SDBM00, WRX735SDBE00, and WRX735SDBH00. It is an 8-cube ice maker, replacing part numbers W10377151 and W10882923. This manual provides essential information for safe installation, operation, and maintenance to ensure optimal performance.
Please read these instructions carefully before installation and retain this manual for future reference.
2. Safety Information
WARNING: To reduce the risk of electric shock, fire, or injury to persons, read all instructions before installing this appliance part.
- Always disconnect power to the refrigerator before attempting any installation, repair, or maintenance.
- Wear appropriate personal protective equipment, such as gloves, to prevent injury.
- If you are unsure about any part of the installation process, consult a qualified appliance technician.
- Ensure all electrical connections are secure and properly insulated.
- Keep children and pets away from the work area during installation.
3. Package Contents
Verify that all components are present and undamaged before proceeding with installation.
- Appizz Compatible Ice Maker (8-cube unit)
- Wiring Harness
- Shut-off Arm

Image 3.1: The Appizz compatible ice maker unit, including the main ice-making mechanism, the wiring harness, and the shut-off arm.

Image 3.2: A detailed view of the included wiring harness and various electrical connectors, essential for connecting the ice maker to the refrigerator's power supply.
4. Installation Instructions
This section outlines the general steps for replacing your refrigerator's ice maker. Specific refrigerator models may vary slightly. Refer to your refrigerator's service manual for detailed instructions if needed.
- Disconnect Power: Unplug the refrigerator from the electrical outlet or turn off the circuit breaker supplying power to the refrigerator.
- Access the Freezer Compartment: Open the freezer door and locate the existing ice maker. You may need to remove the ice bucket and any shelves or bins that obstruct access.
- Remove the Old Ice Maker:
- Carefully disconnect the wiring harness from the old ice maker. There may be a locking tab that needs to be pressed.
- Unscrew any mounting screws that secure the ice maker to the freezer wall. Typically, there are 2-3 screws.
- Gently pull the old ice maker unit out of its position.
- Prepare the New Ice Maker:
- If your refrigerator's existing wiring harness connector does not match the new ice maker, use the provided wiring harness adapter. Connect the adapter to the new ice maker's port and then to the refrigerator's main harness.
- Ensure the shut-off arm is correctly attached to the new ice maker.

Image 4.1: Top view of the ice maker, highlighting the mounting brackets and the general structure for installation within the freezer compartment.
- Install the New Ice Maker:
- Align the new ice maker with the mounting holes in the freezer wall.
- Secure the ice maker with the mounting screws. Do not overtighten.
- Connect the wiring harness (or adapter) to the refrigerator's electrical connection point. Ensure a firm connection.
- Restore Power: Plug the refrigerator back into the electrical outlet or turn on the circuit breaker.
- Initial Operation: The ice maker will not produce ice until the freezer temperature is below 10°F (-12°C). A new unit may take up to 24 hours to produce its first batch of ice. Discard the first few batches of ice to ensure cleanliness.
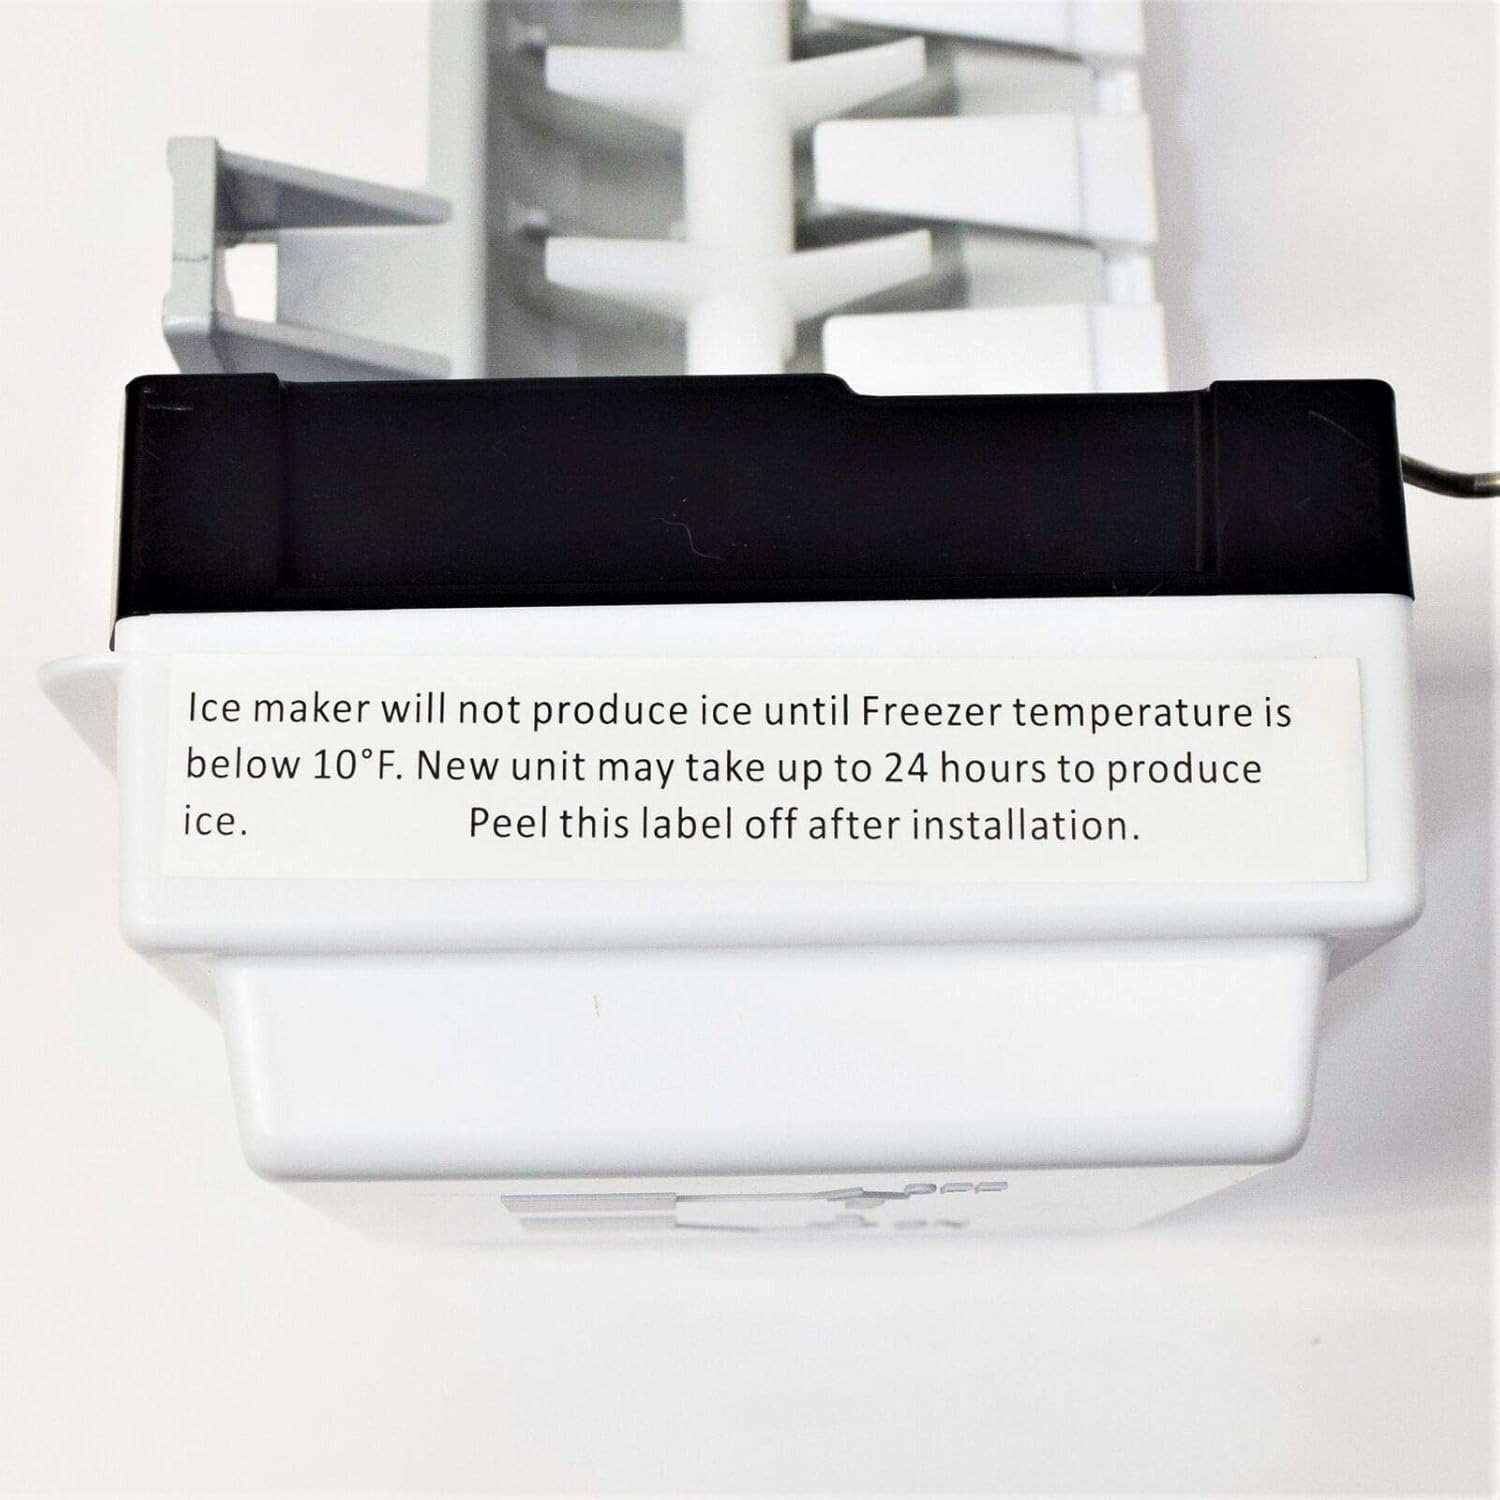
Image 4.2: A close-up of the informational label on the ice maker, which advises that the unit requires the freezer to be below 10°F and may take up to 24 hours to produce ice. This label should be peeled off after installation.
- Remove Label: Peel off the informational label from the ice maker unit after installation is complete.
5. Operation
Once installed and powered, the ice maker will automatically begin the ice production cycle when the freezer reaches the appropriate temperature (below 10°F / -12°C). The shut-off arm controls the ice level in the ice bucket. When the ice bucket is full, the arm will be pushed up, signaling the ice maker to temporarily stop production. Once ice is removed and the arm drops, production will resume.
- Ensure the shut-off arm is in the down position for ice production to occur.
- Allow sufficient time for the freezer to cool down and for the first ice batches to form.
6. Maintenance
Regular maintenance helps ensure the longevity and efficient operation of your ice maker.
- Cleaning: Periodically remove the ice bucket and wash it with mild soap and warm water. Rinse thoroughly and dry completely before returning it to the freezer.
- Check Water Line: Ensure the water supply line to the refrigerator is not kinked or blocked, as this can affect ice production.
- Inspect for Frost Buildup: Excessive frost around the ice maker can impede its function. If present, disconnect power to the refrigerator and allow the frost to melt, then clean and dry the area before restoring power.
7. Troubleshooting
If your ice maker is not functioning as expected, review the following common issues and solutions before seeking professional assistance.
| Problem | Possible Cause | Solution |
|---|---|---|
| No ice production | Refrigerator not plugged in or power off Freezer temperature too high Water supply turned off or kinked Shut-off arm in 'up' position New unit not yet cycled | Check power connection and circuit breaker Ensure freezer is below 10°F (-12°C) Verify water supply valve is open and line is clear Lower the shut-off arm Allow up to 24 hours for first ice production |
| Small or hollow ice cubes | Low water pressure Partially clogged water filter Freezer temperature too high | Check household water pressure Replace water filter if old Ensure freezer is below 10°F (-12°C) |
| Ice tastes bad or has odor | Old ice in bucket Unclean ice bucket Food odors in freezer Water filter needs replacement | Discard old ice and clean bucket Clean ice bucket thoroughly Store odorous foods in sealed containers Replace water filter |
| Ice maker is noisy | Normal operation sounds Loose mounting screws | Some operational sounds are normal Check and tighten mounting screws if necessary (after disconnecting power) |
8. Specifications
- Brand: Appizz
- Model Name: Refrigerator Ice Maker
- Capacity: 8 Pounds (ice storage capacity of compatible refrigerators)
- Manufacturer: Appizz
- Compatible Refrigerator Models: Whirlpool WRX735SDBE00, Whirlpool WRX735SDBM00, Whirlpool WRX735SDBH00
- Replaces Part Numbers: W10377151, W10882923
- Ice Cube Type: 8-cube production
9. Warranty and Support
For warranty information and customer support regarding your Appizz Compatible Ice Maker, please refer to the documentation provided at the time of purchase or contact your retailer. Keep your purchase receipt as proof of purchase.