ANBERX B09HTSHL8M
ANBERX Security Camera Outdoor User Manual
Model: B09HTSHL8M
1. Introduction
This user manual provides comprehensive instructions for the installation, operation, and maintenance of your ANBERX Security Camera Outdoor. Please read this manual thoroughly before using the product to ensure proper functionality and safety.

Figure 1.1: ANBERX Security Camera Outdoor.
Video 1.2: An overview of the ANBERX Security Camera Outdoor's features and capabilities.
2. Safety Information
Always adhere to the following safety precautions:
- Ensure the power supply is disconnected before installation or maintenance.
- Use only the provided power adapter.
- Do not expose the camera to extreme temperatures outside its operating range (-4°F to +140°F / -20°C to +60°C).
- Avoid placing the camera near strong electromagnetic fields.
- Keep out of reach of children.
- This product is IP66 weatherproof, but avoid submerging it in water.
3. Package Contents
Verify that all items are present in your package:
- 1 x ANBERX Security Camera
- 1 x Power Supply
- 1 x User Manual (this document)
- Installation Accessories (screws, wall plugs)

Figure 3.1: Included components in the package.
4. Product Overview
The ANBERX Security Camera is a 3MP HD outdoor surveillance camera featuring Pan/Tilt/Zoom capabilities, two-way audio, motion detection, and advanced night vision modes. It is designed for reliable outdoor use with IP66 weatherproofing.
4.1 Key Features
- 300° Pan & 90° Tilt: Remote control for wide area coverage.
- 5x Digital Zoom: Clear magnification of distant objects.
- 3MP (2304*1296) HD Image: High-resolution video capture.
- Color Night Vision: Enhanced visibility in low-light conditions using 9 infrared lights and 9 white LED lights.
- 2-Way Audio: Built-in microphone and speaker for communication.
- AI Motion Detection: Smart alerts to your smartphone.
- 2.4G Wi-Fi Connectivity: Wireless connection to your home network.
- IP66 Weather-Proof: Durable design for outdoor environments.

Figure 4.1: Visual representation of key features including HD, 5X Digital Zoom, Auto Tracking, 2-Way Audio, AI Human Detect, 2.4GHz Wifi, Waterproof, and IR/White LED.
5. Setup
5.1 Physical Installation
The camera is designed for wall mounting. Choose a location that provides optimal viewing coverage and is within range of your 2.4Ghz Wi-Fi network and a power outlet.
- Mark the drilling points using the camera's mounting base as a template.
- Drill holes and insert the wall plugs.
- Secure the camera to the wall using the provided screws.
5.2 Power Connection
Connect the provided power adapter to the camera's power input and plug it into a standard electrical outlet. The camera will power on automatically.
5.3 App Installation (iCSee)
Download the "iCSee" app from your smartphone's app store (available for Android and iOS). Register an account and log in.
5.4 Network Connection
The camera supports 2.4Ghz Wi-Fi networks only. Ensure your router is configured for 2.4Ghz. There are several methods to connect your camera:
5.4.1 WiFi Camera Mode (QR Code Scan)
This is the recommended method for initial setup.
- Open the iCSee app and tap the "+" icon to add a device.
- Select "WiFi Camera".
- Power on the camera and confirm it's in normal working condition.
- Enter your 2.4Ghz Wi-Fi network name and password in the app.
- The app will generate a QR code. Hold your phone with the QR code facing the camera lens at a distance of 25-35 cm (10-14 inches).
- The camera will emit a sound prompt when the QR code is successfully scanned.
- Follow the app's instructions to complete the setup, including setting a password for the camera.
Video 5.1: How to connect the camera to iCSee using WiFi/IP search/AP Hotspot modes. This video demonstrates the initial setup process, including inserting an SD card, resetting the camera, and connecting via QR code scan.
5.4.2 Nearby Camera Mode
If the QR code scan fails or you prefer to search for devices on your local network:
- In the iCSee app, tap the "+" icon to add a device.
- Select "Nearby Cameras" from the options.
- The app will search for available cameras on your network.
- Select your camera from the list and follow the prompts to add it.
5.4.3 AP Mode Connection
This mode allows direct connection to the camera's hotspot for initial configuration without a router.
- Long press the reset button on the camera for 10-15 seconds to restore default settings. Wait for a sound prompt.
- Quickly press the reset button three times. Most devices will voice prompt "enter the AP mode".
- Go to your phone's Wi-Fi settings and connect to the camera's hotspot (usually named "robot_XXXX" or "camera_XXXX"). The default password is "1234567890".
- Return to the iCSee app and select "AP mode connection".
- Follow the app's instructions to complete the setup and connect the camera to your home Wi-Fi network.
6. Operating the Camera
6.1 Live View and Control
Once connected, you can access the live video feed from your camera through the iCSee app. Use the on-screen controls to:
- Pan/Tilt: Swipe on the video feed to rotate the camera horizontally (300°) and vertically (90°).
- Digital Zoom: Pinch to zoom in or out on the live view.
- Snapshot: Capture still images from the live feed.
- Record: Manually start/stop video recording.

Figure 6.1: The camera's auto-tracking function allows it to follow moving objects within its field of view.
6.2 Two-Way Audio
The camera features a built-in microphone and speaker, allowing for two-way communication.
- From the live view in the iCSee app, tap the microphone icon.
- Hold the icon to speak, and release to listen.
- This feature is useful for communicating with visitors or deterring unwanted guests.

Figure 6.2: Two-way audio allows communication with individuals near the camera, such as a package delivery person.
6.3 Motion Detection & Alerts
The camera uses AI-powered motion detection to identify human movement and send alerts.
- Enable motion detection in the app settings.
- Adjust sensitivity levels to minimize false alarms.
- Receive real-time notifications on your smartphone when motion is detected.

Figure 6.3: AI Human Detect provides more accurate alarms by focusing on human shapes, reducing false alerts.
6.4 Night Vision Modes
The camera offers multiple night vision options for clear monitoring in dark environments.
- Infrared (IR) Night Vision: Provides clear black and white images in complete darkness using infrared LEDs.
- White Light Mode (Color Night Vision): Activates the white LED lights to provide full-color night vision, illuminating the area.
- Double Light Vigilance Mode: Combines IR and white light. The camera uses IR for general monitoring and automatically switches to white light (and color vision) upon detecting motion, acting as a deterrent.

Figure 6.4: Different night vision options: 9 IR Night Vision LEDs, 9 White LEDs, and Double Light Vigilance for enhanced clarity.

Figure 6.5: Visual comparison showing the difference between Full-Color Night Vision and Infrared Night Vision.
6.5 Storage Options
The camera supports two main storage methods for recorded footage:
- Micro SD Card: Insert a Micro SD card (up to 128GB, not included) into the camera's SD card slot for local storage.
- Cloud Storage: Subscribe to cloud storage services through the iCSee app for remote and secure backup of your recordings.
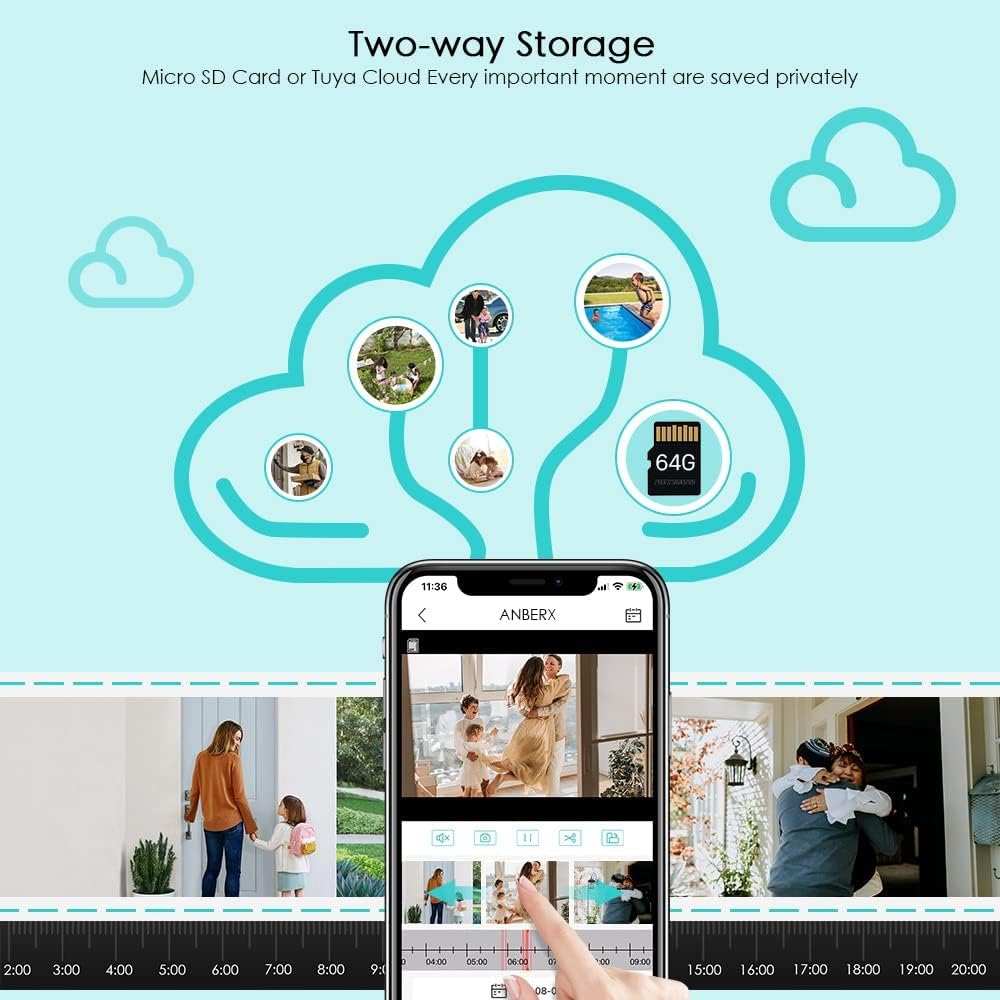
Figure 6.6: Illustration of two-way storage, showing Micro SD card and cloud storage options for saving important moments.
6.6 PC Software (VMS)
For advanced monitoring and management, you can connect your camera to VMS (Video Management Software) on your PC.
- Download the VMS software from the official website or by scanning the QR code provided in the app/manual.
- Install and launch the VMS software on your computer.
- Add your camera to the VMS by searching for devices on the network or manually adding its CloudID.
- You can view live feeds, playback recordings, and configure settings from your PC.
Video 6.7: Instructions on how to connect the ANBERX camera to VMS software on a PC, including how to find the camera's CloudID.
7. Maintenance
- Cleaning: Gently wipe the camera lens and body with a soft, damp cloth. Do not use harsh chemicals or abrasive cleaners.
- Firmware Updates: Regularly check the iCSee app for available firmware updates to ensure optimal performance and security.
- Weather Protection: While IP66 rated, ensure the power connection point is protected from direct heavy rain or snow to prevent water ingress.

Figure 7.1: The camera is IP66 weatherproof, designed to withstand tough outdoor conditions like snow and heavy rain.
8. Troubleshooting
| Problem | Possible Cause | Solution |
|---|---|---|
| Camera offline in app. | No power, Wi-Fi disconnected, weak Wi-Fi signal. | Check power connection. Verify Wi-Fi signal strength. Reconnect camera to Wi-Fi if necessary. |
| Failed to connect to Wi-Fi. | Incorrect Wi-Fi password, 5Ghz network, camera too far from router. | Ensure correct 2.4Ghz Wi-Fi password. Move camera closer to router. Reset camera and try again. |
| No motion detection alerts. | Motion detection disabled, low sensitivity, app notifications off. | Enable motion detection and adjust sensitivity in app. Check phone notification settings for iCSee app. |
| Poor video quality. | Weak Wi-Fi signal, dirty lens. | Improve Wi-Fi signal. Clean the camera lens. |
| SD card not recording. | SD card full, corrupted, or not inserted correctly. | Format or replace SD card. Ensure it's inserted correctly. Check recording settings in app. |
9. Specifications
| Feature | Detail |
|---|---|
| Model | B09HTSHL8M |
| Video Capture Resolution | 3 MP (2304*1296) |
| Pan/Tilt Range | 300° Horizontal Pan, 90° Vertical Tilt |
| Digital Zoom | 5x |
| Connectivity | 2.4Ghz Wi-Fi (IEEE 802.11b/g/n) |
| Night Vision | Infrared, White Light (Color Night Vision), Double Light Vigilance |
| Audio | 2-Way Audio (Built-in Mic & Speaker) |
| Motion Detection | AI Human Detection |
| Storage | Micro SD Card (up to 128GB), Cloud Storage |
| Weatherproof Rating | IP66 |
| Operating Temperature | -4°F to +140°F (-20°C to +60°C) |
| Power Source | Wired (requires power adapter) |
| Dimensions | 7.68 x 6.57 x 4.29 inches |
| Weight | 1.68 pounds |
10. Warranty and Support
ANBERX is committed to providing high-quality products and excellent customer service. All ANBERX smart security cameras undergo quality testing before shipping.
- Warranty: Please refer to your purchase platform or product packaging for specific warranty details.
- Customer Support: For any questions, technical assistance, or support inquiries, please contact ANBERX customer service. Messages are typically replied to within 24 hours during business days.
- Online Resources: Visit the ANBERX official website or product page for FAQs, updated manuals, and software downloads.

Figure 10.1: ANBERX customer support is available to assist with any inquiries.
no relevant documents