1. Important Safety Instructions
Please read all instructions carefully before using the Singer TRIO Dry Iron. Retain this manual for future reference.
- Always ensure the voltage indicated on the iron matches your local mains voltage before connecting.
- Do not leave the iron unattended while it is connected to the power supply.
- Keep the iron out of reach of children and individuals with reduced physical, sensory, or mental capabilities.
- Avoid touching hot surfaces. Use handles or knobs.
- To protect against electric shock, do not immerse the iron, power cord, or plug in water or other liquids.
- Unplug the iron from the outlet when filling with water (if applicable, though this is a dry iron), or when not in use, and before cleaning. Allow to cool completely before putting on or taking off parts, and before cleaning.
- Do not operate any appliance with a damaged cord or plug, or after the appliance malfunctions or has been dropped or damaged in any manner.
- Use the iron only for its intended household use.
- The iron must be used and rested on a stable, level, heat-resistant surface.
- Never pull the cord to disconnect from the outlet; instead, grasp the plug and pull to disconnect.
2. Product Overview
Familiarize yourself with the components of your Singer TRIO Dry Iron.

Image 2.1: The Singer TRIO 1000-Watt Dry Iron, featuring its ergonomic handle and non-stick soleplate.

Image 2.2: Key features of the Singer TRIO Dry Iron, including the Teflon coated soleplate, thermostat controlled temperature dial, indicator light, and cool touch plastic body.
Components:
- Handle: Ergonomically designed for comfortable grip.
- Temperature Control Dial: Used to select the desired ironing temperature for different fabric types.
- Indicator Light: Illuminates when the iron is heating and turns off when the set temperature is reached.
- Non-Stick Coated Soleplate: Provides smooth gliding over fabrics and prevents sticking.
- Power Cord: Connects the iron to the electrical outlet.
- Cool Touch Plastic Body: Designed to remain cool during operation for user safety.
3. Setup
- Unpack the iron and remove all packaging materials.
- Inspect the iron for any damage. Do not use if damaged.
- Ensure the soleplate is clean and free from any protective film or residue.
- Place the iron on a stable, heat-resistant ironing board or surface.
- Plug the power cord into a suitable electrical outlet (230 Volts).
4. Operating Instructions
Follow these steps for effective and safe ironing.
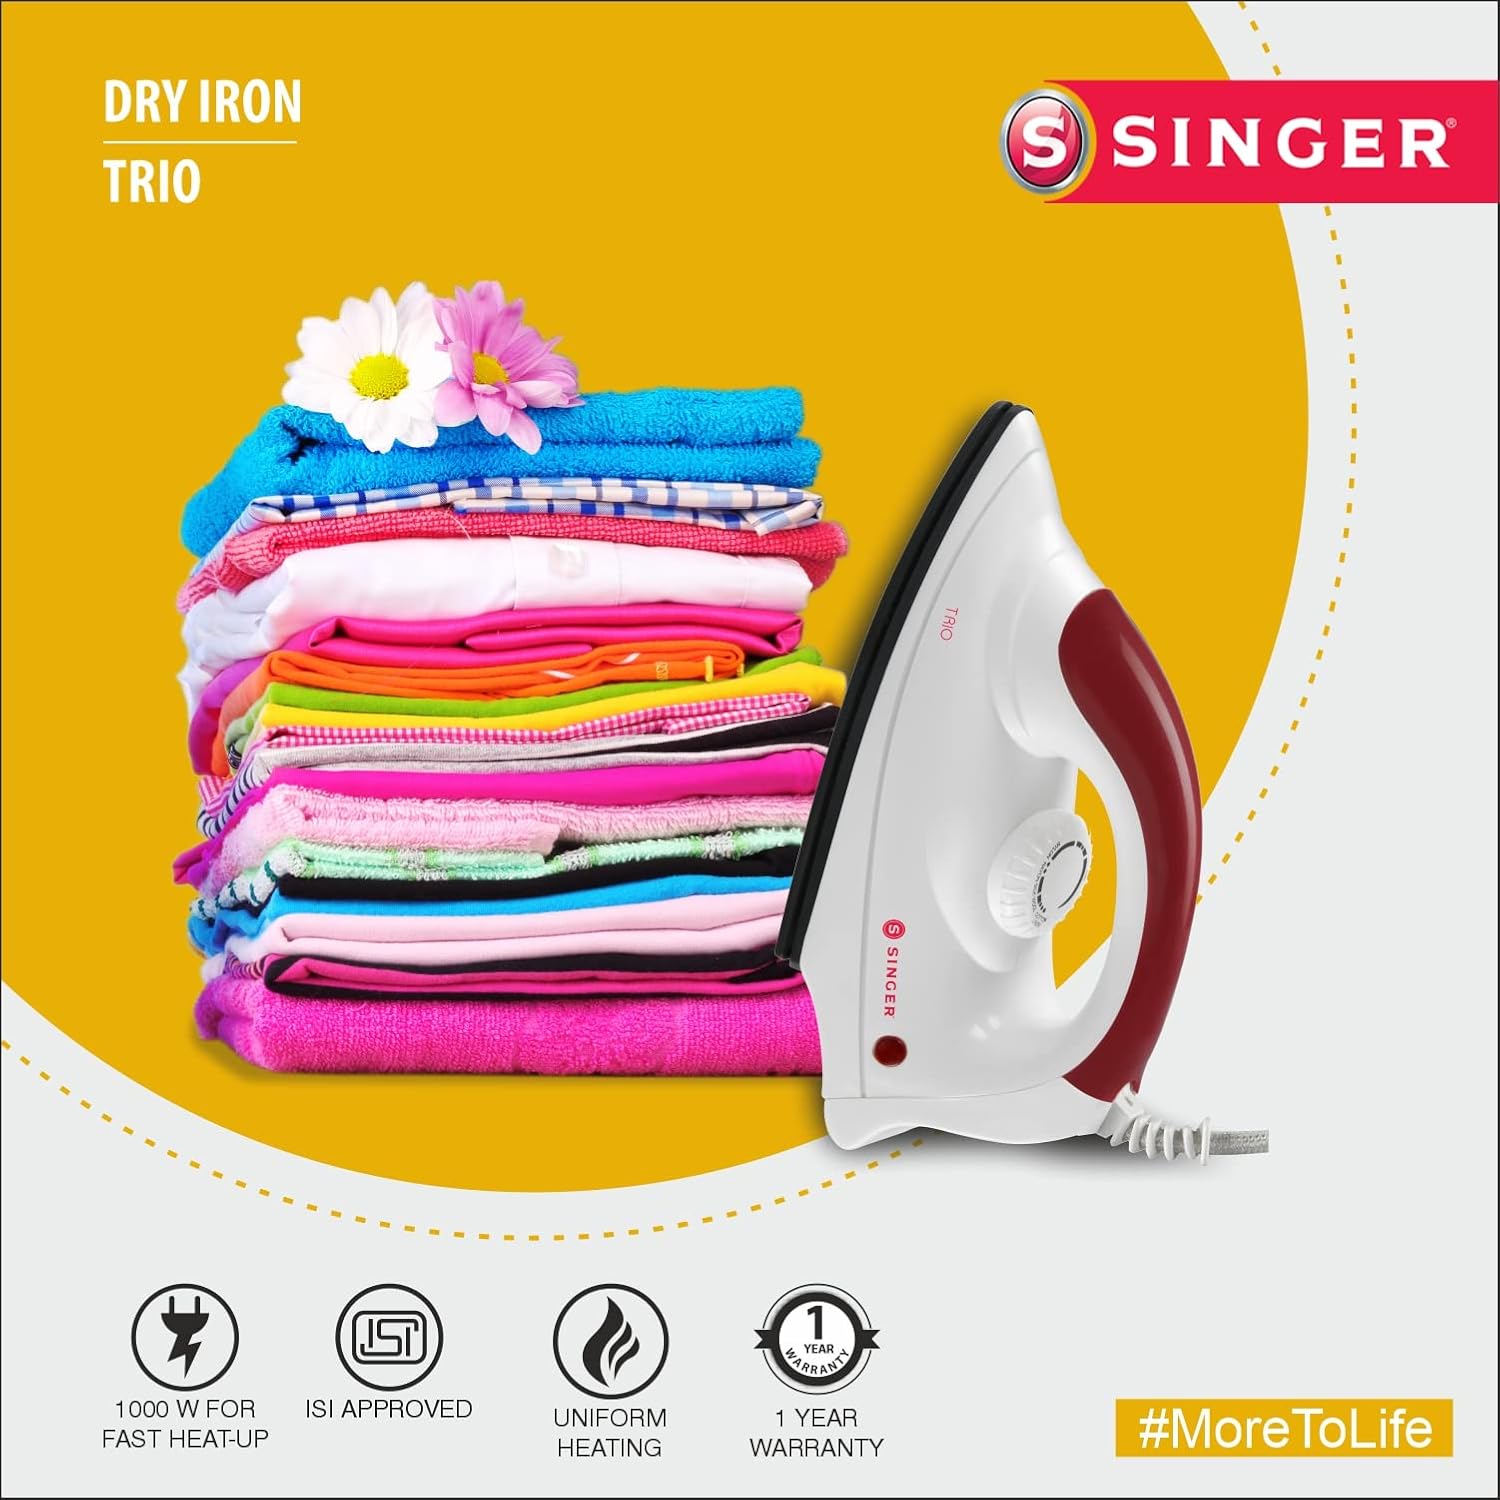
Image 4.1: The Singer TRIO Dry Iron is designed for fast heat-up with 1000 Watts, ensuring uniform heating for various fabrics.
- Sort Laundry: Separate clothes according to fabric type (e.g., cotton, linen, silk, synthetics). Always check the garment's care label for ironing instructions.
- Set Temperature: Turn the temperature control dial to the appropriate setting for the fabric you intend to iron. Start with lower temperatures for delicate fabrics and gradually increase for heavier fabrics.
- Heat Up: Plug the iron into the power outlet. The indicator light will illuminate, indicating that the iron is heating. The light will turn off once the desired temperature is reached, and cycle on and off during ironing to maintain the temperature.
- Ironing: Begin ironing the garments. For best results, iron fabrics that require lower temperatures first.
- Finishing: When finished, turn the temperature dial to the 'Min' or 'Off' position and unplug the iron from the power outlet.
5. Maintenance and Care
Proper care ensures the longevity and performance of your iron.
- Cleaning the Soleplate: After the iron has cooled completely, wipe the soleplate with a damp cloth and a non-abrasive cleaner if necessary. Do not use harsh scouring pads or metallic cleaners as they can damage the non-stick coating.
- Cleaning the Body: Wipe the exterior of the iron with a soft, damp cloth. Do not use abrasive cleaners or solvents.
- Storage: Store the iron upright on its heel rest in a cool, dry place. Ensure the cord is neatly wrapped around the cord wrap area (if available) or loosely coiled. Do not store the iron with the soleplate facing down while it is still warm.
6. Troubleshooting
Refer to this section for solutions to common issues.
| Problem | Possible Cause | Solution |
|---|---|---|
| Iron does not heat up. | Not plugged in; power outage; faulty outlet; temperature dial set to 'Off' or 'Min'. | Check power connection; verify power supply; try a different outlet; turn temperature dial to a fabric setting. |
| Indicator light does not illuminate. | Iron not connected to power; iron has reached set temperature (light cycles off). | Ensure iron is plugged in and switched on; this is normal operation if the iron is at temperature. |
| Soleplate is sticking to fabric. | Temperature too high for fabric; soleplate is dirty. | Reduce temperature setting; clean the soleplate as per maintenance instructions. |
| Iron is not gliding smoothly. | Soleplate is dirty or has residue. | Clean the soleplate thoroughly. |
7. Specifications
Technical details of the Singer TRIO 1000-Watt Dry Iron.

Image 7.1: Approximate dimensions of the Singer TRIO Dry Iron: 240 mm length, 105 mm height, and 95 mm width.
| Feature | Detail |
|---|---|
| Model | TRIO |
| Power Consumption | 1000 Watts |
| Voltage | 230 Volts |
| Soleplate Type | Non-Stick Coated (Teflon Coated) |
| Body Material | Plastic (Cool Touch) |
| Item Weight | 740 g |
| Special Feature | Lightweight |
8. Warranty and Support
The Singer TRIO 1000-Watt Dry Iron comes with a 1-year warranty from the date of purchase, covering manufacturing defects under normal household use.
For warranty claims, technical assistance, or customer support, please contact SINGER customer service or visit the official SINGER store online:
Visit the SINGER Store on Amazon
Please retain your purchase receipt as proof of purchase for warranty validation.


