1. Introduction
Thank you for choosing the JCYWFLODY Moving Head Stage Lights. This manual provides essential information for the safe and efficient operation of your new lighting fixture. Please read these instructions thoroughly before installation and use, and retain them for future reference.
These moving head lights are designed for various applications, offering versatile lighting effects with 8 gobos, 8 colors, and multiple control modes including DMX512, master/slave, sound active, and automatic operation.
2. Safety Information
- Electrical Safety: Ensure the power supply voltage matches the specified AC 100-240V/50-60Hz. Always disconnect power before cleaning or servicing.
- Ventilation: Ensure adequate ventilation around the fixture to prevent overheating. Do not block ventilation openings.
- Installation: Install the fixture in a stable and secure location. If hanging, use appropriate mounting hardware and safety cables. Ensure the mounting surface can support the weight of the fixture.
- Environment: This product is intended for indoor use only. Avoid exposure to water, high humidity, or extreme temperatures.
- Eye Protection: Do not look directly into the light source when the fixture is operating, as it can cause eye damage.
- Servicing: Refer all servicing to qualified personnel. Do not attempt to repair the unit yourself.
3. Package Contents
Upon opening the package, verify that all components are present and undamaged:
- 2 x Moving Head Stage Light Units
- 2 x Set of Installation Gadgets (Mounting Brackets)
- 4 x Screws
- 2 x Instruction Manuals
- 1 x Install Hex Screwdriver
4. Product Features
- Light Source: 1 x 30W LED
- Lifetime: Approximately 100,000 hours
- DMX Channels: 9 or 11 channels selectable
- Control Modes: DMX512, Master/Slave, Sound Active, Automatic
- Colors: 8 distinct colors (blue, pink, red, pale blue, yellow, green, orange, white)
- Gobos: 8 fixed gobo patterns
- Pan/Tilt Movement: Pan 540°, Tilt 180°
- Dimming: 0-100% electronic dimming
- Strobe: Variable strobe speed
- Display: LED display for easy operation and settings
- Sound Sensor: Built-in microphone for sound-activated mode
- Mounting: Includes bracket for hanging on truss, wall, or ground placement
5. Setup
5.1 Mounting
The fixture comes with a mounting bracket for flexible installation. It can be placed on a flat surface, mounted to a truss, or installed on a wall. Ensure the mounting location is secure and can support the fixture's weight.
- Ground Placement: Ensure the surface is level and stable to prevent tipping.
- Truss/Wall Mounting: Use the provided bracket and screws. Always use a safety cable (not included) when suspending the fixture.
5.2 Power Connection
Connect the power cable to the AC input on the rear of the fixture. Plug the other end into a compatible power outlet (AC 100-240V/50-60Hz).
5.3 DMX Connection (Optional)
For DMX control, connect a DMX cable from your DMX controller's output to the DMX IN port of the first fixture. For multiple fixtures, daisy-chain them by connecting the DMX OUT of the first fixture to the DMX IN of the next, and so on.

Figure 1: Rear view of the moving head light with DMX and power connections.
5.4 Control Panel Overview
The LED display and four buttons (MENU, DOWN, UP, ENTER) on the front of the fixture allow for mode selection and parameter adjustment.

Figure 2: Front view of the moving head light with control panel.
- MENU: Cycles through main menu options.
- DOWN: Decreases values or moves to the previous option.
- UP: Increases values or moves to the next option.
- ENTER: Confirms selection or enters a submenu.
6. Operating Modes
6.1 Automatic Operation
In automatic mode, the fixture runs through pre-programmed light shows without external control. This mode is active upon power-up if no DMX signal is detected or if explicitly selected via the control panel.
6.2 Sound Active Mode
The built-in microphone detects ambient sound, and the light effects synchronize with the music beat. Use the control panel to adjust sound sensitivity if needed.
6.3 Master/Slave Mode
This mode allows multiple fixtures to operate in synchronization without a DMX controller. Connect the DMX OUT of the 'Master' fixture to the DMX IN of the first 'Slave' fixture, and daisy-chain subsequent slaves. Set the Master unit to a desired operating mode (e.g., Auto or Sound Active) and set all Slave units to 'Slave' mode via their control panels.
6.4 DMX512 Control
For professional control, connect the fixture to a DMX512 controller. Each fixture requires a unique DMX address. Set the starting DMX address using the control panel. The fixture supports either 9 or 11 DMX channels.
Typical 11-Channel DMX Map:
| Channel | Function | Value Range | Description |
|---|---|---|---|
| 1 | Pan | 0-255 | Horizontal movement (0° to 540°) |
| 2 | Pan Fine | 0-255 | Fine adjustment for Pan |
| 3 | Tilt | 0-255 | Vertical movement (0° to 180°) |
| 4 | Tilt Fine | 0-255 | Fine adjustment for Tilt |
| 5 | Pan/Tilt Speed | 0-255 | Movement speed (Fast to Slow) |
| 6 | Dimmer | 0-255 | Brightness (0% to 100%) |
| 7 | Strobe | 0-10: No Strobe, 11-255: Strobe (Slow to Fast) | Strobe effect control |
| 8 | Color Wheel | 0-255 | Selects colors (8 colors + split colors) |
| 9 | Gobo Wheel | 0-255 | Selects gobo patterns (8 gobos + shake) |
| 10 | Gobo Rotation | 0-255 | Rotates selected gobo |
| 11 | Control/Reset | 0-50: No Function, 51-100: Reset, etc. | Special functions or fixture reset |
Note: The exact DMX channel functions and values may vary slightly. Refer to the specific DMX chart provided with your product if available.

Figure 3: Examples of gobo patterns and colors.

Figure 4: Additional gobo patterns and color combinations.
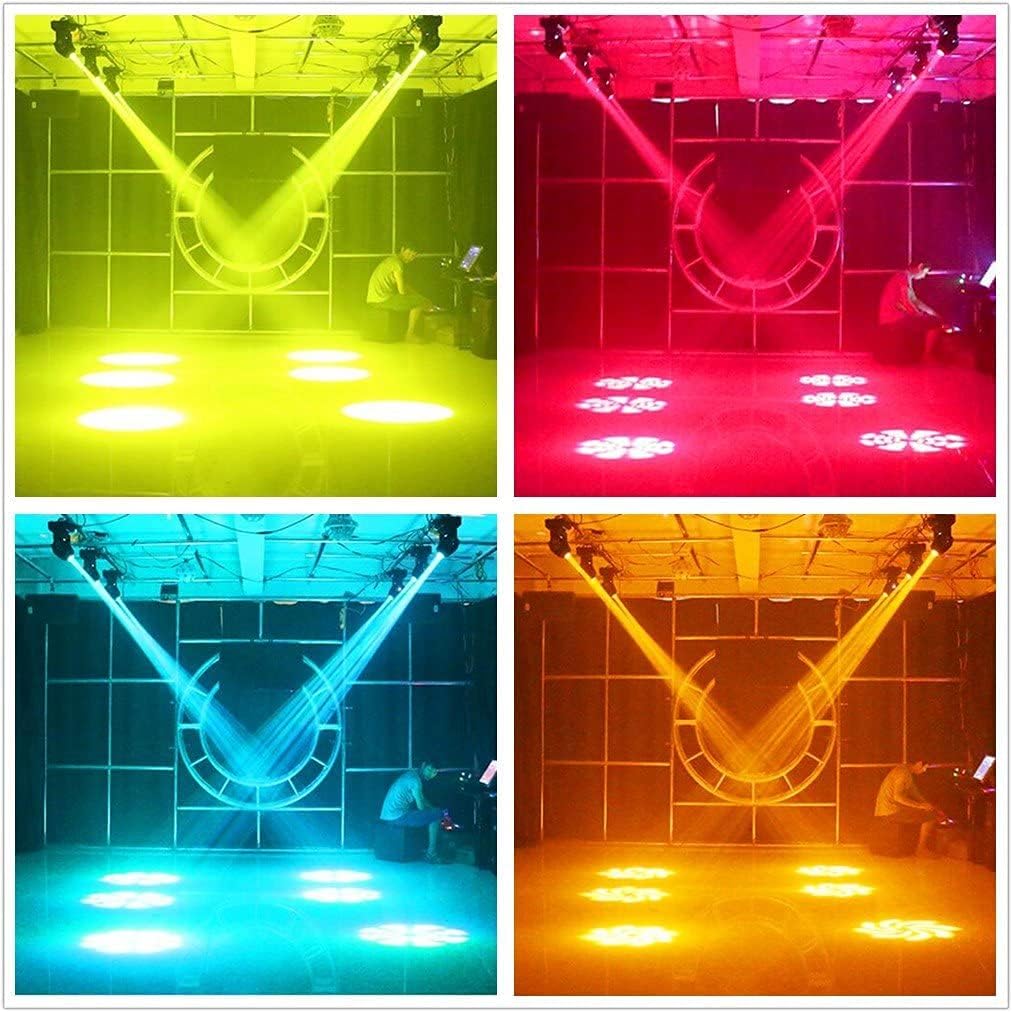
Figure 5: Stage lighting effects with multiple units.

Figure 6: Floor projection effects in different colors.
7. Maintenance
Regular maintenance ensures optimal performance and extends the lifespan of your moving head lights.
- Cleaning: Periodically clean the lens and exterior casing with a soft, lint-free cloth. For stubborn dirt, use a mild glass cleaner. Ensure the fixture is powered off and cool before cleaning.
- Ventilation: Keep the ventilation openings clear of dust and debris. The fixture features ball fans for efficient heat dissipation.
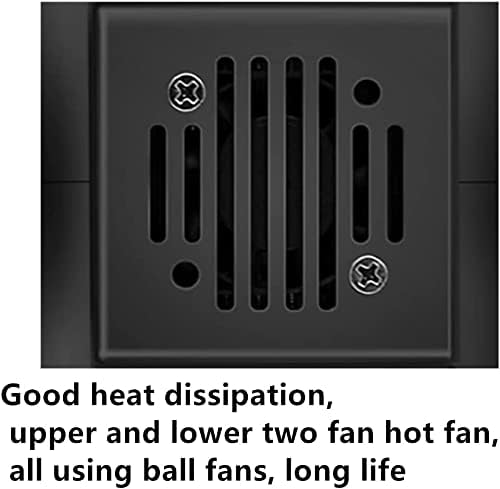
Figure 7: Fan for heat dissipation.
8. Troubleshooting
If you encounter issues with your moving head light, refer to the following common troubleshooting steps:
- No Power:
- Check if the power cable is securely connected to both the fixture and the power outlet.
- Verify the power outlet is functional.
- No Light Output:
- Ensure the dimmer channel (if using DMX) is not set to 0.
- Check if the fixture is in a blackout mode or has a fault code on the display.
- No Movement/Incorrect Movement:
- In DMX mode, verify Pan/Tilt channels are receiving correct values.
- Check for any physical obstructions to the moving head.
- Perform a fixture reset via the DMX control channel or control panel.
- DMX Control Issues:
- Ensure DMX cables are correctly connected (DMX OUT to DMX IN).
- Verify the DMX address of the fixture matches the address set on your controller.
- Check for proper DMX termination at the end of the DMX chain.
- Ensure the DMX controller is sending a valid DMX signal.
- Sound Active Mode Not Responding:
- Increase the sound sensitivity setting via the control panel.
- Ensure there is sufficient audio input near the fixture's microphone.
9. Specifications
| Parameter | Value |
|---|---|
| Model Number | 25W/60W |
| Light Source | 1 x 30W LED |
| Voltage | AC 100-240V / 50-60Hz |
| DMX Channels | 9/11 Channels |
| Control Modes | DMX512, Master/Slave, Sound Active, Automatic |
| Colors | 8 Colors (blue, pink, red, pale blue, yellow, green, orange, white) |
| Gobos | 8 Gobos |
| Pan Movement | 540° |
| Tilt Movement | 180° |
| Dimming | 0-100% Electronic Dimming |
| Shell Material | Plastic / Metal |
| Product Dimensions (L*W*H) | 14.5 x 17 x 23.5 cm / 5.7 x 6.69 x 9.25 inches |
| Product Weight | 2.67 kg / 5.88 lbs |
| Cable Length | 125 cm / 4.10 ft |
| UPC | 797823567963 |
10. Warranty and Support
JCYWFLODY provides a 1-year warranty for this product from the date of purchase. Additionally, lifetime professional technical support is available. For warranty claims or technical assistance, please contact JCYWFLODY customer service.