1. Product Overview
The Toomax Stora Way XL Storage Shed Cabinet is designed to provide secure and weather-resistant storage for outdoor and indoor spaces. With a spacious 600-gallon capacity, it is suitable for storing outdoor furniture, stackable chairs, garden tools, BBQ accessories, or up to two trash cans. Its durable polypropylene construction ensures protection against various weather conditions, and the design allows for customization.
Key Features:
- Large Storage Capacity: 600-gallon volume for versatile storage needs.
- Customizable Design: Paintable and drillable walls for personalization.
- Durable Construction: Weather-resistant, heavy-duty polypropylene walls that resist peeling or rusting.
- Secure Locking: Lockable lid for enhanced security of stored items.
- Dual Access: Front and top openings for convenient access to contents.
- Hydraulic Piston Mechanism: Smooth lid operation, ideal for trash can access.
- Integrated Floor Panel: Protects contents from mud and rainwater.
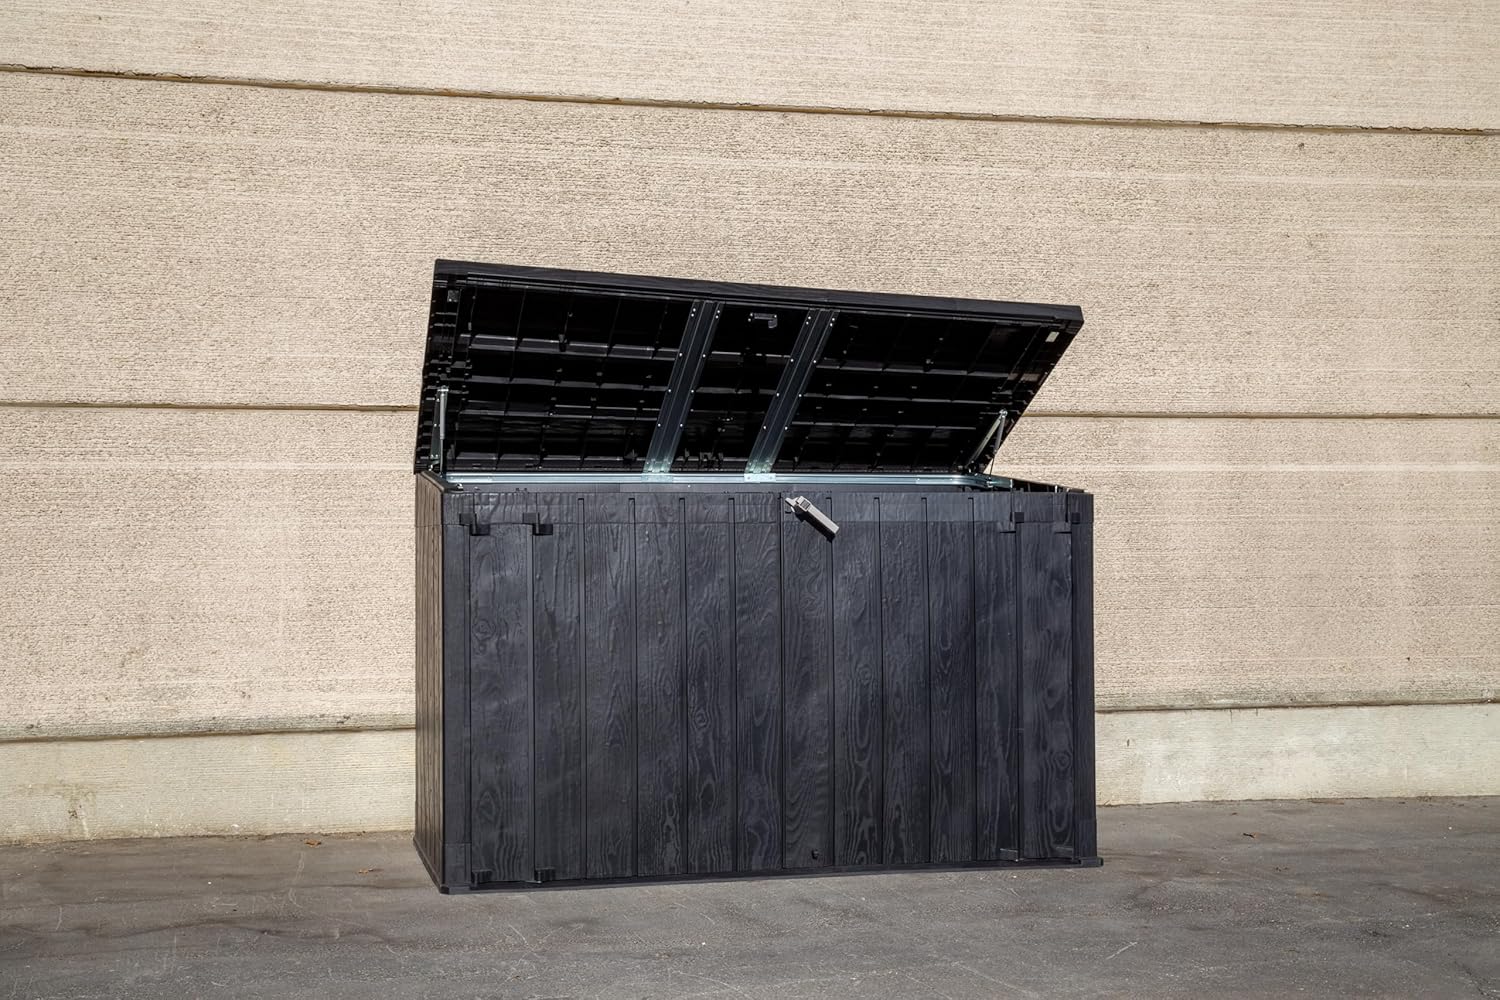
Figure 1: Toomax Stora Way XL Storage Shed with its lid open, showcasing the spacious interior and hydraulic lift mechanism.
2. Safety Information
Please read and understand all safety instructions before assembly and use of the storage shed. Failure to follow these instructions may result in injury or damage to the product.
- Always ensure the shed is properly assembled and secured to the ground before use to prevent tipping.
- Exercise caution when lifting heavy items in and out of the shed to prevent personal injury.
- Keep the shed locked when not in use to prevent unauthorized access, especially by children.
- Do not exceed the weight capacity of the shed. Distribute weight evenly.
- Avoid climbing on or standing inside the shed.
- Keep children and pets away from the assembly area.
- Wear appropriate safety gear (gloves, eye protection) during assembly.
3. Setup and Assembly
Assembly of the Toomax Stora Way XL Storage Shed typically takes approximately 30 minutes with two people. Ensure all parts are present before beginning. A flat, level surface is recommended for installation.
Required Tools (Not Included):
- Screwdriver (Phillips head)
- Rubber Mallet (optional, for gentle tapping)
Assembly Steps:
- Unpack and Identify Parts: Carefully unpack all components and verify against the parts list (refer to the separate parts diagram, if provided).
- Assemble Base Panel: Place the floor panel on your chosen level surface.
- Attach Side and Back Panels: Connect the side panels and back panel to the base panel, ensuring they snap securely into place. Use a rubber mallet gently if needed.
- Install Front Doors: Attach the front door panels to the side panels using the provided hinges. Ensure smooth operation.
- Assemble Lid and Hydraulic Pistons: Attach the lid panel. Connect the hydraulic piston mechanisms to the lid and the back panel as shown in Figure 2. Ensure the pistons are correctly oriented for proper lift assistance.

Figure 2: Detailed view of the hydraulic piston mechanism supporting the shed lid.
- Secure Locking Mechanism: Install any locking hardware or latches as per the instructions.
- Final Check: Verify all connections are secure and the lid and doors operate smoothly. Ensure the shed is stable.
4. Operating Instructions
Opening the Lid:
To open the top lid, simply lift it upwards. The hydraulic piston mechanism will assist in lifting and holding the lid open, providing easy access to the shed's interior, especially useful for trash cans.
Opening the Front Doors:
To access items through the front, unlatch any locking mechanisms and pull the front doors open. Ensure the doors are fully open to avoid obstruction.
Closing and Locking:
To close the lid, gently pull it downwards until it rests securely. For the front doors, push them closed until they latch. For added security, use a padlock (not included) with the integrated locking capabilities on both the lid and front doors.
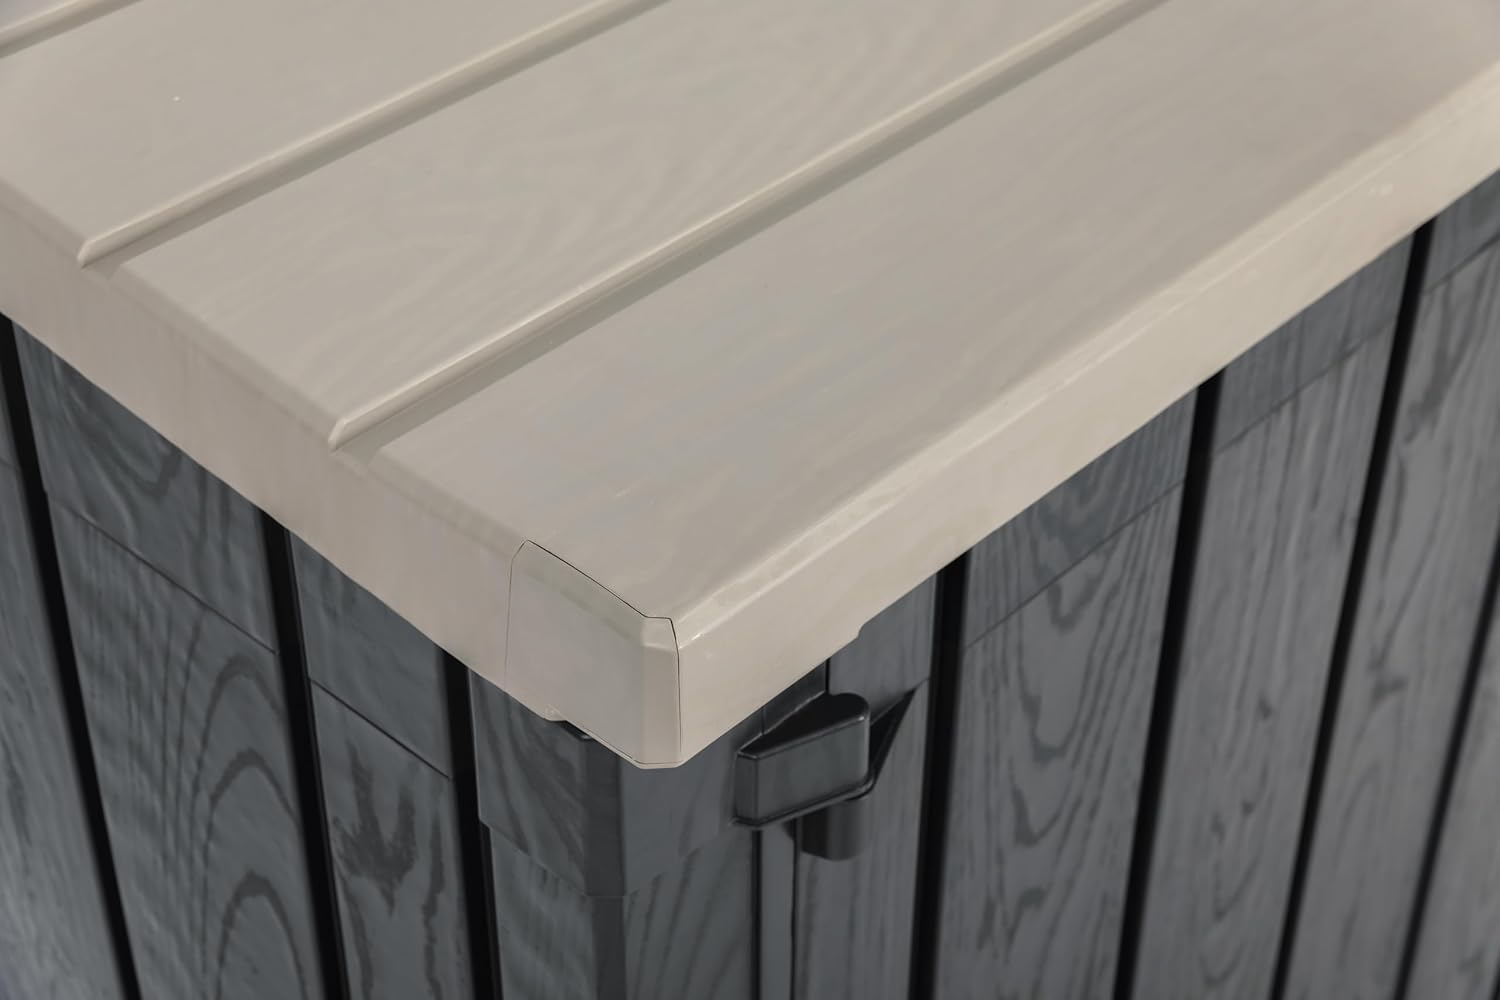
Figure 3: Close-up of the shed's corner, showing the textured finish and secure lid closure.
5. Maintenance
Regular maintenance will help prolong the life and appearance of your Toomax storage shed.
- Cleaning: Clean the shed periodically with mild soap and water. Avoid abrasive cleaners or harsh chemicals that could damage the polypropylene material. Rinse thoroughly with clean water.
- Inspection: Annually inspect all panels, hinges, and locking mechanisms for wear, damage, or loose connections. Tighten any loose screws or fasteners.
- Lubrication: If the hydraulic pistons or hinges become stiff, apply a silicone-based lubricant to ensure smooth operation.
- Customization: The walls are paintable and drillable. If painting, use paints suitable for polypropylene plastics and follow the paint manufacturer's instructions for surface preparation and application.
6. Troubleshooting
If you encounter issues with your storage shed, refer to the following common problems and solutions:
| Problem | Possible Cause | Solution |
|---|---|---|
| Lid or doors do not close properly. | Misalignment during assembly, obstruction, or uneven ground. | Check that the shed is on a level surface. Re-check assembly steps for proper panel alignment. Remove any obstructions. |
| Hydraulic pistons are stiff or not assisting. | Lack of lubrication, incorrect installation, or damage. | Apply silicone lubricant to the pistons. Verify they are installed correctly according to assembly instructions. If damaged, contact support for replacement parts. |
| Shed feels unstable after assembly. | Not all connections are secure, or the ground is uneven. | Ensure all panels are fully snapped or screwed into place. Move the shed to a firm, level surface. |
| Missing parts during unboxing. | Packaging error. | Immediately contact Toomax customer support with your purchase details and a list of missing parts. |
7. Specifications
| Brand: | Toomax |
| Model Number: | TMAX-Z108R095 |
| Material: | Polypropylene |
| Color: | Gray/Anthracite |
| Capacity: | 600 Gallons |
| Water Resistance Level: | Water Resistant |
| Special Features: | Durable, Resistant, Lockable Lid, Hydraulic Piston Mechanism, Paintable Walls, Floor Panel |
| Recommended Use: | Outdoor Storage |
8. Warranty Information
Specific warranty details for the Toomax Stora Way XL Storage Shed Cabinet are not provided in this manual. Please refer to the original purchase documentation, product packaging, or the official Toomax website for comprehensive warranty terms and conditions.
9. Customer Support
For further assistance, missing parts, or technical support regarding your Toomax Stora Way XL Storage Shed Cabinet, please contact Toomax customer service. Contact information can typically be found on the Toomax official website or your purchase receipt.