Introduction
This manual provides detailed instructions for the installation, operation, and maintenance of your REOLINK 4K PoE Security Cameras, including models RLC-810A and RLC-820A. These cameras are designed for outdoor and indoor surveillance, featuring 4K Ultra HD resolution, smart person/vehicle/animal detection, and Power over Ethernet (PoE) technology for simplified installation.
What's in the Box
Upon unboxing your REOLINK 4K PoE Security Camera package, you should find the following components:
- 2x RLC-810A Cameras with accessories (including 1M Network Cables for testing)
- 2x RLC-820A Cameras with accessories (including 1M Network Cables for testing)

Image: Two REOLINK RLC-810A PoE bullet cameras, typically included in the package.
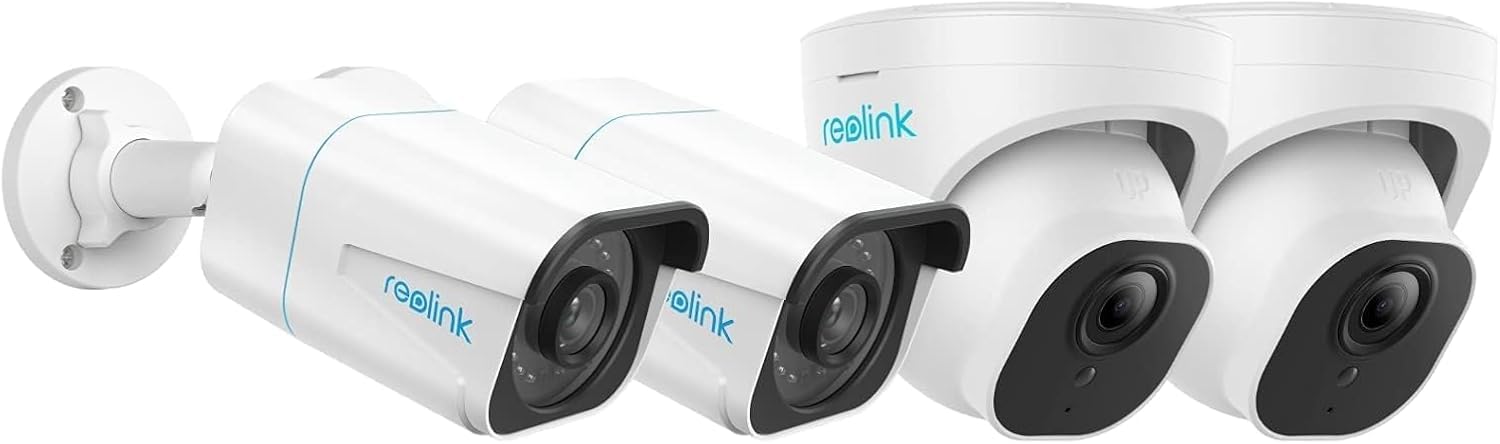
Image: Two REOLINK RLC-820A PoE dome cameras, typically included in the package.
Product Overview
The REOLINK RLC-810A and RLC-820A cameras offer advanced surveillance capabilities. Both models feature 4K Ultra HD video resolution for clear imaging and Power over Ethernet (PoE) for simplified installation, requiring only a single network cable for both power and data transmission.
Key Features:
- 4K Ultra HD Resolution: Provides high-definition video for detailed monitoring.
- Smart Person/Vehicle/Animal Detection: Reduces false alarms by accurately identifying relevant objects.
- Power over Ethernet (PoE): Simplifies wiring by delivering power and data through one Ethernet cable.
- Outdoor/Indoor Use: Designed for versatile deployment in various environments.
- Support for 256GB Micro SD Card: Allows for local storage of recordings.
- Works with Smart Home: Integrates with smart home ecosystems like Google Assistant.
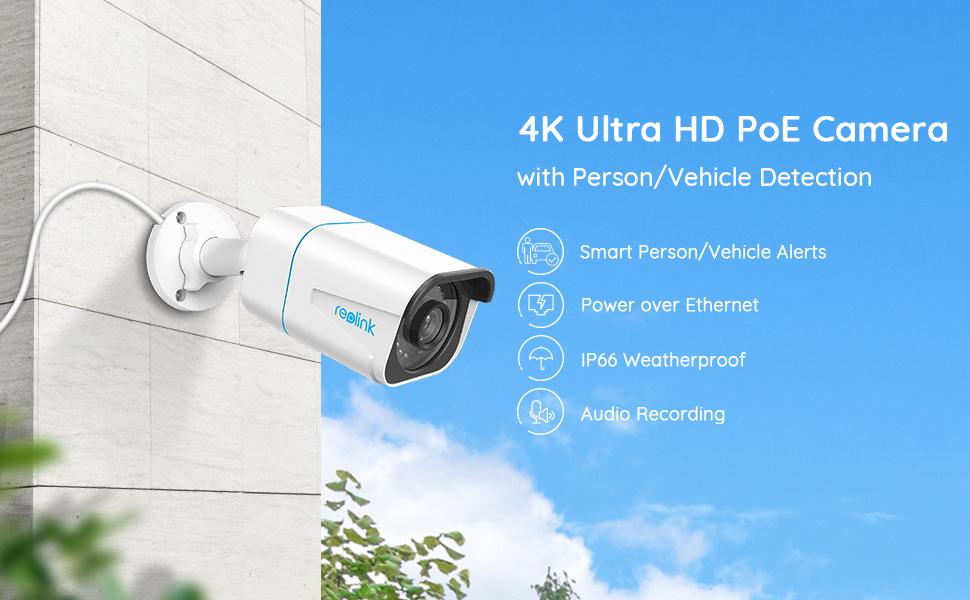
Image: The REOLINK RLC-810A bullet camera, highlighting its 4K Ultra HD resolution, PoE connectivity, IP66 weatherproof rating, and audio recording capabilities.

Image: The REOLINK RLC-820A dome camera, showcasing its 4K Ultra HD resolution, PoE connectivity, IP66 weatherproof rating, and audio recording features.
Setup
1. Physical Installation
Mount the cameras in desired locations, ensuring a clear field of view. Both RLC-810A (bullet) and RLC-820A (dome) models are suitable for outdoor and indoor use. Use the provided mounting screws and templates. Ensure the camera is securely fastened.

Image: A REOLINK RLC-810A bullet camera mounted on an exterior wall, demonstrating typical installation.
2. Power and Network Connection (PoE)
Connect the camera to a PoE-enabled NVR (Network Video Recorder) or a PoE switch using a single Ethernet cable. This cable will provide both power and data connectivity to the camera. Ensure the cable is securely plugged into both the camera's Ethernet port and the PoE device.
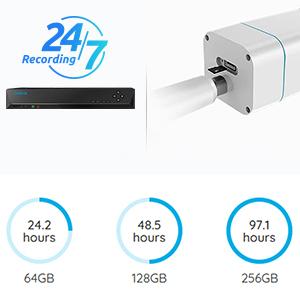
Image: An illustration showing a REOLINK NVR connected to a camera, symbolizing the PoE connection and recording options.
3. Initial Configuration via Reolink App/Client
Download the Reolink App from your mobile app store or the Reolink Client software for your computer. Follow the on-screen instructions to add your cameras. This typically involves scanning a QR code on the camera or manually entering its UID. Once added, you can configure network settings, recording schedules, and alert preferences.
Operating Instructions
Live View and Remote Access
Access live video feeds from your cameras anytime, anywhere using the Reolink App or Client. Ensure your device has an internet connection. You can view multiple cameras simultaneously and switch between them.

Image: A person viewing live camera feeds on a smartphone, tablet, and laptop, demonstrating remote access capabilities.
Smart Detection and Alerts
The cameras feature advanced detection capabilities for persons, vehicles, and animals. Configure alert settings in the Reolink App to receive push notifications, email alerts, or upload recordings to an FTP server when motion is detected. This helps in minimizing false alarms from irrelevant movements.

Image: An illustration showing smart detection in action, with a person and vehicle highlighted, and corresponding push and email notifications.
Recording Options
Recordings can be stored in several ways:
- Reolink NVR: Continuous 24/7 recording when connected to a compatible Network Video Recorder.
- Micro SD Card: Insert a Micro SD card (up to 256GB supported) into the camera for local storage of motion-triggered or continuous recordings.
- FTP/NAS: Upload recordings to an FTP server or Network Attached Storage for off-site backup.
Image: Visual representation of recording options including Reolink NVR and Micro SD card storage.
Night Vision
Both RLC-810A and RLC-820A cameras are equipped with night vision capabilities to provide clear surveillance even in low-light or complete darkness. The cameras automatically switch to night vision mode as ambient light decreases.
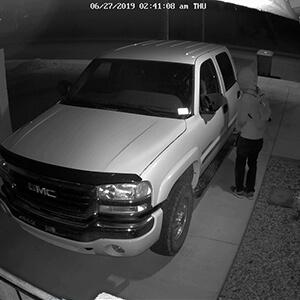
Image: An icon representing night vision functionality.
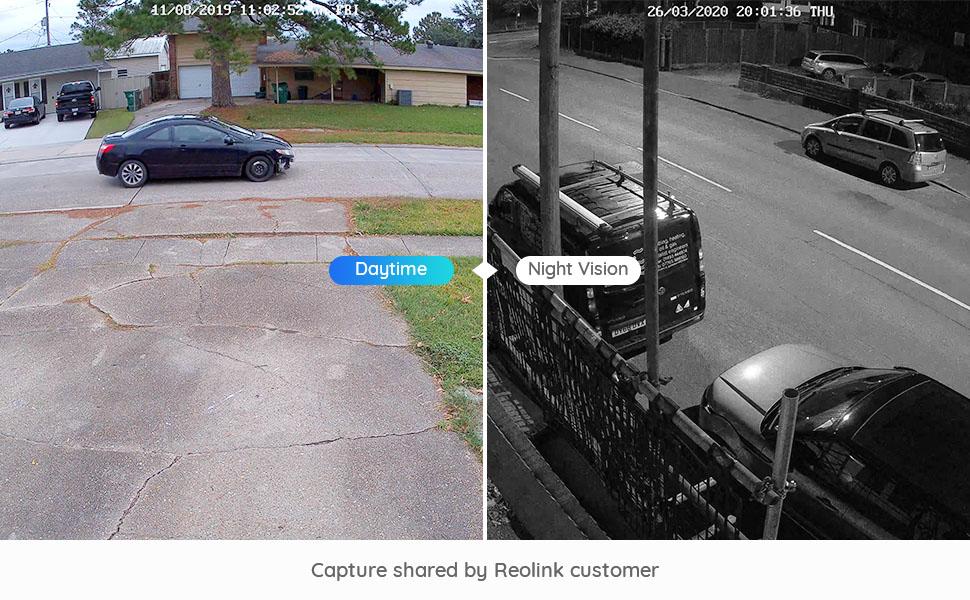
Image: A split image comparing daytime and night vision footage from a Reolink camera, showing clear visibility in both conditions.
Smart Home Integration
These cameras can integrate with smart home platforms like Google Assistant. You can use voice commands to view camera feeds on compatible smart displays.

Image: An icon representing Google Assistant integration.
Maintenance
To ensure optimal performance and longevity of your REOLINK cameras, follow these maintenance guidelines:
- Regular Cleaning: Periodically clean the camera lens with a soft, damp cloth to remove dust, dirt, or water spots that may obstruct the view.
- Weather Protection: Both models are IP66 weatherproof, designed to withstand various weather conditions. However, avoid directing high-pressure water jets directly at the camera.
- Firmware Updates: Regularly check for and install firmware updates via the Reolink App or Client to ensure your cameras have the latest features and security enhancements.
- Cable Inspection: Periodically inspect the Ethernet cable for any signs of wear, damage, or loose connections.
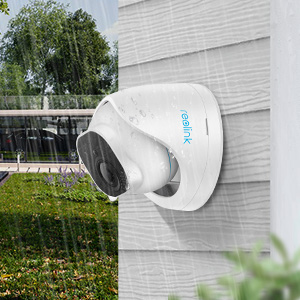
Image: An icon representing the weatherproof feature of the camera.
Troubleshooting
If you encounter issues with your REOLINK cameras, consider the following common troubleshooting steps:
- No Power/Video:
- Ensure the Ethernet cable is securely connected at both ends.
- Verify that the PoE NVR or switch is powered on and functioning correctly.
- Test with a different Ethernet cable if possible.
- Poor Video Quality:
- Clean the camera lens.
- Check network bandwidth; a stable network is crucial for 4K streaming.
- Ensure the camera's resolution settings are appropriate for your network and viewing device.
- False Alarms:
- Adjust the motion detection sensitivity in the Reolink App.
- Configure motion zones to exclude areas with frequent irrelevant movement (e.g., swaying trees).
- Remote Access Issues:
- Verify your camera and viewing device both have active internet connections.
- Ensure the Reolink App/Client is updated to the latest version.
For further assistance, please refer to the official REOLINK support website or contact customer service.
Specifications
Below are the key specifications for the REOLINK 4K PoE Security Cameras (RLC-810A and RLC-820A):
| Feature | Specification |
|---|---|
| Brand | REOLINK |
| Recommended Uses | Outdoor Security |
| Connectivity Technology | PoE (Power over Ethernet) |
| Special Feature | Motion Sensor, Smart Person/Vehicle/Animal Detection |
| Indoor/Outdoor Usage | Outdoor |
| Compatible Devices | Smartphone, NVR |
| Controller Type | Amazon Alexa, Google Assistant |
| Mount Type | Ceiling Mount (RLC-820A), Wall/Ceiling Mount (RLC-810A) |
| Form Factor | Bullet (RLC-810A), Dome (RLC-820A) |
| Alert Type | Motion Only (with smart detection filters) |
| Waterproof Rating | IP66 |
| Video Capture Resolution | 4K (3840x2160) |
| Night Vision | Yes |
| Micro SD Card Support | Up to 256GB |
Warranty and Support
REOLINK products typically come with a limited warranty. Please refer to the official REOLINK website for the most current warranty policy and terms specific to your region. For technical support, product inquiries, or warranty claims, visit the REOLINK Official Store or their dedicated support portal.