EYETOO C250
EYETOO C250 3-Channel Dash Cam User Manual
Model: C250 | Brand: EYETOO
Introduction
Thank you for choosing the EYETOO C250 3-Channel Dash Cam. This device is designed to provide comprehensive video surveillance for your vehicle, recording simultaneously from the front, interior, and rear perspectives. Equipped with advanced features such as IR night vision, G-sensor, loop recording, and 24-hour parking monitoring, it ensures your driving moments are captured vividly and securely. Please read this manual carefully before operation to ensure proper use and optimal performance.
Package Contents
Please check the box for the following items:
- 1 x EYETOO C250 3-Channel Dash Cam
- 1 x Rear Camera
- 1 x Car Charger
- 1 x Adjustable Suction Cup Mount
- 1 x Mini USB Cable
- 1 x User Manual

Image: All components included in the EYETOO C250 Dash Cam package.
Product Overview
The EYETOO C250 features a compact design with a 2.45-inch display and three integrated cameras for comprehensive coverage.

Image: Front view of the EYETOO C250 Dash Cam and its components.
Key Features:
- 3-Channel Recording: Simultaneous recording from front (1080P), interior (720P), and rear (720P) cameras.
- Wide Angle Lenses: Front 170°, Inside 150°, Rear 150° for reduced blind spots.
- IR Night Vision: Ensures clear recording in low-light or dark conditions, especially for the interior camera.
- Loop Recording: Automatically overwrites oldest footage when the SD card is full.
- G-sensor Lock: Automatically locks current footage upon sudden impact or collision.
- 24-Hour Parking Monitor: Detects impacts and records while the vehicle is parked.
- WDR (Wide Dynamic Range): Improves video clarity in varying light conditions.
- 2.45-inch LCD Screen: For live view and playback.
Setup
1. Inserting the Micro SD Card
The dash cam requires a Class 10, 16GB-128GB Micro SD card (not included). Ensure the card is inserted correctly before powering on the device.
- Locate the Micro SD card slot on the side of the dash cam.
- Insert the Micro SD card with the gold contacts facing the back of the dash cam until it clicks into place.
- Important: Format the Micro SD card within the dash cam's settings menu before first use to ensure compatibility and optimal performance.
2. Mounting the Dash Cam
Use the provided suction cup mount to securely attach the dash cam to your vehicle's windshield.
- Clean the area on your windshield where you intend to mount the dash cam.
- Attach the suction cup mount to the dash cam.
- Press the suction cup firmly against the windshield and flip the lever to secure it.
- Adjust the angle of the dash cam to ensure a clear view of the road ahead, the vehicle interior, and the rear.

Image: Dash cam mounted on a windshield, illustrating the three camera views.
3. Connecting Power
Connect the dash cam to your vehicle's power source using the provided car charger.
- Plug the mini USB end of the car charger into the dash cam's power port.
- Plug the other end of the car charger into your vehicle's cigarette lighter socket.
- The dash cam will automatically power on and begin recording when your vehicle starts.
- Note: The built-in battery is for emergency recording and saving settings only. The dash cam must remain plugged into the car's cigarette lighter for continuous operation.
Operating Instructions
Basic Recording
Once powered on, the dash cam will automatically start recording. The 2.45-inch screen will display the live view from the cameras.

Image: The dash cam screen showing simultaneous recording from three channels.
Loop Recording
The dash cam features seamless loop recording. When the Micro SD card is full, the oldest unlocked footage will be automatically overwritten by new recordings. This ensures continuous recording without manual deletion.
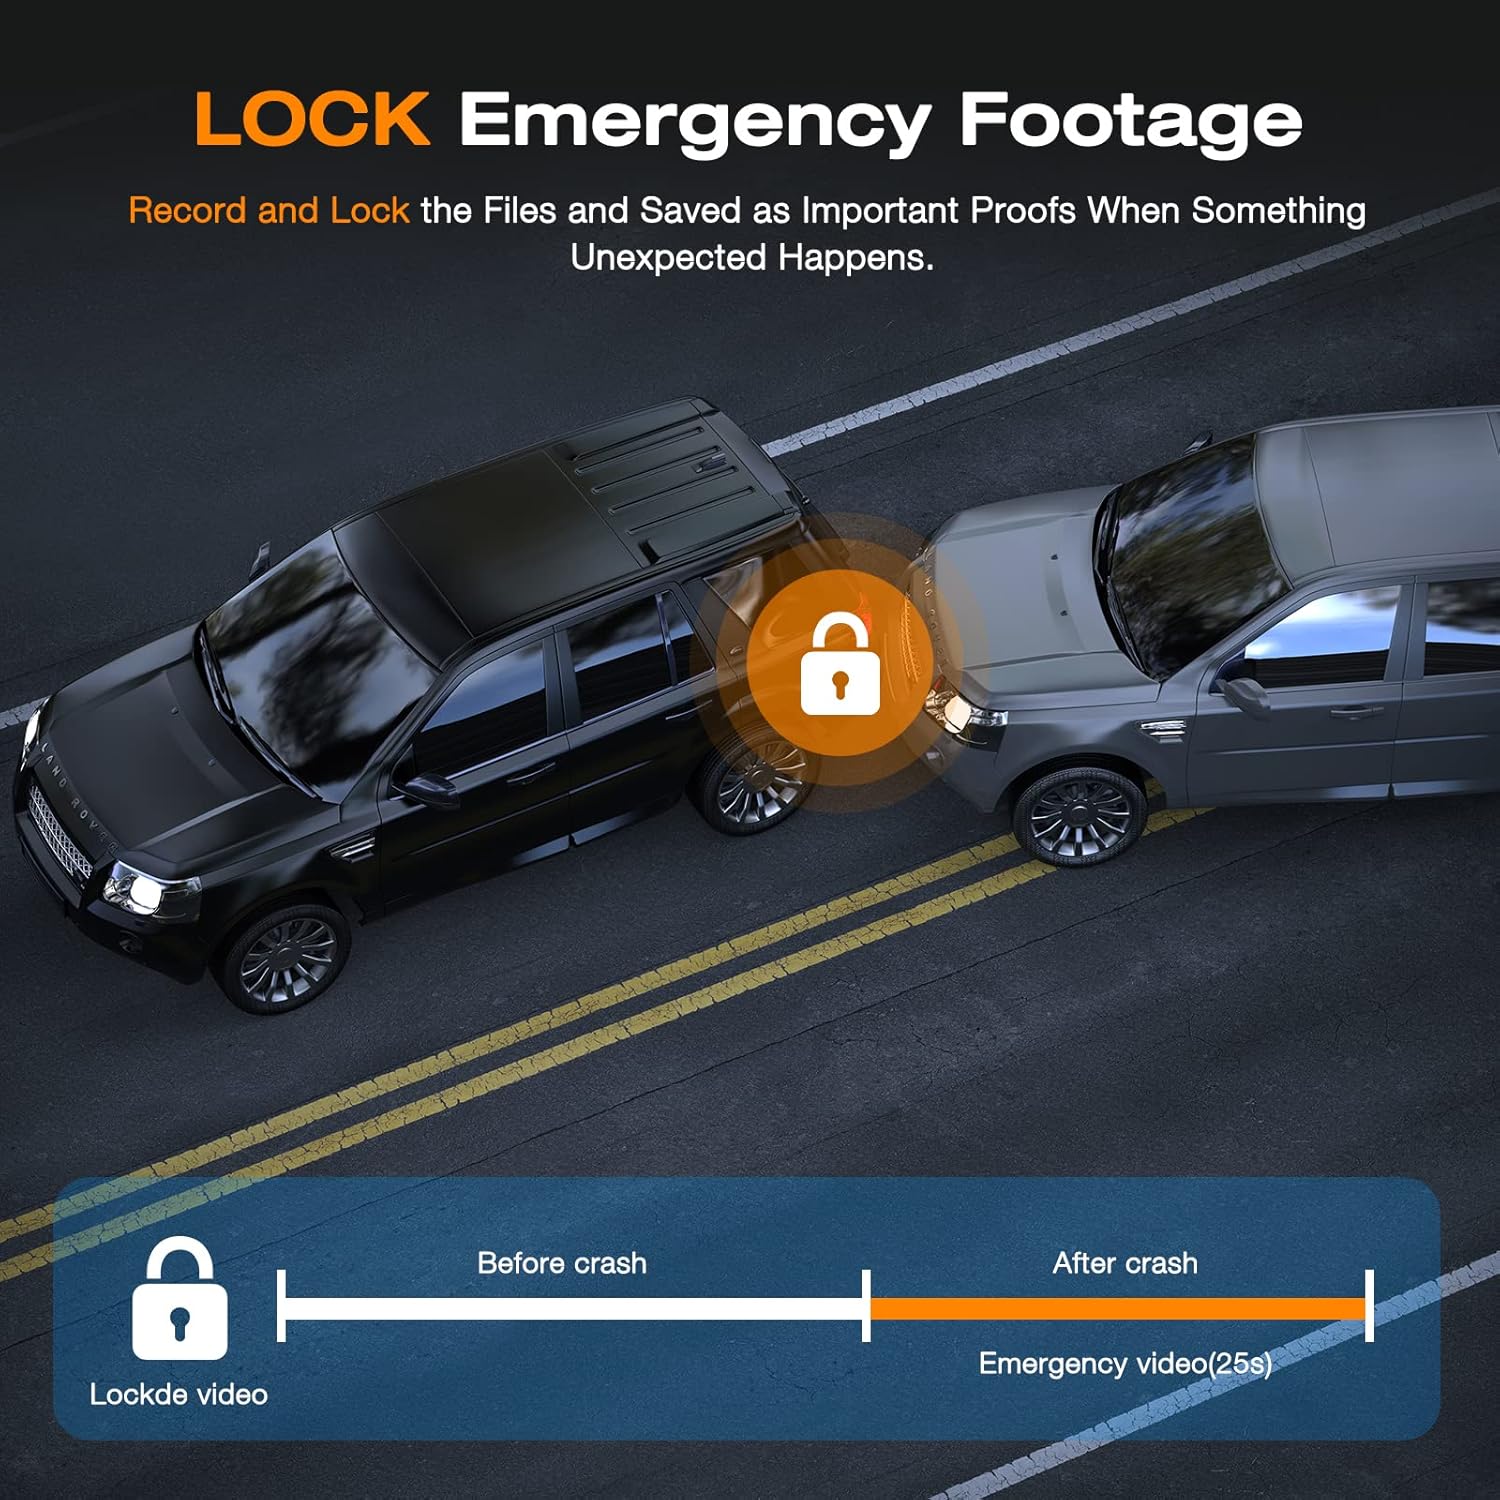
Image: Visual representation of loop recording, showing how older files are replaced by new ones.
G-sensor (Emergency Recording)
The built-in adjustable G-sensor detects sudden shakes or collisions. When triggered, it automatically locks the current footage, preventing it from being overwritten by loop recording. This ensures critical evidence is preserved.
- You can also manually lock the current video by pressing the designated button on the dash cam.

Image: G-sensor activation, showing how footage is locked during an impact.
24-Hour Parking Monitor
With the parking monitor feature enabled, the dash cam will automatically power on and start recording if an impact is detected while your vehicle is parked. This provides continuous surveillance and evidence for incidents occurring when you are away from your car.
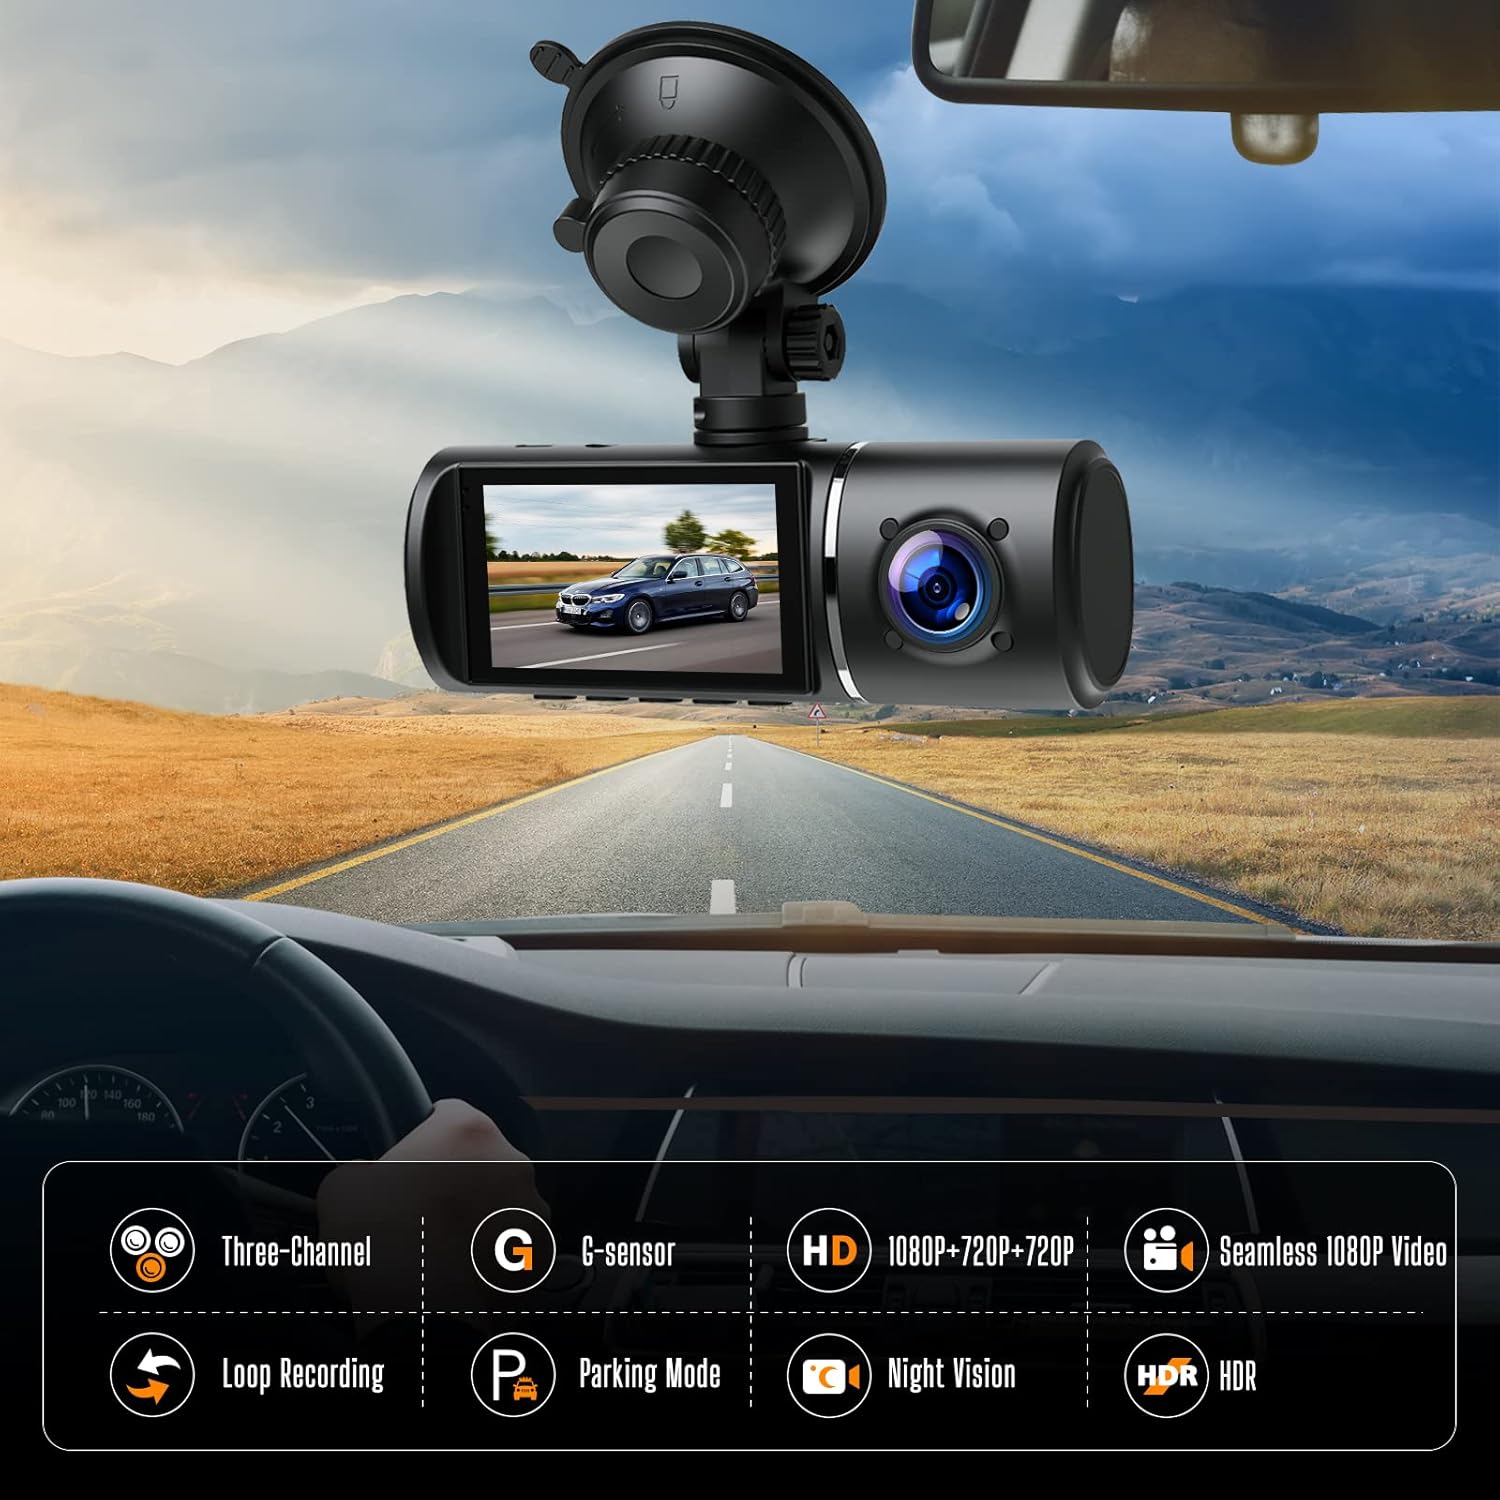
Image: The 24-hour parking monitor feature providing surveillance for a parked car.
IR Night Vision
The interior camera is equipped with Infrared (IR) LEDs, ensuring clear recording of the driver and passengers even in completely dark conditions. This is crucial for ride-sharing drivers or for capturing events inside the cabin at night.
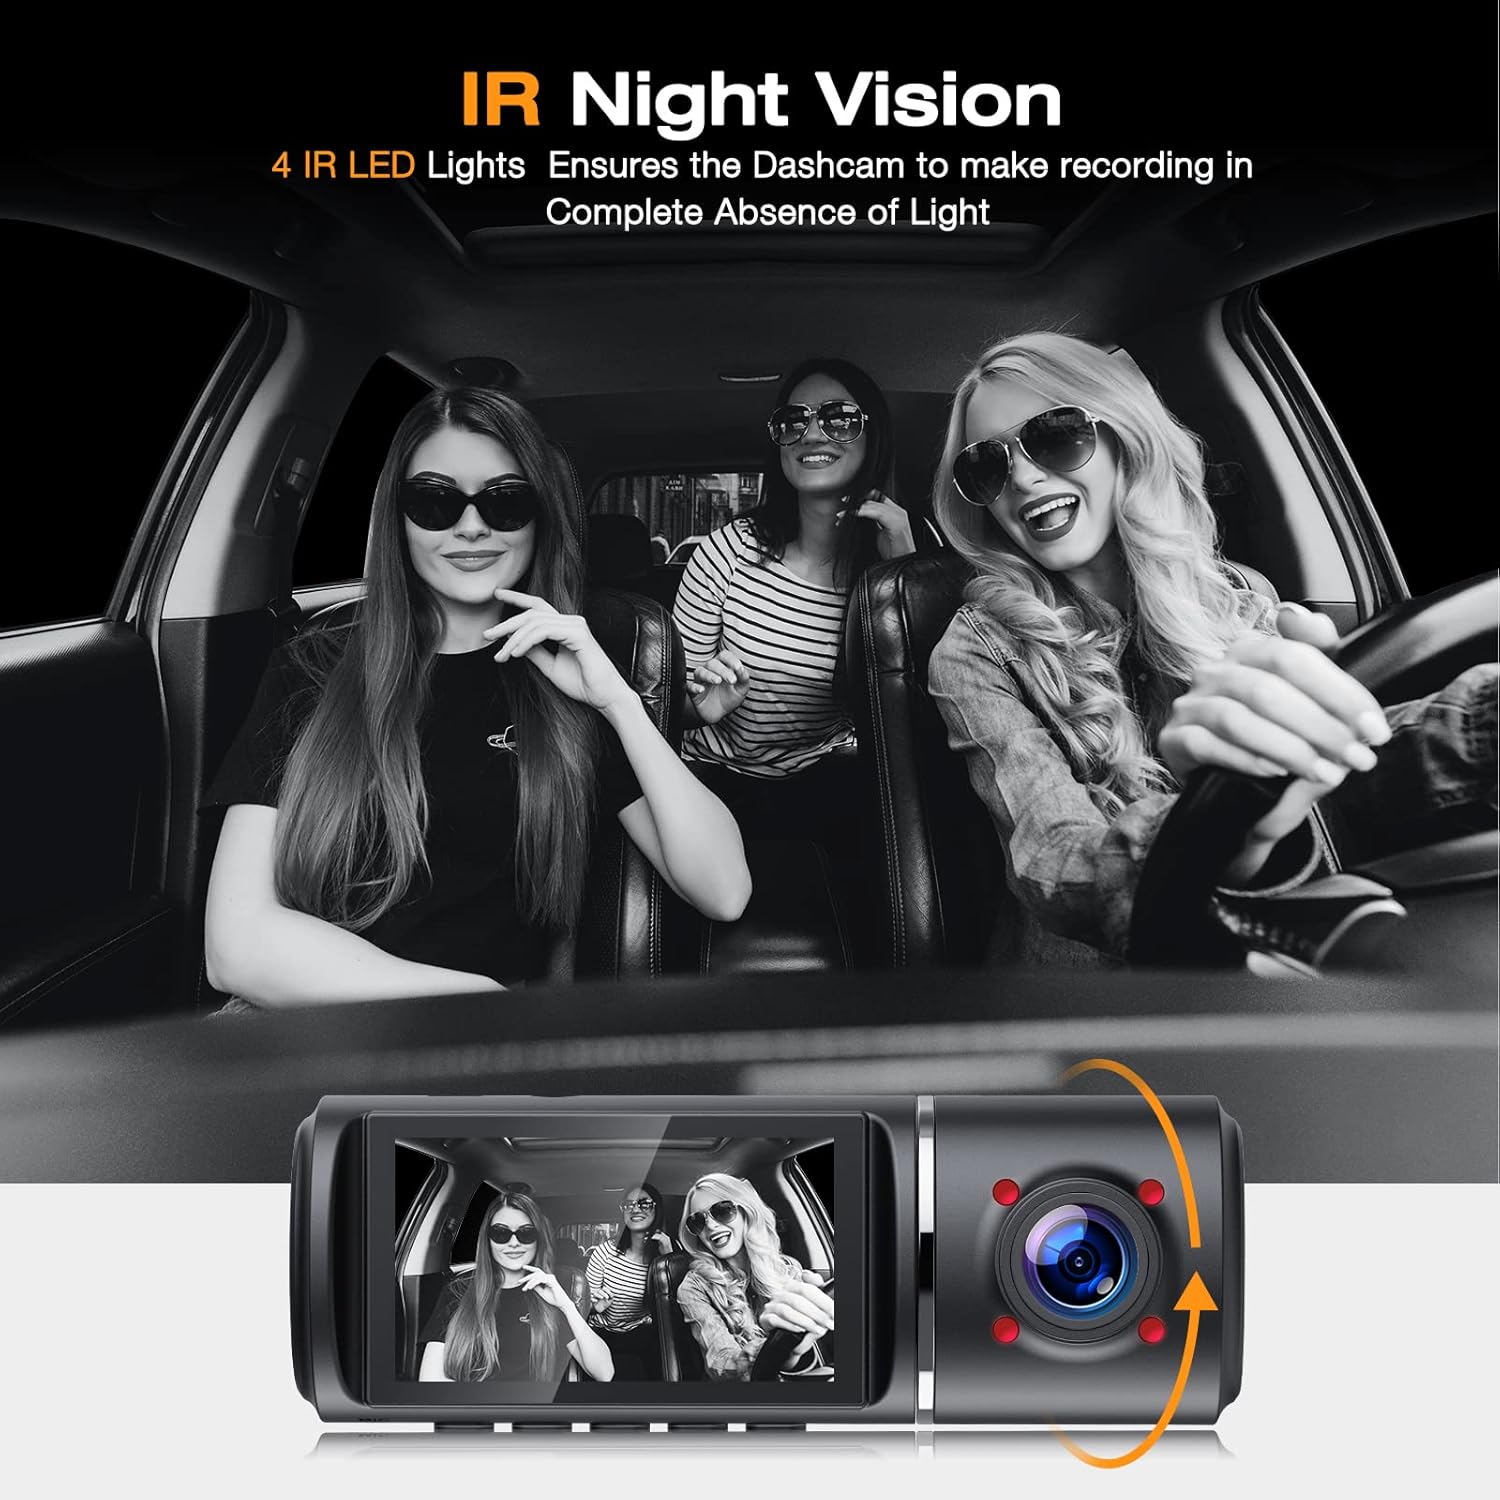
Image: IR Night Vision in action, providing clear interior recording in darkness.
Wide Angle View
The dash cam features wide-angle lenses for all three cameras: Front 170°, Inside 150°, and Rear 150°. This extensive field of view minimizes blind spots and captures more details of the surrounding environment, providing a more comprehensive record of events.
Image: Wide-angle coverage of the three cameras.
WDR (Wide Dynamic Range)
The WDR function enhances video quality by balancing exposure in areas of high contrast, such as tunnels or bright sunlight. This ensures that both bright and dark areas of the footage are clearly visible, maintaining continuity and clarity of video recording.

Image: Comparison of video quality with WDR ON vs. WDR OFF.
Auto LCD OFF
To prevent distraction while driving, the dash cam features an auto LCD off function. The screen will turn off after a set period, but recording will continue uninterrupted. You can adjust this setting in the menu.
Maintenance
- SD Card Management: Regularly format your Micro SD card (e.g., once a month) to maintain optimal performance and prevent data corruption. Back up any important footage before formatting.
- Cleaning: Use a soft, dry cloth to clean the dash cam's lenses and screen. Avoid using abrasive cleaners or solvents.
- Temperature: Avoid exposing the dash cam to extreme temperatures for prolonged periods, as this can affect battery life and overall performance.
- Firmware Updates: Check the manufacturer's website periodically for any available firmware updates to ensure your dash cam has the latest features and bug fixes.
Troubleshooting
| Problem | Possible Cause / Solution |
|---|---|
| Dash cam does not power on. |
|
| "Please format SD card" error or random freezing. |
|
| Video footage is blurry or unclear. |
|
| Dash cam stops recording randomly. |
|
| Parking monitor not working. |
|
Specifications
| Feature | Detail |
|---|---|
| Model | C250 |
| Display Size | 2.45 Inches |
| Video Capture Resolution | Front: 1080p, Interior: 720p, Rear: 720p |
| Front Camera Angle | 170° Wide Angle |
| Interior Camera Angle | 150° Wide Angle |
| Rear Camera Angle | 150° Wide Angle |
| Storage | Supports Micro SD Card (Class 10, 16GB-128GB, not included) |
| Connectivity Technology | USB |
| Mounting Type | Suction Mount |
| Product Dimensions | 4.33 x 1.38 x 1.57 inches |
| Item Weight | 1.08 pounds |
| Battery | 1 Lithium Polymer battery (included, for emergency/settings) |
Warranty and Support
For any questions, technical support, or warranty claims, please contact EYETOO customer service. While specific warranty details are not provided in this manual, please refer to your purchase documentation or the official EYETOO website for the most up-to-date warranty information.
EYETOO is committed to providing reliable road safety solutions and offers customer support to assist with any product-related inquiries.


Images: EYETOO's commitment to customer service and positive feedback.