1. Introduction
This manual provides comprehensive instructions for the installation, setup, operation, and maintenance of your DSF EKPH1A Keypad Deadbolt. Please read this manual thoroughly before installation and use to ensure proper function and to maximize the lifespan of your lock. This keyless entry lock offers enhanced security and convenience for your home.
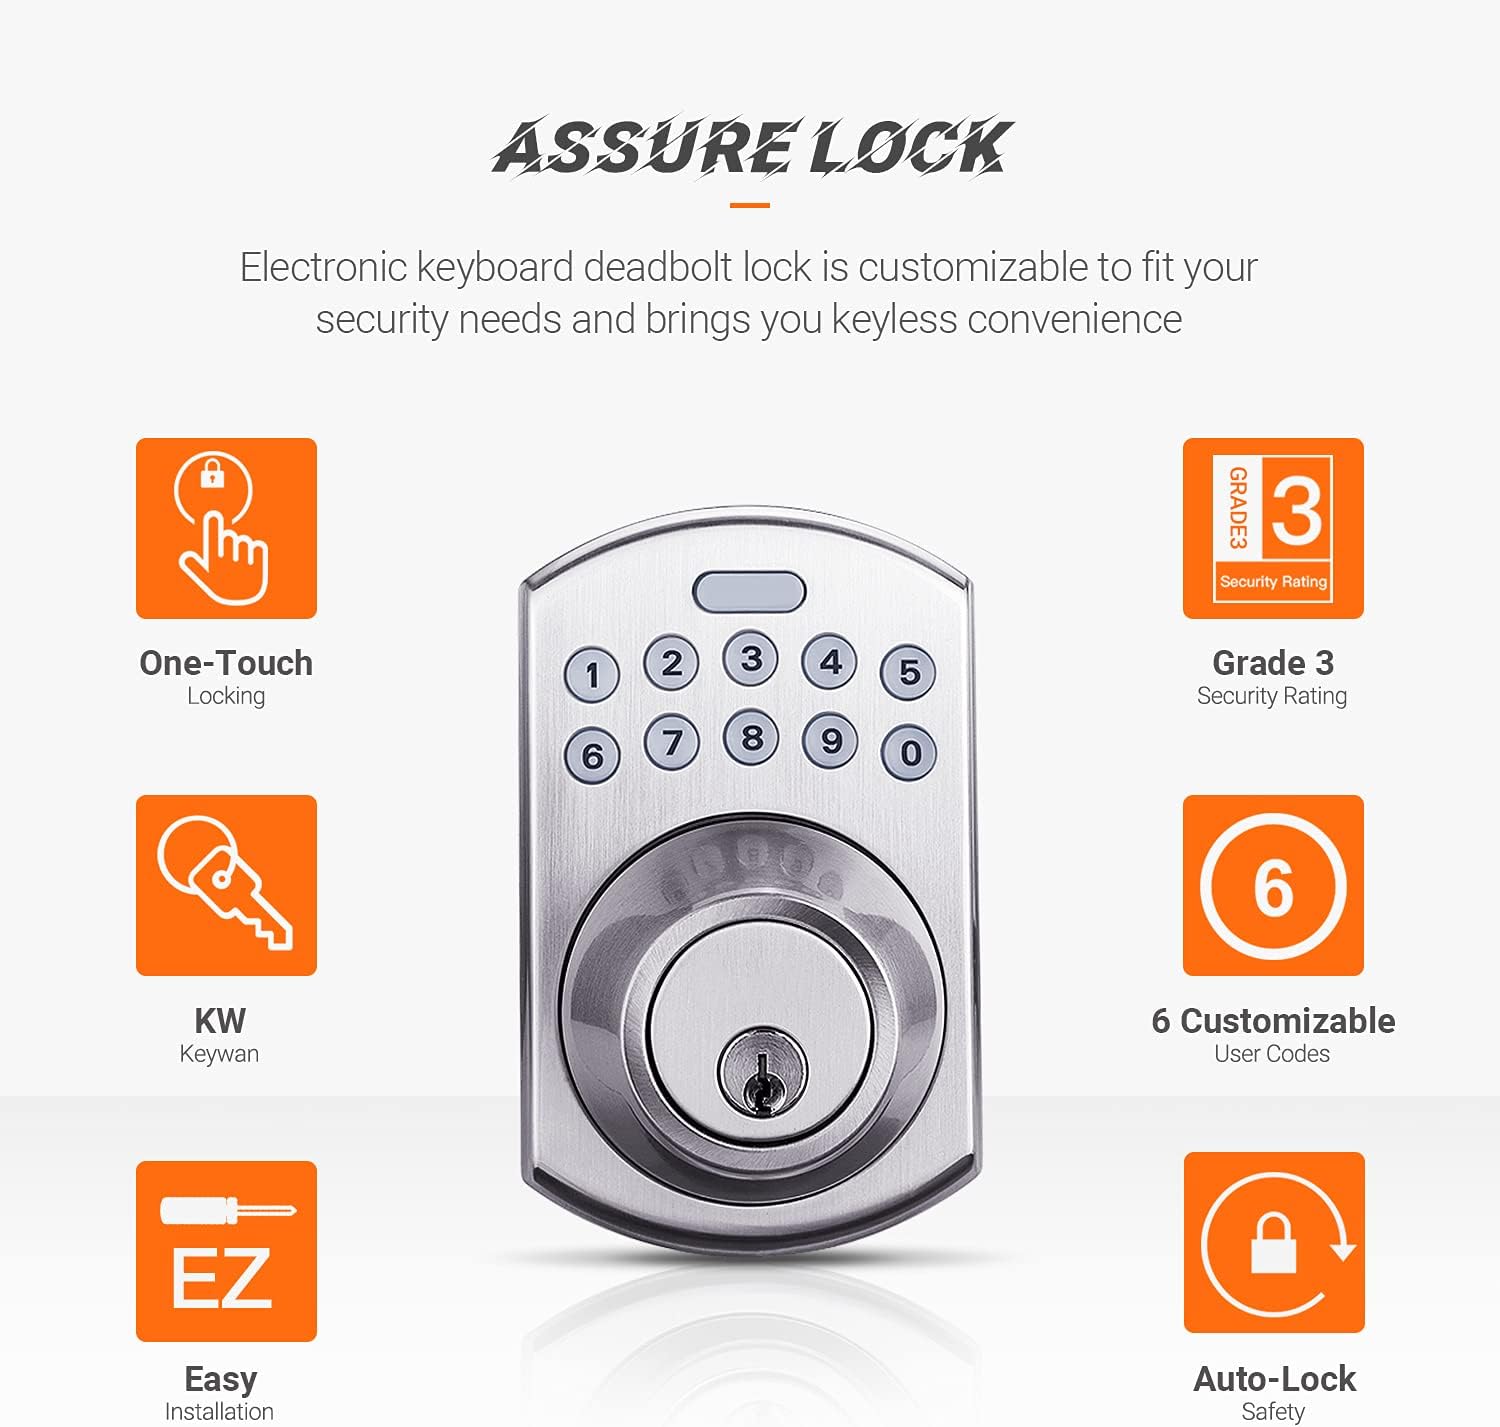
Figure 1: Overview of the DSF EKPH1A Keypad Deadbolt, highlighting features such as one-touch locking, Grade 3 security rating, 6 customizable user codes, easy installation, and auto-lock safety.
2. Safety Information
Observe the following safety precautions to prevent injury or damage to the product:
- Do not use an electric screwdriver during installation to avoid over-tightening screws, which can damage the lock components.
- Ensure all components are correctly aligned and installed as per the instructions to prevent operational issues.
- Use only 4 AA (1.5V, LR6) alkaline batteries. Do not mix old and new batteries or different battery types.
- Keep your programming code and user codes confidential.
- This lock is designed for standard single-cylinder deadbolt applications. It is not compatible with French doors, interconnected locks, or mortise locks.
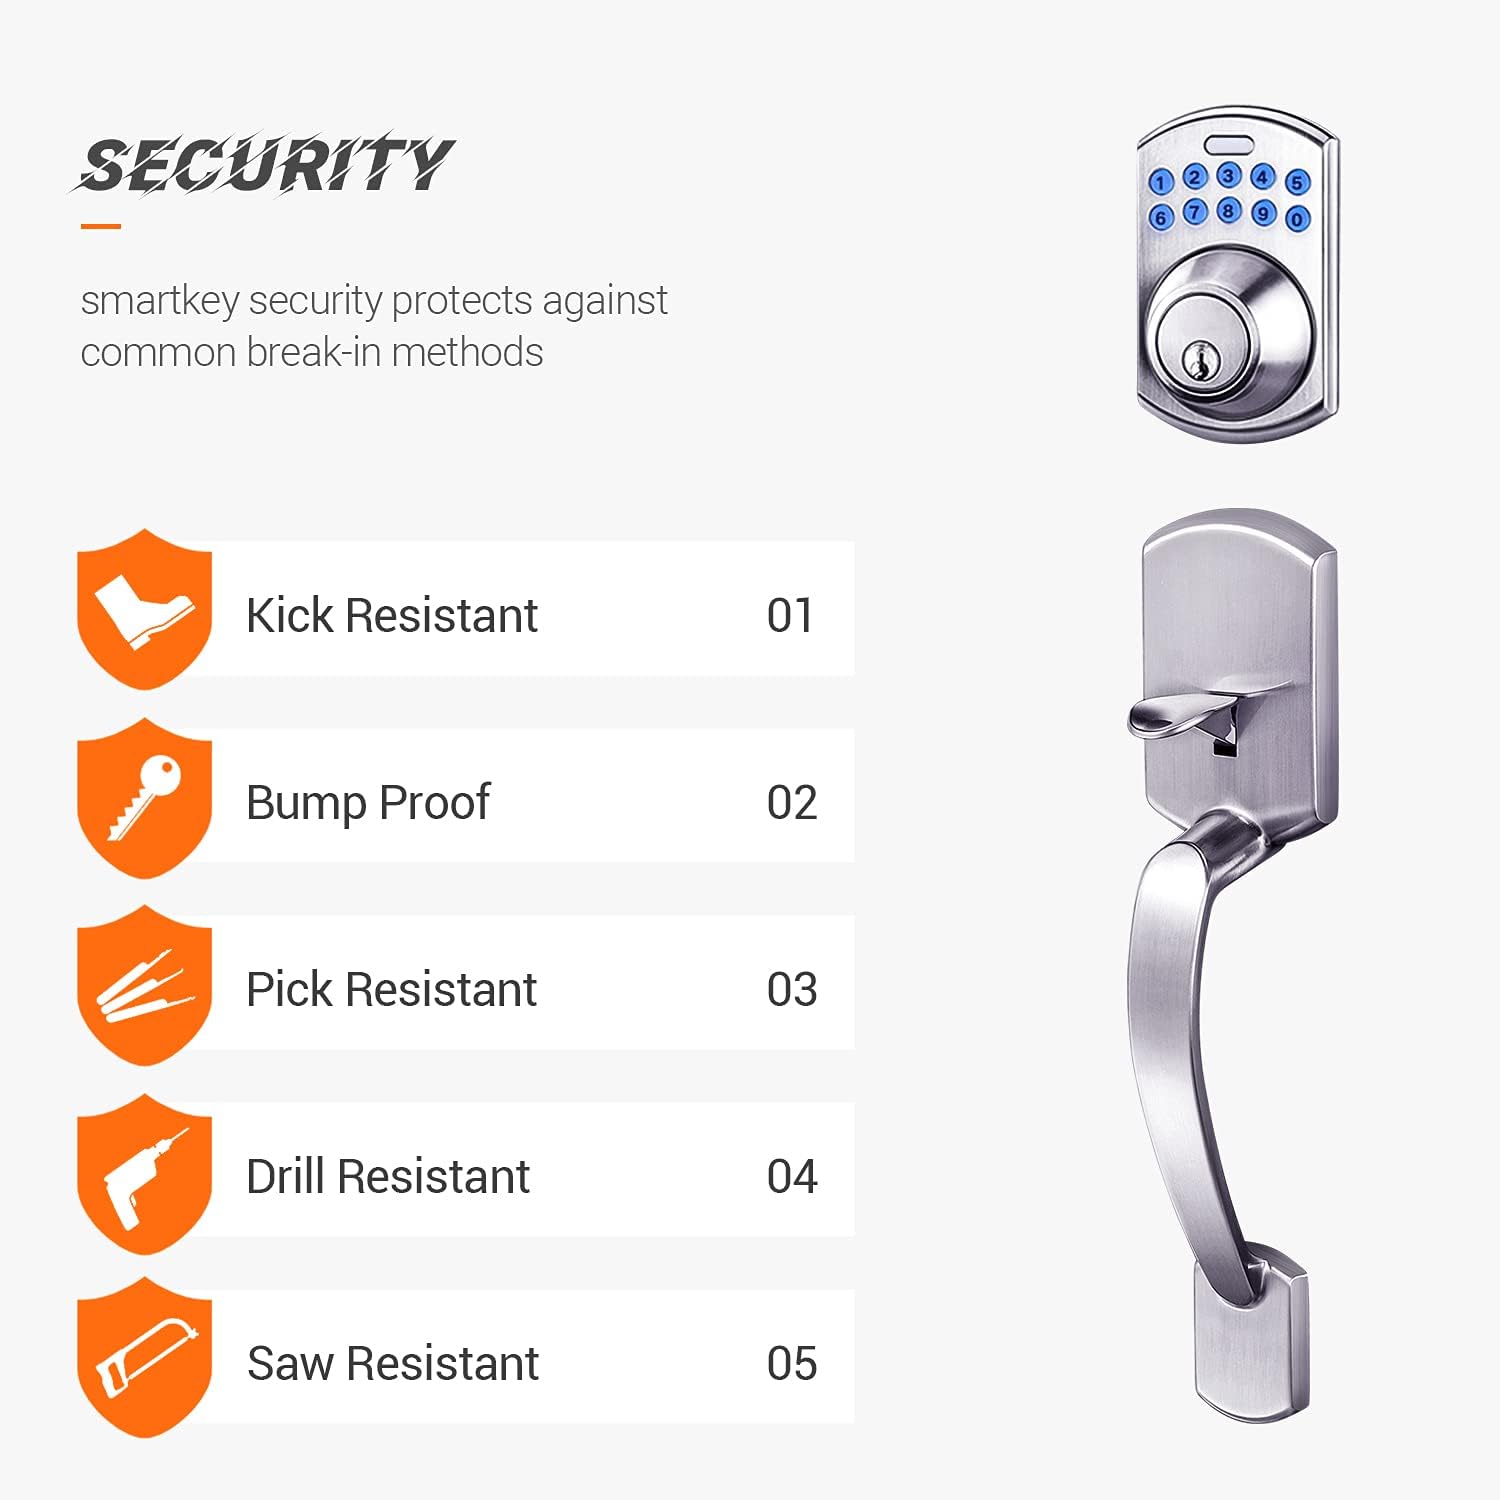
Figure 2: Illustration of the security features, including kick resistance, bump proof design, pick resistance, drill resistance, and saw resistance.
3. Package Contents
Verify that all parts are present before beginning installation. If any parts are missing or damaged, contact customer support.
- Exterior Keypad Assembly
- Interior Receiver Assembly
- Deadbolt Latch
- Strike Plate
- Mounting Screws
- Polo Knob (Interior)
- Keys (2)
- Installation Guide (this manual)
4. Installation
Follow these steps carefully for proper installation. The lock is suitable for wooden doors with a thickness of 1-3/8 inches to 2 inches (35mm-51mm).
- Prepare the Door: Ensure your door is properly prepped for a standard deadbolt. The latch is adjustable for backsets of 2-3/8 inches to 2-3/4 inches (60mm-70mm).
- Install the Latch: Insert the deadbolt latch into the door edge. Ensure the black hub of the latch is in the lower position. Secure with screws.
- Install Exterior Keypad Assembly: Install the cylinder into the deadbolt keypad assembly with the tailpiece in a horizontal position, inserting it through the hub of the latch.
- Install Interior Receiver Assembly: Position the interior receiver assembly. The thumb turn piece should be opposite to the latching side. Ensure the deadbolt tailpiece engages with the turn piece. Connect the IC wire firmly.
- Secure Assemblies: Fasten the interior and exterior assemblies together using the provided mounting screws. Do not over-tighten.
- Install Strike Plate: Install the strike plate on the door frame, ensuring proper alignment with the deadbolt latch.
- Install Batteries: Insert 4 new AA alkaline batteries into the battery compartment of the interior assembly. Ensure correct polarity.
- Door Handing Identification: After installation, perform the door handing identification process. This calibrates the lock to your door's orientation. Refer to the quick start guide for specific steps.

Figure 3: The DSF Keypad Deadbolt and matching handle assembly installed on a typical wooden door.
5. Setup and Programming
The default programming code is 0000. It is recommended to change this immediately after installation.
5.1. Creating a New User Code
You can create up to 6 customizable user codes, each 4-10 digits long.
- Enter the current Programming Code (default is 0000).
- Press the DSF Logo Button (top button on the keypad).
- Press 1.
- Enter your New User Code (4-10 digits).
- Press the DSF Logo Button again to confirm.
A successful programming sequence will be indicated by a series of beeps and/or light flashes. Test the new user code immediately.
5.2. Changing the Programming Code
Refer to the full programming guide for advanced settings, including changing the master programming code, deleting user codes, and setting one-time use codes.
6. Operating Instructions
6.1. Locking the Door
- Keyless Locking: Press the DSF Logo Button on the keypad. The deadbolt will extend, locking the door.
- Manual Locking: From the interior, turn the thumb turn to the locked position.
6.2. Unlocking the Door
- Keyless Unlocking: Enter a valid User Code on the keypad. The deadbolt will retract, unlocking the door.
- Manual Unlocking: From the interior, turn the thumb turn to the unlocked position. From the exterior, use the physical key provided.
6.3. Auto-Locking Feature
The lock features customizable automatic door locking after 10-99 seconds for added security. This feature can be configured through the programming menu. Refer to the full programming guide for details on enabling and adjusting the auto-lock timer.
7. Maintenance
7.1. Battery Replacement
The lock will provide a low battery indication (e.g., specific beeps or light flashes) when the batteries are running low. Replace all 4 AA alkaline batteries promptly to ensure continuous operation. Do not use rechargeable batteries.
7.2. Cleaning
Clean the keypad and lock body with a soft, damp cloth. Avoid using abrasive cleaners or solvents, as these can damage the finish and electronic components.
8. Troubleshooting
- Lock not responding: Check battery levels and ensure they are installed correctly. Replace batteries if necessary.
- Keypad not lighting up: This usually indicates dead batteries. Replace them.
- Lock not engaging/disengaging smoothly: Check for proper alignment of the deadbolt latch and strike plate. Ensure no obstructions are preventing the deadbolt from extending fully. Re-run the door handing identification process.
- User code not working: Verify the user code is correct. Ensure the lock is not in a programming mode. Try re-programming the user code.
- Auto-lock not functioning: Check the auto-lock settings in the programming menu to ensure it is enabled and the delay time is set correctly.
9. Specifications
| Feature | Specification |
|---|---|
| Model Number | EKPH1A |
| Power Source | DC6V, 4 AA (1.5V, LR6) alkaline batteries |
| Material | Zinc alloy die casting |
| Surface Finish | Satin Nickel |
| Door Thickness Compatibility | 1-3/8 in. to 2 in. (35mm-51mm) |
| Adjustable Latch | 2-3/8 in. to 2-3/4 in. (60mm-70mm) |
| Operating Temperature | -20°C to 70°C (-4°F to 158°F) (without battery) |
| Operating Humidity | 30%-90% RH (without battery) |
| Security Rating | ANSI/BHMA Grade 3 Certified |
| User Codes | Up to 6 customizable (4-10 digits) |
10. Warranty and Support
DSF products are designed for reliability and performance. For warranty information, technical support, or to purchase replacement parts, please refer to the contact information provided with your purchase or visit the official DSF website. Keep your proof of purchase for warranty claims.