Mintu 41A5483 / 41AC050-1 / 41A4315-7D Compatible Gear Sprocket Kit
Mintu Gear Sprocket Assembly Kit Instruction Manual
Brand: Mintu | Model Compatibility: 41A5483 / 41AC050-1 / 41A4315-7D Compatible Kit
1. Introduction
This manual provides comprehensive instructions for the installation and maintenance of the Mintu Gear Sprocket Assembly Kit. This kit is designed as a direct replacement for worn or damaged gear and sprocket assemblies in compatible garage door openers, restoring proper function and extending the life of your unit. Please read all instructions carefully before beginning the installation process.
2. Product Overview and Kit Contents
The Mintu Gear Sprocket Assembly Kit includes all necessary components to replace the main drive gear and sprocket in your garage door opener. The design ensures an easy installation process without requiring disassembly of the output shaft assembly.
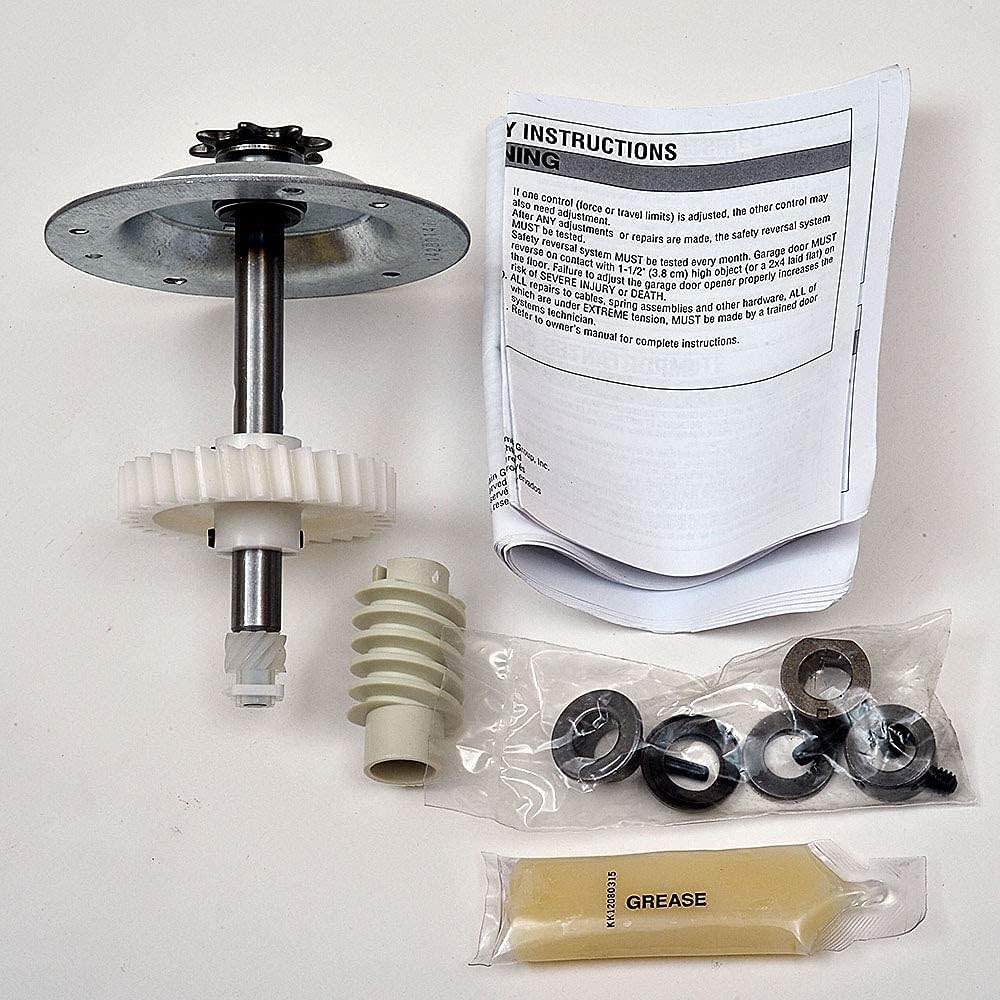
Figure 2.1: Complete Mintu Gear Sprocket Assembly Kit.

Figure 2.2: Detailed breakdown of kit components.
Kit Includes:
- 1 x Gear and Sprocket Assembly
- 1 x Worm Gear
- 1 x Tube of Grease (for lubrication)
- Motor Shaft Bearings
- Sprocket Bearings
- Roll Pins
- Installation Instructions
3. Compatibility
This gear sprocket assembly kit is compatible with a wide range of garage door opener models from various brands. Please verify your model number against the list below to ensure proper fitment.
Compatible Models:
- Chamberlain: 2265R, 248730, 41AC050-1, 41CA4220, 41A5021 Opener
- Liftmaster: 41A5021, 41A3627, 41A5483, 2245, 3265, 3255, 1256LM, 1345M
- Craftsman: 139.53615SR, 139.53995SRT
- Also compatible with chamberlain, sears, craftsman and lift master 1/3 and 1/2 HP chain drive models, including 2245, 2255, 2265, pd210, pd212, pd610, pd612k, 1200 series, 1240, 1245, 1246, 1250, 1255, 1256, 1260, 1265.
4. Common Symptoms of Gear Failure
If your garage door opener is exhibiting any of the following symptoms, replacing the gear sprocket assembly may resolve the issue:

- Grinding or unusual noises during operation.
- Garage door not opening or closing properly.
- Motor running but the door is not moving.
- Jerky or inconsistent door movement.
- Door bouncing or reversing unexpectedly.
5. Safety Information
WARNING: Disconnect power to the garage door opener before performing any repairs or maintenance to prevent electric shock or accidental operation. Garage door springs are under extreme tension and can cause serious injury. Do not attempt to adjust or repair springs yourself. Consult a qualified garage door technician if spring adjustments are needed.
- Always wear appropriate personal protective equipment, such as safety glasses and gloves.
- Ensure the garage door is fully closed and secured before working on the opener.
- Keep children and pets away from the work area.
- After any adjustments or repairs, always test the safety reverse system of your garage door opener.
6. Installation Instructions
The Mintu Gear Sprocket Assembly Kit is designed for relatively easy DIY installation. However, familiarity with basic mechanical repairs is recommended. Watching online video tutorials for your specific garage door opener model can be highly beneficial.
Video 6.1: Overview of the Mintu Gear Sprocket Assembly Kit and its components, highlighting ease of installation.
Step-by-Step Installation:

- Preparation: Disconnect power to the garage door opener. Open the opener's housing to access the internal components.
- Remove Old Assembly: Take off the cap on the chain sprocket and remove the chain. Carefully remove the screws holding the old gear assembly in place. The old gear and sprocket can then be lifted out. Save all screws and small parts for reuse.
- Prepare New Assembly: The screw holes on the round mounting plate of the new assembly are typically not pre-threaded. Hand screw in the mounting screws to create threads before attempting to mount it. This will make final installation easier.
- Lubricate: Apply a liberal amount of the provided grease to the main gear and worm gear of the new assembly. Ensure all moving parts are well-lubricated.
- Install New Assembly: With the main sprocket greased up, carefully insert the new gear and sprocket assembly back into the motor housing. Align the mounting holes and secure it with the saved screws.
- Reassemble: Reattach the chain to the sprocket and replace the chain cap. Close the opener's housing.
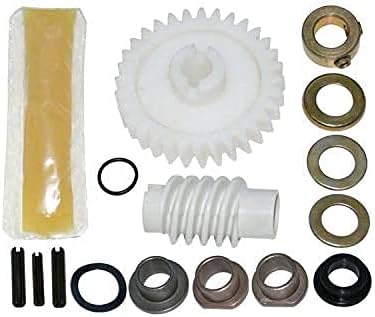

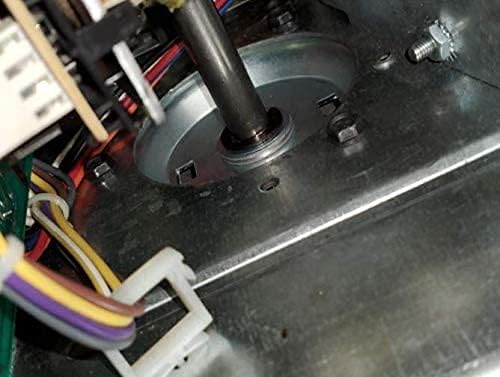
Figure 6.2: Views of the gear sprocket assembly installed within the opener.
7. Post-Installation Checks and Operating Instructions
After installation, it is crucial to perform several checks to ensure the garage door opener operates safely and correctly.
Testing and Adjustment:
- Power On: Reconnect power to the garage door opener.
- Test Operation: Operate the garage door using your remote or wall button. Observe the door's movement.
- Adjust Travel Limits: It is highly likely that you will need to reset the open and close travel limits on your garage door opener. Refer to your specific opener's user manual for detailed instructions on how to adjust these limits. Proper limit adjustment is essential for safe and reliable operation.
- Test Safety Reverse System: After any adjustments, always test the safety reverse system. Place a 1.5-inch (4 cm) high object (like a 2x4 board laid flat) on the floor in the path of the door. The door should reverse upon contact with the object. If it does not, adjust the force settings or consult your opener's manual immediately. Do not use the opener until the safety reverse system functions correctly.
8. Maintenance
Regular maintenance helps ensure the longevity and optimal performance of your garage door opener and its components.
- Lubrication: Periodically inspect the gear and worm gear for adequate lubrication. Reapply grease as needed, especially if you notice increased noise or friction.
- Inspection: Annually inspect the gear and sprocket for signs of wear, cracks, or damage. Check for any loose connections or excessive play.
- Cleanliness: Keep the internal components of the opener clean and free from dust, debris, or excessive grease buildup.
9. Troubleshooting
If you encounter issues after installing the new gear sprocket assembly, consider the following common troubleshooting steps:
- Door Not Moving / Motor Running: Double-check that the chain is properly seated on the sprocket and tensioned correctly. Verify that the travel limits are set appropriately.
- Intermittent Thumping Noise: This could indicate an issue with the rotational collar or worm gear alignment. Ensure all components are seated correctly and that the worm gear is not binding. Re-check the installation steps, particularly regarding the shaft components.
- Door Not Stopping at Correct Position: This is almost always related to incorrect travel limit settings. Refer to your opener's manual to recalibrate the open and close limits.
- Excessive Noise: Ensure sufficient grease has been applied to the gears. Check for any foreign objects or misaligned components.
If problems persist, consult the original manufacturer's manual for your garage door opener or contact a qualified technician.
10. Specifications
| Feature | Detail |
|---|---|
| Manufacturer | Mintu |
| Item Weight | 15.8 ounces |
| Package Dimensions | 7.13 x 5.39 x 4.45 inches |
| Batteries Included? | No |
| Batteries Required? | No |
| First Available Date | September 24, 2021 |
11. Warranty and Support
For specific warranty information regarding your Mintu Gear Sprocket Assembly Kit, please refer to the product packaging or contact Mintu customer support directly. For technical assistance or further inquiries, please reach out to the seller or manufacturer through the platform where the product was purchased.