
1. Introduction
The MikroTik cAP XL ac is a powerful and versatile dual-band wireless access point designed for ceiling or wall mounting. It features two Gigabit Ethernet ports, Power over Ethernet (PoE) capabilities, and supports 802.11ac wireless standards for high-speed connectivity. This manual provides essential information for the safe and efficient installation, configuration, and operation of your cAP XL ac device.
2. Safety Information
- Always follow local electrical codes and safety regulations during installation.
- Ensure the device is powered by a compatible power source (18-57 V DC via PoE or DC jack).
- Do not open or attempt to repair the device yourself. Refer to qualified service personnel.
- Keep the device away from water, moisture, and extreme temperatures.
- Mount the device securely to prevent accidental falls.
3. Package Contents
Verify that your package contains the following items:
- MikroTik cAP XL ac Access Point (RBcAPGi-5acD2nD-XL)
- Mounting bracket
- Screw kit for mounting
- Gigabit PoE Injector (may be included depending on region/bundle)
- Power Adapter (if PoE injector is not used or for direct DC power)
- Quick Start Guide
4. Device Overview
The cAP XL ac features several ports, indicators, and buttons for its operation.
4.1 Ports and Indicators
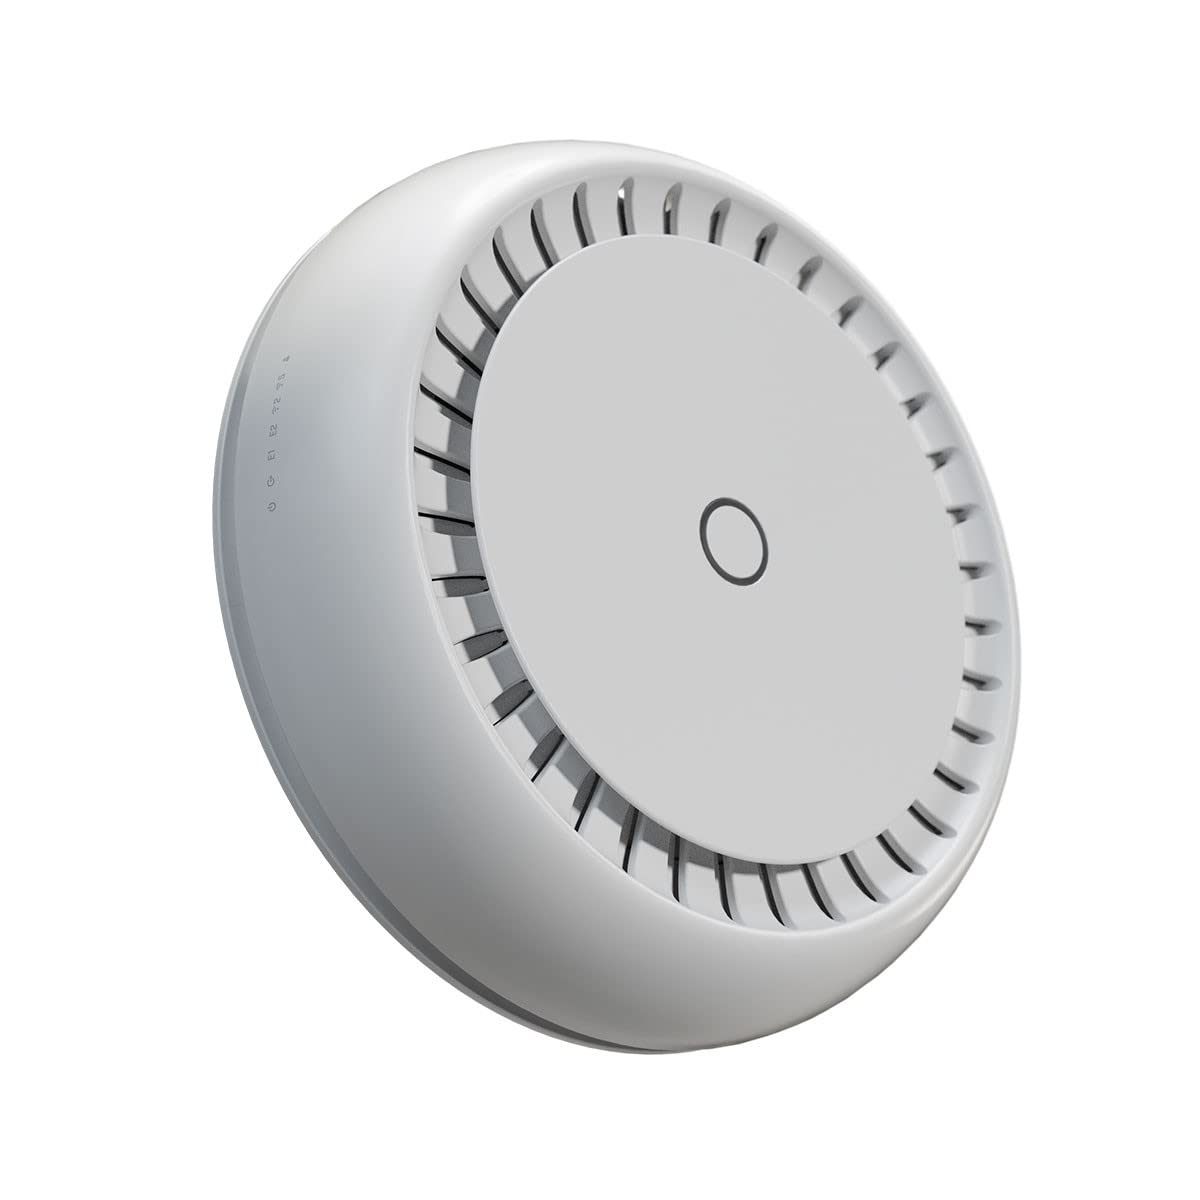
Image: Bottom view of the MikroTik cAP XL ac, highlighting the Ethernet ports and power input. This image shows the 18-57 V DC power input, ETH 1 (PoE In), ETH 2 (PoE out), and the MODE and RESET buttons.
- 18-57 V DC: Power input jack for direct DC power.
- ETH 1 (PoE In): Gigabit Ethernet port that supports Power over Ethernet input. This port can power the device.
- ETH 2 (PoE out): Gigabit Ethernet port that can provide Power over Ethernet output to another device.
- MODE Button: User-configurable button, typically used for various functions in RouterOS.
- RESET Button: Used to reset the device to factory defaults or enter RouterBOOT loader mode.
4.2 Device Appearance

Image: Top view of the MikroTik cAP XL ac access point, showing its circular design suitable for ceiling mounting.

Image: A typical Gigabit Power over Ethernet (PoE) injector, which can be used to power the cAP XL ac via its ETH 1 port.
5. Setup
5.1 Mounting the Device
The cAP XL ac is designed for ceiling or wall mounting. Use the provided mounting bracket and screws to secure the device. Ensure the mounting surface is strong enough to support the device's weight.
- Attach the mounting bracket to the desired ceiling or wall location using appropriate screws.
- Align the cAP XL ac with the bracket and twist it clockwise until it locks securely into place.
5.2 Powering On
The device can be powered via PoE on ETH 1 or directly via the DC jack.
- PoE (Recommended): Connect an Ethernet cable from a PoE-enabled switch or a Gigabit PoE injector to the ETH 1 port of the cAP XL ac.
- DC Jack: Connect a compatible 18-57 V DC power adapter to the DC jack.
Once powered, the device will boot up. The LEDs will indicate its status.
5.3 Initial Configuration
The cAP XL ac runs MikroTik's RouterOS. Initial configuration can be done via a web browser or WinBox utility.
- Connect your computer to either ETH 1 or ETH 2 port of the cAP XL ac using an Ethernet cable.
- Open a web browser and navigate to the default IP address (usually http://192.168.88.1). If this doesn't work, use WinBox to discover the device.
- Log in using the default username (admin) and an empty password. You will be prompted to set a new password.
- Follow the on-screen instructions or the Quick Set interface to configure basic network settings, Wi-Fi name (SSID), and security.
6. Operating the Device
6.1 Basic Network Configuration
After initial setup, you can further configure the device using RouterOS. This includes setting up IP addresses, DHCP server, and firewall rules.
- Access the device via web browser or WinBox.
- Navigate to IP > Addresses to configure static IP addresses.
- Navigate to IP > DHCP Server to enable and configure a DHCP server for connected clients.
6.2 Wireless Settings
The cAP XL ac supports dual-band (2.4 GHz and 5 GHz) wireless operation with 802.11ac standard.
- Go to Wireless in RouterOS.
- Configure separate SSIDs for 2.4 GHz and 5 GHz bands for optimal performance.
- Set strong WPA2/WPA3 security passwords for your wireless networks.
- Adjust channel settings to avoid interference, if necessary.
6.3 WPS Functionality
The device supports WPS (Wi-Fi Protected Setup) for easy connection of compatible wireless clients. Refer to the RouterOS documentation for specific configuration steps for WPS.
7. Maintenance
7.1 Firmware Updates
Regularly update RouterOS firmware to ensure optimal performance, security, and access to new features.
- Download the latest RouterOS package for your device model from the MikroTik website.
- Upload the package to the device using WinBox or the web interface (Files > Upload).
- Reboot the device (System > Reboot) to apply the update.
7.2 Cleaning
Clean the device periodically with a soft, dry cloth. Do not use liquid cleaners or aerosols.
7.3 Resetting the Device
To reset the device to factory default settings, press and hold the RESET button for approximately 5 seconds during power-on until the user LED starts flashing. Release the button to initiate the reset process.
8. Troubleshooting
- Device not powering on: Check power source, PoE injector, and cable connections. Ensure the power supply meets the voltage requirements.
- Cannot access device via IP: Verify your computer's IP settings. Try using WinBox to discover the device by MAC address. Ensure cables are properly connected.
- No Wi-Fi signal: Check wireless interface status in RouterOS. Ensure SSIDs are broadcasted and security settings are correct.
- Slow Wi-Fi speed: Check for channel interference, update firmware, ensure optimal placement, and verify client device compatibility.
- Forgot password: Perform a factory reset using the RESET button (refer to section 7.3).
9. Specifications
| Feature | Value |
|---|---|
| Brand | MikroTik |
| Model Name | RBcAPGi-5acD2nD-XL |
| Frequency Band Class | Dual-Band |
| Wireless Communication Standard | 802.11ac |
| Connectivity Technology | Ethernet, Wi-Fi |
| Item Weight | 400 Grams |
| Operating System | RouterOS |
| Security Protocol | WPS |
| Number of Ports | 2 (Gigabit Ethernet) |
| Data Transfer Rate | 12 Gigabits Per Second (Aggregate) |
| LAN Port Bandwidth | 6000000000 bps (6 Gbps) |
| Maximum Upstream Data Transfer Rate | 6000 Megabits Per Second (6 Gbps) |
| Frequency | 5 GHz |
| Model Number | 4752224007278 |
| Manufacturer | MikroTik |
10. Warranty and Support
MikroTik products are covered by a limited warranty. For detailed warranty information, please refer to the official MikroTik website or the warranty card included with your product. For technical support, visit the MikroTik support portal or contact your authorized MikroTik reseller.


