1. Introduction
The SEVEN LADY G400 Automatic Pet Food Dispenser is designed to provide scheduled meals for your pet, ensuring a consistent feeding routine. This device helps manage your pet's diet by dispensing precise portions at set times, offering convenience for pet owners and promoting healthy eating habits for pets.

Image: The automatic feeder provides a healthy diet for your pet.
2. Product Components
Please verify that all components are present in the package:
- Automatic Pet Feeder Unit (3.5L capacity)
- Stainless Steel Bowl
- ABS Plastic Bottom Bowl
- USB Cable
- Power Adapter
- Desiccant Bag
- Instruction Manual
- Velcro Safety Buckle

Image: All components included in the package.
3. Setup
3.1 Power Supply
The feeder supports dual power supply options: USB-C adapter (included) and 4*AA batteries (not included). It is recommended to use both for uninterrupted operation, especially during power outages. The batteries serve as a backup power source.
- Primary Power: Connect the USB-C cable to the feeder and plug the adapter into a wall outlet.
- Backup Power: Open the battery compartment at the bottom of the feeder and insert 4 AA batteries.
Note: If the feeder loses power completely (both USB and batteries), you will need to reset the time settings.

Image: Dual power support with USB and AA batteries.
3.2 Food Loading
- Remove the lid from the top of the feeder.
- Place the desiccant bag into its designated compartment under the lid to help keep food fresh.
- Pour dry pet food into the 3.5L food tank. Ensure the kibble size is between 0.19 and 0.39 inches (0.5-1 cm) for optimal dispensing.
- Replace the lid securely.

Image: Desiccant box and 3.5L capacity for fresh food storage.
3.3 Bowl Placement
Place the stainless steel bowl into the ABS plastic bottom bowl, then position it under the feeder's dispensing outlet.

Image: Stainless Steel Bowl for easy cleaning.
4. Operating Instructions
The feeder features a simple control panel with four keys for operation.

Image: Multi-Function Control Panel overview.
4.1 Setting the Current Time
- Press and hold the 'Set/Switch' button (right arrow icon) for 5 seconds to enter the system setting mode. The hour display will flash.
- Use the '+' (Increase) and '-' (Decrease/Reset) buttons to adjust the hour.
- Press the 'Return/OK' button (circular arrow icon) to switch to minute setting.
- Use the '+' and '-' buttons to adjust the minute.
- Press the 'Return/OK' button to save the current time.
4.2 Setting Meal Times and Portions
You can set 1 to 6 meals per day, with 0 to 6 portions per meal. Each portion is approximately 10-15 grams.
- Press the 'Set/Switch' button to enter meal setting mode. The display will show '01' for the first meal.
- Use the '+' and '-' buttons to set the desired meal time (e.g., 07:00).
- Press the 'Return/OK' button to move to portion setting. The display will show 'P-00'.
- Use the '+' and '-' buttons to set the number of portions (0-6) for this meal.
- Press the 'Return/OK' button to save the settings for the current meal and proceed to set the next meal (e.g., '02').
- Repeat steps 2-5 for up to 6 meals. If you do not wish to set all 6 meals, simply press the 'Return/OK' button after setting your last desired meal to exit the setting mode.

Image: Easy Setting for Time and Meals.
4.3 Manual Feeding
To dispense food manually, briefly press the '-' (Decrease/Reset) button. Each press will dispense one portion.
5. Features Overview
- Scheduled Feeding: Program up to 6 meals per day with adjustable portion sizes (1-6 portions, 10-15g per portion).
- Dual Power Supply: Operates via USB-C adapter with 4 AA batteries as backup, ensuring continuous feeding during power interruptions.
- Freshness Preservation: Includes a desiccant bag compartment in the lid to keep dry food fresh.
- Transparent Food Tank: Allows easy monitoring of food levels without opening the lid.
- Anti-Clog Design: Internal structure designed to prevent food jams and ensure smooth dispensing.
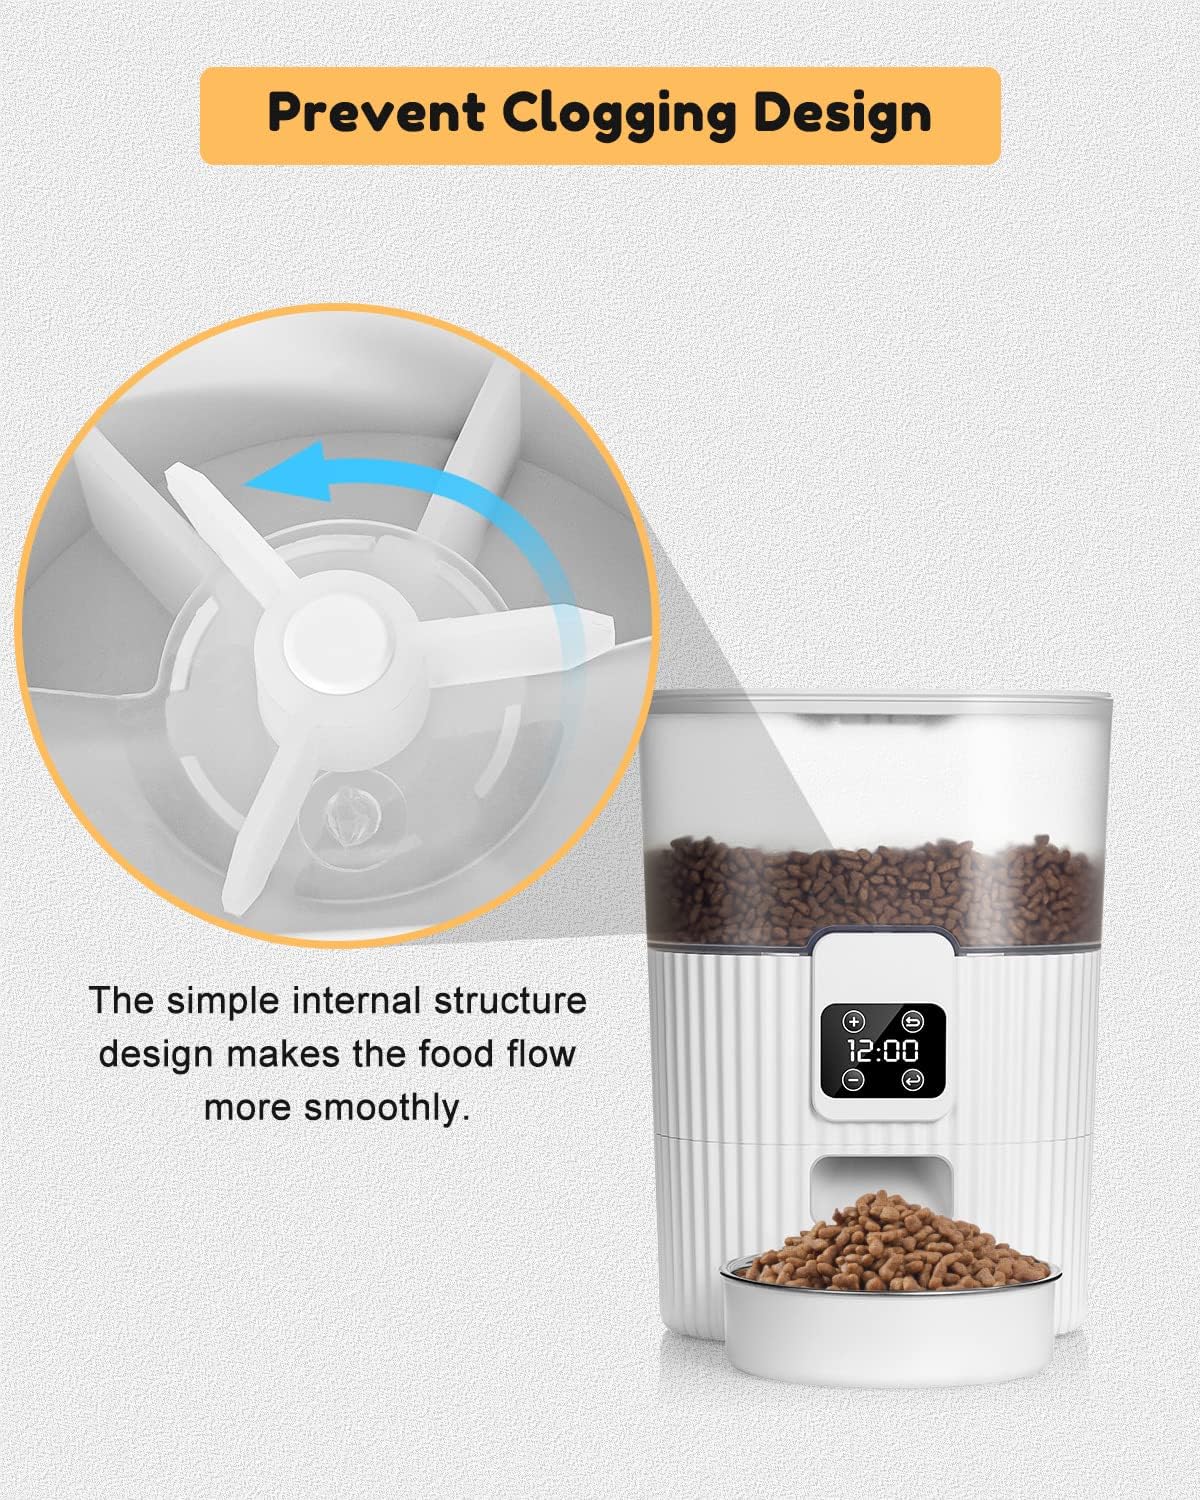
Image: Prevent Clogging Design for smooth food dispensing.
6. Maintenance
6.1 Cleaning
Regular cleaning is essential for hygiene and proper functioning.
- Food Tank: The transparent food tank can be detached and hand washed with mild soap and water. Ensure it is completely dry before reattaching and refilling with food.
- Stainless Steel Bowl: The stainless steel bowl is removable and dishwasher-safe or can be hand washed.
- Main Unit: Wipe the main unit with a damp cloth. Do not immerse the main unit in water.
6.2 Desiccant Bag Replacement
Replace the desiccant bag every 1-2 months, or as needed, to maintain food freshness.
7. Troubleshooting
- Feeder Not Dispensing Food:
- Check if the food tank is empty.
- Ensure kibble size is appropriate (0.19-0.39 inches).
- Verify that the feeder is powered on and the power adapter is securely connected.
- Check for any food jams in the dispensing mechanism.
- Time/Schedule Resetting:
- If the feeder loses power completely (both USB and battery), the time settings will reset. Re-enter the current time and meal schedules.
- Ensure backup batteries are installed and functional to prevent resets during power outages.
- Low Battery Reminder: A red dot indicator on the display signifies low battery power, reminding you to replace the AA batteries.

Image: Low Battery Reminder indicator.
8. Specifications
| Specification | Detail |
|---|---|
| Model Number | G400 |
| Brand | SEVEN LADY |
| Capacity | 3.5 Liters |
| Dimensions (L x W x H) | 8.2 x 8.2 x 11 inches |
| Item Weight | 15 Grams (0.53 ounces) |
| Material | Plastic (ABS), Stainless Steel |
| Power Supply | USB-C Adapter (included) + 4*AA Batteries (not included) |
| Meals Per Day | 1-6 meals |
| Portions Per Meal | 0-6 portions (approx. 10-15g per portion) |
| Recommended Kibble Size | 0.19-0.39 inches (0.5-1 cm) |
| Target Species | Cat, Dog (Small Breeds) |

Image: Product Dimensions.
9. Safety Information
- This appliance is for indoor use only.
- Do not use with wet food or canned food. Only use dry pet food.
- Keep out of reach of children and pets when not in use or during assembly/disassembly.
- Ensure the power cord is placed where pets cannot chew on it.
- Always unplug the feeder before cleaning.
10. Warranty and Support
For any issues or questions regarding your SEVEN LADY G400 Automatic Pet Food Dispenser, please contact SEVEN LADY customer service. Refer to your purchase documentation for specific warranty details and contact information.