1. Introduction
This manual provides essential instructions for the installation, operation, maintenance, and troubleshooting of your NovaNic H81H3-AM V1.0 Motherboard. Please read this manual thoroughly before proceeding with installation to ensure proper setup and to maximize the performance and longevity of your system. Keep this manual for future reference.
2. Product Overview
The NovaNic H81H3-AM V1.0 is an H81 chipset motherboard designed to support 4th generation Intel Core i3, i5, and G series processors with an LGA 1150 socket. It features DDR4 RAM memory technology and is suitable for personal computer, desktop, and laptop applications. This motherboard provides a stable and efficient platform for various computing needs.
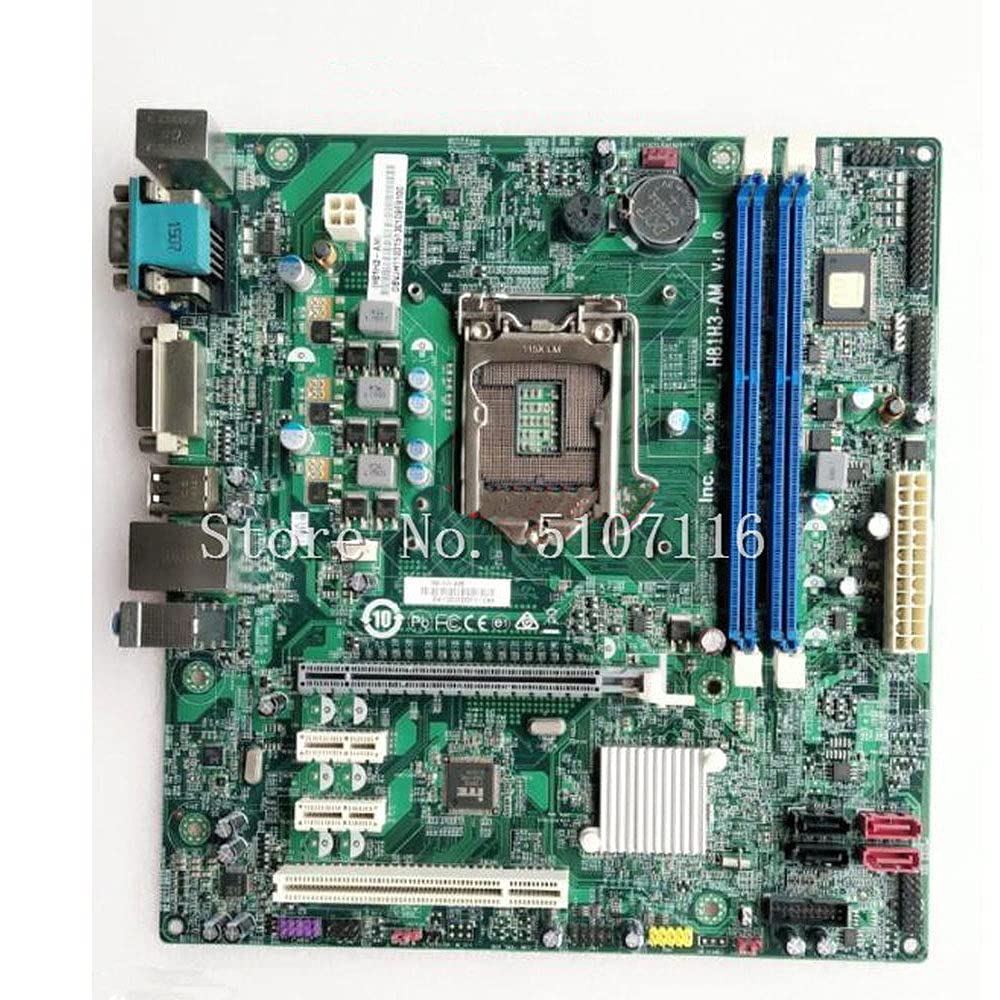
Figure 2.1: Top-down view of the NovaNic H81H3-AM V1.0 Motherboard, showing the CPU socket, RAM slots, and various connectors.
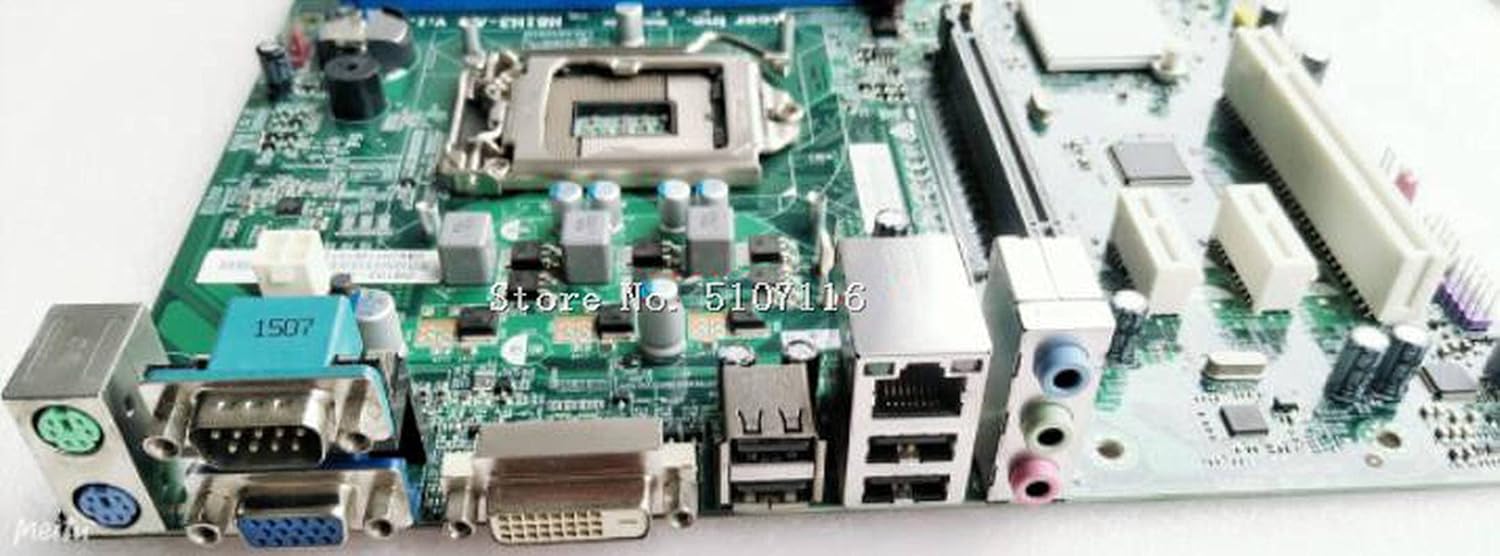
Figure 2.2: Close-up view of the rear I/O panel of the NovaNic H81H3-AM V1.0 Motherboard, displaying various ports including USB, VGA, DVI, and audio jacks.
3. Setup and Installation
Before beginning installation, ensure your workspace is clean, well-lit, and static-free. It is recommended to wear an anti-static wrist strap to prevent damage to components.
3.1 Required Components
- LGA 1150 compatible CPU (Intel Core i3-4xxx, i5-4xxx, etc.)
- DDR4 RAM modules
- Compatible CPU cooler
- Power Supply Unit (PSU)
- Storage device (HDD/SSD)
- Computer case
- Graphics card (if not using integrated graphics)
3.2 Installation Steps
- Prepare the Case: Install the motherboard standoffs into your computer case according to the motherboard's form factor.
- Install the CPU: Open the CPU socket lever, carefully align the CPU with the socket (matching the golden triangle on the CPU to the indicator on the socket), and gently place it in. Close the lever to secure the CPU.
- Install the CPU Cooler: Apply thermal paste (if not pre-applied) and install the CPU cooler according to its manufacturer's instructions. Connect the CPU fan cable to the designated header on the motherboard.
- Install RAM: Open the clips on the RAM slots. Align the RAM module with the slot, ensuring the notch on the module matches the key in the slot. Press down firmly on both ends until the clips snap into place.
- Mount the Motherboard: Carefully place the motherboard into the case, aligning the screw holes with the standoffs. Secure the motherboard with screws.
- Connect Power: Connect the 24-pin ATX power connector and the 4-pin or 8-pin CPU power connector from the PSU to the motherboard.
- Connect Storage and Peripherals: Connect SATA data and power cables to your storage devices. Connect front panel headers (power button, reset button, USB, audio) to their respective pins on the motherboard. Refer to the motherboard's silkscreen labels for correct orientation.
- Install Graphics Card (Optional): If using a dedicated graphics card, insert it into the PCIe x16 slot and secure it. Connect PCIe power cables from the PSU if required.
- Final Checks: Double-check all connections before closing the case.
4. Operating Instructions
4.1 Initial Boot
After completing the hardware installation, connect your monitor, keyboard, and mouse. Power on the system. The system should display the BIOS/UEFI splash screen. If not, refer to the Troubleshooting section.
4.2 BIOS/UEFI Setup
During startup, press the designated key (commonly DEL or F2) to enter the BIOS/UEFI setup utility. Here you can configure system settings such as boot order, date/time, and hardware parameters. Ensure your boot device is correctly prioritized for operating system installation.
4.3 Operating System Installation
Once the BIOS/UEFI is configured, proceed with installing your preferred operating system (e.g., Windows 10, as specified for this platform) from a bootable USB drive or DVD. Follow the on-screen instructions provided by the operating system installer.
4.4 Driver Installation
After the operating system is installed, install the necessary drivers for the motherboard chipset, audio, network, and any other integrated components. These drivers are typically available on the manufacturer's website or included on a driver CD/USB with the motherboard (if applicable).
5. Maintenance
Regular maintenance helps ensure the longevity and stable operation of your motherboard and system.
- Dust Removal: Periodically clean dust from inside the computer case, especially from fans and heatsinks, using compressed air. Ensure the system is powered off and unplugged before cleaning.
- BIOS/UEFI Updates: Check the manufacturer's website for BIOS/UEFI updates. Updates can improve compatibility, stability, and performance. Follow the update instructions carefully to avoid system damage.
- Driver Updates: Keep your system drivers updated to ensure optimal performance and compatibility with new software and hardware.
- Physical Inspection: Occasionally inspect the motherboard for any signs of damage, loose connections, or bulging capacitors.
6. Troubleshooting
This section provides solutions to common issues you might encounter.
6.1 No Power / No Boot
- Check Power Connections: Ensure the 24-pin ATX and CPU power cables are securely connected to the motherboard and PSU.
- PSU Functionality: Verify the power supply unit is working correctly.
- Front Panel Connections: Confirm the power button cable is correctly connected to the motherboard's front panel header.
- CMOS Reset: Try resetting the CMOS by removing the CMOS battery for a few minutes or using the clear CMOS jumper (refer to motherboard diagram if available).
6.2 No Display
- Monitor Connection: Ensure the monitor cable is securely connected to the graphics output (either integrated or dedicated GPU).
- RAM Seating: Reseat the RAM modules firmly in their slots. Try booting with only one RAM module if multiple are installed.
- Graphics Card: If using a dedicated graphics card, ensure it is properly seated in the PCIe slot and any required power cables are connected.
6.3 System Instability / Crashes
- Overheating: Check CPU and case fan operation. Ensure heatsinks are clean and properly mounted.
- RAM Issues: Run a memory diagnostic tool to check for faulty RAM.
- Driver Conflicts: Ensure all drivers are correctly installed and up-to-date.
- BIOS/UEFI Settings: Reset BIOS/UEFI to default settings.
7. Specifications
| Feature | Detail |
|---|---|
| Model Name | H81H3-AM V1.0 |
| Manufacturer | NovaNic |
| CPU Socket | LGA 1150 |
| Chipset Type | Intel H81 |
| Compatible Processors | Intel Core i3-4xxx, Intel Core i5-4xxx, Intel Core i3-5xxx, Intel Core i5-5xxx, Intel Core i3-6xxx, Intel Core i5-6xxx, Intel Core i3-7xxx, Intel Core i5-7xxx |
| RAM Memory Technology | DDR4 |
| Memory Clock Speed | 2133 MHz |
| Memory Storage Capacity (Max) | 32 GB |
| Compatible Devices | Personal Computer, Desktop, Laptop |
| Platform | Windows 10 |
| ASIN | B09GMP5TS3 |
| Date First Available | September 18, 2021 |
8. Warranty and Support
For specific warranty information regarding your NovaNic H81H3-AM V1.0 Motherboard, please refer to the documentation provided at the time of purchase or contact NovaNic customer support directly. Warranty terms and conditions may vary by region and retailer.
For technical support, driver downloads, and BIOS/UEFI updates, please visit the official NovaNic website or contact their support channels.