Introduction
This manual provides comprehensive instructions for the safe and effective use of your haisstronica 330PCS Marine Grade Heat Shrink Butt Connectors Set. This kit is designed to create reliable, waterproof electrical connections for various wiring projects, particularly in marine and automotive environments. Please read this manual thoroughly before operation and retain it for future reference.
Product Overview
The haisstronica Heat Shrink Butt Connectors Set includes a variety of connectors and a specialized crimping tool, all organized in a durable case for convenience.
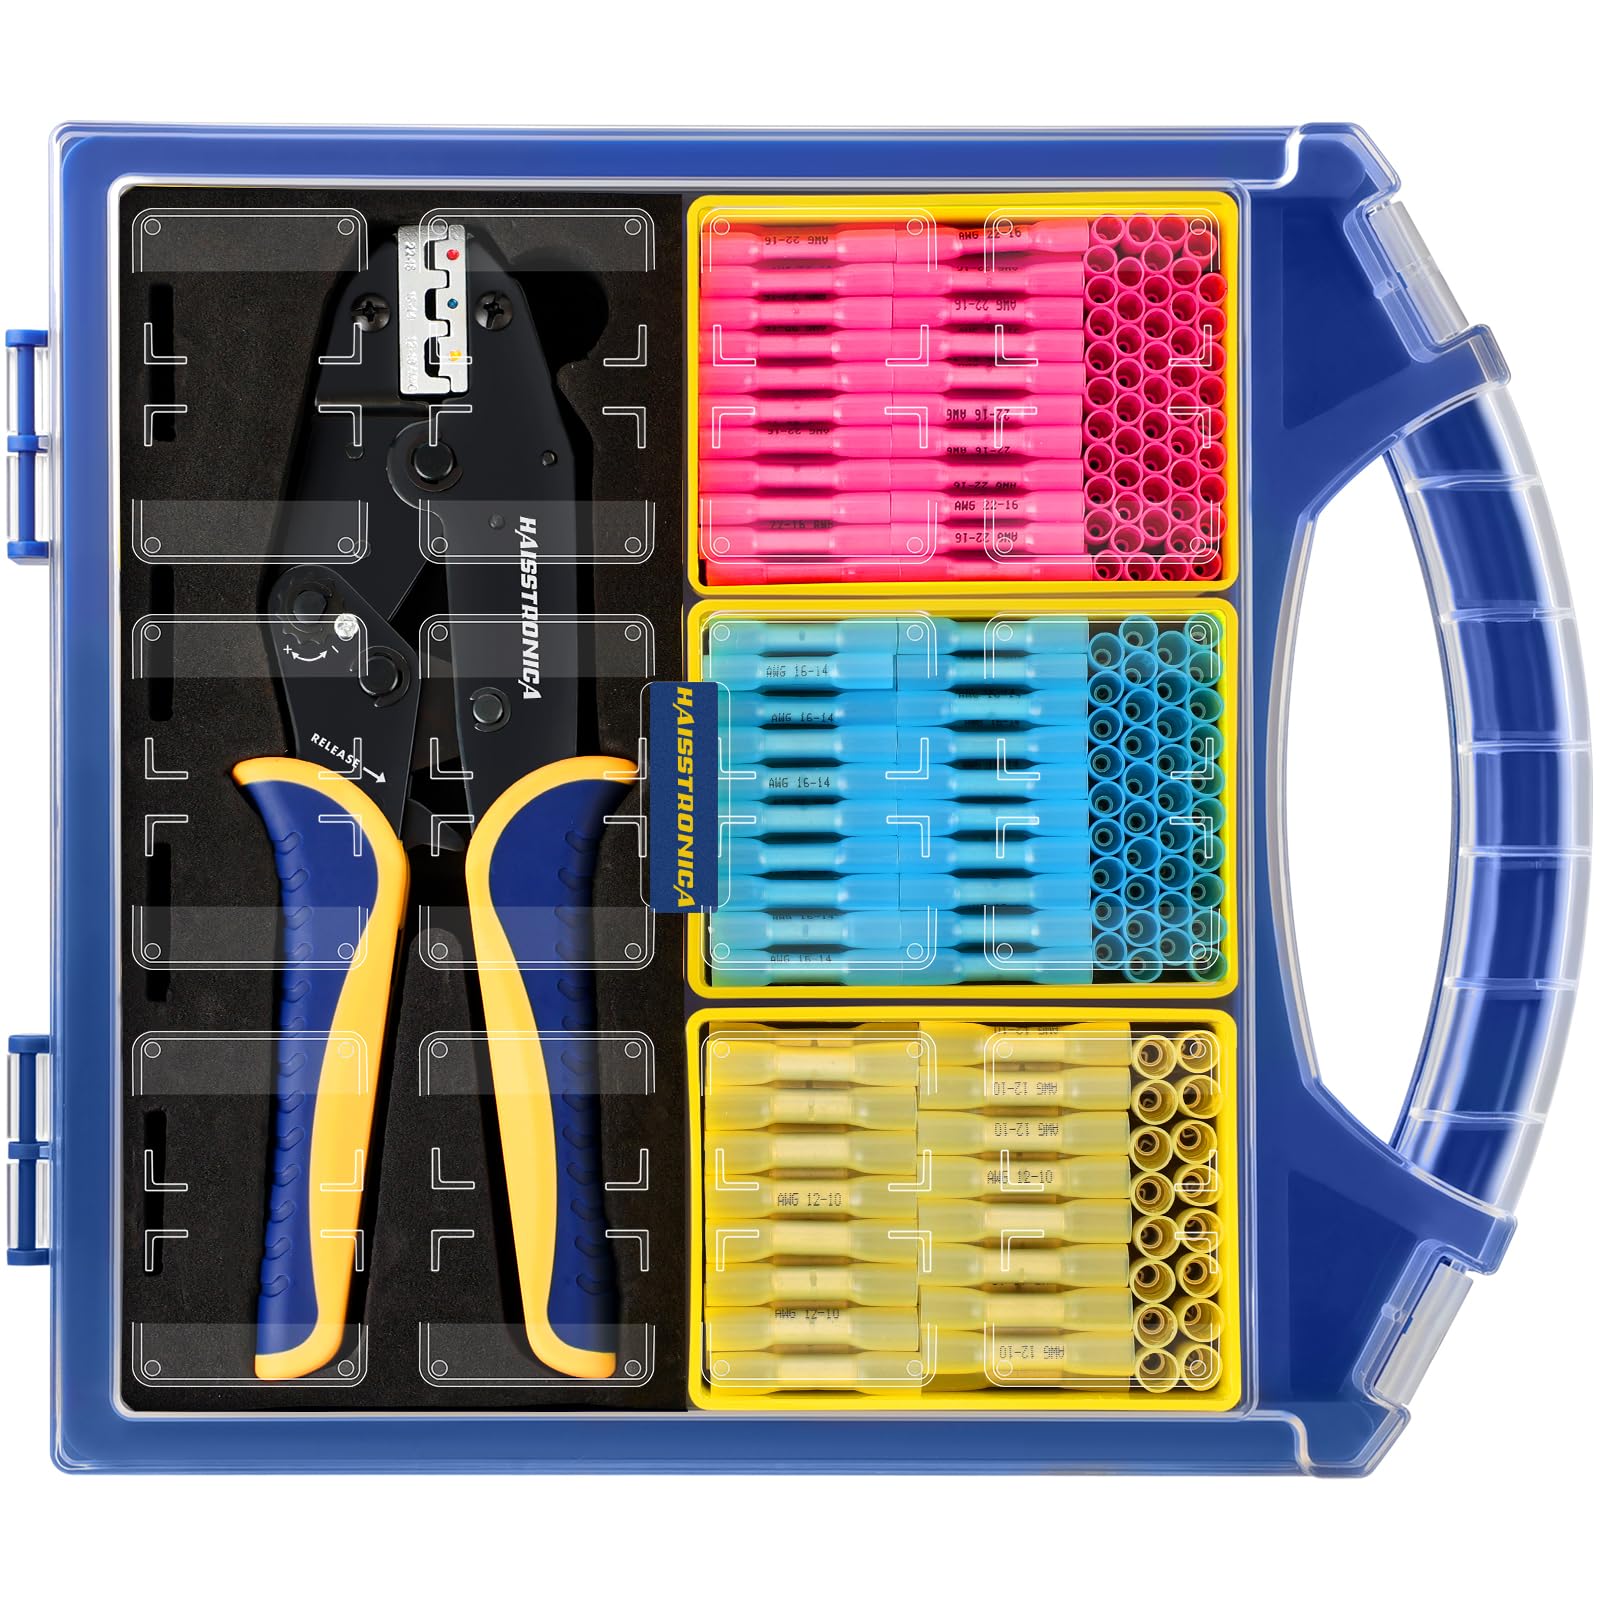
Image: The complete haisstronica 330PCS Marine Grade Heat Shrink Butt Connectors Set, showcasing the organized case filled with various colored connectors and the included crimping tool.
Kit Contents:
- 330PCS Heat Shrink Butt Connectors (22-10 AWG, 3 colors/3 sizes)
- 9" Heat Shrink Crimping Tool (Model: HS-8327)
- Organizer with 3 large removable bins
Key Features:
- Marine Grade: Designed for harsh environments, ensuring durability and resistance to corrosion.
- Shrinkage Ratio 3:1: Provides a tight, secure seal around wires.
- Adhesive-lined Tubing: Enhances waterproof sealing and connection integrity.
- Ratcheting Crimping Tool: Ensures uniform and secure crimps with comfortable handles.
- Organized Storage: Removable bins prevent connector mix-ups and allow for easy access.

Image: A clear view of the haisstronica organizer case, featuring multiple compartments with removable bins containing various colored heat shrink butt connectors. The crimping tool is also visible in its dedicated slot.
Specifications
| Feature | Detail |
|---|---|
| Model | HX1349 |
| Brand | haisstronica |
| Connector Type | Butt Splice |
| Wire Gauge Range | 22-10 AWG (Red: 22-16 AWG, Blue: 16-14 AWG, Yellow: 12-10 AWG) |
| Material Type | Copper (Contact Material), Polyolefin (Insulation Material) |
| Shrinkage Ratio | 3:1 |
| Temperature Rating | 257°F (125°C) |
| Maximum Voltage | 12 Volts (DC) |
| Crimping Tool Length | 9 inches / 230mm |
| Crimping Tool Weight | 1.2 pounds / 550g |
| Waterproof Rating | IP67 |
| Item Dimensions (L x W x H) | 10.79"L x 2.2"W x 12.71"H (Organizer) |

Image: A detailed graphic displaying the specifications of the haisstronica crimping tool, including its AWG crimping range (22-16, 16-14, 12-10), weight (1.2 lbs / 550g), and length (9 in / 230mm).
Setup
- Unpack the Kit: Carefully remove all components from the organizer. Ensure the crimping tool and all connector bins are present.
- Familiarize with Connectors: Identify the different sizes and colors of butt connectors. Each color corresponds to a specific AWG (American Wire Gauge) range:
- Red: 22-16 AWG
- Blue: 16-14 AWG
- Yellow: 12-10 AWG
- Inspect the Crimping Tool: Check the crimping tool for any damage. Ensure the jaws are clean and operate smoothly. The tool features color-coded crimping slots matching the connector colors for easy identification.
- Prepare Wires: Strip approximately 1/4 to 3/8 inch (6-9mm) of insulation from the ends of the wires you intend to connect. Ensure the exposed wire strands are clean and untwisted.
Operating Instructions
Follow these steps to create a secure and waterproof electrical connection using your haisstronica kit:
Step 1: Crimping the Connector
- Select the Correct Connector: Choose a butt connector that matches the gauge of your wire. The connector's color corresponds to the crimping slot on the tool.
- Insert Wire into Connector: Insert one stripped end of the wire into one side of the butt connector until the insulation meets the connector's metal barrel.
- Position for Crimping: Place the connector with the inserted wire into the appropriate color-coded crimping slot on the crimping tool. Ensure the metal barrel of the connector is fully seated in the crimping jaws.
- Crimp the Connection: Squeeze the handles of the crimping tool firmly until the ratcheting mechanism releases. This ensures a complete and secure crimp.
- Repeat for Second Wire: Insert the second stripped wire end into the other side of the butt connector and repeat the crimping process. Gently tug on both wires to ensure they are securely fastened.

Image: A close-up view of the haisstronica crimping tool securely fastening a blue butt connector onto an electrical wire. The tool's handles are yellow and blue, and the connector is positioned in the appropriate crimping slot.
Step 2: Heat Shrinking for Waterproof Seal
- Apply Heat: Using a heat gun (not included), apply even heat to the butt connector. Start from one end and slowly move towards the other, rotating the connector to ensure uniform heat distribution.
- Observe Shrinkage: The heat shrink tubing will begin to shrink and the adhesive inside will melt and flow out from the ends of the connector, creating a waterproof seal. Continue applying heat until the tubing is tightly conformed to the wire insulation and the adhesive is visible.
- Allow to Cool: Once fully shrunk, allow the connector to cool completely before handling or placing it under stress. This ensures the adhesive sets properly.

Image: A heat gun is being used to shrink a blue butt connector onto two joined wires. The heat causes the connector's tubing to tighten and the internal adhesive to melt, forming a protective seal.
Demonstration Videos:
How to Use haisstronica Heat Shrink Butt Connectors
Video: This video demonstrates the complete process of using haisstronica heat shrink butt connectors, from stripping wires and crimping to applying heat for a waterproof seal. It shows the crimping tool in action and the heat shrinking process.
haisstronica Heat Shrink Butt Connectors with 9" Crimper Overview
Video: A detailed overview of the haisstronica heat shrink butt connectors set, including the 9-inch crimper. The video highlights the features of the crimping tool and the different types of connectors.
Maintenance
- Crimping Tool: Keep the crimping tool clean and free of debris. Periodically apply a light oil to the pivot points and jaws to ensure smooth operation. Store the tool in its designated slot within the organizer.
- Connectors: Store connectors in their respective bins within the organizer to prevent mixing and damage. Keep the organizer closed to protect connectors from moisture and dust.
- General Storage: Store the entire kit in a dry, cool place away from direct sunlight and extreme temperatures to preserve the integrity of the connectors and tool.
Troubleshooting
| Problem | Possible Cause | Solution |
|---|---|---|
| Loose Connection After Crimping | Incorrect connector size for wire gauge, insufficient crimping pressure, or improper wire stripping. | Ensure the correct connector size is used. Squeeze the crimping tool handles completely until the ratchet releases. Re-strip the wire if necessary to expose enough copper. |
| Heat Shrink Not Sealing Properly | Insufficient heat applied, uneven heat distribution, or incorrect heat gun temperature. | Apply heat evenly across the entire connector, rotating it for uniform shrinkage. Ensure the heat gun is set to an appropriate temperature (refer to heat gun manual). Continue heating until adhesive flows out. |
| Wire Pulls Out of Connector | Poor crimp, incorrect wire stripping length, or damaged connector. | Verify the crimp is secure and the wire is fully inserted into the connector barrel. Ensure proper wire stripping length (1/4 to 3/8 inch). Use a new connector if the current one appears damaged. |
Warranty & Support
For warranty information, technical support, or any inquiries regarding your haisstronica product, please visit the official haisstronica store on Amazon or contact customer service through the provided channels on the product packaging.
Online Support: Visit the haisstronica Store on Amazon