Introduction
This manual provides detailed instructions for the setup, operation, maintenance, and troubleshooting of your Rockville Titan Portable Array 1200W Battery Powered PA DJ Speaker System. Please read this guide thoroughly before using the product to ensure proper function and longevity.
Included Components
- 8” Powered subwoofer with built-in mixer amplifier and Battery
- (3) Column speakers – 1 column with 4 drivers, and 2 columns are empty and are used to elevate the loaded one
- Travel bag for the subwoofer and column speakers, with carry handles
- 5 Foot Power cable
- Owners manual
Important Safety Instructions
- Do not open the unit. There are no user-serviceable parts inside. Refer servicing to qualified personnel.
- Do not expose this unit to moisture or water.
- Ensure proper ventilation around the unit to prevent overheating.
- Use only the power cable provided.
- Position the unit on a stable, level surface to prevent tipping.
- Keep the unit away from heat sources and direct sunlight.
Setup Guide
Unpacking
Carefully remove all components from the packaging. Inspect for any signs of damage during transit. Retain the packaging for future transport or storage.
Assembly
The Rockville Titan Portable Array consists of a powered subwoofer and three column speakers. One column contains the drivers, while the other two are empty and serve as risers to achieve the desired height.
- Place the powered subwoofer on a stable, flat surface.
- Connect the column speakers to the top of the subwoofer. The column with drivers should be placed at the top, and the empty columns can be used in between to adjust the height. Ensure all connections are secure.

Figure 1: Assembly diagram of the speaker system.
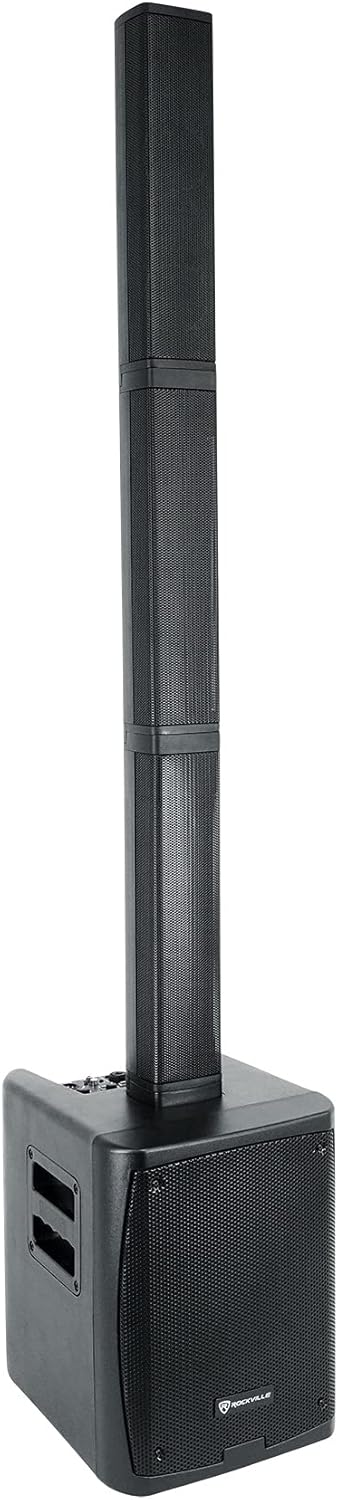
Figure 2: Fully assembled speaker system.

Figure 3: The three column speakers before assembly.

Figure 4: Top connection detail of a column speaker.

Figure 5: Bottom connection detail of a column speaker.
Powering On/Charging
Connect the provided 5-foot power cable to the AC IN port on the rear panel of the subwoofer and then to a standard electrical outlet. The unit features a built-in rechargeable battery. The battery status indicator on the rear panel will show the current charge level. Charge the unit fully before first use. A full charge typically takes 3 hours.

Figure 6: Rear panel with power and battery status.
Operating Instructions
Control Panel Overview
The mixer section is located on the rear panel of the subwoofer. Familiarize yourself with the controls before operation.

Figure 7: Mixer control panel.

Figure 8: Detailed view of the mixer controls.
Bluetooth Pairing
The unit features Bluetooth 5.0 for wireless audio streaming.
- Turn on the speaker system.
- Activate Bluetooth on your mobile device.
- Search for “TITAN PORTABLE ARRAY” in your device’s Bluetooth list and select it to pair.
- The BT STATUS indicator will confirm a successful connection.
TWS (True Wireless Stereo) Linking
Two Titan Portable Array systems can be linked wirelessly for stereo sound.
- Ensure both units are powered on and not connected to any Bluetooth device.
- On one unit, hold the BT/TWS button for 2 seconds to initiate TWS pairing. The BT STATUS light will flash.
- The units will automatically connect. Once connected, the BT STATUS light on both units will be solid.
- Now, connect your mobile device via Bluetooth to the primary unit (the one you initiated TWS pairing on).
Mixer Functions
- Channel 1: Selectable for microphone or line-level input. Features independent volume, treble, bass, and reverb controls.
- Channel 2: Selectable for microphone, line-level, or guitar input. Features independent volume, treble, bass, and reverb controls.
- Channel 3: Line-level input with RCA and 3.5mm jacks. Features independent volume control.
- Channel 4: Dedicated to Bluetooth playback. Features independent volume control.
- Master Output: A mixed output allows you to send the combined signal of all inputs to another powered speaker or amplifier.
Audio Input Connections
The system supports various audio input types:
- XLR (for microphones or line-level devices)
- 1/4 inch (for line/mic/guitar level devices)
- RCA (for line-level devices)
- 3.5mm (for line-level devices)
Maintenance
Cleaning
Wipe the unit with a soft, dry cloth. Do not use abrasive cleaners or solvents. Ensure the unit is powered off and unplugged before cleaning.
Battery Care
To prolong battery life, avoid fully discharging the battery frequently. Recharge the unit regularly, even if not in use, to maintain optimal battery health. Do not leave the unit plugged in constantly for extended periods after it is fully charged, as this can degrade battery performance over time.
Storage
When storing the unit for extended periods, ensure it is fully charged and stored in a cool, dry place. Use the provided travel bag for protection.
Troubleshooting
| Problem | Possible Cause | Solution |
|---|---|---|
| No power | Power cable not connected; Unit not switched on; Battery depleted | Check power cable connection; Ensure power switch is ON; Charge the battery |
| No sound output | Volume levels too low; Incorrect input selected; Faulty cable/device | Increase master and channel volumes; Verify correct input; Test with different cables/devices |
| Bluetooth not connecting | Device too far; Bluetooth not enabled; Incorrect pairing mode | Move device closer; Enable Bluetooth on device; Ensure unit is in pairing mode (flashing BT STATUS) |
| Distorted sound | Input signal too high; Volume too high; Faulty source | Reduce input gain/volume; Lower master volume; Test with a different audio source |
| TWS linking failure | Units too far apart; One unit already paired via Bluetooth | Ensure units are within range; Disconnect any active Bluetooth connections before TWS pairing |
Technical Specifications
| Feature | Specification |
|---|---|
| Mounting Type | Freestanding |
| Power Source | Battery Powered |
| Connector Type | USB |
| Material | Plastic, Metal, Neodymium magnet |
| Item Weight | 16.31 Kilograms (35.9 pounds) |
| Number of Channels | 3 |
| Audio Input | XLR, ¼ inch (line/mic/guitar level), RCA, 3.5mm |
| Recommended Uses | Travel, Outdoor |
| Product Dimensions (L x W x H) | 13.38 x 11.02 x 14.76 inches |
| Connectivity Technology | Bluetooth, RCA, USB, XLR |
| Color | Black |
| Compatible Devices | Smartphone |
Warranty Information
This product is covered by a manufacturer's warranty. Please refer to the warranty card included in your packaging or contact Rockville customer support for specific details regarding warranty coverage and terms.
Customer Support
For technical assistance, troubleshooting not covered in this manual, or warranty inquiries, please contact Rockville customer support. Contact information can typically be found on the manufacturer's website or on the product packaging.