Introduction
This instruction manual provides detailed guidance for the installation and operation of your ZZHOB 25PCS Pre-Wired Micro Blinking 0805 SMD LEDs. These LEDs are designed for various model building and DIY projects, offering a flashing multicolor light effect. Please read this manual thoroughly before use to ensure proper setup and functionality.
Package Contents
Verify that all items listed below are included in your package:
- 25 x Pre-Wired 0805 SMD Blinking LEDs
- 2 x CH2 Quick Connectors
- 1 x Battery Holder (case only, requires CR2030 button battery, not included)
- Resistors (quantity may vary, for optional use with higher voltage sources)

Specifications
| Model Number | L-0402 |
| LED Type | 0805 SMD LED |
| Light Mode | Flashing Multicolor (Auto fading & changing RGB) |
| Voltage | 3 Volts |
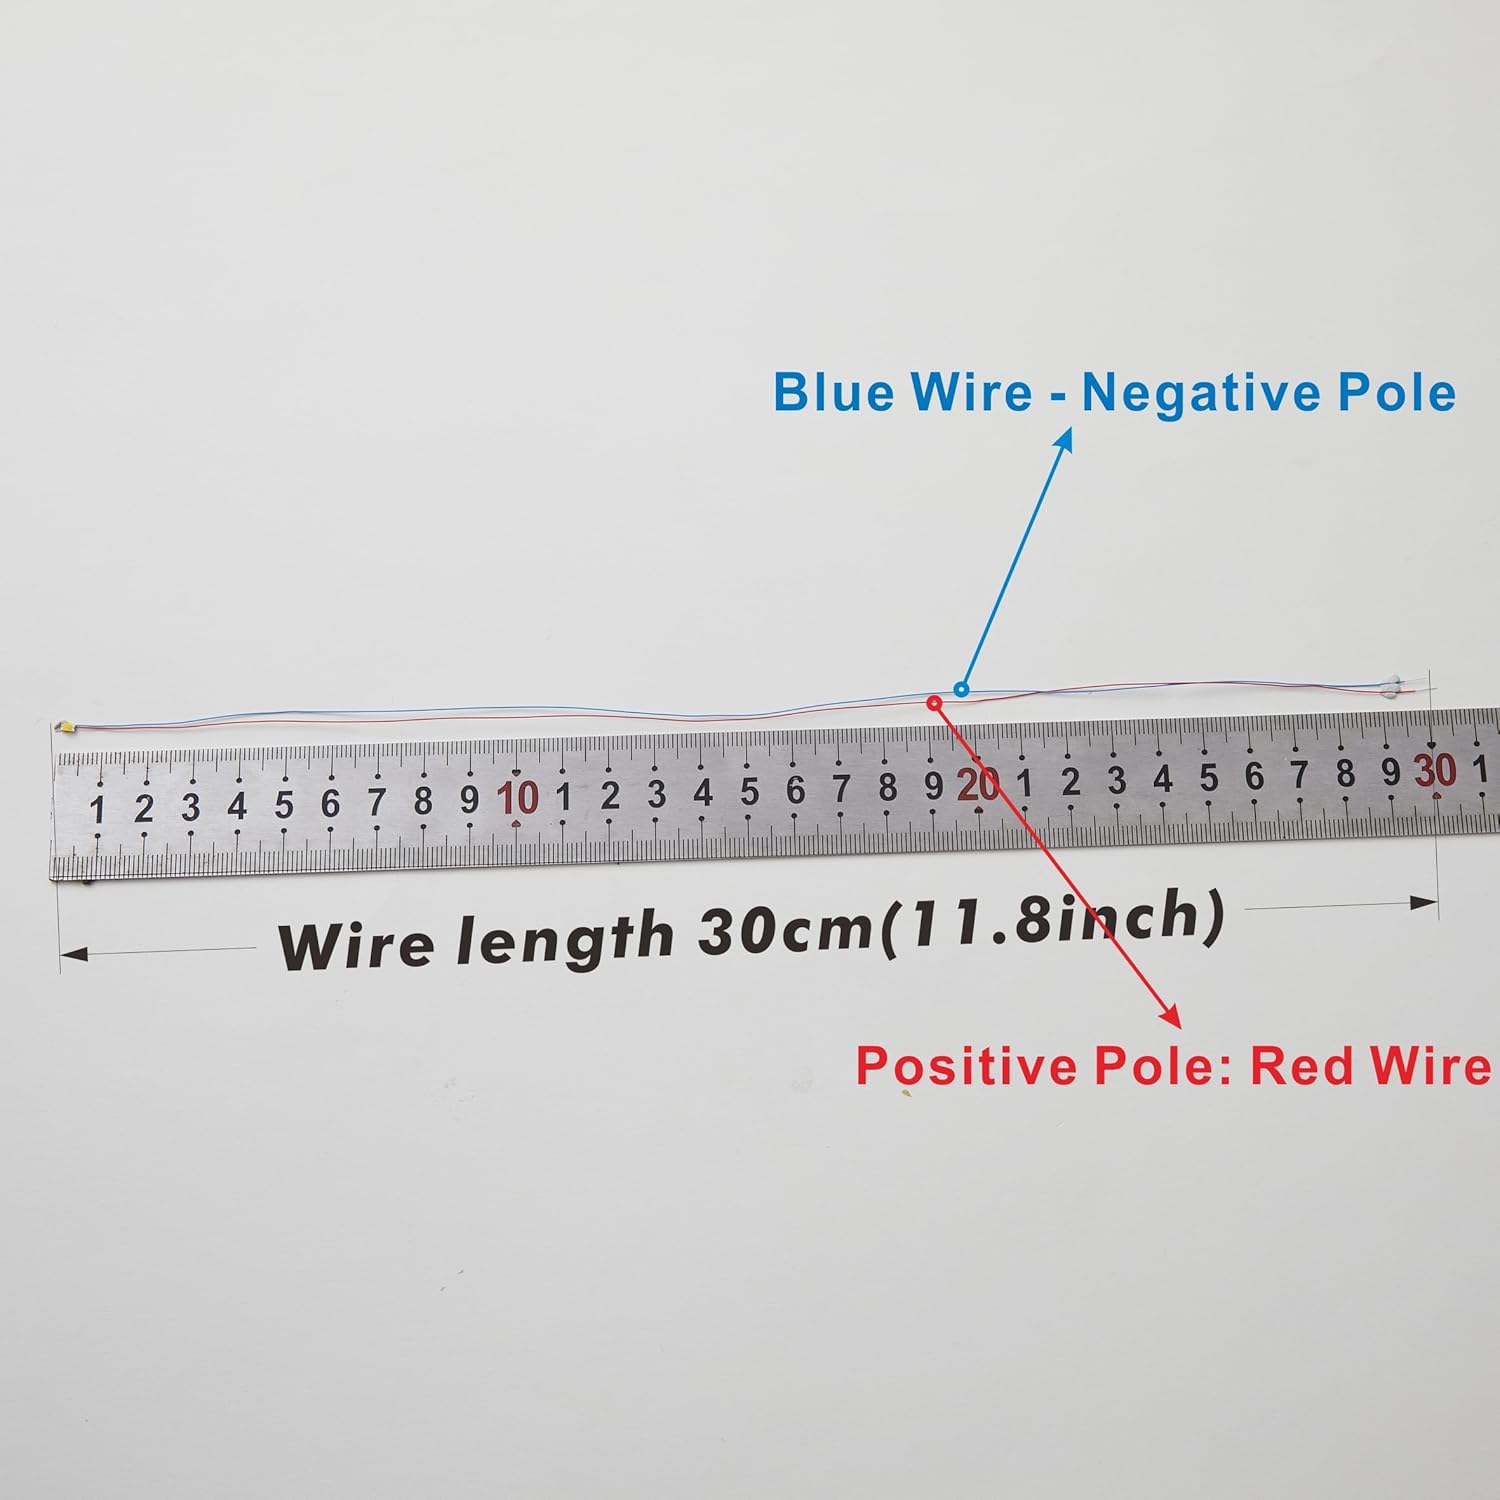
| Lead Wire Length | 11.8 inches (30 cm) |
| LED Dimensions | 0.08 × 0.05 × 0.003 inches (0805 size) |
| Power Source | Battery Powered (CR2030 button battery not included) |
| Material | Copper wire, Resin LED cover |

Setup and Installation
These pre-wired LEDs are designed for convenient installation, especially for beginners. Follow these steps for proper setup:
- Identify Polarity: Each LED has two wires. The red wire is the positive pole, and the blue wire is the negative pole. Correct polarity is essential for the LED to function.
- Prepare Power Source: The LEDs operate at 3 Volts. If using the included battery holder, insert a CR2030 button battery (not included) into the holder. Ensure the battery is inserted with the correct orientation.
- Connect LEDs using Quick Connectors:
- Open the lever on the CH2 quick connector.
- Insert the red wire of the LED into one terminal and the blue wire into the other terminal.
- Close the lever to secure the connection.
- Connect the wires from your 3V power source (e.g., the battery holder) to the remaining terminals of the quick connector, ensuring positive to positive and negative to negative.
- Optional Resistor Use: If you are connecting the LEDs to a power source higher than 3V (e.g., 3.5-13V DC), you will need to use the included resistors. The resistors help regulate the voltage and current to prevent damage to the LEDs. Consult a voltage divider calculator or an electronics guide to determine the appropriate resistor value for your specific voltage.
- Wire Length Adjustment: The lead wires are 11.8 inches (30 cm) long and can be cut to your desired length for specific applications.
- Placement: The LEDs are small and protected by a resin cover, making them suitable for tight spaces. The wires are bendable, allowing for easy shaping and positioning within your model or project.


Operating Instructions
Once properly connected to a 3V power source, the LEDs will automatically begin their blinking multicolor sequence.
- Flashing Multicolor Light: These LEDs are auto-fading and changing RGB LEDs. Each LED will slowly and individually transition through more than 10 colors, creating a dynamic blinking effect.
- Synchronization: When multiple LEDs are connected, they will fade and change colors independently. Over time, their blinking patterns will desynchronize, resulting in a random and varied display of colors.
- Fading Mode: The specific fading and blinking mode is pre-programmed and cannot be changed or adjusted by the user.

Maintenance
The ZZHOB Pre-Wired Micro Blinking LEDs require minimal maintenance:
- Cleaning: If necessary, gently wipe the LED and wires with a dry, soft cloth. Avoid using liquids or abrasive cleaners.
- Storage: Store the LEDs in a dry, cool place away from direct sunlight and extreme temperatures when not in use.
- Wire Handling: While the wires are bendable, avoid excessive bending or sharp creases, which could damage the internal conductors.
Troubleshooting
| Problem | Possible Cause | Solution |
| LED does not light up. | Incorrect polarity. No power. Dead battery. Loose connection. | Check that the red wire is connected to positive and blue to negative. Ensure the power source is active and the battery (if used) is charged and correctly inserted. Verify all connections are secure. |
| LED is dim or flickers. | Low battery power. Insufficient voltage. | Replace the battery or ensure the power supply provides a stable 3V. If using a higher voltage, confirm the correct resistor is in place. |
| LED is too bright or burns out quickly. | Excessive voltage. No resistor used with higher voltage. | Ensure the power source does not exceed 3V without a current-limiting resistor. If using a power source above 3V, install the appropriate resistor in series with the LED. |
| Wires detach from LED. | Rough handling. | The wires are delicate. Handle with care. If a wire detaches, the LED may be irreparable. |
Warranty and Support
No specific warranty information is provided for this product. For any questions or support, please refer to the seller or retailer from whom the product was purchased.