1. Introduction
This manual provides detailed instructions for the installation, operation, and maintenance of your XOMAX XM-2DN6914 car stereo. Please read this manual thoroughly before using the device to ensure proper functionality and safety.
2. Safety Information
- Ensure proper wiring to prevent short circuits or damage.
- Do not operate the device in a way that distracts you from driving.
- Consult a professional for installation if you are unsure.
- Keep the device away from moisture and extreme temperatures.
3. Package Contents
Verify that all items are present in the package:
- XOMAX XM-2DN6914 Car Stereo
- 2DIN Metal Mounting Frame
- Micro-SD Card with Navigation Software (Europe Maps)
- GPS Antenna
- Remote Control (battery not included)
- Wiring Harness for Steering Wheel Remote Control
- Assembly Material
- Mounting Instructions (English)
- User Manual (English, PDF available on XOMAX.de)

Image: The package contents of the XOMAX XM-2DN6914 car stereo, showing the main unit, remote control, various cables, GPS antenna, mounting frame, navigation SD card, and installation tools.
4. Product Overview
4.1 Front Panel Features
The front panel features a 6.9-inch capacitive touchscreen display, control buttons, USB port, and AUX-IN.

Image: Front view of the XOMAX XM-2DN6914 car stereo, highlighting the 6.9-inch touchscreen, physical control buttons on the left, and the USB port and MicroSD card slot on the right side of the unit.
4.2 Rear Connections
The rear panel provides various input and output connections for power, audio, video, and accessories.

Image: Rear view of the XOMAX XM-2DN6914 car stereo, detailing the various connection ports. These include the ISO connector, steering wheel remote control input, GPS antenna input, audio/video inputs and outputs, camera inputs, subwoofer output, and radio antenna input.
- ISO Connector for ISO-Connection Cable
- Connection for Steering Wheel Remote Control
- GPS Antenna Connection
- Audio Output (FR)
- Audio Output (FL)
- Front Camera Connection
- Audio Output (RR)
- Audio Output (RL)
- Subwoofer Connection
- Video Output V1
- Video Output V2
- Rear Camera Connection
- Audio Input (R)
- Video Input
- Audio Input (L)
- Radio Antenna Connection
4.3 Dimensions
The unit has standard 2DIN dimensions for installation.
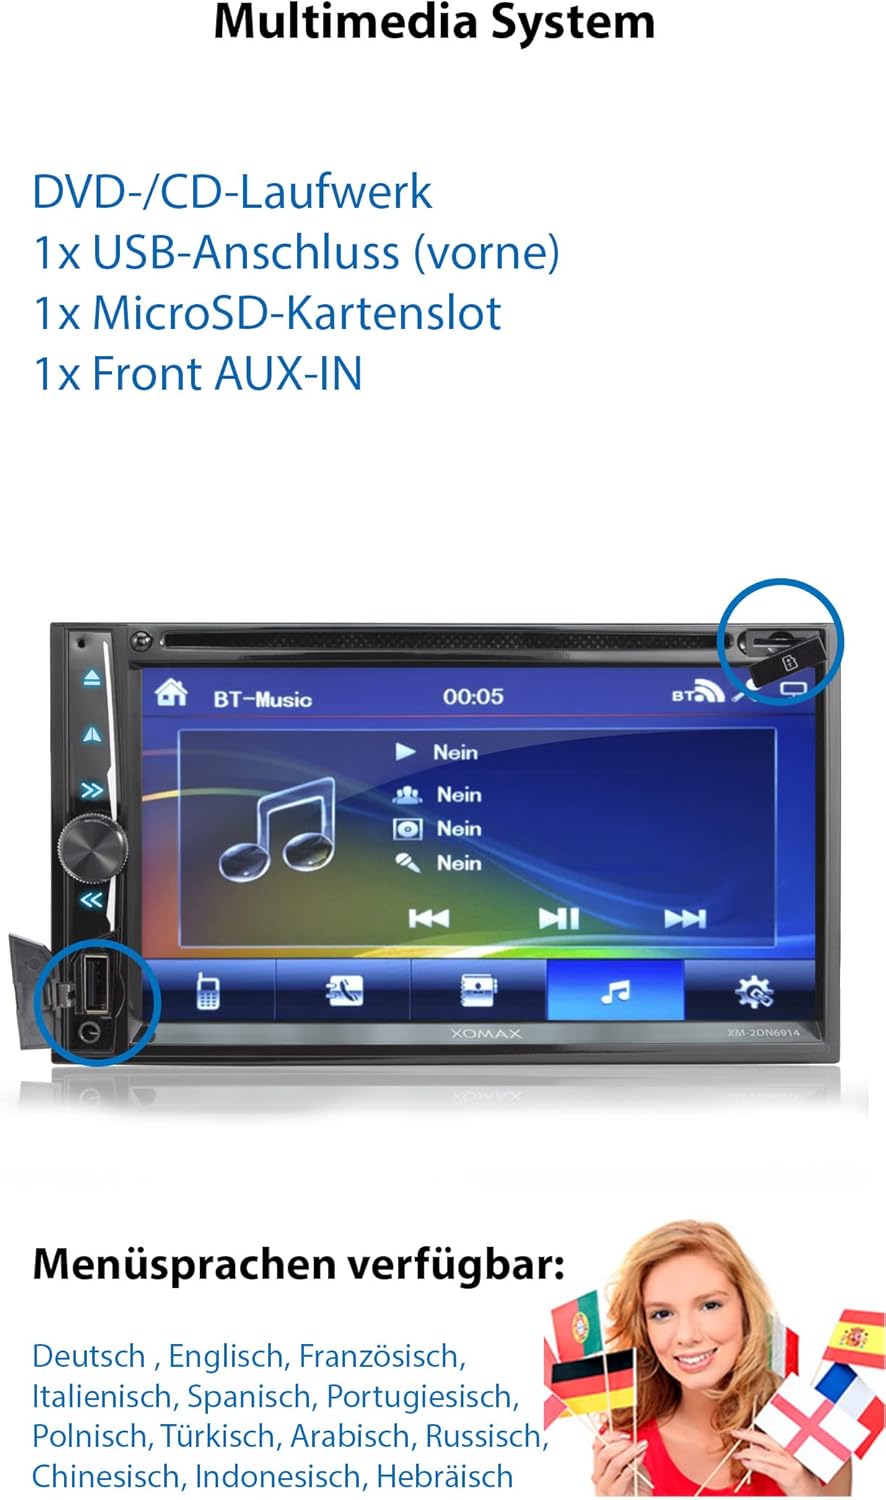
Image: Technical drawing showing the dimensions of the XOMAX XM-2DN6914 car stereo in millimeters, including measurements with and without the bezel for accurate installation.
- Width (without bezel): 178 mm
- Width (with bezel): 182 mm
- Height (without bezel): 100 mm
- Height (with bezel): 108 mm
- Depth: 160 mm
5. Installation
Proper installation is crucial for the performance and safety of your car stereo. If you are not confident in performing the installation yourself, please seek professional assistance.
5.1 Wiring Diagram
Refer to the wiring diagram provided with your vehicle and the stereo for correct connections. Ensure all connections are secure before powering on the unit.
5.2 Mounting
Use the included 2DIN metal mounting frame and assembly material to secure the unit in your vehicle's dashboard.
6. Initial Setup
6.1 Initial Power On
After installation, turn on your vehicle's ignition. The stereo should power on automatically. If not, press the power button on the unit.
6.2 Language Settings
Upon first use, you may be prompted to select a language. Navigate through the menu to select your preferred language. Supported languages include German, English, French, Italian, Spanish, Portuguese, Polish, Turkish, Arabic, Russian, Chinese, Indonesian, and Hebrew.

Image: A visual representation of the XOMAX car stereo's menu language selection, displaying flags and text for various supported languages such as German, English, French, Italian, Spanish, Portuguese, Polish, Turkish, Arabic, Russian, Chinese, Indonesian, and Hebrew.
6.3 Date and Time Settings
Access the system settings to adjust the date and time. This can often be synchronized with GPS signals once navigation is active.
7. Operating Instructions
7.1 Basic Operations
Power On/Off: Press the power button on the front panel.
Volume Control: Use the rotary knob or touchscreen controls to adjust the volume.
Menu Navigation: Use the touchscreen to navigate through menus and select functions.
7.2 Radio (FM)
Select the "Radio" function from the main menu. Use the scan or seek functions to find radio stations. You can save your favorite stations as presets.

Image: A screenshot of the XOMAX car stereo's radio interface, showing frequency display (e.g., FM 87.50 MHz) and controls for tuning, station presets, and sound adjustments.
7.3 Media Playback (DVD/CD/USB/SD)
Insert a DVD/CD into the disc slot, or a USB drive into the front USB port, or a MicroSD card into the MicroSD slot. The unit will automatically detect the media and display playback options. Supported formats include MPEG1, MPEG4, AVI, MP3, WMA, WAV, JPG, BMP.
Image: The XOMAX car stereo displaying the location of the USB port and MicroSD card slot, with an on-screen interface for media playback (BT-Music).
7.4 Bluetooth Functionality
Pairing: Go to the Bluetooth menu on the stereo. Enable Bluetooth on your smartphone and search for available devices. Select "XOMAX" (or similar name) from the list on your phone to pair. Enter the PIN if prompted (usually "0000").
Hands-free Calling: Once paired, you can make and receive calls directly through the stereo. Your phonebook can be imported.
Audio Streaming (A2DP): Play music from your smartphone wirelessly through the car stereo.

Image: The XOMAX car stereo screen showing the Bluetooth telephone interface with a dial pad, and a separate display illustrating Bluetooth music playback with album art and track information from a connected smartphone.
7.5 GPS Navigation
The unit features integrated GPS navigation with pre-installed European maps on a Micro-SD card. Insert the Micro-SD card into the designated slot. Select the "Navigation" function from the main menu to launch the GPS software. Follow the on-screen instructions to set your destination.
Image: The XOMAX car stereo displaying a GPS navigation map, showing a route on a street with an included GPS antenna icon, indicating active navigation. The map shows "Hauptstrasse Berlin" and "Leipziger Straße".
7.6 Mirrorlink (Android Only)
Connect your Android smartphone to the stereo via a USB cable. Activate the Mirrorlink function on the stereo and follow the prompts on your phone to duplicate its screen onto the stereo display. This allows you to control compatible apps from your phone directly on the stereo's touchscreen.
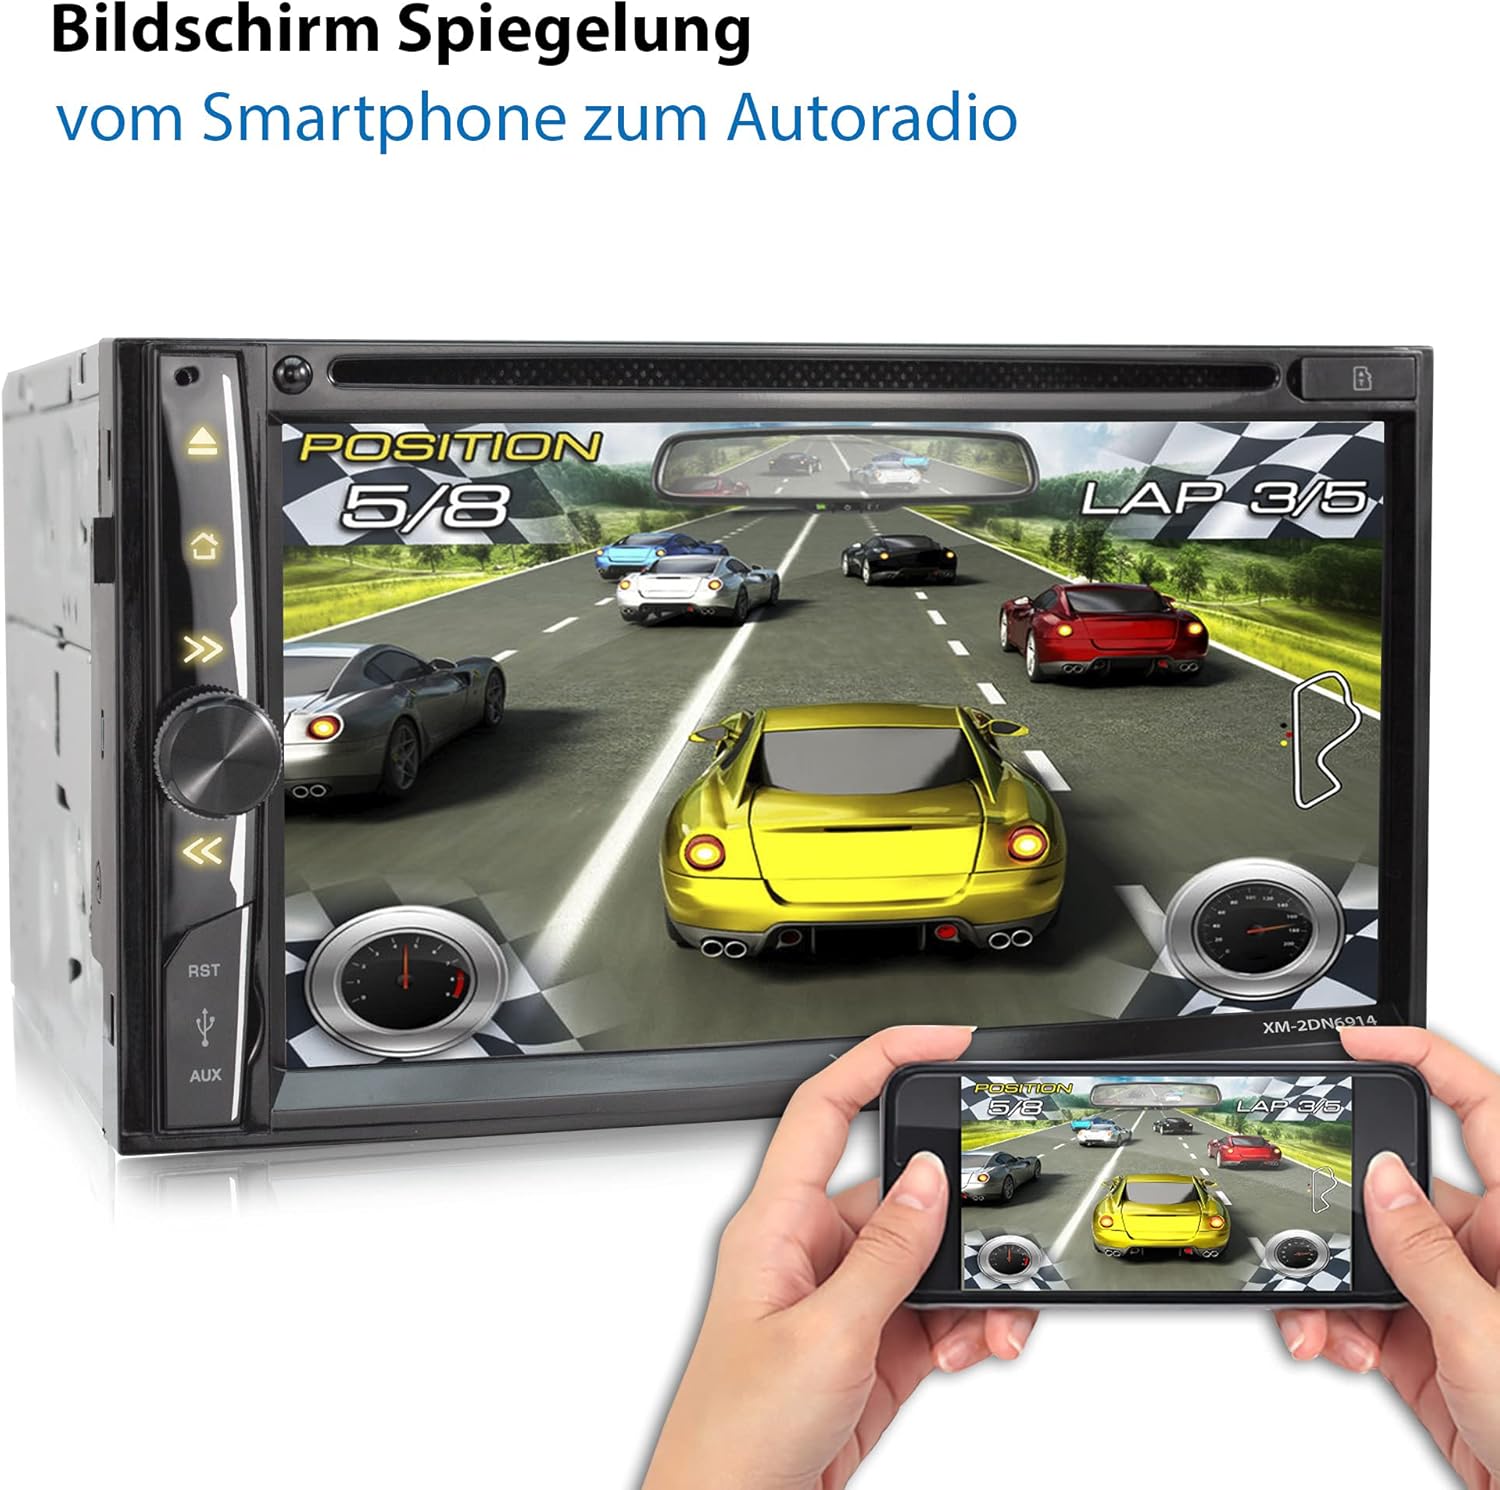
Image: The XOMAX car stereo screen mirroring a racing game from an Android smartphone, demonstrating the Mirrorlink feature where the phone's display content is shown on the car stereo's larger screen.
7.7 Camera Input (Front/Rear)
The unit supports connection for both front and rear cameras. When a camera is connected and activated (e.g., by shifting into reverse gear for the rear camera), the display will automatically switch to the camera view.

Image: The XOMAX car stereo displaying a rear camera view with parking guidelines, showing a car in the background, indicating the unit's compatibility with front and rear cameras.
7.8 Steering Wheel Control
If your vehicle supports steering wheel controls, connect the appropriate wiring harness (included) to integrate these functions with the stereo. This allows you to control basic stereo functions without taking your hands off the steering wheel.
Image: The XOMAX car stereo displaying an on-screen interface for steering wheel controls, with icons for volume, track skip, mode, and call functions, indicating support for integrated steering wheel remote control.
7.9 Display Settings (LED Colors)
You can customize the LED illumination color of the unit. Access the display settings menu to choose from 7 available colors: blue, red, yellow, lilac, green, white, and turquoise. There may also be an option for automatic color cycling.
Image: The XOMAX car stereo screen showing the display settings menu, specifically the options for background illumination and selecting from 7 LED colors (blue, red, yellow, lilac, green, white, turquoise), or an automatic cycle.
8. Maintenance
Cleaning: Use a soft, dry cloth to clean the screen and unit. Do not use abrasive cleaners or solvents.
Software Updates: Check the XOMAX website periodically for any available software updates for your model.
9. Troubleshooting
No Power: Check all power connections and fuses. Ensure the ignition is on.
No Sound: Verify speaker connections. Check volume levels and audio settings.
GPS Not Working: Ensure the GPS antenna is properly connected and has a clear view of the sky. Check if the navigation SD card is correctly inserted.
Bluetooth Pairing Issues: Ensure Bluetooth is enabled on both the stereo and your smartphone. Try restarting both devices.
Touchscreen Unresponsive: Try restarting the unit. If the issue persists, contact support.
10. Specifications
| Feature | Specification |
|---|---|
| Model Number | XM-2DN6914 |
| Display Size | 6.9 inches (17.5 cm) |
| Display Type | Capacitive Touchscreen, 16:9 HD (800 x 480 pixels) |
| Connectivity | Bluetooth, USB, MicroSD |
| Media Support | DVD, CD, USB (up to 128GB), MicroSD (up to 128GB) |
| Supported File Formats | MPEG1, MPEG4, AVI, MP3, WMA, WAV, JPG, BMP |
| GPS Navigation | Integrated, with Europe maps on Micro-SD card |
| Bluetooth Features | Hands-free calling, Phonebook import, A2DP audio streaming |
| Mirrorlink | Android smartphone via USB cable |
| Output Power | 4x60 Watts (MOSFET) = 240 Watts max |
| LED Illumination Colors | Blue, Red, Yellow, Lilac, Green, White, Turquoise (7 colors) |
| Camera Inputs | Front and Rear camera support |
| Dimensions (Standard) | 2DIN |
11. Warranty and Support
For detailed warranty information, please refer to the documentation included with your purchase or visit the official XOMAX website.
A comprehensive user manual in PDF format is available for download on XOMAX.de.
For technical support or service inquiries, please contact XOMAX customer service.