1. Introduction
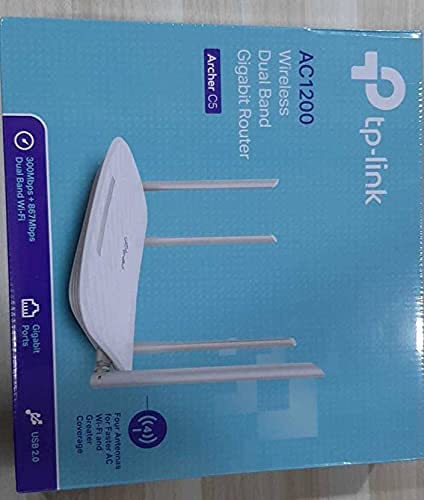
This manual provides comprehensive instructions for the installation, operation, and maintenance of your TP-Link Archer C5 AC1200 Dual-Band Gigabit Wireless Wi-Fi Router. The Archer C5 is designed to provide seamless Wi-Fi coverage with its dual-band capabilities, offering speeds up to 750Mbps on the 5GHz band and up to 300Mbps on the 2.4GHz band. It features four external antennas for stable wireless connections and full Gigabit ports for high-speed wired connections.
Please read this manual carefully before using the device to ensure proper setup and optimal performance.
2. Package Contents
Verify that your package contains the following items:
- TP-Link Archer C5 Router
- Power Adapter (DC Adapter)
- Ethernet Cable (RJ45)
- Quick Installation Guide (may be a separate document)
3. Product Overview
3.1 Front Panel

The front panel features LED indicators that provide information about the router's status, including power, internet connectivity, Wi-Fi status for both 2.4GHz and 5GHz bands, and LAN port activity.
3.2 Rear Panel

The rear panel includes all physical connection ports and buttons:
- Power Input: Connects to the provided power adapter.
- Power Button: Turns the router on or off.
- USB Port: For connecting USB storage devices to share files across the network.
- WAN Port (Blue): Connects to your modem for internet access. This is a Gigabit port.
- LAN Ports (Yellow): Four Gigabit Ethernet ports for connecting wired devices such as computers, gaming consoles, or smart TVs.
- Reset Button: Used to restore the router to factory default settings.
- WPS/Wi-Fi Button: Press to enable WPS (Wi-Fi Protected Setup) for easy connection, or press and hold to turn Wi-Fi on/off.
4. Setup Guide
Follow these steps to set up your TP-Link Archer C5 router:
- Power Off Your Modem: Disconnect the power from your existing modem.
- Connect the Router:
- Connect one end of the provided Ethernet cable to the WAN port (blue) on your Archer C5 router.
- Connect the other end of the Ethernet cable to your modem's Ethernet port.
- Power On Devices:
- Connect the power adapter to the router's power input and plug it into a power outlet.
- Power on your modem, then wait for it to fully boot up (usually indicated by stable LED lights).
- Power on the Archer C5 router. Wait for the LED indicators to stabilize, particularly the Internet LED.
- Connect to the Router's Wi-Fi Network:
- Locate the Wi-Fi network name (SSID) and password printed on the label at the bottom of your router.
- On your computer or mobile device, select the router's Wi-Fi network and enter the password to connect.
- Access the Web Management Interface:
- Open a web browser (e.g., Chrome, Firefox) and type
http://tplinkwifi.netor192.168.0.1into the address bar. - Log in using the default username and password (usually
adminfor both, or as specified on the router label). - Follow the Quick Setup wizard to configure your internet connection and personalize your Wi-Fi network name and password.
- Open a web browser (e.g., Chrome, Firefox) and type
- Optional: Use the TP-Link Tether App: Download the TP-Link Tether app from your mobile device's app store for easy setup and management.
5. Operating Instructions
Once your router is set up, you can manage its functions through the web management interface or the TP-Link Tether app.
5.1 Dual-Band Wi-Fi
The Archer C5 operates on two Wi-Fi bands:
- 2.4 GHz Band: Provides wider coverage and better penetration through walls, suitable for general internet use and older devices.
- 5 GHz Band: Offers faster speeds and less interference, ideal for bandwidth-intensive activities like online gaming and HD video streaming.
You can configure separate SSIDs (network names) and passwords for each band or use a single SSID with Band Steering enabled (if available in your firmware) to allow the router to automatically assign devices to the best band.
5.2 Network Management
Through the web interface, you can:
- Change Wi-Fi settings (SSID, password, security type).
- Set up a Guest Network for visitors.
- Configure parental controls to manage internet access for children.
- Prioritize devices or applications using Quality of Service (QoS).
- Manage connected devices.
- Access advanced settings like port forwarding, VPN server, and dynamic DNS.
6. Maintenance
Regular maintenance helps ensure the longevity and optimal performance of your router.
- Firmware Updates: Periodically check the TP-Link official website for firmware updates. Updating firmware can improve performance, add new features, and fix security vulnerabilities.
- Physical Placement: Place the router in a central location, away from obstructions and devices that emit electromagnetic interference (e.g., microwaves, cordless phones). Elevating the router can also improve signal distribution.
- Cleaning: Keep the router clean and free from dust. Ensure ventilation holes are not blocked to prevent overheating.
- Rebooting: If you experience slow speeds or connectivity issues, try rebooting the router by unplugging its power adapter for 10 seconds and then plugging it back in.
7. Troubleshooting
This section addresses common issues you might encounter with your Archer C5 router.
7.1 No Internet Access
- Check Cable Connections: Ensure the Ethernet cable from your modem is securely connected to the router's blue WAN port.
- Modem Status: Verify that your modem is working correctly and has an active internet connection.
- Router LEDs: Check the Internet LED on the router. If it's off or red, there might be an issue with your internet service provider (ISP) or modem connection.
- Reboot Devices: Power cycle your modem and then your router.
- Clone MAC Address: Some ISPs require MAC address cloning. Access the router's web interface and check WAN settings for this option.
7.2 Wi-Fi Signal Drops or is Weak
- Router Placement: Move the router to a central location, away from obstacles and interference sources.
- Antenna Orientation: Adjust the four external antennas for optimal signal reception.
- Channel Interference: In the router's web interface, try changing the Wi-Fi channel for both 2.4GHz and 5GHz bands to a less congested one.
- Firmware Update: Ensure your router's firmware is up to date.
7.3 Forgot Router Login Password
If you forget the password for the web management interface, you will need to reset the router to its factory default settings. Locate the Reset button on the rear panel, press and hold it for about 10 seconds until the LEDs flash, then release. The router will reboot with default settings (usually admin for username and password).
8. Specifications
| Feature | Detail |
|---|---|
| Brand | TP-Link |
| Model Name | Archer C5 |
| Wireless Standard | IEEE 802.11ac/n/a 5 GHz, IEEE 802.11n/b/g 2.4 GHz |
| Wi-Fi Speed | AC1200 (867 Mbps on 5 GHz, 300 Mbps on 2.4 GHz) |
| Frequency Band Class | Dual-Band (2.4 GHz and 5 GHz) |
| Ethernet Ports | 1x Gigabit WAN Port, 4x Gigabit LAN Ports |
| USB Port | 1x USB 2.0 Port |
| Antennas | 4x External Antennas |
| Security Protocol | WPA2-PSK |
| Operating System | RouterOS (as per product data, typically TP-Link custom firmware) |
| Special Feature | Remote Access |
| Item Weight | 710 g |
| Included Components | Router, DC Adapter, RJ45 Ethernet Cable |
9. Warranty and Support
9.1 Warranty Information
The TP-Link Archer C5 router typically comes with a 1 Year Warranty. Please refer to the warranty card included in your product packaging or visit the official TP-Link website for detailed warranty terms and conditions specific to your region.
9.2 Technical Support
For technical assistance, firmware updates, or further information, please visit the official TP-Link support website. You can usually find FAQs, troubleshooting guides, and contact information for customer support there.
TP-Link Official Website: www.tp-link.com


