1. Introduction
This manual provides essential instructions for the safe and efficient operation, setup, and maintenance of your Creality CR-10 Smart 3D Printer. The CR-10 Smart is designed for ease of use, featuring an auto-leveling system, a large build volume, and WiFi connectivity for convenient printing.

Image: The Creality CR-10 Smart 3D Printer, showcasing its substantial build volume of 300mm x 300mm x 400mm.
2. Safety Instructions
- Always operate the printer in a well-ventilated area.
- Keep hands clear of moving parts during operation.
- Do not touch the hot nozzle or heated bed during or immediately after printing. Allow components to cool.
- Ensure the power supply is correctly connected and grounded.
- Keep children and pets away from the printer during operation.
- Use only recommended filament types and follow their specific temperature guidelines.
3. Product Overview
The Creality CR-10 Smart 3D Printer integrates several advanced features for an enhanced printing experience:
- 4.3-inch Color Touch Screen: Provides an intuitive user interface for easy control and monitoring.
- Dual Z-axis Lead Screws: Enhances stability and precision during vertical movement.
- Support Strut Bars: Further reinforces the printer's frame for reduced vibration and improved print quality.
- Redesigned Extruder: Optimized for reliable filament feeding.
- Carborundum Glass Bed: Offers excellent adhesion and easy removal of prints.
- Filament Run-out Detection: Automatically pauses printing when filament runs out.
- LED Lights: Illuminates the print area for better visibility.

Image: Detailed view of the hotend and extruder assembly, highlighting the robust design.

Image: The 4.3-inch color touch screen displaying the user interface for printer control.
4. Setup
The CR-10 Smart features a modular design for quick and easy assembly.
4.1 Unpacking and Component Check
Carefully remove all components from the packaging. Verify that all parts listed in the packing list are present and undamaged. Keep the packaging for future transport or storage.
4.2 Assembly Steps
- Base and Gantry Assembly: Attach the gantry frame to the printer base using the provided screws. Ensure all connections are secure.
- Support Rods Installation: Install the two support strut bars to enhance Z-axis stability.
- Cable Connections: Connect all necessary cables, including the power cable, motor cables, and endstop cables, according to the labels.
- Filament Holder: Mount the filament spool holder onto the designated position.

Image: An exploded diagram illustrating the modular components of the CR-10 Smart for simplified assembly.
4.3 Power Connection
Connect the power cable to the printer and a suitable power outlet. Ensure the voltage switch on the power supply unit (if present) matches your local power grid voltage (e.g., 115V or 230V).
5. Operating Instructions
5.1 Auto Bed Leveling
The CR-10 Smart features an automatic bed leveling system (Auto Bed Leveling 2.0) to ensure optimal first layer adhesion. Before your first print, or if you notice adhesion issues, perform the auto-leveling procedure:
- Turn on the printer.
- Navigate to the 'Leveling' menu on the touch screen.
- Select 'Auto Level' and follow the on-screen prompts. The printer will automatically probe multiple points on the print bed.
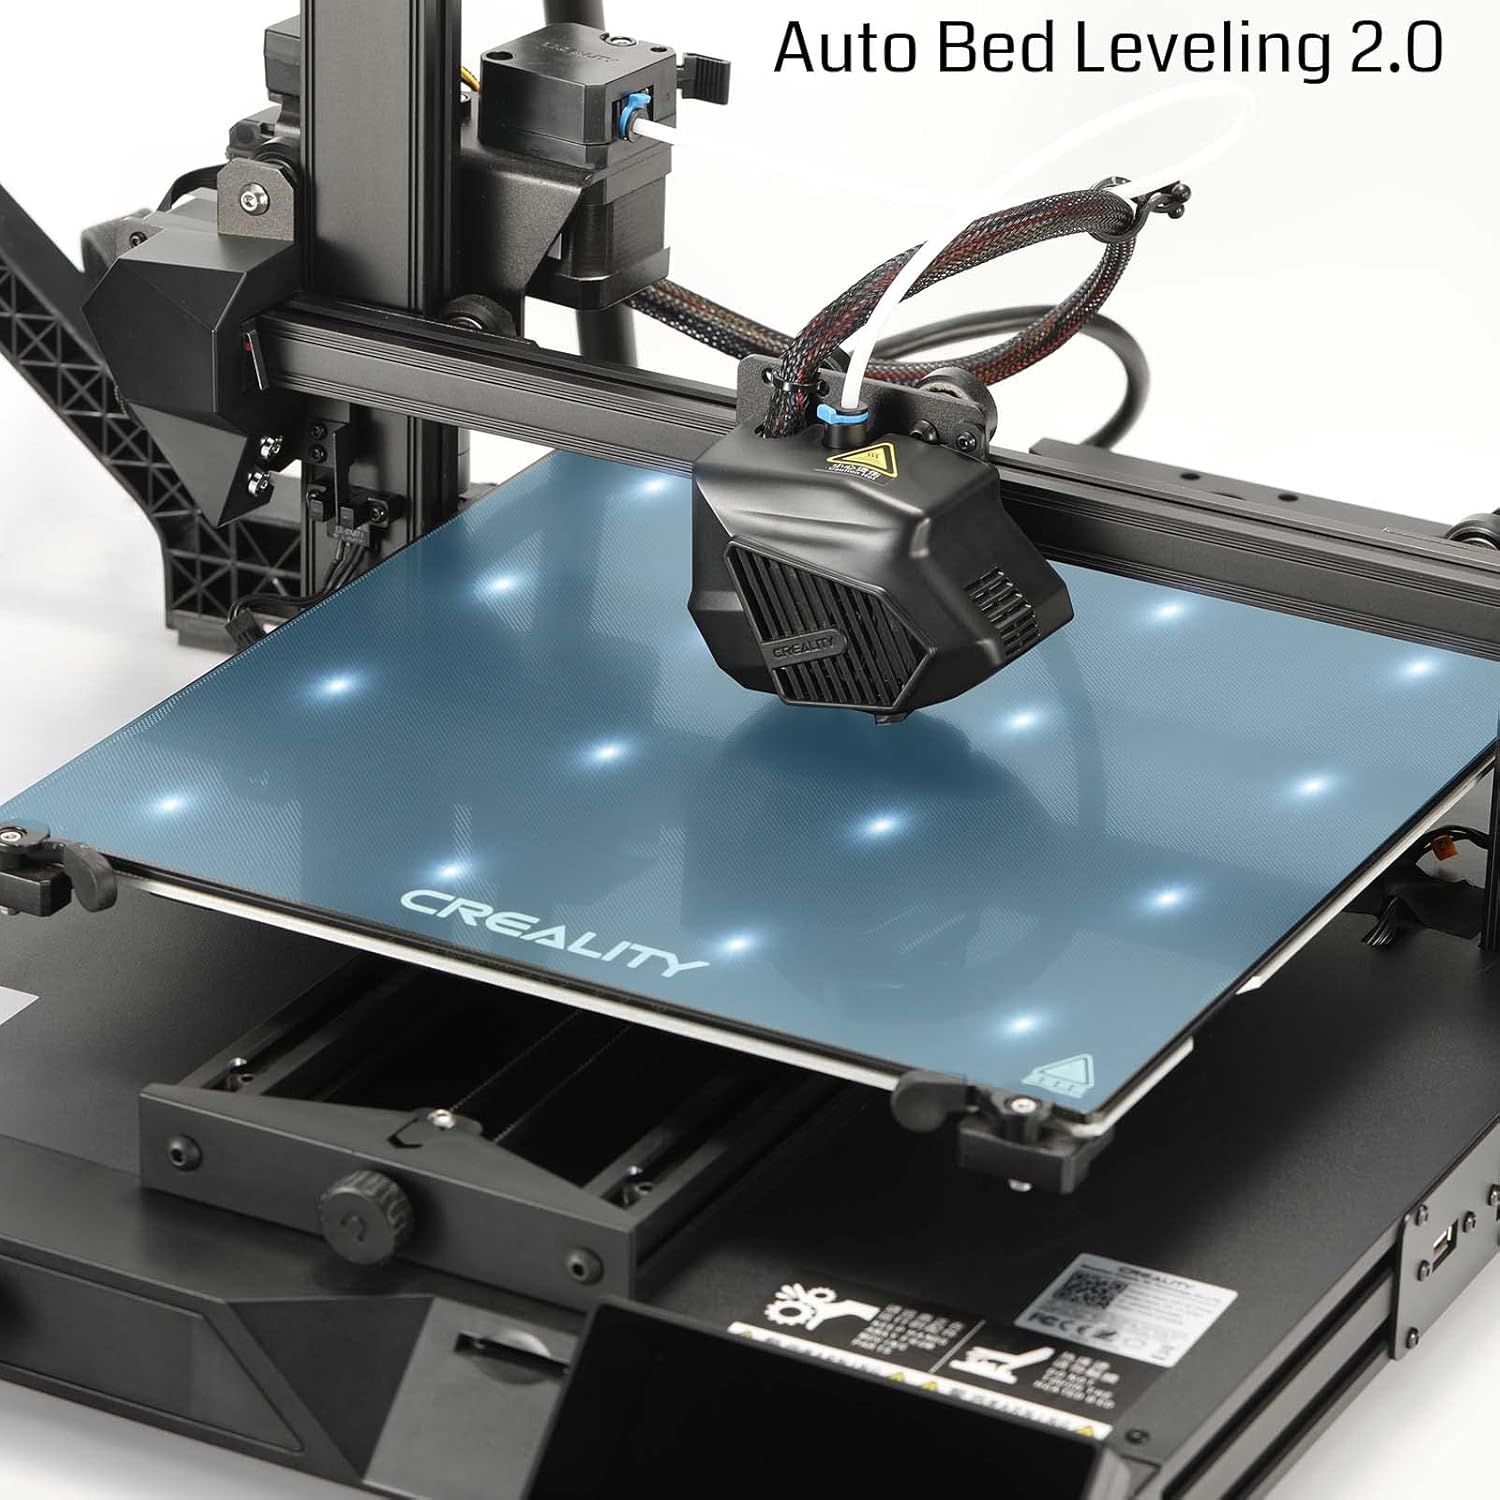
Image: The printer's nozzle probing the print bed during the automatic bed leveling process.
5.2 Loading Filament
- Place the filament spool onto the filament holder.
- Preheat the nozzle to the recommended temperature for your filament type (e.g., 200°C for PLA).
- Insert the filament into the extruder's input hole and push it until it reaches the hotend.
- Use the 'Extrude' function on the touch screen to feed the filament through the nozzle until molten plastic emerges smoothly.
5.3 Printing via WiFi and Cloud
The CR-10 Smart includes a built-in WiFi module, allowing for remote control and printing through the Creality Cloud platform.
- Ensure your printer is connected to your local WiFi network via the 'Settings' menu.
- Download and install the Creality Cloud app on your smartphone or access the web platform.
- Register an account and add your CR-10 Smart printer to your device list.
- You can now monitor print progress, control printer functions, and send print files remotely.
5.4 Starting a Print
- Prepare your 3D model using slicing software (e.g., Cura, PrusaSlicer) and save it as a G-code file.
- Transfer the G-code file to the printer via SD card, USB, or Creality Cloud.
- On the touch screen, navigate to 'File Selection'.
- Select your desired G-code file and confirm to start printing.
6. Maintenance
Regular maintenance ensures optimal performance and longevity of your 3D printer.
6.1 Cleaning the Print Bed
After each print, allow the print bed to cool down. Remove any residual filament or debris using a scraper. For stubborn residue, clean the Carborundum glass bed with isopropyl alcohol.
6.2 Nozzle Maintenance
- Nozzle Clogs: If the nozzle is clogged, preheat it to printing temperature and use a thin needle or cleaning filament to clear the obstruction.
- Nozzle Replacement: If clogs persist or the nozzle is damaged, replace it with a new one. Ensure the hotend is heated during replacement to prevent damage.
6.3 Lubrication of Moving Parts
Periodically apply a small amount of lithium grease or similar lubricant to the Z-axis lead screws and smooth rods to ensure smooth movement and reduce wear.
7. Troubleshooting
This section addresses common issues you might encounter with your CR-10 Smart 3D Printer.
| Problem | Possible Cause | Solution |
|---|---|---|
| First layer not sticking | Bed not level, incorrect Z-offset, dirty print surface, incorrect bed temperature. | Perform auto bed leveling. Adjust Z-offset. Clean the print bed with isopropyl alcohol. Verify bed temperature settings. |
| Filament not extruding | Clogged nozzle, tangled filament, extruder gear slip, incorrect temperature. | Clear nozzle clog. Untangle filament. Check extruder tension. Verify nozzle temperature. |
| Poor print quality (layer shifts, stringing) | Loose belts, unstable frame, incorrect retraction settings, excessive temperature. | Check and tighten belts. Ensure printer is on a stable surface. Adjust retraction settings in slicer. Optimize print temperatures. |
| WiFi connectivity issues | Incorrect network settings, weak signal, firewall restrictions. | Verify WiFi password and network name. Move printer closer to router. Check router settings for device access. |
| Filament run-out sensor not working | Sensor dirty or faulty, incorrect firmware setting. | Clean the sensor. Check firmware settings for sensor activation. Contact support if faulty. |
8. Specifications
Key technical specifications for the Creality CR-10 Smart 3D Printer:
| Feature | Detail |
|---|---|
| Model Number | CR-10 Smart |
| Build Volume | 300mm × 300mm × 400mm (11.81in × 11.81in × 15.74in) |
| Auto Leveling | Yes (Auto Bed Leveling 2.0) |
| Connectivity | WiFi, SD Card, USB |
| Display | 4.3-inch Color Touch Screen |
| Frame Structure | Aerospace Aluminium Alloys, Dual Z-axis lead screws, Dual Support Strut Bars |
| Print Bed | Carborundum Glass Bed |
| Filament Detection | Filament Run-out Detection |
| Item Weight | 9.5 Kilograms (20.9 pounds) |
| Package Dimensions | 25.8 x 24 x 11.2 inches |
| Material | Acrylonitrile Butadiene Styrene (ABS), Polylactic Acid (PLA) |
| Color | Black |
9. Warranty and Support
9.1 Warranty Information
Your Creality CR-10 Smart 3D Printer is covered by a manufacturer's warranty against defects in materials and workmanship. Please refer to the warranty card included with your product for specific terms, conditions, and duration. Keep your proof of purchase for warranty claims.
9.2 Technical Support
For technical assistance, troubleshooting beyond this manual, or spare parts inquiries, please contact SainSmart customer support. You can typically find contact information on the manufacturer's official website or through your purchase platform.
Online Resources:
- Visit the official Creality website for firmware updates, FAQs, and community forums.
- Explore the SainSmart Store on Amazon for additional products and support.


