Introduction
Thank you for choosing GETINLIGHT 12-inch Plug-in LED Under Counter Lights. This manual provides detailed instructions for the safe and efficient installation, operation, and maintenance of your new lighting system. These slim, linkable LED light bars are designed to provide bright, adjustable illumination for various indoor spaces, such as kitchens, workshops, or shelves.
Key features include:
- Slim Design: 12" length x 0.82" width x 0.27" height, ideal for limited spaces.
- Durable Construction: Brushed nickel finish with extruded aluminum and polycarbonate lens.
- Efficient Lighting: Built-in 4-watt LED module (12 watts total for a 3-pack), producing 660 lumens with a Day Light 5000K color temperature and 90 CRI.
- Easy Installation: Plug-and-play design with options for clip-with-screws or double-sided tape mounting.
- Dimmable: Includes an in-line slide dimmer for adjustable brightness.
- Safety Certified: ETL listed for safe use.
Package Contents
Please ensure all components are present before beginning installation. The package typically includes:
- LED Light Bars (Quantity varies by pack size, e.g., 3 for this model)
- Power Adapter
- In-line Slide Dimmer Switch
- Linking Cords (for connecting multiple light bars)
- End-to-End Connectors (for direct connection of light bars)
- Mounting Clips with Screws
- Double-Sided Adhesive Tapes
- Cable Management Clips
- User Manual
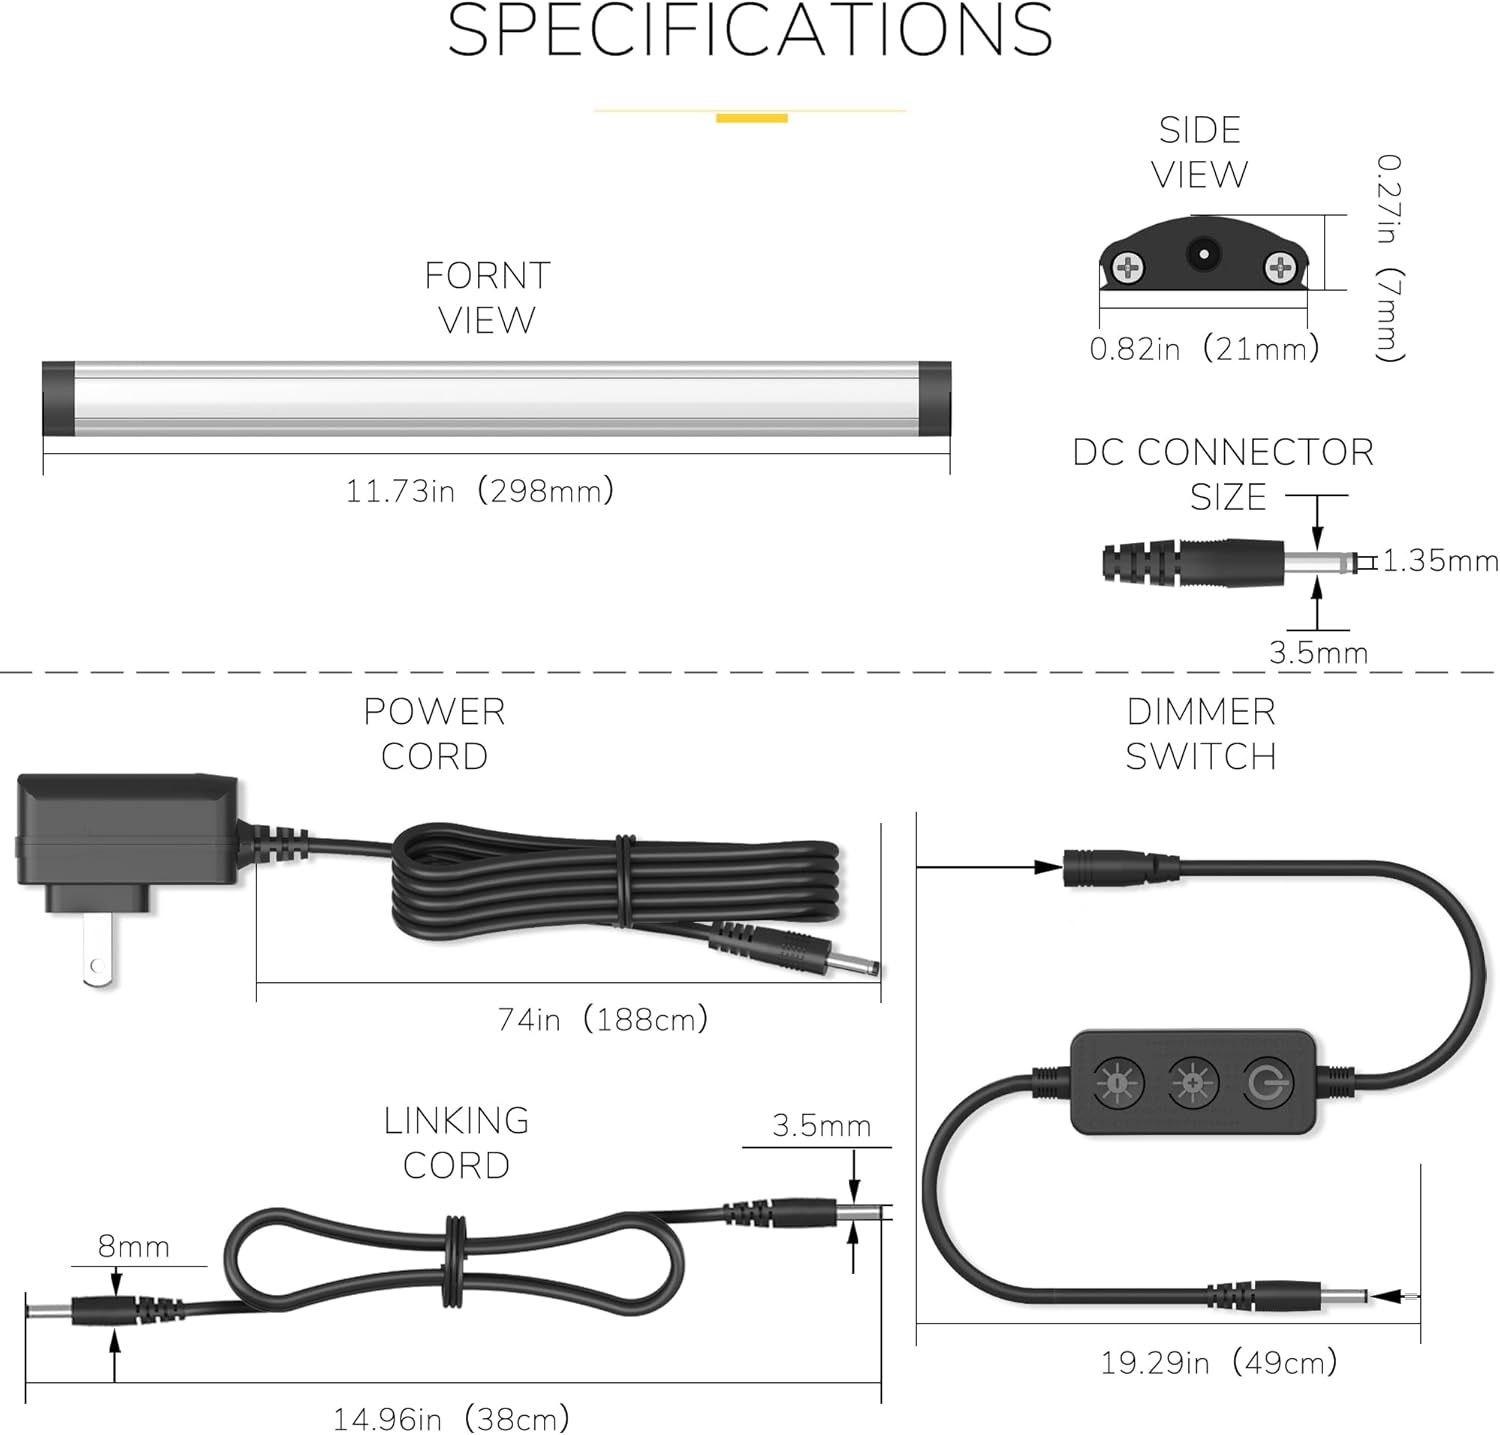
Figure 1: Package Contents Diagram
Specifications
| Brand | GETINLIGHT |
| Model Name | under cabinet light kit |
| Part Number | IN-0110-23-SN-5K |
| Color Temperature | Cool White 5000K |
| Brightness | 660 Lumens (per 3-pack) |
| Wattage | 12 Watts (per 3-pack) |
| Dimensions (each bar) | 11.73"L x 0.82"W x 0.27"H |
| Material | Aluminum, Plastic (Polycarbonate lens) |
| Power Source | Corded Electric (12 Volts) |
| Special Features | Dimmable, Instant On |
| Control Method | Push Button (on dimmer) |
| Installation Type | Plug In, Under Cabinet Mount |
| Safety Certification | ETL Listed |
Setup and Installation
Before installation, plan the layout of your light bars to ensure optimal coverage and accessibility for the dimmer switch. Ensure the power is off at the outlet before beginning.
1. Connecting Light Bars
Light bars can be connected in two ways:
- End-to-End Connection: Use the small, black end-to-end connectors to directly link light bars for a seamless appearance.
- Linking Cord Connection: Use the provided linking cords to connect light bars that are spaced apart or around corners.

Figure 2: Light Bar Connection Options
2. Mounting the Light Bars
Choose one of the following methods to mount your light bars:
- Screw Installation (More Solid Choice):
- Position the mounting clips where you want to install the light bars.
- Mark the screw holes and pre-drill if necessary.
- Secure the clips using the provided screws.
- Snap the LED light bars into the secured clips.
- Adhesive Tape Installation (No Damage to Cabinet):
- Clean the mounting surface thoroughly to ensure it is free of dust and grease.
- Peel the backing from the double-sided adhesive tapes and apply them to the back of the light bars.
- Firmly press the light bars onto the desired surface for at least 30 seconds.
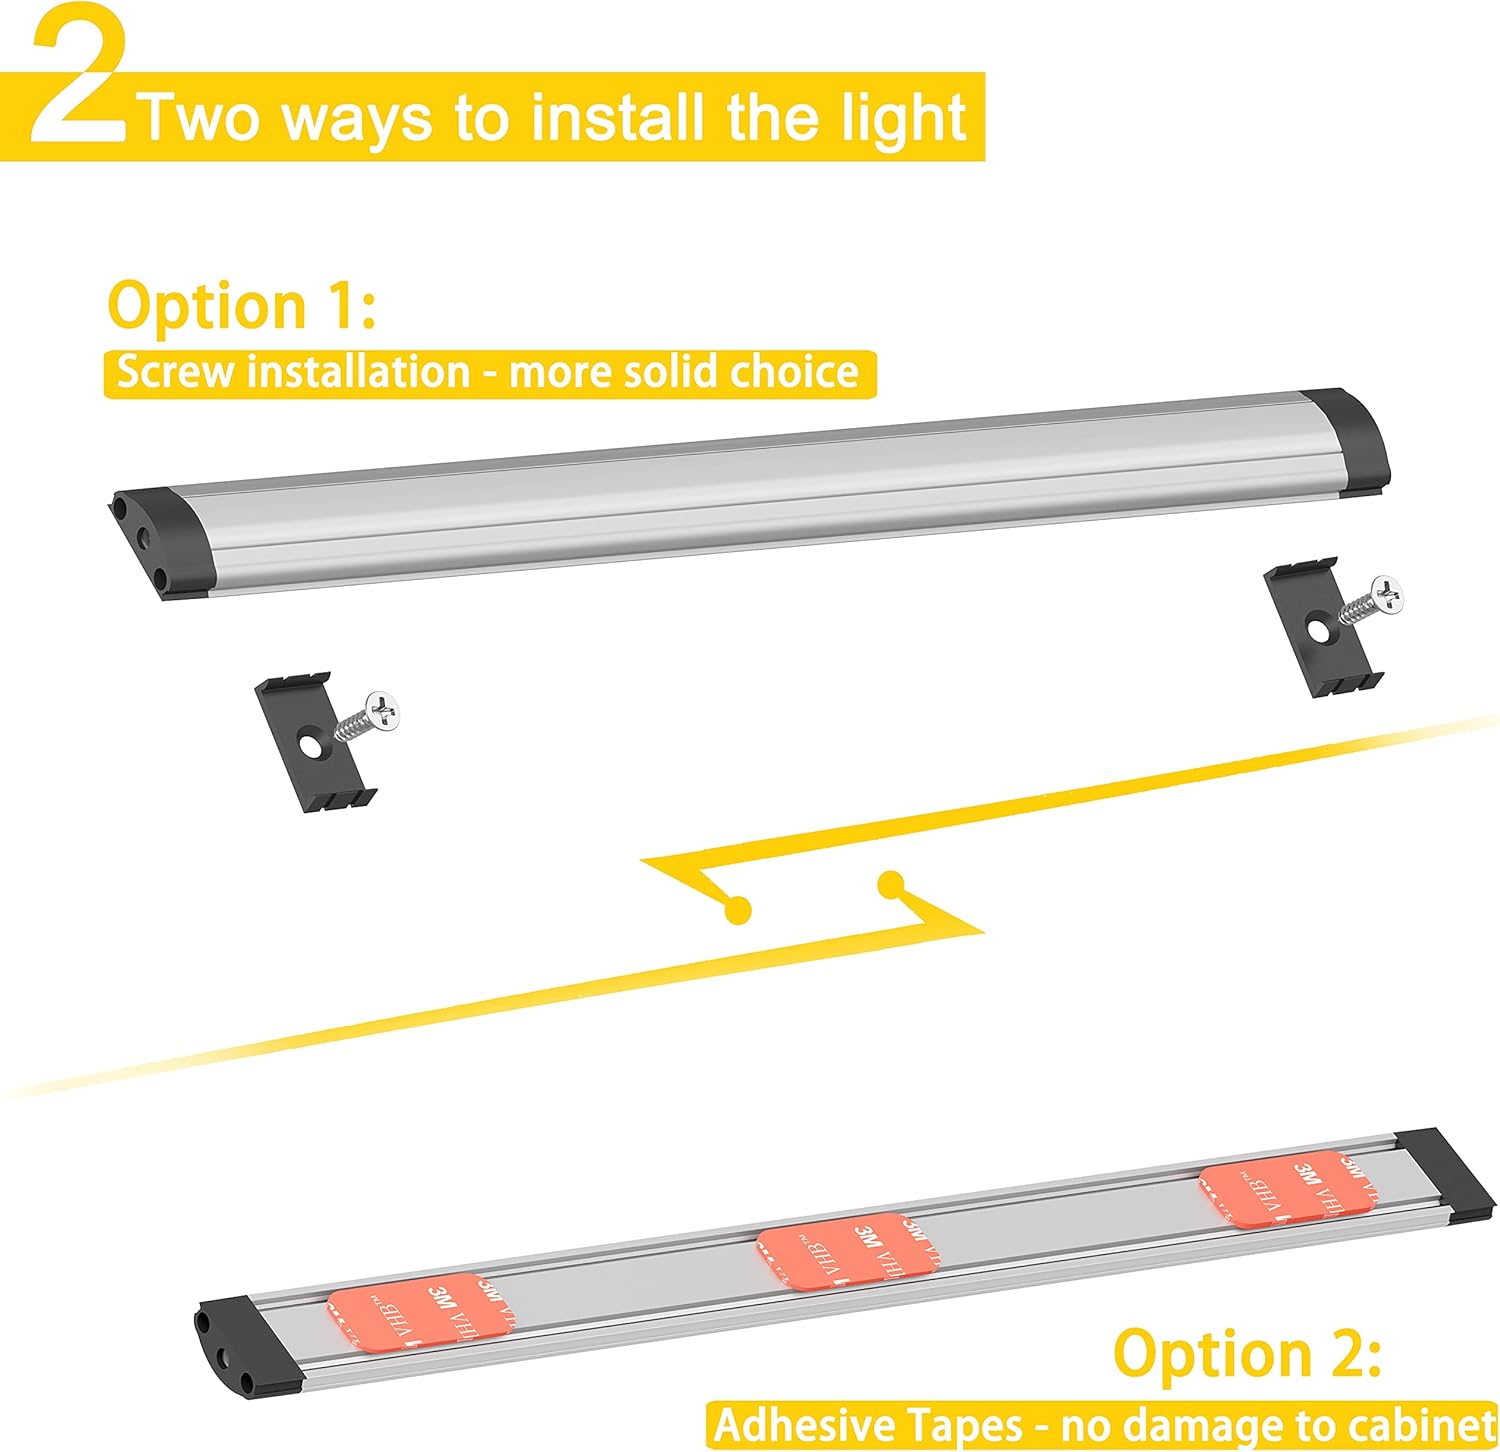
Figure 3: Light Bar Installation Options
3. Power Connection
Connect the power adapter to the dimmer switch, and then connect the dimmer switch to the first light bar in your series. Plug the power adapter into a standard electrical outlet.
Installation Video Guide
Video 1: This video demonstrates the unboxing and installation process for the GETINLIGHT LED Under Cabinet Lighting Kit, including connecting the light bars and mounting them under a cabinet or workbench. It shows both the adhesive and screw mounting options, as well as the dimmer functionality.
Operating Instructions
Power On/Off
Press the power button on the in-line dimmer switch to turn the lights ON or OFF.
Dimming Function
The in-line dimmer switch allows for smooth dimming from 0-100% brightness. Slide the switch up or down to adjust the light intensity to your preference. The lights feature a memory function, returning to the last dimming level when powered back on.

Figure 4: Dimming and Memory Function
Maintenance
These LED lights require minimal maintenance. Follow these guidelines to ensure longevity:
- Cleaning: Disconnect power before cleaning. Wipe the light bars with a soft, dry cloth. Do not use abrasive cleaners or solvents, as they may damage the finish or lens.
- Inspection: Periodically check all connections and mounting points to ensure they are secure.
- Bulb Replacement: The LED modules are built-in and not user-replaceable. The expected lifespan of the LEDs is long, reducing the need for frequent replacements.
Troubleshooting
| Problem | Possible Cause | Solution |
|---|---|---|
| Lights do not turn on. | No power to the outlet. Loose connection. Dimmer switch is off. | Check the circuit breaker. Ensure all cables are securely connected. Press the power button on the dimmer switch. |
| Lights flicker or dim unexpectedly. | Loose connection. Faulty dimmer switch. | Check all cable connections. Test with a different dimmer switch or bypass the dimmer to see if the issue persists. |
| Some light bars in a series are not working. | Faulty linking cord/connector. Damaged light bar. | Check the connections between the working and non-working light bars. Replace the linking cord/connector if necessary. Isolate the faulty light bar to determine if it needs replacement. |
Warranty and Support
GETINLIGHT products are covered by a manufacturer-and-seller-combination warranty. For specific warranty details, claims, or technical support, please refer to the contact information provided with your purchase or visit the official GETINLIGHT website.
For further assistance, please contact:
- Manufacturer: Inlight
- Website: www.getinlight.com


