1. Introduction
This manual provides comprehensive instructions for the installation, operation, maintenance, and troubleshooting of your LeeKooLuu LK8 RV Backup Camera System. Please read this manual thoroughly before installation and use to ensure proper function and safety.
2. Product Components
The LeeKooLuu LK8 RV Backup Camera System includes a wireless camera unit designed for vehicle rear-view monitoring. Key components are detailed below:
- Wireless Camera Unit: Features a wide-angle lens, CMOS optical sensor, and integrated LED lights for enhanced visibility.
- Adjustable Mounting Bracket: Allows for secure and flexible positioning of the camera.
- Wireless Antenna: Ensures stable signal transmission to a compatible monitor (monitor sold separately).

Figure 2.1: Front view of the LeeKooLuu LK8 wireless RV backup camera, showing the central lens and surrounding LED lights for night vision.

Figure 2.2: Angled front-side view of the LeeKooLuu LK8 wireless RV backup camera, highlighting the antenna and adjustable mounting bracket.
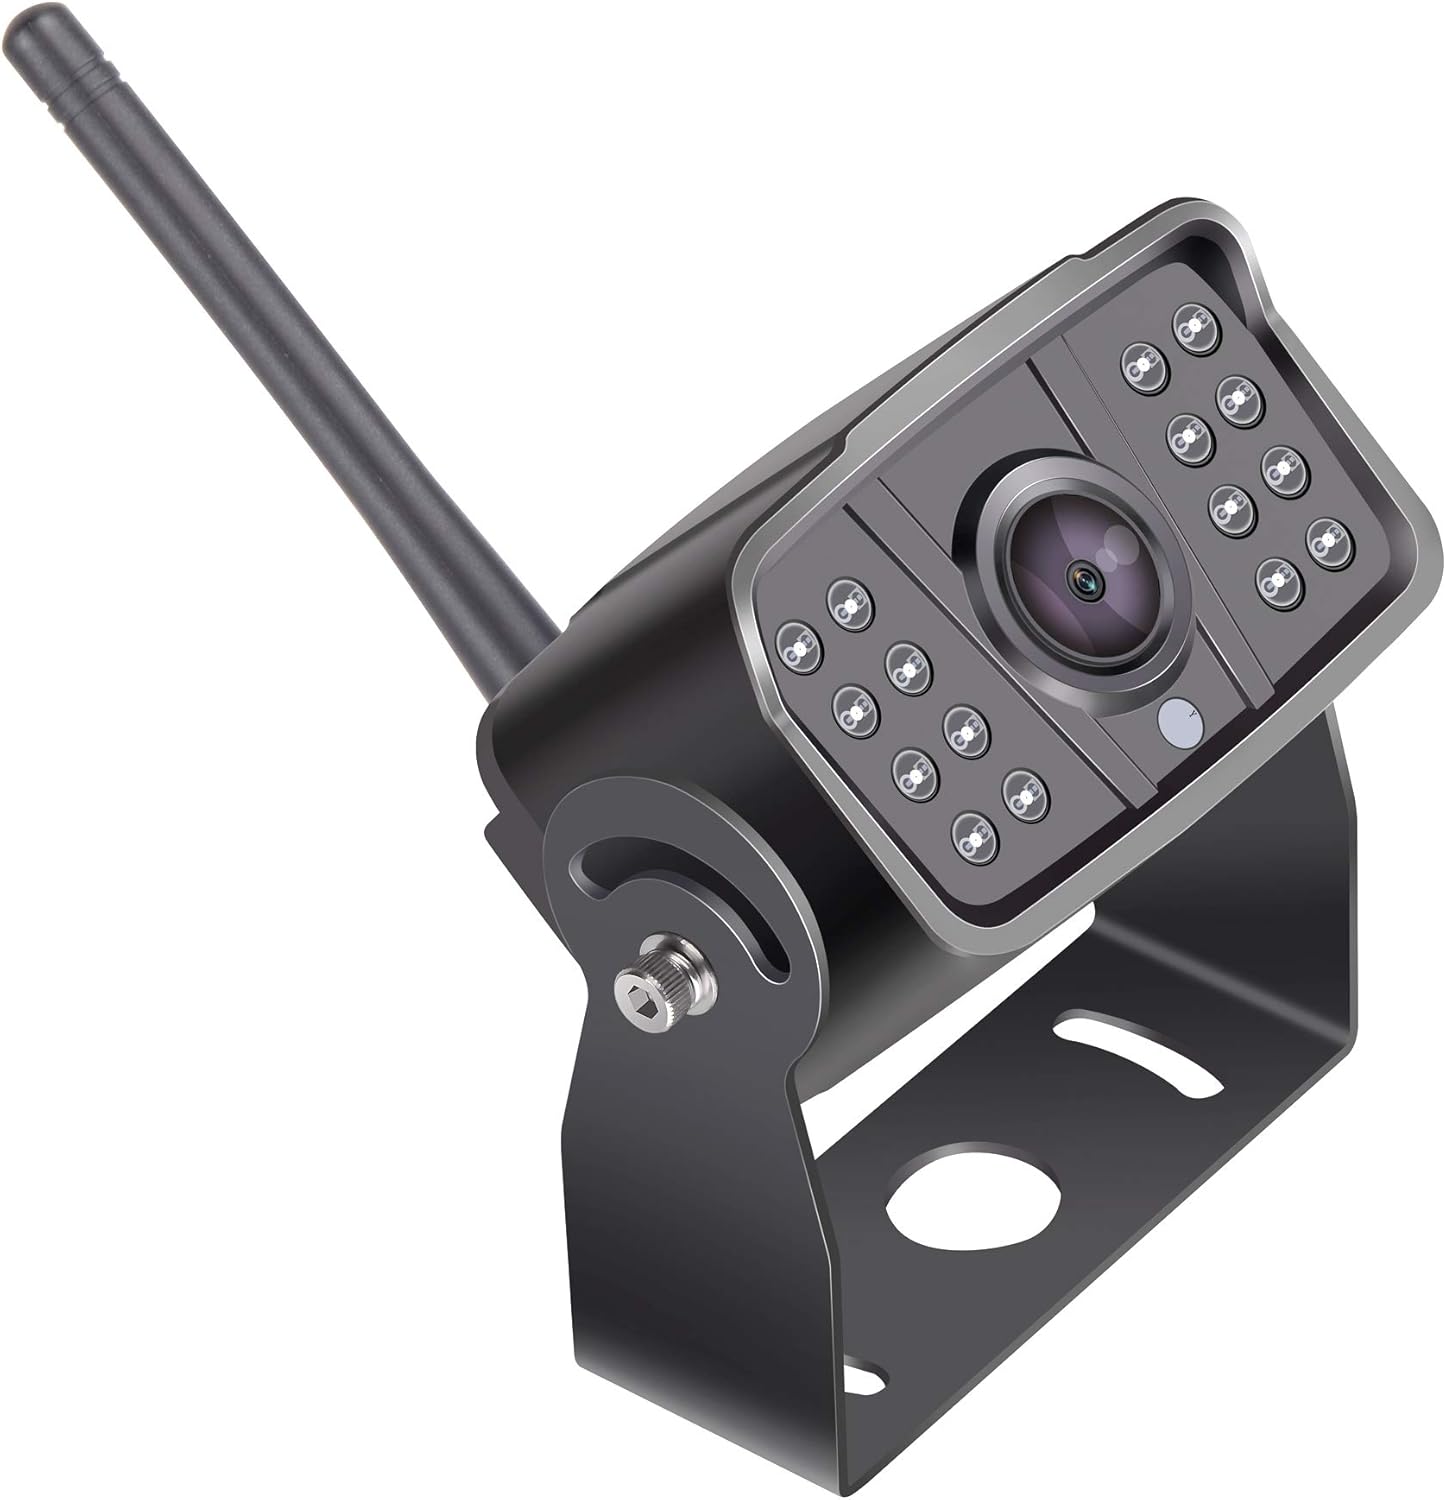
Figure 2.3: Side view of the LeeKooLuu LK8 wireless RV backup camera, illustrating the adjustable mounting bracket and the position of the wireless antenna.
3. Installation Guide
The LK8 camera is designed for monitor-based installation and wireless connectivity. Ensure your compatible monitor (e.g., LeeKooLuu LK8 monitor) is ready for pairing.
3.1 Mounting the Camera
- Select Location: Choose a suitable location at the rear of your RV or vehicle that provides a clear, unobstructed view. The camera's wide-angle lens offers broad coverage.
- Secure Bracket: Use appropriate fasteners (not included) to securely attach the adjustable mounting bracket to the chosen surface. Ensure the bracket is stable and can support the camera's weight.
- Attach Camera: Mount the camera unit onto the bracket. Adjust the camera angle for optimal viewing, then tighten the bracket screws to fix its position.
3.2 Power Connection
The camera requires a stable power supply. Connect the camera's power cable to a 12V DC power source on your vehicle. Common connection points include:
- Reverse light circuit (for automatic activation when reversing).
- Running lights or auxiliary power (for continuous monitoring).
Ensure all connections are secure and properly insulated to prevent short circuits and water damage.
3.3 Wireless Pairing
Once the camera is powered, it will automatically attempt to pair with a compatible LeeKooLuu wireless monitor. Refer to your monitor's user manual for specific pairing instructions if automatic connection does not occur.
Video 3.1: Detailed installation guide for the LeeKooLuu RV Backup Camera System. This video provides visual steps for mounting and connecting the camera.
4. Operation Instructions
After successful installation and pairing, your LeeKooLuu LK8 camera system is ready for use.
4.1 Powering On/Off
The camera's operation is typically linked to its power source. If connected to reverse lights, it will activate when the vehicle is in reverse. If connected to continuous power, it will operate whenever the vehicle's ignition is on or the power source is active.
4.2 Viewing the Feed
The camera feed will automatically display on your paired monitor. Use the monitor's controls to adjust brightness, contrast, or other display settings as needed. The wide-angle lens provides a comprehensive view of your surroundings, aiding in parking and maneuvering.
4.3 Night Vision
The integrated LED lights automatically activate in low-light conditions, providing clear night vision for safe operation in the dark.
Video 4.1: Overview of the LeeKooLuu RV Backup Camera System's operational features, including day and night vision capabilities.
5. Maintenance
Regular maintenance ensures the longevity and optimal performance of your camera system.
- Cleaning the Lens: Periodically clean the camera lens with a soft, damp cloth. Avoid abrasive cleaners that could scratch the lens.
- Checking Connections: Inspect all power and antenna connections regularly to ensure they are secure and free from corrosion or damage.
- Bracket Security: Verify that the mounting bracket remains securely fastened and the camera's angle has not shifted due to vibrations or impacts.
6. Troubleshooting
If you encounter issues with your LeeKooLuu LK8 RV Backup Camera System, refer to the following troubleshooting steps:
| Problem | Possible Cause | Solution |
|---|---|---|
| No image on monitor | No power to camera or monitor; Loose connection; Pairing issue; Interference. | Check power supply to both camera and monitor. Ensure all cables are securely connected. Re-attempt wireless pairing. Minimize sources of wireless interference. |
| Poor image quality / Flickering | Dirty lens; Weak wireless signal; Electrical interference. | Clean the camera lens. Ensure the camera and monitor are within effective range and antenna is unobstructed. Check for strong electrical sources nearby. |
| Camera not activating | Incorrect power connection; Blown fuse. | Verify power connection to the correct circuit (e.g., reverse lights). Check vehicle fuses related to the power source. |
Video 6.1: Troubleshooting common issues with wireless backup camera systems, including signal loss and power problems.
7. Specifications
| Feature | Specification |
|---|---|
| Brand | LeeKooLuu |
| Model | LK8 |
| Product Dimensions | 12.2 x 6.1 x 3.1 inches (12.2"L x 6.1"W x 3.1"H) |
| Item Weight | 1.01 pounds |
| Compatible Devices | LK8 (compatible monitors) |
| Installation Type | Monitor-based |
| Optical Sensor Technology | CMOS |
| Lens Type | Wide Angle |
| Connector Type | Wireless |
| Optical Sensor Size | 1/3 inch |
| Other Display Features | Wireless |