Mintu Refrigerator Ice Maker Replacement
Mintu Refrigerator Ice Maker Replacement Instruction Manual
For Compatible Whirlpool, Amana, Kenmore, and Maytag Refrigerators
1. Introduction
This manual provides detailed instructions for the installation, operation, maintenance, and troubleshooting of your new Mintu Refrigerator Ice Maker Replacement. Please read this manual thoroughly before installation and use to ensure proper function and safety. Keep this manual for future reference.
2. Compatibility
This ice maker is designed as a replacement part for various refrigerator models from Whirlpool, Amana, Kenmore, and Maytag. Please verify your refrigerator's model number against the list below to confirm compatibility before installation.
Compatible Whirlpool Models:
- WRS322FDAM03, WRS322FDAM04
- WRS322FDAT00, WRS322FDAT01, WRS322FDAT02, WRS322FDAT03, WRS322FDAT04
- WRS322FDAW00, WRS322FDAW02, WRS322FDAW03
Compatible Amana Models:
- ASD2275BRB00, ASD2275BRB01, ASD2275BRB02, ASD2275BRS00, ASD2275BRS01, ASD2275BRW00, ASD2275BRW01
- ASD2575BRB00, ASD2575BRB01, ASD2575BRB03, ASD2575BRS00, ASD2575BRS01, ASD2575BRW00, ASD2575BRW01
- ASI2175GRB00, ASI2175GRB01, ASI2175GRB03, ASI2175GRS00, ASI2175GRS01, ASI2175GRS03, ASI2175GRW00, ASI2175GRW01, ASI2175GRW03
- ASI2275FRB00, ASI2275FRS00, ASI2275FRW00
- ASI2575FRB00, ASI2575FRS00, ASI2575FRW00
- ASI2575GRB00, ASI2575GRB01, ASI2575GRB02, ASI2575GRB04, ASI2575GRS00, ASI2575GRS01, ASI2575GRS02, ASI2575GRS04, ASI2575GRW00, ASI2575GRW01, ASI2575GRW02, ASI2575GRW04
- IRS335SDHM00, ISC21CNEDS00, ISF25D2XBM00, ISF25D2XBM01
Compatible Kenmore Models:
- 106.50022210, 106.50023210, 106.50023211, 106.50029210, 106.50029213, 106.50042710, 106.50042711, 106.50043710, 106.50043711, 106.50045710, 106.50045711, 106.50049710, 106.50049711
- 106.51112710, 106.51112711, 106.51113210, 106.51113710, 106.51113711, 106.51115710, 106.51115711, 106.51119710, 106.51119711
- 106.51122210, 106.51122211, 106.51123210, 106.51123211, 106.51124210, 106.51124211, 106.51129210, 106.51129211, 106.51129212
- 106.51722410, 106.51723410, 106.51724410, 106.51729410
- 106.51752710, 106.51752711, 106.51753710, 106.51753711, 106.51754710, 106.51754711, 106.51759710, 106.51759711
- 106.51792410, 106.51792411, 106.51792412, 106.51793410, 106.51793412, 106.51799410, 106.51799411, 106.51799412, 106.51799413
Compatible Maytag Models:
- MSD2272VEB00, MSD2272VES00, MSD2272VES01, MSD2272VES02, MSD2272VEW00
- MSD2273VEB00, MSD2273VES00, MSD2273VES02, MSD2273VEW00
- MSD2274VEA00, MSD2274VEB00, MSD2274VEM00, MSD2274VEM01, MSD2274VEM02, MSD2274VEQ00, MSD2274VEW00
- MSD2572VEB00, MSD2572VEB01, MSD2572VES00, MSD2572VES01, MSD2572VES02, MSD2572VES03, MSD2572VEU00, MSD2572VEU01, MSD2572VEW00, MSD2572VEW01
- MSD2573VEB00, MSD2573VEB01, MSD2573VEB02, MSD2573VES01, MSD2573VES02, MSD2573VES03, MSD2573VES04, MSD2573VEW00, MSD2573VEW01, MSD2573VEW02
- MSD2574VEA00, MSD2574VEA10, MSD2574VEB00
3. Important Safety Information
- Disconnect Power: Always disconnect power to the refrigerator before attempting any installation, repair, or maintenance. Failure to do so can result in electric shock or injury.
- Water Supply: Turn off the water supply to the refrigerator before beginning installation to prevent water leaks.
- Professional Installation: If you are unsure about any step of the installation process, it is recommended to consult a qualified appliance technician.
- Sharp Edges: Be aware of potentially sharp edges on refrigerator components during installation. Wear appropriate protective gloves.
- Proper Tools: Use only the correct tools for the job to avoid damage to the appliance or injury.
4. Package Contents
Your package should contain the following items:
- Mintu Refrigerator Ice Maker Replacement unit
- Any necessary mounting hardware (if applicable)
Inspect all components for damage upon receipt. If any parts are missing or damaged, contact customer support immediately.
5. Setup and Installation
Follow these general steps for installing your new ice maker. Specific steps may vary slightly depending on your refrigerator model. Refer to your refrigerator's original service manual for detailed instructions if needed.
- Prepare the Refrigerator:
- Disconnect the refrigerator from the power supply.
- Turn off the water supply to the refrigerator.
- Empty the freezer compartment, especially the ice bucket.
- Remove the Old Ice Maker:
- Locate the existing ice maker in the freezer.
- Carefully disconnect any wiring harnesses.
- Unscrew or unclip the old ice maker from its mounting brackets.
- Remove the old unit.
- Install the New Ice Maker:
- Align the new Mintu ice maker with the mounting brackets in the freezer.
- Secure the ice maker using the appropriate screws or clips. Ensure it is firmly in place.
- Connect the wiring harness from the refrigerator to the new ice maker. Ensure a secure connection.
- Final Steps:
- Turn the water supply back on. Check for any leaks around the water inlet.
- Reconnect the refrigerator to the power supply.
- Place the ice bucket back into position.
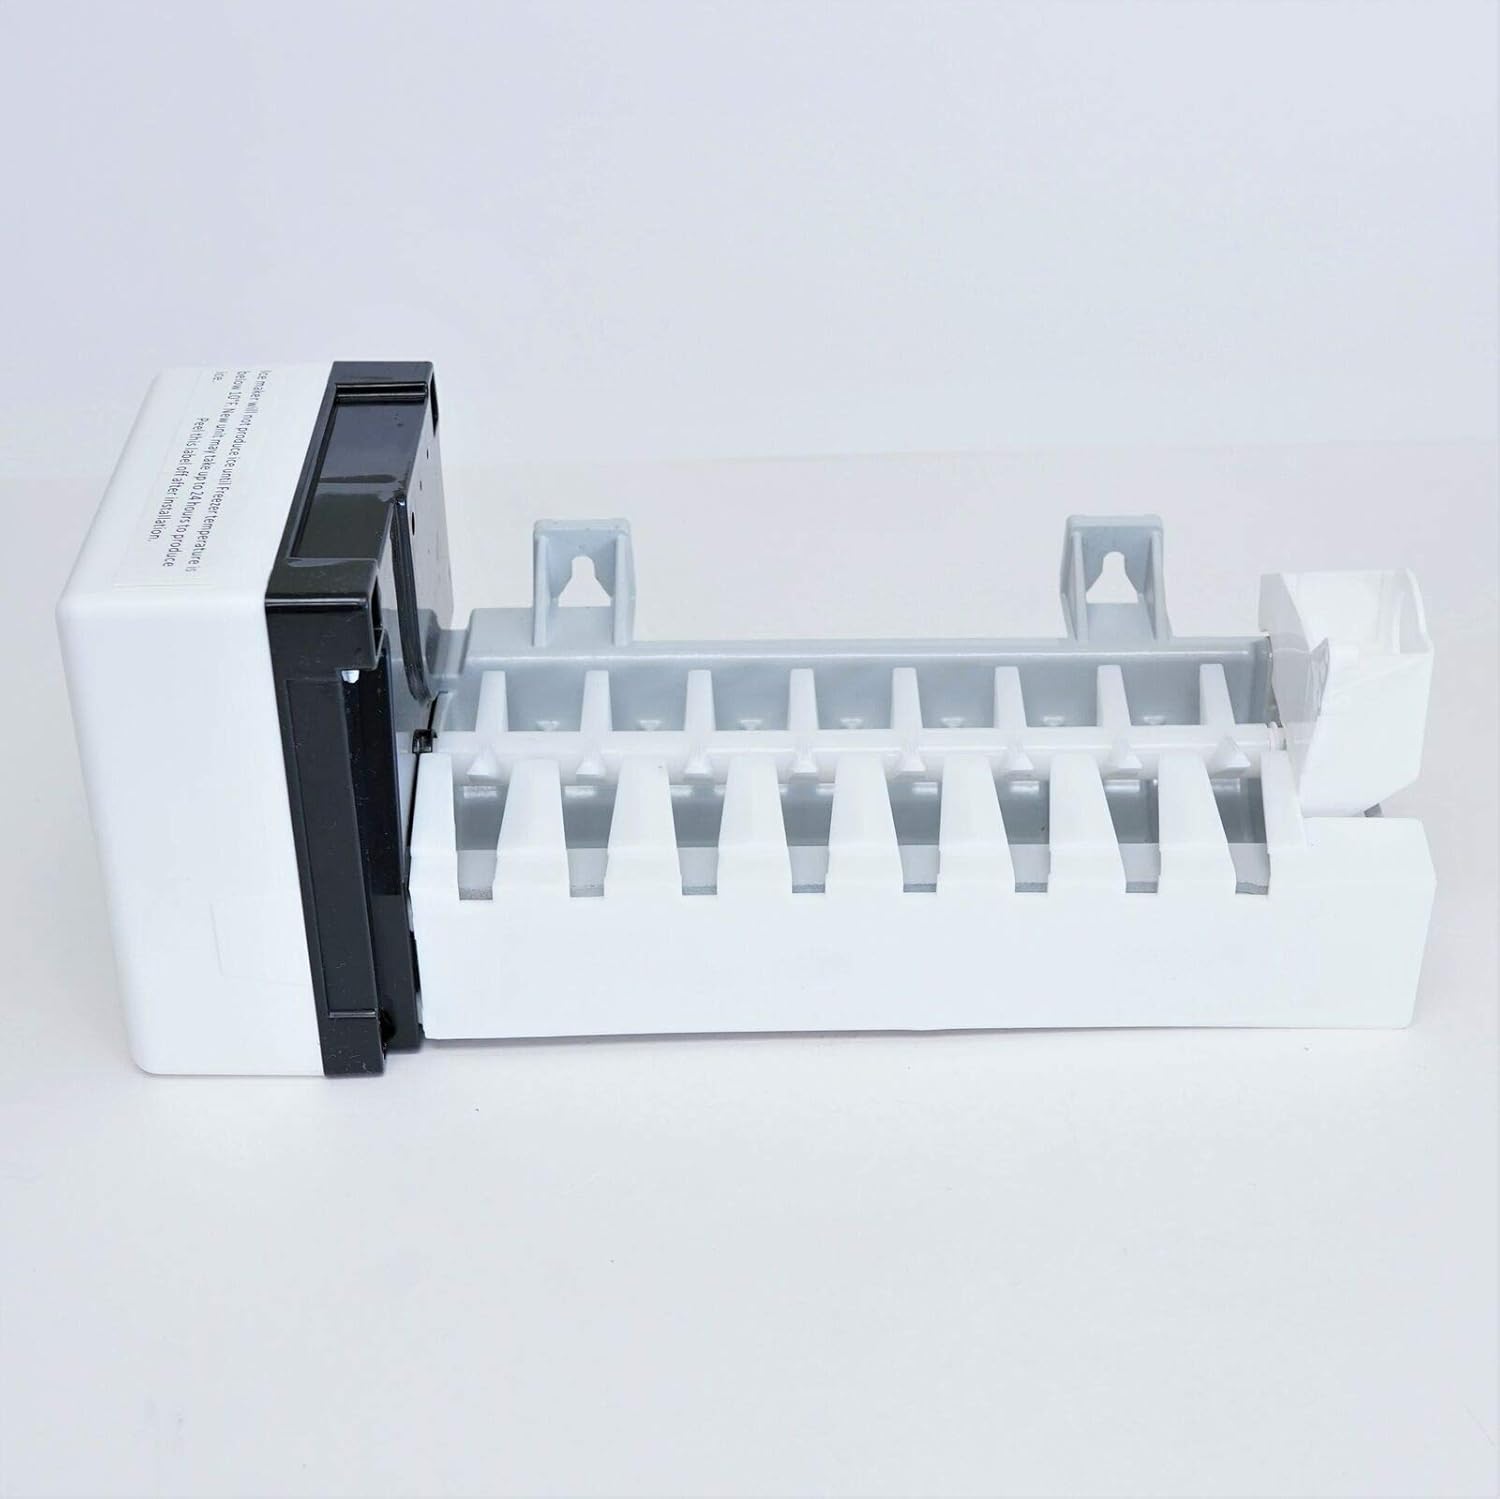
Figure 1: Side view of the Mintu Refrigerator Ice Maker Replacement unit. This image shows the overall shape and design of the ice maker, including the ice mold tray and the control module on the left side.

Figure 2: Close-up view of the ice ejector arm and water fill cup area. This component is responsible for pushing formed ice cubes out of the mold and into the ice bucket.

Figure 3: Detailed view of the water inlet and fill cup mechanism on the ice maker. Water flows into this cup to fill the ice mold for freezing.

Figure 4: A warning label on the side of the ice maker. It states that the ice maker will not produce ice until the freezer temperature is below 10°F and that a new unit may take up to 24 hours to produce ice. This label should be peeled off after installation.

Figure 5: Underside view of the ice maker, revealing the heating element and internal components. The heating element assists in releasing ice cubes from the mold.
6. Operating Instructions
After installation, the ice maker will begin its cycle automatically once the freezer reaches the optimal temperature.
- Initial Ice Production: It may take up to 24 hours for the new ice maker to produce its first batch of ice. This is normal as the system needs to cool down and fill with water.
- Temperature Requirement: The freezer temperature must be below 10°F (-12°C) for the ice maker to operate correctly and produce ice.
- Discard First Batches: It is recommended to discard the first two to three batches of ice to flush out any impurities from the water line or new components.
- Ice Level Arm: The ice maker features a shut-off arm that automatically stops ice production when the ice bucket is full. Ensure this arm can move freely.
7. Maintenance
Regular maintenance helps ensure optimal performance and longevity of your ice maker.
- Cleaning the Ice Bucket: Periodically remove and wash the ice bucket with mild soap and warm water. Rinse thoroughly and dry completely before returning it to the freezer.
- Cleaning the Ice Maker: If necessary, the ice maker unit itself can be wiped down with a damp cloth. Do not use abrasive cleaners or immerse the unit in water. Ensure power is disconnected before cleaning.
- Water Filter: Ensure your refrigerator's water filter is replaced regularly according to the manufacturer's recommendations to maintain water quality and prevent mineral buildup in the ice maker.
- Check Water Line: Periodically inspect the water supply line for kinks, leaks, or damage.
8. Troubleshooting
If your ice maker is not functioning as expected, refer to the following common issues and solutions:
| Problem | Possible Cause | Solution |
|---|---|---|
| No ice production |
|
|
| Small or hollow ice cubes |
|
|
| Ice cubes taste bad or have odor |
|
|
9. Specifications
| Brand | Mintu |
| Product Type | Refrigerator Ice Maker Replacement |
| UPC | 824252619731 |
| Package Dimensions | 12 x 6 x 6 inches |
| Item Weight | 3 Pounds |
| Manufacturer | Mintu |
| First Available | September 8, 2021 |
10. Warranty and Support
For warranty information, please refer to the terms provided at the time of purchase or contact the seller directly. This product may be eligible for extended protection plans, which can be purchased separately.
If you encounter any issues not covered in this manual or require further assistance, please contact Mintu customer support through your retailer's platform or the manufacturer's official channels.
Related Documents - Refrigerator Ice Maker Replacement
 |
Whirlpool Modular Ice Maker Kit Installation Guide Comprehensive installation guide for the Whirlpool Modular Ice Maker Kit, covering safety, tools, components, installation steps, water connection, power connection, startup, and troubleshooting for Whirlpool refrigerators. |
 |
Top-Mount Refrigerator Owner's Manual: Installation, Care, and Operation Guide Comprehensive owner's manual for top-mount refrigerators, detailing installation, maintenance, safety guidelines, features, and operating instructions for optimal appliance performance and longevity. |
 |
Refrigerator Water Filter Installation and Maintenance Guide Comprehensive guide for installing, maintaining, and troubleshooting the EFF-6002S refrigerator water filter, compatible with Whirlpool, Maytag, Amana, KitchenAid, JennAir, and Kenmore models. Includes performance data and FAQs. |
 |
Whirlpool®, Maytag®, Amana®, & IKEA® Refrigerators Service Manual Comprehensive service manual for Whirlpool, Maytag, Amana, and IKEA side-by-side refrigerators, covering diagnostics, component testing, and access procedures. Includes model specifications and safety information. |
 |
Best Buy Essentials Refrigerator Water Filter BE-MTUKF531 Quick Setup Guide Quick setup guide for the Best Buy Essentials BE-MTUKF531 refrigerator water filter, including installation, troubleshooting, specifications, and compatibility with Amana, Maytag, KitchenAid, and Kenmore filters. |
 |
Waterdrop WDP-F07 Refrigerator Water Filter Replacement - Installation & Performance Detailed information on the Waterdrop WDP-F07 refrigerator water filter, including compatibility with Whirlpool, Maytag, KitchenAid, and Kenmore models, installation instructions, maintenance tips, FAQs, and NSF performance data. |