1. Introduction
This manual provides detailed instructions for the installation, operation, maintenance, and troubleshooting of your new Mintu Refrigerator Ice Maker Replacement. Please read this manual thoroughly before installation and retain it for future reference. Proper installation and care will ensure optimal performance and longevity of your ice maker.
2. Safety Information
- Always disconnect power to the refrigerator before attempting any installation, repair, or maintenance. Failure to do so can result in electric shock or personal injury.
- Wear appropriate personal protective equipment, such as gloves, during installation to prevent injury.
- Ensure all connections are secure and properly sealed to prevent water leaks.
- If you are unsure about any step, consult a qualified appliance technician.
3. Compatible Refrigerator Models
This Mintu Ice Maker Replacement is compatible with a wide range of Amana, Kenmore, Maytag, and Whirlpool refrigerator models. Please verify your refrigerator's model number against the lists below to ensure compatibility.
Amana Models:
- ASD2275BRB00
- ASD2275BRB01
- ASD2275BRB02
- ASD2275BRS00
- ASD2275BRS01
- ASD2275BRW00
- ASD2275BRW01
- ASD2575BRB00
- ASD2575BRB01
- ASD2575BRB03
- ASD2575BRS00
- ASD2575BRS01
- ASD2575BRW00
- ASD2575BRW01
- ASI2175GRB00
- ASI2175GRB01
- ASI2175GRB03
- ASI2175GRS00
- ASI2175GRS01
- ASI2175GRS03
- ASI2175GRW00
- ASI2175GRW01
- ASI2175GRW03
- ASI2275FRB00
- ASI2275FRS00
- ASI2275FRW00
- ASI2575FRB00
- ASI2575FRS00
- ASI2575FRW00
- ASI2575GRB00
- ASI2575GRB01
- ASI2575GRB02
- ASI2575GRB04
- ASI2575GRS00
- ASI2575GRS01
- ASI2575GRS02
- ASI2575GRS04
- ASI2575GRW00
- ASI2575GRW01
- ASI2575GRW02
- ASI2575GRW04
- IRS335SDHM00
- ISC21CNEDS00
- ISF25D2XBM00
- ISF25D2XBM01
Kenmore Models:
- 106.50022210
- 106.50023210
- 106.50023211
- 106.50029210
- 106.50029213
- 106.50042710
- 106.50042711
- 106.50043710
- 106.50043711
- 106.50045710
- 106.50045711
- 106.50049710
- 106.50049711
- 106.51112710
- 106.51112711
- 106.51113210
- 106.51113710
- 106.51113711
- 106.51115710
- 106.51115711
- 106.51119710
- 106.51119711
- 106.51122210
- 106.51122211
- 106.51123210
- 106.51123211
- 106.51124210
- 106.51124211
- 106.51129210
- 106.51129211
- 106.51129212
- 106.51722410
- 106.51723410
- 106.51724410
- 106.51729410
- 106.51752710
- 106.51752711
- 106.51753710
- 106.51753711
- 106.51754710
- 106.51754711
- 106.51759710
- 106.51759711
- 106.51792410
- 106.51792411
- 106.51792412
- 106.51793410
- 106.51793412
- 106.51799410
- 106.51799411
- 106.51799412
- 106.51799413
Maytag Models:
- MSD2272VEB00
- MSD2272VES00
- MSD2272VES01
- MSD2272VES02
- MSD2272VEW00
- MSD2273VEB00
- MSD2273VES00
- MSD2273VES02
- MSD2273VEW00
- MSD2274VEA00
- MSD2274VEB00
- MSD2274VEM00
- MSD2274VEM01
- MSD2274VEM02
- MSD2274VEQ00
- MSD2274VEW00
- MSD2572VEB00
- MSD2572VEB01
- MSD2572VES00
- MSD2572VES01
- MS2572VES02
- MSD2572VES03
- MSD2572VEU00
- MSD2572VEU01
- MSD2572VEW00
- MSD2572VEW01
- MSD2573VEB00
- MSD2573VEB01
- MSD2573VEB02
- MSD2573VES01
- MSD2573VES02
- MSD2573VES03
- MSD2573VES04
- MSD2573VEW00
- MSD2573VEW01
- MSD2573VEW02
- MSD2573VEW04
- MSD2574VEA00
- MSD2574VEA10
- MSD2574VEB00
- MSD2574VEB10
- MSD2574VEB11
- MSD2574VEM00
Whirlpool Models:
- ASD2275BRB00
- ASD2275BRB01
- ASD2275BRB02
- ASD2275BRS00
- ASD2275BRW00
- ASD2275BRW01
- ASD2575BRB00
- ASD2575BRB01
- ASD2575BRS00
- ASD2575BRS01
- ASD2575BRW00
- ASD2575BRW01
- MSD2274VEM02
4. Setup and Installation
Replacing your refrigerator's ice maker typically involves a few key steps. Always refer to your refrigerator's specific service manual for detailed instructions, as procedures may vary by model.
- Disconnect Power: Unplug the refrigerator from the electrical outlet or turn off the circuit breaker.
- Access Ice Maker: Locate the ice maker compartment, usually in the freezer section. You may need to remove the ice bucket and any retaining screws or clips.
- Disconnect Old Ice Maker: Carefully disconnect the wiring harness and water line (if applicable) from the old ice maker. Remove any mounting screws or brackets holding the old unit in place.
- Install New Ice Maker: Position the new Mintu ice maker in the same location as the old one. Secure it with the original screws or mounting hardware.
- Connect Wiring and Water Line: Reconnect the wiring harness to the new ice maker. Ensure the water line is securely attached and free of leaks.
- Restore Power: Plug the refrigerator back into the electrical outlet or turn on the circuit breaker.
- Initial Operation: The ice maker will begin its cycle once power is restored and the freezer temperature drops below 10°F (-12°C). It may take up to 24 hours for the new unit to produce its first batch of ice.
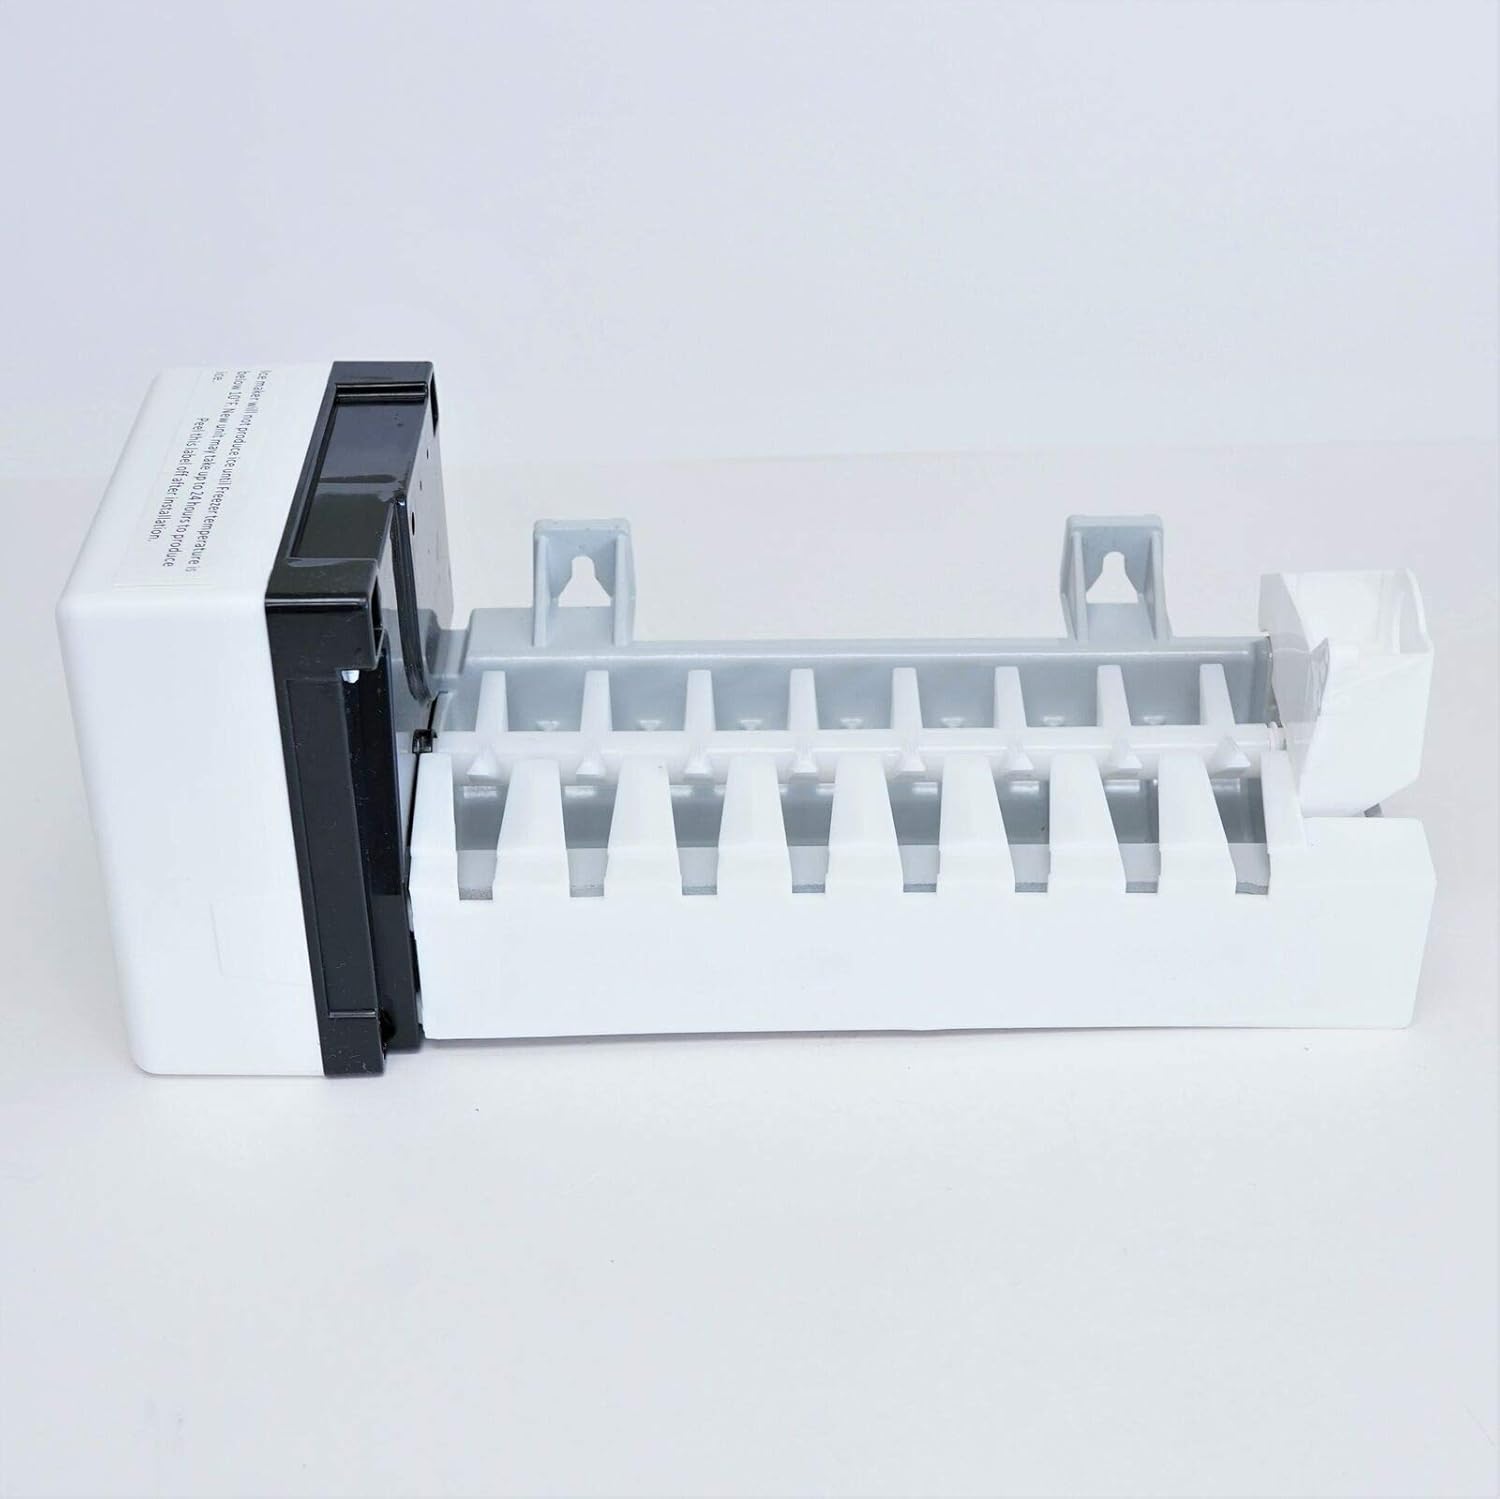
Figure 1: Side view of the Mintu Refrigerator Ice Maker Replacement, showing its general form factor.

Figure 2: Underside view of the ice maker, revealing the heating element and other internal mechanisms.

Figure 3: Important label indicating that the ice maker requires freezer temperature below 10°F and may take up to 24 hours for initial ice production. This label should be removed after installation.
5. Operating Instructions
Once installed and powered, the ice maker operates automatically. It fills with water, freezes it into cubes, and then ejects the ice into the ice bucket.
- Ice Level Arm: The ice maker features an automatic shut-off mechanism controlled by an ice level arm (also known as a bail arm or stopper). When the ice bucket fills and raises this arm, the ice maker temporarily stops production. Once ice is removed and the arm lowers, production resumes.
- Monitoring Ice Production: In some cases, the ice maker may produce ice rapidly, potentially leading to overflow if the ice level arm does not fully engage or if the ice bucket is not emptied regularly. Monitor ice levels and manually lift the ice level arm if the bucket is full to prevent excessive ice production.

Figure 4: Close-up view of the ice level arm, which controls ice production based on the ice bucket's fill level.

Figure 5: A different angle of the ice level arm, highlighting its position and function.
6. Maintenance
Regular maintenance helps ensure your ice maker functions efficiently.
- Cleaning: Periodically remove the ice bucket and wash it with mild soap and warm water. Rinse thoroughly and dry before returning it to the freezer.
- Water Filter: If your refrigerator has a water filter, ensure it is replaced according to the manufacturer's recommendations to maintain water quality and ice production.
- Check Water Line: Occasionally inspect the water supply line for kinks, leaks, or damage.
7. Troubleshooting
If your ice maker is not functioning as expected, try the following troubleshooting steps:
- No Ice Production:
- Ensure the refrigerator is plugged in and receiving power.
- Check that the ice maker's power switch (if present) is in the ON position.
- Verify the water supply line is connected and the water valve is open.
- Confirm the freezer temperature is below 10°F (-12°C). New units require up to 24 hours to reach optimal temperature and begin ice production.
- Ensure the ice level arm is in the down position, indicating the ice bucket is not full.
- Slow Ice Production:
- Check the water filter; a clogged filter can restrict water flow.
- Ensure the freezer temperature is set correctly and is not too warm.
- Ice Overflowing:
- Verify the ice level arm is moving freely and is not obstructed by ice.
- Manually lift the ice level arm to the OFF position if the ice bucket is full, and lower it when more ice is needed.
- Leaking Water:
- Check all water line connections for tightness.
- Inspect the water fill cup for cracks or misalignment.
If these steps do not resolve the issue, it may indicate a faulty component or a more complex problem requiring professional service.
8. Specifications
| Brand | Mintu |
| Material | Plastic |
| Package Dimensions | 12 x 6 x 6 inches |
| Item Weight | 3 Pounds |
| Manufacturer | Mintu |
| ASIN | B09FLPTFJG |
| UPC | 824252619540 |
9. Warranty and Support
For warranty information and customer support, please refer to the documentation provided with your purchase or contact the seller directly. Specific warranty terms may vary.