1. Introduction
Thank you for choosing a Whirlpool appliance. This user manual provides essential information for the safe and efficient use of your new TDLR 7221BS EU/N top-loading washing machine. Please read these instructions carefully before using the appliance and keep them for future reference. Proper installation, operation, and maintenance will ensure optimal performance and longevity of your washing machine.
2. Safety Information
Always follow basic safety precautions when using electrical appliances to reduce the risk of fire, electric shock, or injury to persons.
- Electrical Safety: Ensure the appliance is connected to a properly grounded outlet with the correct voltage (220 Volt). Do not use extension cords or adapters. Unplug the machine before cleaning or performing any maintenance.
- Water Safety: Ensure water inlet and drain hoses are securely connected to prevent leaks. Do not operate the machine if there is a water leak.
- Child Safety: Keep children and pets away from the appliance during operation. Do not allow children to play with the controls.
- Installation: The appliance must be installed on a firm, level surface. Remove all transport bolts before use.
- Flammable Materials: Do not wash items that have been cleaned, washed, soaked, or spotted with combustible or explosive substances (such as wax, oil, paint, gasoline, degreasers, dry-cleaning solvents) as they give off vapors that could ignite or explode.
- Appliance Use: This appliance is intended for household use only. Do not use it for purposes other than washing laundry.
3. Product Overview
The Whirlpool TDLR 7221BS EU/N is a top-loading washing machine designed for efficient and convenient laundry care. It features a 7 kg capacity and a maximum spin speed of 1200 RPM. The control panel includes an LED display and intuitive button input for program selection and settings adjustment.
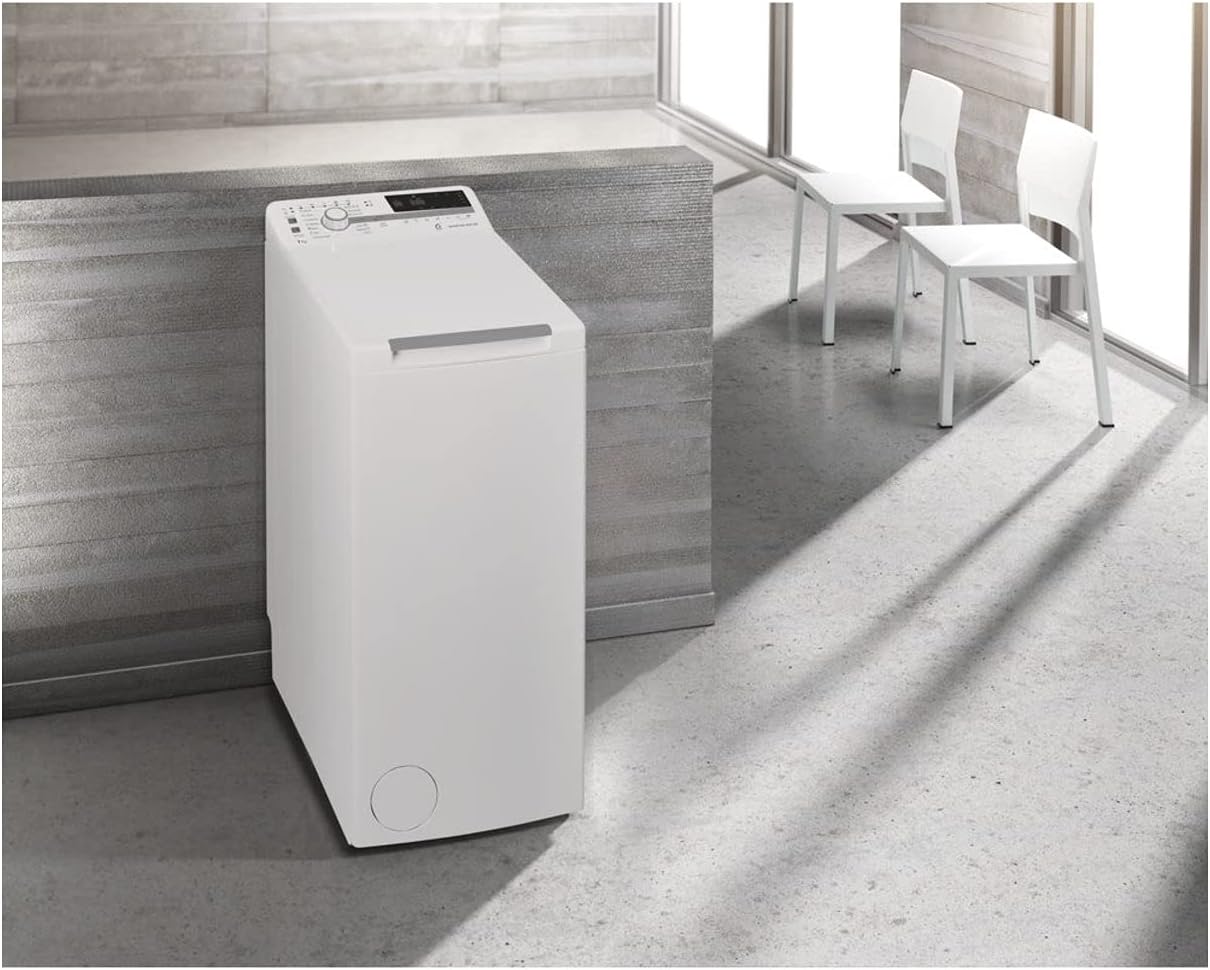
Figure 1: Full view of the Whirlpool TDLR 7221BS EU/N Top-Loading Washing Machine. This image shows the appliance in a modern laundry setting, highlighting its compact, freestanding design and white finish.

Figure 2: Close-up of the control panel. This image details the program selector knob, LED display, and various function buttons for cycle options like 'Colours 15', 'Mixed', 'Cotton', 'Synthetics', 'Delicates', 'Wool', 'Spin', 'Rinse & Spin', 'Jeans', 'Hygiene', 'Rapid 30', 'Eco 40-60', 'Aqua Saver', and 'Intensive/Outdoor'.
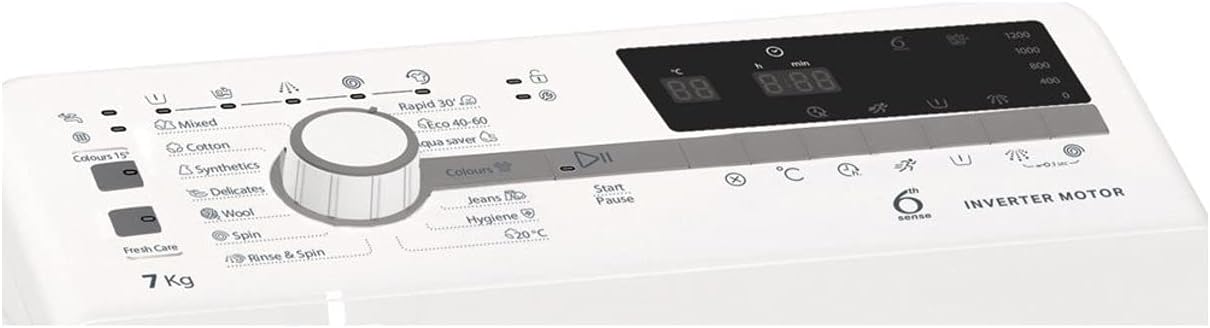
Figure 3: Another perspective of the control panel, emphasizing the LED display which shows time remaining and other cycle information, along with the '6th Sense' technology indicator and 'Inverter Motor' branding.
4. Setup
4.1 Unpacking
- Remove all packaging materials, including the polystyrene base and any protective film.
- Carefully remove the transport bolts located at the rear of the machine. Keep these bolts for future transport.
4.2 Location
- Place the washing machine on a firm, level floor. Ensure there is adequate ventilation around the appliance.
- Avoid installing the machine in areas where the temperature may drop below freezing, as this can damage internal components.
4.3 Water Connection
- Connect the cold water inlet hose to a cold water tap with a 3/4" thread. Ensure the connection is tight to prevent leaks.
- Position the drain hose into a standpipe or over the edge of a sink, ensuring it is securely fixed to prevent displacement during operation. The drain hose should not be kinked.
4.4 Electrical Connection
- Plug the appliance into a grounded electrical outlet. The power supply must be 220 Volt.
- Do not use adapter plugs or extension cords.
4.5 Leveling the Appliance
- Adjust the feet of the washing machine to ensure it is perfectly level. A level machine reduces vibration and noise during operation.
5. Operating Instructions
5.1 Loading Laundry
- Open the top lid and the drum flaps.
- Load laundry loosely into the drum, ensuring not to overload the machine. The maximum capacity is 7 kg.
- Close the drum flaps and the top lid securely.
5.2 Adding Detergent
- Pull out the detergent dispenser drawer.
- Add the appropriate amount of detergent and fabric softener to the designated compartments according to the detergent manufacturer's instructions and the selected wash program.
- Push the dispenser drawer back in completely.
5.3 Selecting a Program
- Turn the program selector knob to choose the desired washing program. Available programs include: Cold, Economic, Intensive/Outdoor, Mixed, Cotton, Synthetics, Delicates, Wool, Spin, Rinse & Spin, Jeans, Hygiene, Rapid 30, Eco 40-60, Aqua Saver, Colours 15.
- The LED display will show the default settings for the selected program.
- Use the option buttons to adjust temperature, spin speed, or add extra functions if available for the chosen program.
5.4 Starting a Cycle
- Press the 'Start/Pause' button to begin the wash cycle. The program indicator light will illuminate.
5.5 Pausing/Canceling a Cycle
- To pause a running cycle, press the 'Start/Pause' button. Press it again to resume.
- To cancel a cycle, press and hold the 'Start/Pause' button for a few seconds until the machine resets or the program light turns off.
5.6 End of Cycle
- The machine will signal the end of the cycle, and the display will show 'End' or similar.
- Open the lid and remove the laundry promptly to prevent creasing.
6. Washing Programs
Your Whirlpool TDLR 7221BS EU/N washing machine offers a variety of programs to suit different fabric types and soil levels. Refer to the control panel for a complete list and specific settings.
| Program | Description | Typical Use |
|---|---|---|
| Eco 40-60 | Standard program for normally soiled cotton laundry declared to be washable at 40°C or 60°C, together in the same cycle. | Energy-efficient wash for mixed cottons. |
| Cotton | For normally to heavily soiled cottons. | Towels, bed linen, underwear, etc. |
| Synthetics | For normally soiled synthetic items. | Blouses, shirts, mixed fiber garments. |
| Mixed | For lightly to normally soiled resilient garments in cotton, linen, synthetic fibers, and mixed fabrics. | Everyday mixed laundry. |
| Delicates | For delicate garments requiring gentle washing. | Silk, lingerie, delicate synthetics. |
| Wool | For wool garments, hand-washable items. | Wool sweaters, scarves. |
| Rapid 30' | A quick wash program for lightly soiled items. | Small loads, lightly soiled clothes. |
| Spin | Drains water and spins laundry. | Removing excess water from hand-washed items. |
| Rinse & Spin | Rinses and then spins laundry. | Adding an extra rinse or rinsing hand-washed items. |
| Jeans | Specific program for denim items. | Jeans, denim jackets. |
| Hygiene | For heavily soiled white cottons, with a high temperature wash to remove bacteria. | Baby clothes, items requiring sanitization. |
| Colours 15° | Low temperature wash to preserve colors. | Colored garments prone to fading. |
| Intensive/Outdoor | For robust, heavily soiled items or outdoor wear. | Work clothes, sportswear. |
7. Maintenance
Regular maintenance ensures the optimal performance and extends the lifespan of your washing machine.
7.1 Cleaning the Detergent Dispenser
- Periodically remove the detergent dispenser drawer and rinse it under running water to remove any detergent residue.
- Clean the housing of the dispenser with a brush if necessary.
7.2 Cleaning the Filter
- Locate the filter cover at the bottom front of the machine.
- Place a shallow container beneath the filter to catch any residual water.
- Unscrew the filter slowly to allow water to drain.
- Remove any lint, coins, or foreign objects from the filter and clean it thoroughly under running water.
- Screw the filter back in tightly.
7.3 Cleaning the Exterior
- Wipe the exterior surfaces of the washing machine with a soft, damp cloth.
- Do not use abrasive cleaners, solvents, or harsh chemicals.
7.4 Drum Care
- To prevent odors and mold, leave the top lid slightly ajar after each wash to allow the drum to air dry.
- Periodically run a maintenance wash (e.g., a hot cycle with no laundry and a descaling agent or washing machine cleaner).
8. Troubleshooting
Before contacting customer service, please refer to the following table for common issues and their solutions.
| Problem | Possible Cause | Solution |
|---|---|---|
| Machine does not start | Power cord not plugged in; Lid not closed properly; 'Start/Pause' button not pressed; Fuse blown. | Check power connection; Ensure lid is fully closed; Press 'Start/Pause'; Check household fuse/circuit breaker. |
| No water filling | Water tap closed; Water inlet hose kinked or blocked; Water pressure too low. | Open water tap; Straighten hose, clean filter if blocked; Check household water pressure. |
| Water not draining | Drain hose kinked or blocked; Filter blocked; Drain pump fault. | Straighten hose, clear blockage; Clean the filter (Section 7.2); Contact service if pump fault suspected. |
| Excessive vibration/noise | Machine not level; Transport bolts not removed; Overloaded or unbalanced load. | Adjust feet to level machine; Remove transport bolts (Section 4.1); Redistribute laundry, reduce load size. |
| Detergent residue in dispenser | Insufficient water pressure; Dispenser blocked; Too much detergent used. | Check water pressure; Clean dispenser (Section 7.1); Use recommended detergent amount. |
9. Specifications
Key technical specifications for the Whirlpool TDLR 7221BS EU/N washing machine:
- Model: TDLR 7221BS EU/N (TDLR7221BSEUN)
- Brand: Whirlpool
- Type: Top-Loading Washing Machine
- Capacity: 7 Kilograms
- Maximum Spin Speed: 1200 RPM
- Dimensions (H x W x D): 90 x 40 x 60 cm
- Weight: 56 kg
- Voltage: 220 Volt
- Noise Level (Spin): 78 Decibels
- Display Type: LED
- User Interface: Buttons
- Number of Programs: 14
- Installation Type: Freestanding
- Color: White
10. Warranty and Support
Your Whirlpool TDLR 7221BS EU/N washing machine comes with a manufacturer's warranty. Please refer to the warranty card included with your appliance for specific terms and conditions, including the warranty period and coverage details.
For technical assistance, spare parts, or to schedule a service appointment, please contact Whirlpool Customer Service. You can find contact information on the Whirlpool official website or in the documentation provided with your appliance. When contacting support, please have your model number (TDLR7221BSEUN) and serial number ready.