Welcome to the user manual for your TIM Vision Box Atmosphere Sagecom Decoder. This guide provides essential information for setting up, operating, maintaining, and troubleshooting your device. Please read these instructions carefully to ensure optimal performance and a seamless user experience.
1. Getting Started
1.1. Package Contents
Please ensure all components are present in the package:
- TIM Vision Box Atmosphere Decoder
- Remote Control
- Power Adapter
- HDMI Cable
- Quick Start Guide (if included)
1.2. Connecting the Device
Follow these steps to connect your TIM Vision Box:
- Connect the Antenna Cable to the 'ANTENNA IN' port on the back of the decoder.
- Connect one end of the HDMI Cable to the 'HDMI' port on the decoder and the other end to an available HDMI input on your TV.
- For wired internet, connect an Ethernet Cable to the 'Ethernet Port' on the decoder and to your router. Alternatively, you can use Wi-Fi during the setup process.
- Connect the Power Adapter to the 'Power Cable Socket' (12V 2.5A) on the decoder and then plug it into a wall outlet.
- Press the On/Off/Standby button on the top side of the decoder to power it on.
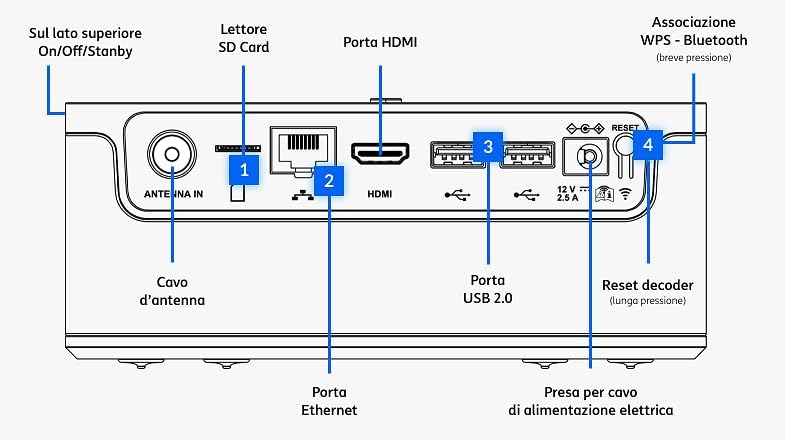
Image: Rear panel connections of the TIM Vision Box Atmosphere decoder. This image shows the various ports including Antenna In, SD Card Reader, Ethernet Port, HDMI Port, USB 2.0 Ports, Power Socket, and Reset button, along with the On/Off/Standby button on the top.
1.3. Remote Control Pairing
Upon first use, you will need to pair the remote control with your TIM Vision Box:
- Ensure the decoder is powered on and connected to your TV.
- The TV screen will display a prompt to pair the remote control via Bluetooth.
- Press any button on the remote control to initiate the pairing process.
- The remote control will search for the decoder and connect automatically.
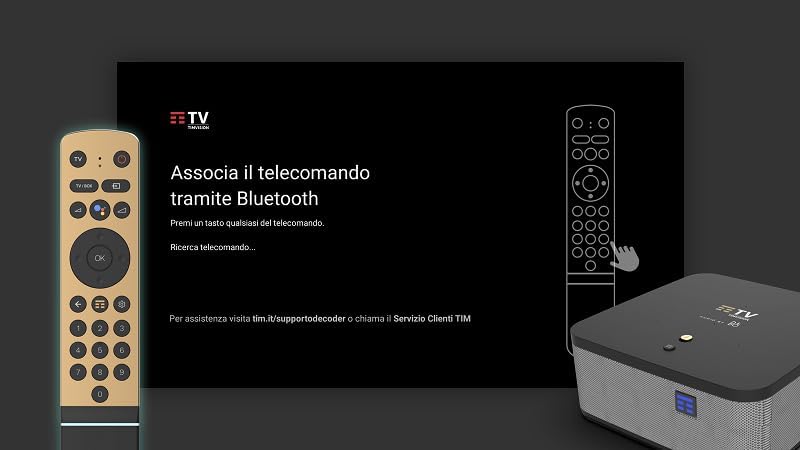
Image: Screen displaying instructions to pair the remote control via Bluetooth. The text reads "Associa il telecomando tramite Bluetooth" (Pair the remote control via Bluetooth) and prompts the user to press any button on the remote.
1.4. Initial Setup Wizard
After pairing the remote, the on-screen setup wizard will guide you through the initial configuration:
- Language Selection: Choose your preferred language.
- Network Connection: Select your Wi-Fi network from the list or connect via Ethernet. Enter the Wi-Fi password if prompted.
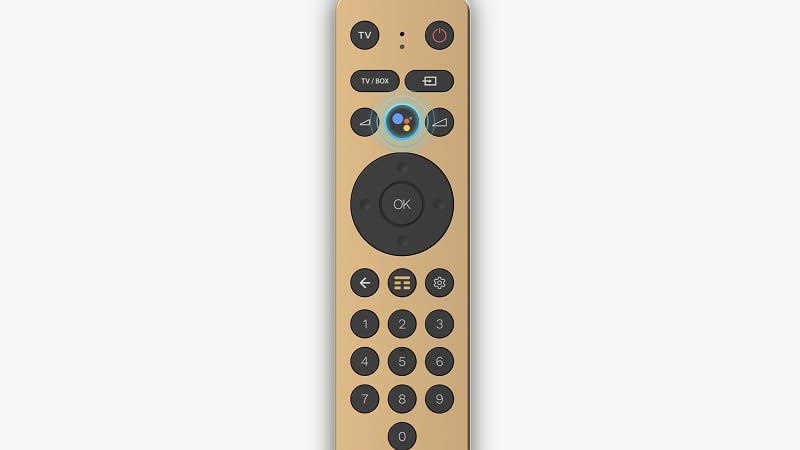
Image: Screen displaying "Seleziona la tua rete Wi-Fi" (Select your Wi-Fi network) with a list of available networks and an option to connect via Ethernet.
- Google Account Sign-in: Sign in with your Google account to access Google Play apps, personalized recommendations, and other services. You can choose to skip this step and sign in later.

Image: Screen prompting the user to sign in to their Google account to "Utilizza al meglio la tua TV" (Make the most of your TV) with options to "Accedi" (Sign in) or "Ignora" (Skip).
- Channel Tuning: The decoder will automatically scan for available digital terrestrial (DVB-T2) channels. This process may take a few minutes.
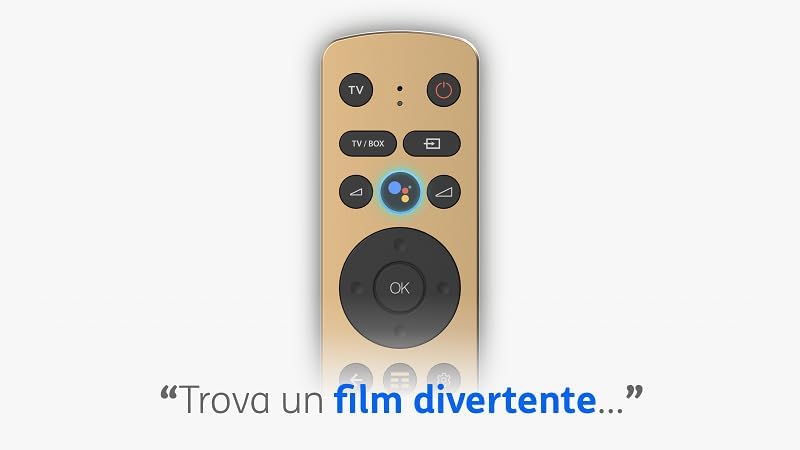
Image: Screen displaying "Sintonizzazione dei canali TV..." (TV channel tuning...) with a progress bar and the number of channels found.
2. Operating Your TIM Vision Box
2.1. Remote Control Functions
The remote control provides access to all functions of your TIM Vision Box. Familiarize yourself with the key buttons:
- TV Power Button: Controls your TV's power.
- Decoder Power Button: Controls the TIM Vision Box power/standby.
- TV/BOX Button: Switches between TV and Box modes (may be disabled depending on configuration).
- Input Source Button: Changes the input source on your TV.
- Navigation Pad (Up/Down/Left/Right/OK): Navigates menus and confirms selections.
- Google Assistant Button: Activates voice commands.
- Back Button: Returns to the previous screen.
- Home Button: Returns to the Android TV home screen.
- Settings Button: Accesses device settings.
- Number Pad: For direct channel input or other numerical entries.
- P+/P- (Channel Up/Down): Changes channels in DVB-T2 mode.
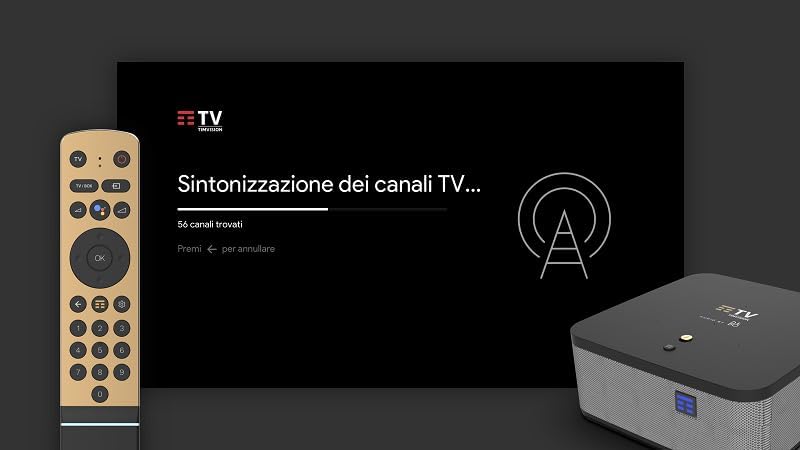
Image: Detailed layout of the TIM Vision Box remote control. Key buttons are labeled, including TV power, Decoder power, TV/BOX switch, Input source, Google Assistant, Back, Settings, Home, and Channel Up/Down.
2.2. Navigating Android TV
The TIM Vision Box runs on Android TV 10, providing access to a wide range of applications and services. Use the navigation pad and OK button on your remote to browse the home screen, launch apps, and manage settings. The home screen typically displays recommended content, installed apps, and access to Google Play Store.
2.3. Using Google Assistant
Your TIM Vision Box features integrated Google Assistant. Press the Google Assistant button on your remote control and speak into the remote's microphone to:
- Search for movies, TV shows, or videos.
- Open applications.
- Get information (weather, news, etc.).
- Control smart home devices (if configured).

Image: Close-up view of the TIM Vision Box remote control, specifically highlighting the circular Google Assistant button with its distinctive colored dots.
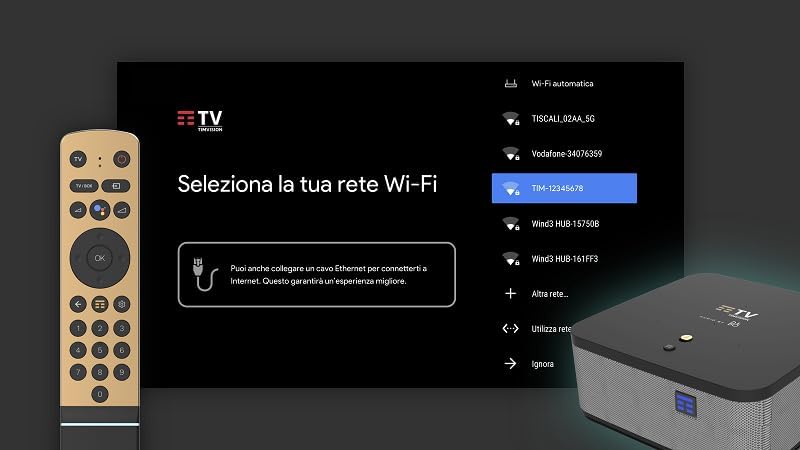
Image: The remote control with a speech bubble displaying the Italian phrase "Trova un film divertente..." (Find a fun movie...), illustrating a typical voice command for Google Assistant.
2.4. DVB-T2 Digital Terrestrial TV
The integrated DVB-T2 tuner allows you to receive digital terrestrial television channels. You can access these channels through the TV interface or by using the number pad on your remote control. Channel scanning is performed during the initial setup, but you can rescan for channels in the settings menu if needed.
2.5. Audio Features
The TIM Vision Box Atmosphere is equipped with advanced audio technology from BANG & OLUFSEN and supports Dolby ATMOS. This provides high-quality audio for music and programs. For content encoded with Dolby ATMOS, you will experience immersive, three-dimensional sound.
3. Maintenance
3.1. Cleaning
To maintain your device, gently wipe the exterior surfaces with a soft, dry cloth. Do not use liquid cleaners, aerosols, or abrasive materials, as these can damage the finish or internal components.
3.2. Software Updates
The TIM Vision Box may receive automatic software updates to improve performance, add new features, or fix bugs. Ensure your device is connected to the internet to receive these updates. Do not power off the device during an update process.
4. Troubleshooting
4.1. Common Issues and Solutions
- No Power:
- Check if the power adapter is securely connected to the decoder and the wall outlet.
- Ensure the wall outlet is functioning.
- Press the On/Off/Standby button on the top of the decoder.
- No Picture/Sound on TV:
- Verify the HDMI cable is securely connected to both the decoder and the TV.
- Ensure your TV is set to the correct HDMI input source.
- Check TV volume and mute settings.
- Remote Control Not Responding:
- Ensure the remote control batteries are not depleted. Replace if necessary.
- Re-pair the remote control by following the instructions in Section 1.3.
- No Internet Connection:
- If using Wi-Fi, check your Wi-Fi network settings and password.
- If using Ethernet, ensure the cable is connected and your router is working.
- Restart your router and the TIM Vision Box.
- No DVB-T2 Channels:
- Check the antenna cable connection.
- Perform a channel rescan in the device settings.
- Ensure your antenna is properly positioned and functional.
- Device Reset:
- If the device is unresponsive, you can perform a soft reset by unplugging the power adapter for 10 seconds and plugging it back in.
- For a factory reset, locate the 'Reset decoder' button on the back panel (often a small pinhole) and press it with a paperclip for a long duration (e.g., 10 seconds). Note: A factory reset will erase all personal data and settings.
5. Technical Specifications
| Feature | Specification |
|---|---|
| Brand | TIM |
| Model Number | 2106-SBZB4-12680 |
| Operating System | Android TV 10 |
| Processor | Broadcom 72180 |
| Connectivity Technology | HDMI |
| Video Output Resolution | 4K |
| Supported Internet Services | TIM Vision |
| Digital Tuner | DVB-T2 |
| Audio Technology | BANG & OLUFSEN, Dolby ATMOS |
| Color | Black |
| Product Dimensions | 18L x 20W x 6.8H cm |
| Item Weight | 1.8 Kilograms |
| Compatible Devices | Android |
6. Warranty Information
This product is covered by a manufacturer's warranty. Please refer to the warranty card included in your package or contact TIM customer support for detailed information regarding warranty terms and conditions.
7. Customer Support
For further assistance, technical support, or service inquiries, please contact TIM customer support. Contact details can typically be found on the official TIM website or in the documentation provided with your product.