Introduction
This manual provides detailed instructions for the installation, operation, and maintenance of your Brick Shine Light Kit for The Simpsons House 71006. This kit is designed to seamlessly integrate with your model, enhancing its visual appeal with high-quality lighting.
Brick Shine light kits are crafted from premium-grade materials, including durable ABS plastic for light bricks, copper wire for connecting cables, and high-efficiency LEDs. These materials ensure reliability, longevity, and safety.
The design focuses on seamless integration, with components matching the color, texture, and shape of the original model's bricks, ensuring the light kit enhances rather than detracts from the original design.

Image: The Simpsons House model illuminated by the Brick Shine Light Kit, showcasing the front exterior.
Package Contents
Please verify that all components are present before beginning installation. The kit includes:
- LED light strings and individual LEDs
- Connecting cables
- Expansion boards
- Battery box (batteries not included) or USB power cable
- Adhesive squares or mounting clips
- Instruction manual (this document)
If any parts are missing or damaged, please contact Brick Shine customer service for assistance.
Setup and Installation
The Brick Shine light kit is designed for easy installation with clear, concise, step-by-step instructions. No electronic knowledge is required as components are plug-and-play.
- Preparation: Ensure your The Simpsons House 71006 model set is fully assembled and stable. Identify the areas where lights will be installed based on the provided diagrams.
- Component Identification: Familiarize yourself with the different types of lights (e.g., strip lights, individual LEDs) and connectors.
- Routing Cables: Carefully route the connecting cables through the model's existing gaps or by gently separating bricks as indicated in the detailed instructions. Avoid pinching or sharply bending cables.
- Attaching Lights: Secure individual LEDs and light strips in their designated positions using the provided adhesive squares or by integrating them directly into the brick structure.
- Connecting to Expansion Boards: Connect the light cables to the expansion boards. Ensure connectors are fully inserted and secure.
- Connecting Power: Connect the expansion boards to the main power source cable (either battery box or USB cable).
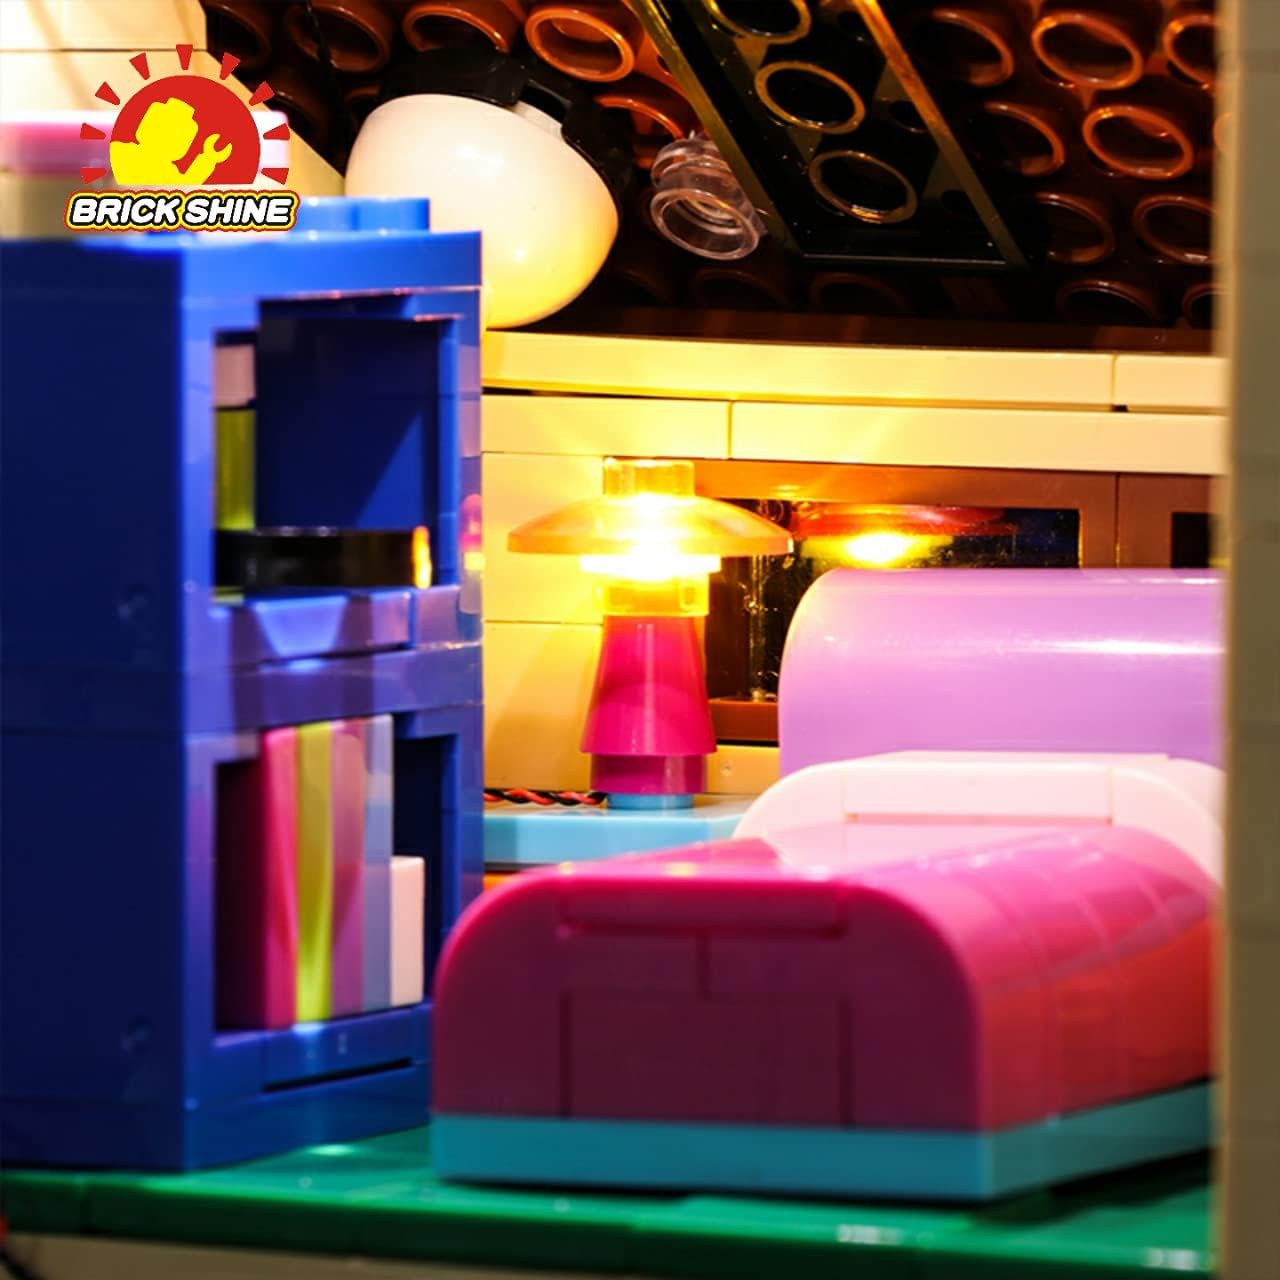
Image: Detailed view of an illuminated interior space, showing a small lamp and furniture.
Refer to the specific diagrams and step-by-step guidance included with your physical light kit for precise placement and connection details.
Operating Instructions
To power your Brick Shine light kit, you have two primary options:
- Battery Power: Insert AAA or AA batteries (not included) into the battery pack. Ensure correct polarity. Once batteries are inserted, the lights should illuminate.
- USB Power: Connect the built-in USB cable to a USB power bank or a USB wall adapter (not included). The lights will turn on once a stable power connection is established.
There is no on/off switch on the light kit itself; power is controlled by connecting or disconnecting the power source. For prolonged display, USB power is recommended.
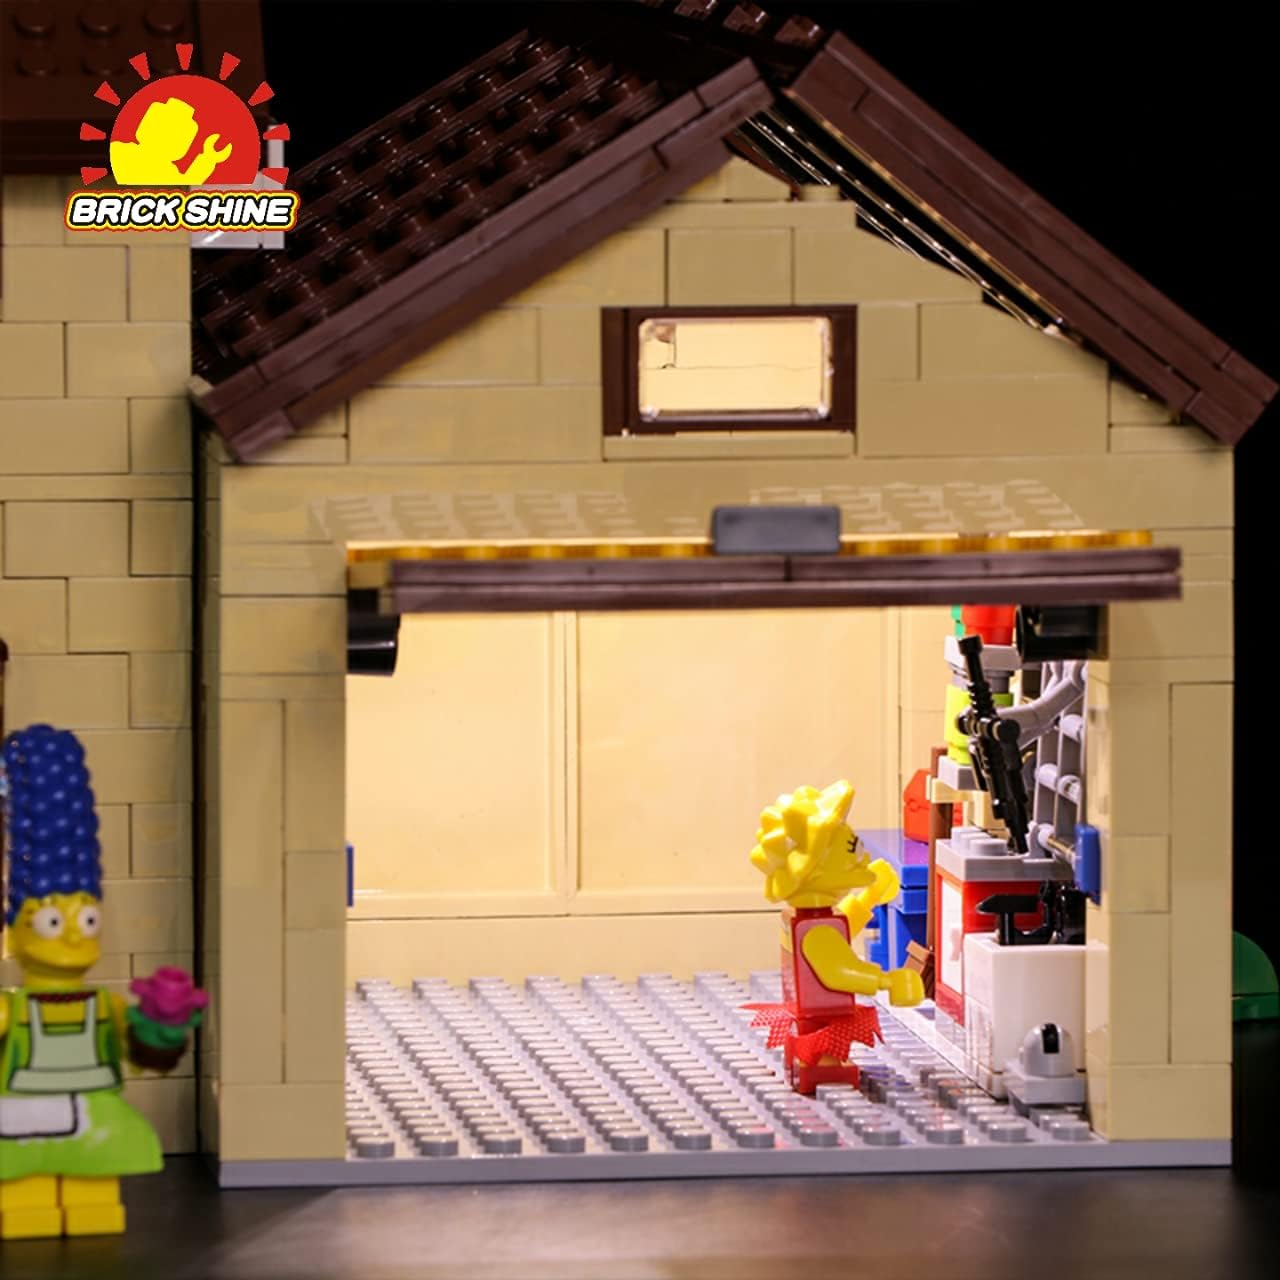
Image: The iconic pink car with functional headlights and taillights from the light kit.
Maintenance
Proper maintenance will ensure the longevity and optimal performance of your light kit:
- Cleaning: Gently dust the lights and cables with a soft, dry cloth. Avoid using liquid cleaners directly on the electrical components.
- Cable Management: Periodically check that cables are not pinched or excessively strained. Re-route if necessary to prevent damage.
- Power Source: If using batteries, remove them if the kit will not be used for an extended period to prevent leakage.
- Storage: If disassembling the kit for storage, carefully disconnect components and store them in a dry, cool place away from direct sunlight.
Troubleshooting
If you encounter issues with your light kit, please refer to the following common solutions:
| Problem | Possible Cause | Solution |
|---|---|---|
| Lights do not turn on. | No power, loose connection, or faulty component. |
|
| Some lights are dim or flickering. | Insufficient power or loose connection. |
|
| Lights are not securely attached. | Adhesive failure or improper placement. | Re-secure lights using fresh adhesive squares or by adjusting their position within the model's bricks. |
If the problem persists after attempting these solutions, please contact Brick Shine customer support.
Specifications
| Feature | Detail |
|---|---|
| Product Name | Light Kit for The Simpsons House 71006 (Classic) |
| Brand | Brick Shine |
| Model Compatibility | The Simpsons House 71006 (Model Set is not Included) |
| Power Source Options | AAA/AA Batteries (not included) or USB Power Bank/Wall Adapter (not included) |
| Recommended Age | 8 years and up |
| Manufacturer | FENGMA Technology Pty Ltd |
| ASIN | B09FF63SQJ |
Warranty and Support
Brick Shine is an Australian brand known for its quality products and exceptional customer service. For any inquiries, technical support, or warranty claims, please contact our customer service team through the retailer where you purchased the product or visit the official Brick Shine website.
Please retain your proof of purchase for warranty purposes.