Introduction
This manual provides detailed instructions for the installation, operation, and maintenance of your weelye RX29 12V Four-Sided Socket 2.4G Bluetooth Remote Control and Receiver. This product is designed as a replacement part for children's electric ride-on cars.
Compatibility
To ensure compatibility, open your existing electric ride-on car and inspect the control box. If the appearance of the control box matches the weelye RX29, this replacement part should be compatible with your vehicle.
This kit includes the Wellye 2.4G Bluetooth Remote Control TX1 and the WEELYE RX29 Four-sided Socket 12V Control Box.
Before installation, verify that other functions of your car, such as motors and batteries, are working correctly.

Image: Top view of the weelye RX29 control box, clearly showing the 'weelye' brand logo and the 'RX29' model number on the top cover. This view helps in identifying the correct replacement part.

Image: Side view of the weelye RX29 control box, highlighting the four-sided socket connectors located at the bottom. This perspective is crucial for verifying the socket type for compatibility.
Setup
1. Remote Control Battery Installation
- Install two AAA 1.5V batteries into the remote control. Ensure correct positive and negative polarity within the battery chamber.
- Close the battery cover securely. The indicator light will flash three times, confirming correct battery installation.
2. Frequency Matching (Binding)
This process is required for the first use or after replacing the remote control batteries.
- With the remote control batteries installed, press and hold the frequency key (often labeled "car select" or indicated by a specific symbol) for approximately 2-4 seconds. The indicator light on the remote will flash.
- While the remote's indicator is flashing, turn on the power supply of the ride-on car.
- The indicator light on the remote control should turn off, signifying successful frequency matching.
- If the matching is unsuccessful (the indicator light continues to flash), turn off the car's power supply and repeat steps 1-3.

Image: Top view of the weelye 2.4G Bluetooth remote control. This image displays the layout of the buttons, including the central oval button (likely the frequency key), 'P' for emergency brake, 'S' for speed, and directional arrows for movement.
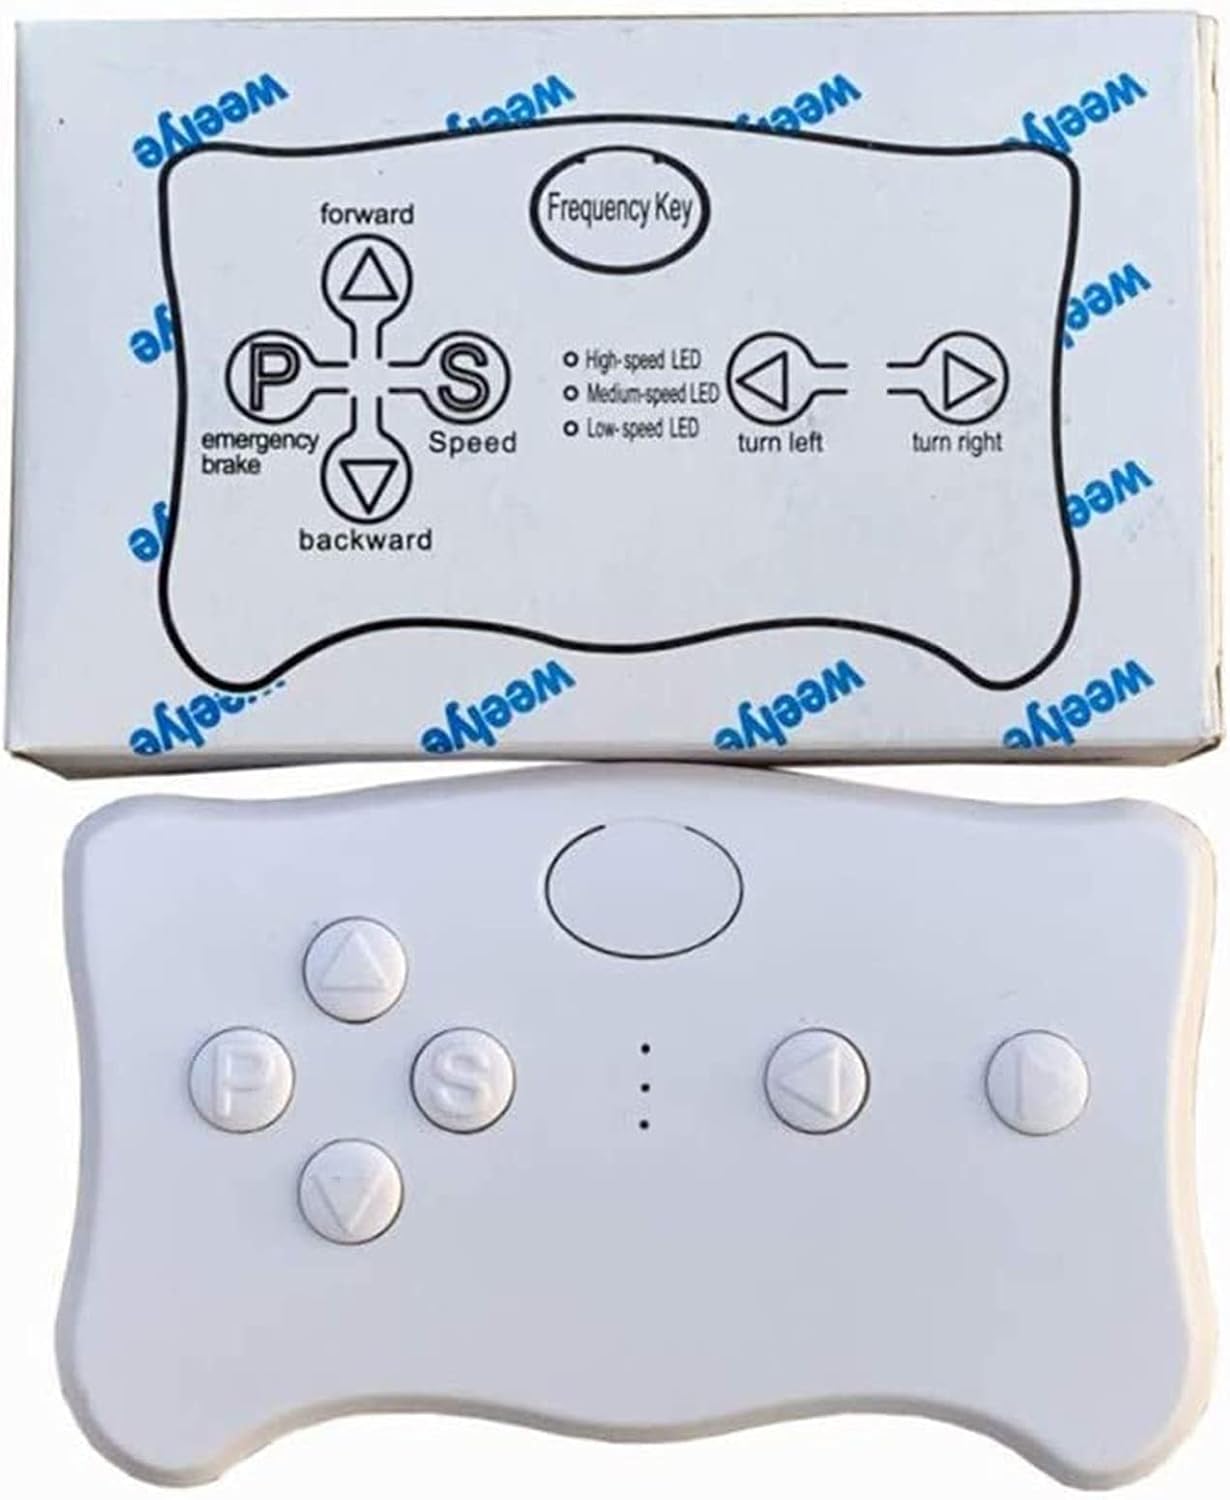
Image: The weelye remote control shown alongside its packaging, which features a diagram illustrating the function of each button. This visual aid helps users understand the remote's controls.
Operating Instructions
The weelye RX29 control box features a slow start function, eliminating the need for additional slow starter installations.
Remote Control Functions
- Frequency Key (Car Select): Used for pairing the remote with the car.
- Forward (Triangle Up): Moves the car forward.
- Backward (Triangle Down): Moves the car backward.
- Turn Left (Arrow Left): Turns the car left.
- Turn Right (Arrow Right): Turns the car right.
- Speed (S): Adjusts the speed setting (High-speed LED, Medium-speed LED, Low-speed LED).
- Emergency Brake (P): Press this button to engage the emergency brake, stopping the car. Press again to release.
If the remote control is not operated for 10 seconds, the indication light will turn off, and it will enter power-saving mode.

Image: A close-up view of the operation manual printed on the remote control's packaging. This text provides a summary of frequency binding and button descriptions, serving as a quick reference.
Maintenance
- Keep the control box and remote control clean and dry.
- Avoid exposing the components to extreme temperatures or direct sunlight for prolonged periods.
- Regularly check battery compartments for corrosion and replace batteries as needed.
- Ensure all connections are secure when installing the control box.
This product is made of durable plastic material.
Troubleshooting
- Remote Control Not Responding:
- Check if the remote control batteries (AAA 1.5V) are installed correctly and have sufficient charge. Replace if necessary.
- Perform the frequency matching (binding) procedure again as described in the Setup section.
- Car Not Operating After Control Box Installation:
- Verify that the control box is securely connected to the car's wiring harness.
- Ensure the car's main power switch is ON.
- Check the car's battery and motor functionality independently.
- Confirm that the control box model (RX29) is compatible with your specific ride-on car model.
- Intermittent Operation:
- Ensure there are no strong interference sources nearby (e.g., other 2.4Ghz devices).
- Re-bind the remote control to the car.
If issues persist, consult a qualified technician or contact weelye customer support.
Specifications
| Feature | Detail |
|---|---|
| Brand | weelye |
| Model Number | RX29 |
| Voltage | 12V |
| Remote Control Type | 2.4G Bluetooth TX1 |
| Control Box Type | Four-Sided Socket |
| Material | Plastic |
| Item Dimensions (Control Box) | 5.1 x 3.2 x 2.4 inches |
| Item Weight (Control Box) | 5.76 ounces |
Warranty and Support
For warranty information or technical support, please refer to the original product packaging or contact weelye customer service directly. Keep your purchase receipt for any warranty claims.
You can often find support information on the official weelye website or through the retailer where the product was purchased.