1. Introduction
The TimeMoto TM-838 SC is an advanced cloud-connected time clock designed for efficient employee time management. This device supports multiple clock-in methods including Face ID, RFID, and PIN, and integrates seamlessly with the TimeMoto Cloud software for comprehensive time tracking, scheduling, and reporting.
This manual provides detailed instructions to help you set up, operate, and maintain your TimeMoto TM-838 SC time clock, ensuring optimal performance and longevity.
2. Safety Information
Please read and understand all safety instructions before using the device. Keep this manual for future reference.
- Power Source: Use only the specified power adapter. Ensure the power cable is not damaged or pinched.
- Environment: Operate the device indoors. Avoid exposure to extreme temperatures, direct sunlight, moisture, or dust.
- Cleaning: Disconnect the power before cleaning. Use a soft, dry cloth. Do not use liquid or aerosol cleaners.
- Servicing: Do not attempt to open or repair the device yourself. Refer all servicing to qualified personnel.
- Placement: Mount the device securely using the provided wall mount. Ensure it is placed in a stable location to prevent falling.
3. Package Contents
Verify that all items are present in the package:
- TimeMoto TM-838 SC Time Clock Unit
- Power Adapter
- Wall Mount Bracket
- Mounting Hardware (screws, wall plugs)
- Quick Start Guide (refer to this manual for full instructions)
4. Setup
4.1 Mounting the Device
- Choose a suitable indoor location for installation, ensuring stable light conditions for optimal Face ID performance.
- Use the provided wall mount bracket as a template to mark drilling points on the wall.
- Drill holes and insert the wall plugs.
- Secure the wall mount bracket to the wall using the screws.
- Carefully attach the TimeMoto TM-838 SC unit to the mounted bracket.
4.2 Initial Power-Up and Network Connection
- Connect the power adapter to the device and plug it into a power outlet.
- The device will power on and display the initial setup wizard on its 3.5" TFT screen.
- Follow the on-screen instructions to configure basic settings such as date, time, and language.
- Network Connection: The TM-838 SC supports Wi-Fi, Ethernet (LAN), and USB host connections.
- Wi-Fi: Select your Wi-Fi network from the list, enter the password, and confirm.
- Ethernet (LAN): Connect an Ethernet cable from the device to your network router or switch. The device will automatically obtain an IP address via DHCP.
- USB Host: For offline data transfer or specific configurations, a USB host connection can be utilized.
- Once connected, the device will attempt to synchronize with the TimeMoto Cloud (if configured).

Figure 1: TimeMoto TM-838 SC device showing Face ID recognition in progress.
5. Operating Instructions
The TimeMoto TM-838 SC offers multiple methods for employees to clock in and out.
5.1 Employee Registration
Before employees can use the device, their profiles must be registered. This typically involves:
- Creating an employee profile in the TimeMoto Cloud software.
- Enrolling Face ID templates (up to 400 unique face templates supported).
- Assigning RFID badges/key fobs or PINs to employees.
5.2 Clocking In/Out Methods
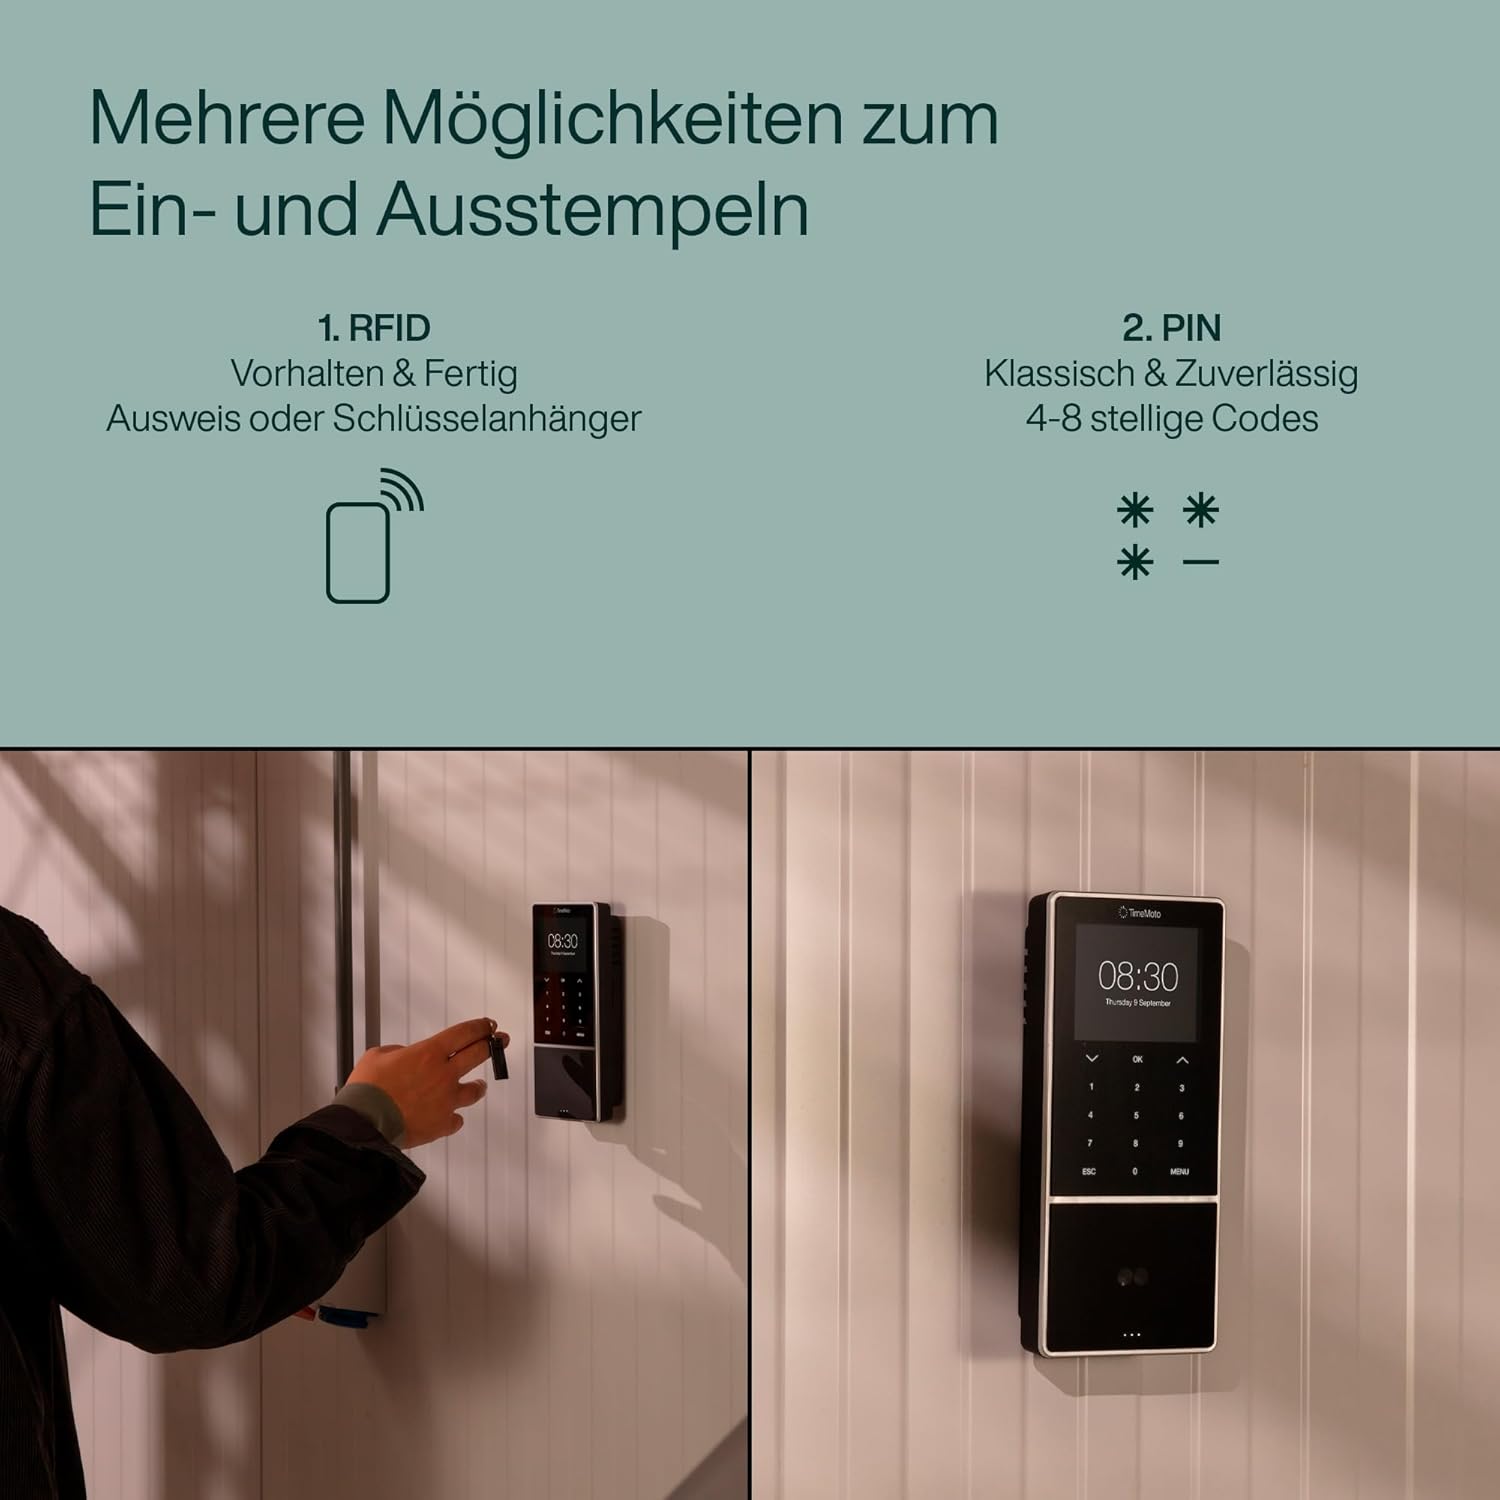
Figure 2: Multiple clock-in options including RFID and PIN codes.

Figure 3: Smartcard compatibility and hands-free Face ID recognition.
- Face ID Recognition: Employees stand in front of the device. The dual camera with 3D technology will scan their face. Upon successful recognition, the device will confirm the clock-in/out. This method is hands-free and secure.
- RFID Badge/Key Fob: Employees hold their personal RFID badge or key fob near the designated RFID reader area on the device. The device will register the clock-in/out.
- PIN Code: Employees enter their unique 4-8 digit PIN code using the keypad on the device.
- Existing Smartcard Systems: The device is compatible with existing contactless smart card systems operating on a 13.56 MHz frequency and using ISO/IEC 14443A protocol. Employees can use their existing access cards to clock in/out.
The intelligent clocking system prevents accidental double clock-ins/outs.
5.3 Project Tracking
For project-based time tracking:
- After initiating a clock-in, employees can select a specific project or project code from the device menu.
- Optionally, they can add a comment related to the project.
- Confirm the entry to associate the work time with the selected project.
5.4 Offline Data Storage
In case of a lost network connection, the device securely stores up to 100,000 clocking records locally. Once the connection is restored, all stored data will automatically synchronize with the TimeMoto Cloud.
6. TimeMoto Cloud Integration
The TimeMoto TM-838 SC is designed to work with the TimeMoto Cloud software, providing a comprehensive solution for time management.
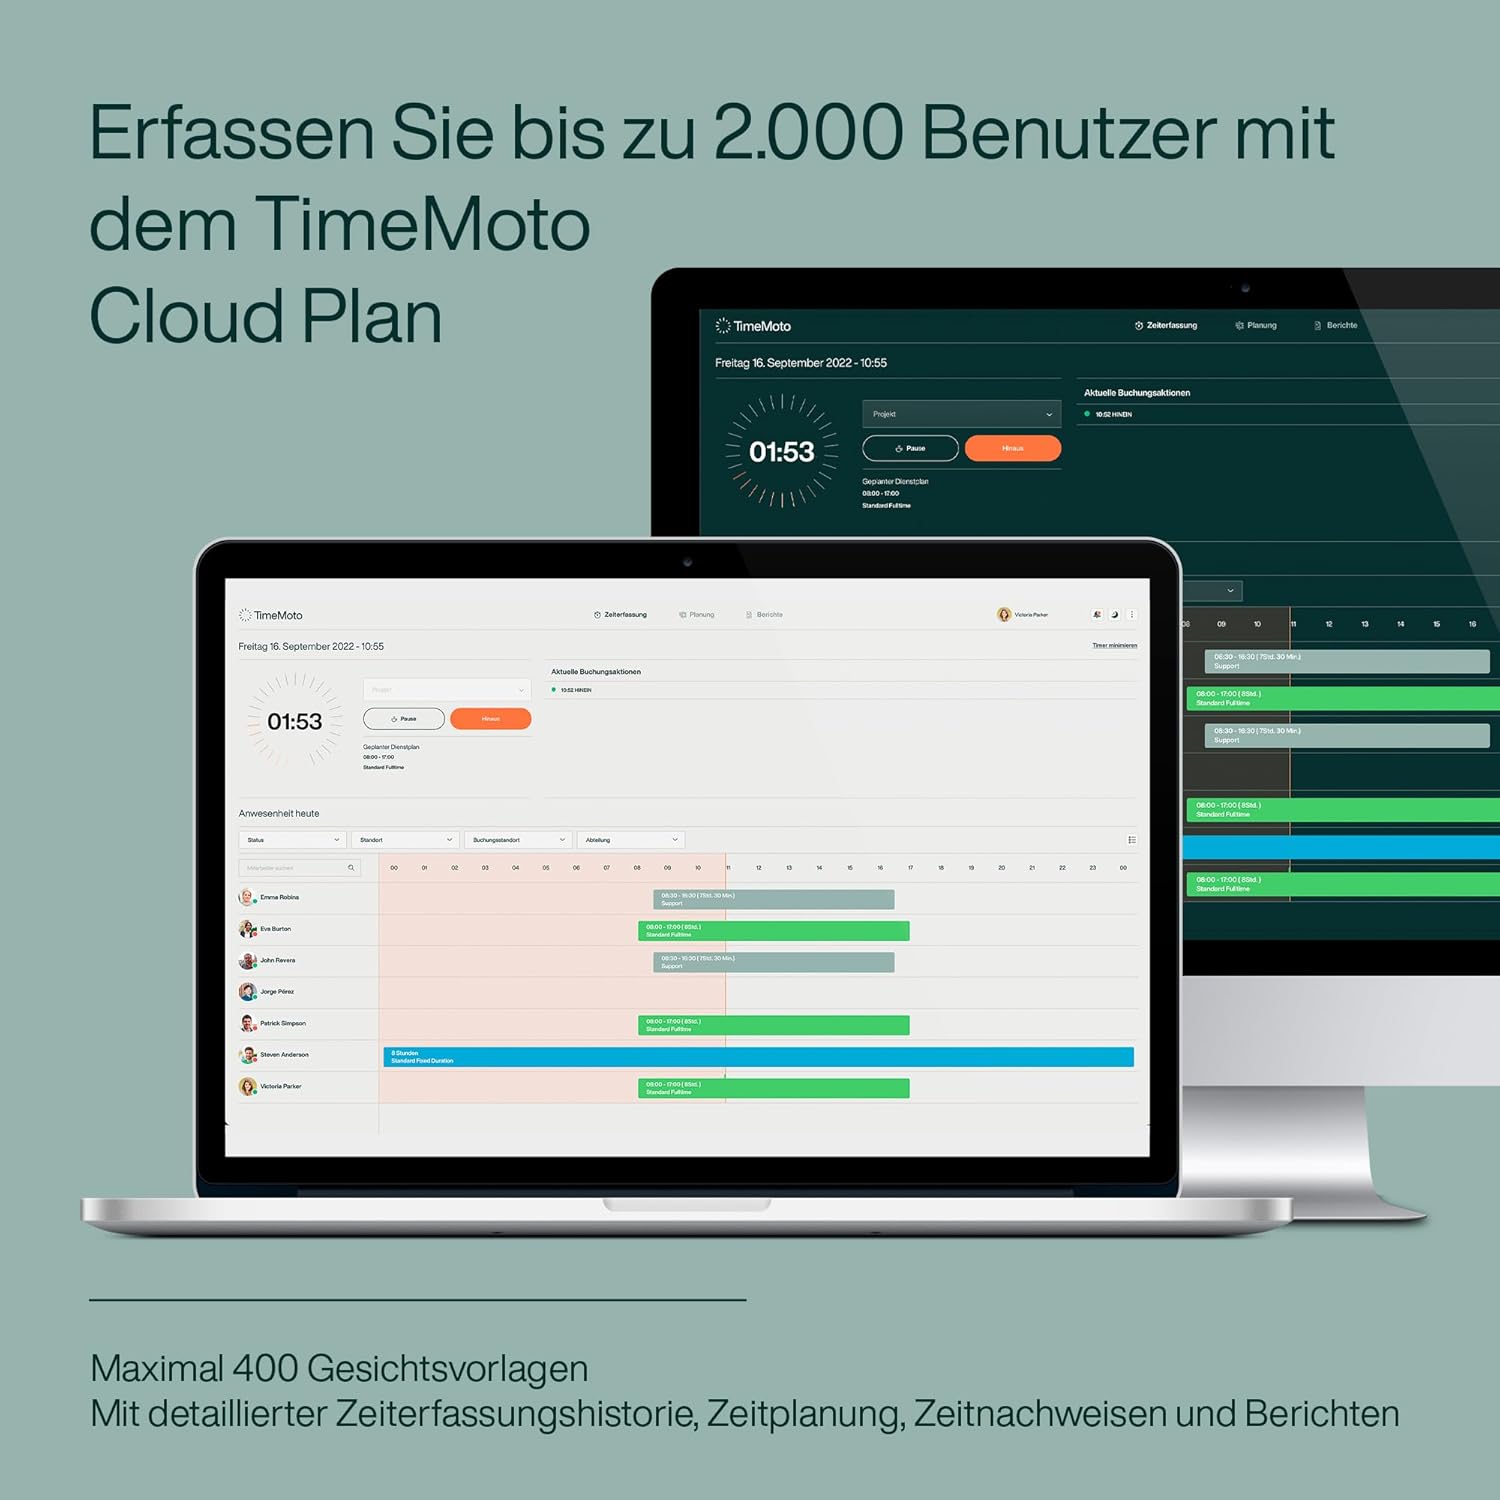
Figure 4: TimeMoto Cloud Plan for managing up to 2,000 users and 400 face templates.

Figure 5: Combining the time clock with the TimeMoto Cloud Plan for comprehensive management.
- Real-time Monitoring: View and monitor clocking data from your device in real-time, from any location.
- Editing and Reporting: Easily edit entries, generate detailed reports on total work time, overtime, project time, and absences.
- Scheduling: Create detailed schedules for your team.
- Absence Management: Manage overtime, absences, and leave requests efficiently.
- Mobile App: The TimeMoto mobile application allows employees to clock in and out remotely, with optional geofencing capabilities for specific locations.

Figure 6: Mobile app for clocking in/out, monitoring, and managing from anywhere.
A 30-day trial of the TimeMoto Cloud Plus plan is included with your device, allowing you to experience all features before selecting a subscription plan that suits your needs.
7. Maintenance
7.1 Cleaning
- Ensure the device is powered off and unplugged before cleaning.
- Use a soft, dry, lint-free cloth to wipe the exterior of the device.
- For the screen, use a screen-specific cleaning solution and a microfiber cloth to avoid scratches.
- Do not use abrasive cleaners, solvents, or aerosol sprays, as these can damage the device's surface or internal components.
7.2 Software Updates
Periodically check for software updates through the TimeMoto Cloud platform or the device's settings menu. Keeping the firmware updated ensures optimal performance, security, and access to new features.
8. Troubleshooting
If you encounter issues with your TimeMoto TM-838 SC, refer to the following common problems and solutions:
- Device not powering on:
Ensure the power adapter is securely connected to both the device and a working power outlet. Test the outlet with another device. - Face ID not recognizing users:
Ensure the user is positioned correctly in front of the camera. Check for sufficient and consistent lighting conditions. Avoid direct backlight or overly dim environments. Ensure the user's face is clear of obstructions (e.g., hats, masks, excessive hair). Re-enroll the face template if issues persist. - RFID/Smartcard not working:
Ensure the badge/card is held correctly over the RFID reader. Verify that the RFID badge/card is properly registered to the user's profile. Check if the card operates on the supported 13.56 MHz frequency and ISO/IEC 14443A protocol. - No network connection:
For Wi-Fi, verify the network password and signal strength. For Ethernet, check the cable connection and ensure your router/switch is functioning. Restart the device and your network equipment. - Data not syncing with TimeMoto Cloud:
Confirm the device has an active internet connection. Ensure your TimeMoto Cloud subscription is active. If the connection was temporarily lost, allow time for the device to re-establish connection and sync stored data. - Device unresponsive:
Perform a soft reset by unplugging the power adapter, waiting 10 seconds, and plugging it back in. If the issue persists, contact TimeMoto support.
9. Specifications
| Feature | Detail |
|---|---|
| Brand | TimeMoto |
| Model Number | 125-0684 |
| Color | Black |
| Dimensions (L x W x H) | 9.53 x 3.81 x 21.51 cm |
| Weight | 470 grams |
| Material | Plastic |
| Display Type | Digital (3.5" TFT screen) |
| User Capacity | Up to 2,000 users |
| Face Template Capacity | Up to 400 face templates |
| Record Capacity | Up to 100,000 clocking records |
| Clock-in Methods | Face ID, RFID, PIN, 13.56 MHz ISO/IEC 14443A Smartcard |
| Connectivity | Wi-Fi, Ethernet (LAN), USB Host |
| Power Source | Electric Cable |
| Usage Environment | Indoor |
10. Warranty and Support
10.1 Warranty Information
The TimeMoto TM-838 SC time clock comes with a 3-year warranty from the date of purchase, covering manufacturing defects and malfunctions under normal use. Please retain your proof of purchase for warranty claims.
Spare parts are generally available for up to 2 years after purchase.
10.2 Customer Support
For technical assistance, troubleshooting beyond this manual, or warranty claims, please contact TimeMoto customer support. Refer to the official TimeMoto website for the most up-to-date contact information and support resources.
You can also find additional resources and FAQs on the TimeMoto support pages.


