1. Introduction
This manual provides detailed instructions for the assembly, operation, maintenance, and troubleshooting of your UGEARS Wooden Marble Run Stepped Hoist, Model 70157. This mechanical 3D wooden puzzle kit offers an engaging and educational building experience, culminating in a fully functional marble run with a unique three-step hoist mechanism.

Figure 1: Fully assembled UGEARS Wooden Marble Run Stepped Hoist.
2. Safety Information
WARNING: Choking Hazard - Small Parts. Not for children under 14 years. Adult supervision is recommended during assembly and operation, especially with younger users, due to small components and moving parts.
3. What's in the Box
Your UGEARS Wooden Marble Run Stepped Hoist kit includes:
- Laser pre-cut plywood boards with 355 parts
- Fishing line
- Paraffin wax
- Sandpaper
- Marbles
- Detailed instruction booklet (in 11 languages)

Figure 2: Contents of the UGEARS Marble Run Stepped Hoist kit.
4. Assembly Instructions
The UGEARS Wooden Marble Run Stepped Hoist is designed for self-assembly without the need for glue or special tools. Follow the comprehensive, illustrated instruction booklet provided in your kit for step-by-step guidance.
4.1. Preparation
- Carefully remove all parts from the plywood boards. Use the provided sandpaper to smooth any rough edges or burrs.
- Organize parts by number as indicated in the instruction booklet.
- Ensure you have a clean, well-lit workspace.
4.2. Key Assembly Tips
- Waxing: Apply paraffin wax to all moving parts, especially gears, axles, and any components that slide or rotate against another. This reduces friction and ensures smooth operation. Pay particular attention to the sides of gears that rub against supporting structures.
- Precision: UGEARS models are designed with tight tolerances. Ensure parts fit snugly but avoid forcing them, which can cause breakage. If a part is too tight, gently sand the edges.
- Step-by-Step: Follow the visual instructions precisely. Each step builds upon the previous one.

Figure 3: Assembling the wooden components. No glue is required.
Video 1: A user demonstrating the assembly process of a UGEARS Marble Run, highlighting the intricate steps involved.
5. Operating Instructions
Once fully assembled, your UGEARS Marble Run Stepped Hoist is ready for operation. The model features a manual crank that powers the stepped hoist mechanism, lifting marbles to the top of the track where they then descend through various paths.
5.1. Basic Operation
- Place the provided marbles into the designated collection area at the base of the hoist.
- Turn the manual crank steadily to activate the stepped hoist. The hoist will lift marbles one by one to the upper tracks.
- Observe the marbles as they navigate the various slopes, turns, and mechanisms, returning to the base to be lifted again.
Video 2: Official UGEARS video demonstrating the full operation of the Marble Run Stepped Hoist, showcasing its mechanical movement and marble flow.
Video 3: A short clip showing the UGEARS Marble Run Stepped Hoist in action, with marbles moving through the tracks.
5.2. Modular Connectivity
The Stepped Hoist model is designed to connect with other UGEARS Marble Run models, such as the Marble Run Chain Hoist, to create larger, more complex kinetic sculptures. Refer to the specific instructions for connecting multiple modules.
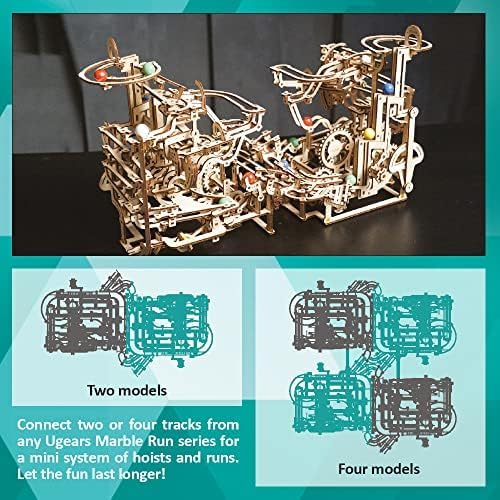
Figure 4: Illustration of modular connectivity, allowing two or four Marble Run models to be combined.
6. Maintenance
To ensure the longevity and smooth operation of your UGEARS Marble Run Stepped Hoist, periodic maintenance is recommended.
- Cleaning: Dust can accumulate on the wooden parts and tracks, potentially affecting marble movement. Use a soft, dry cloth or a small brush to gently remove dust.
- Re-waxing: Over time, the paraffin wax on moving parts may wear off. Reapply wax to gears, axles, and sliding components as needed to maintain smooth operation.
- Storage: Store the model in a dry environment away from direct sunlight or extreme temperature changes to prevent wood warping or damage.
7. Troubleshooting
If you encounter issues with your Marble Run, consider the following troubleshooting steps:
- Marbles getting stuck:
- Check for any rough edges on the tracks or moving parts. Gently sand them smooth.
- Ensure all moving parts are adequately waxed. Reapply wax if necessary.
- Verify that all parts are correctly aligned and assembled according to the instructions. Misaligned components can obstruct marble flow.
- Inspect the lifting prongs and sprocket teeth for any obstructions or misalignments that might cause marbles to jam or the chain to catch. Filing the teeth of sprockets before assembly can help guide them into chain links more effectively.
- Mechanism jamming or stiff operation:
- Ensure all gears and moving parts are properly waxed.
- Check for any loose or incorrectly installed parts that might be causing interference.
- Allow for a "break-in" period. Sometimes, mechanisms become smoother after initial operation.
- Parts breaking during assembly: While UGEARS models are robust, excessive force can cause breakage. If a part breaks, contact UGEARS customer support for replacement parts.
Video 4: A user demonstrating potential mechanical issues and how marbles can get stuck, offering visual context for troubleshooting.
8. Specifications
| Model Number | 70157 |
| Product Dimensions (L x W x H) | 11.61 x 10.63 x 10.83 inches (295 x 270 x 275 mm) |
| Item Weight | 7.1 ounces |
| Number of Parts | 355 |
| Recommended Age | 14 years and up |
| Assembly Time (Approx.) | 8 hours |
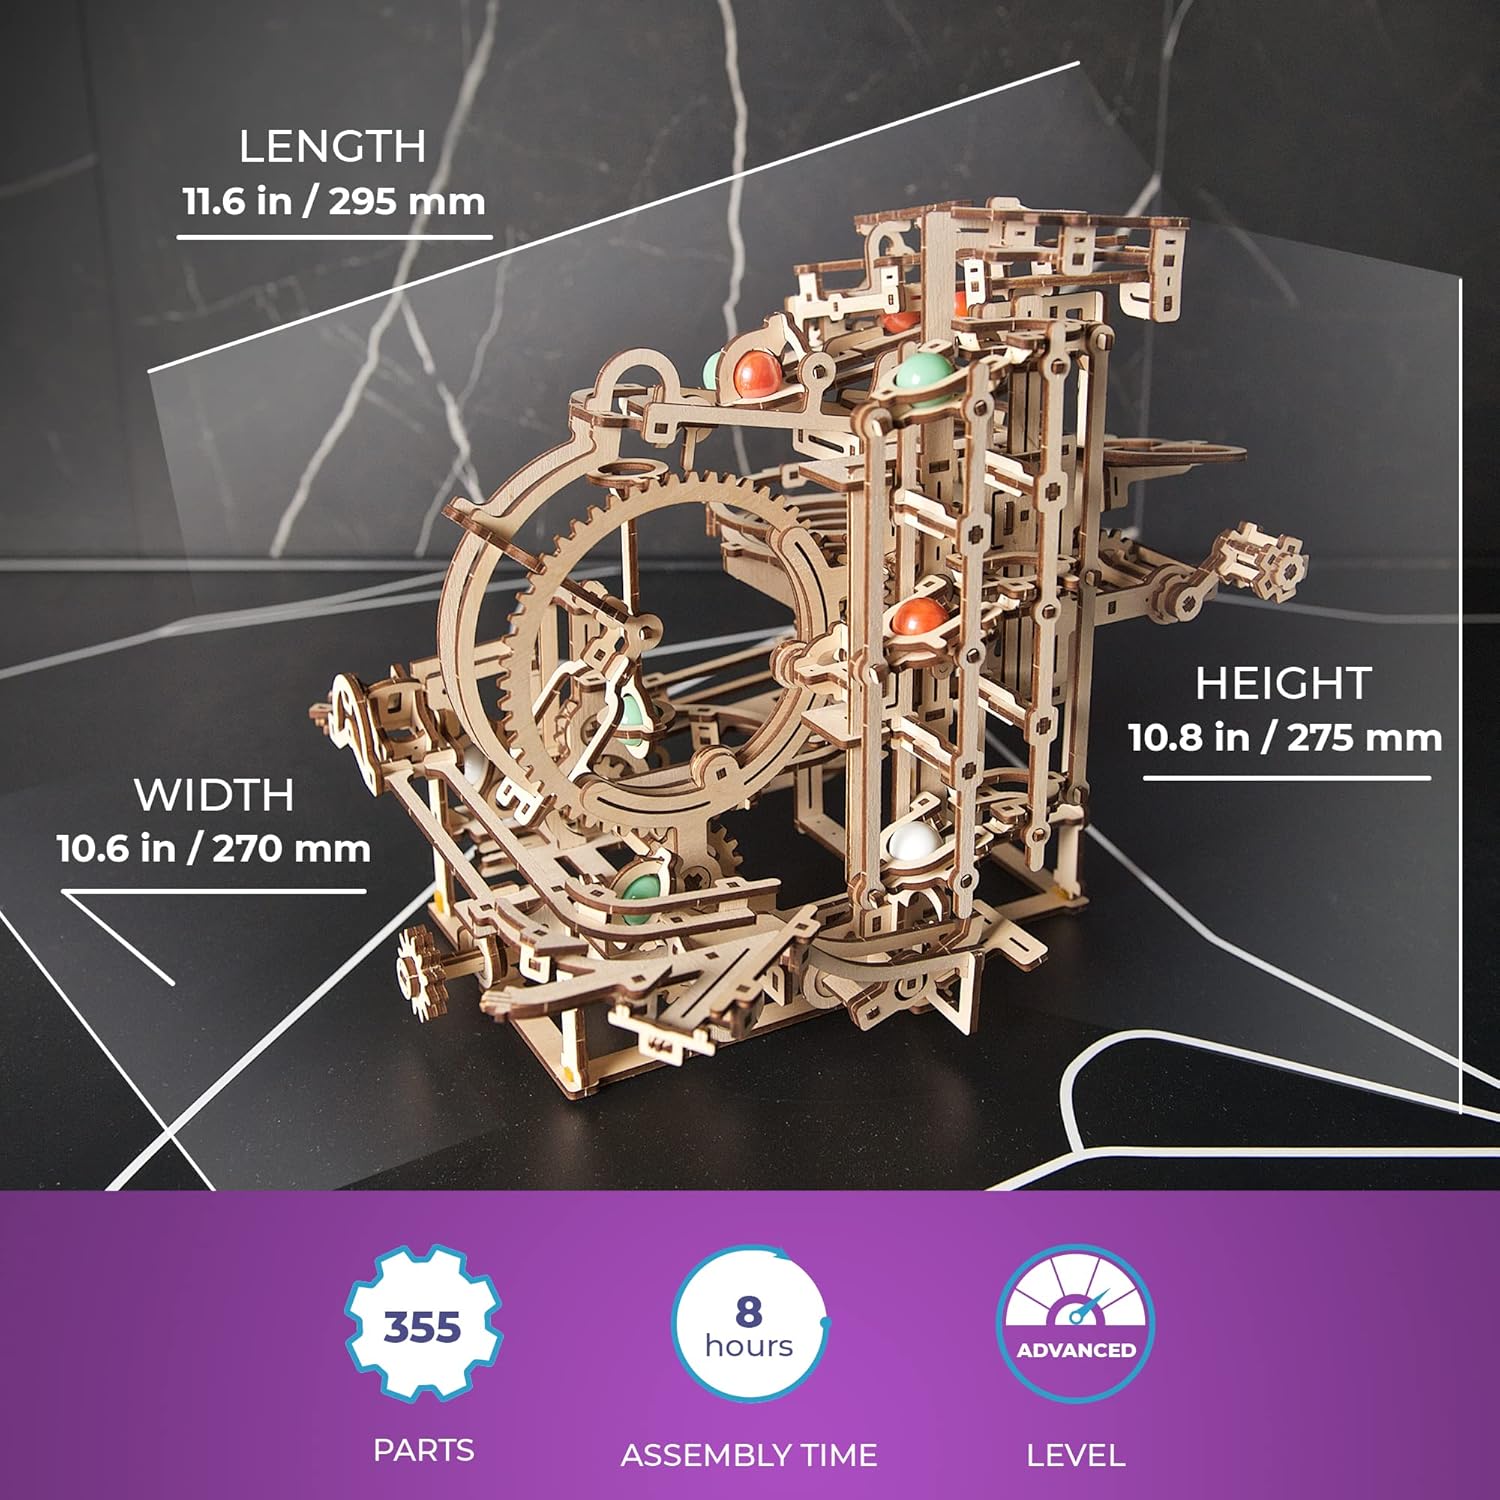
Figure 5: Product dimensions and key specifications.
9. Warranty and Support
For warranty information, replacement parts, or further technical assistance, please refer to the contact details provided in your product packaging or visit the official UGEARS website. Ensure you have your model number (70157) ready when contacting support.


