
1. Introduction
Thank you for choosing the SPEAKA PROFESSIONAL Corner TV Mount. This mount is designed to securely hold televisions ranging from 32 to 70 inches, offering both tilt and swivel functionalities for optimal viewing angles. Its unique design allows for installation on two adjacent corner walls or a single flat wall, maximizing space utilization and viewing flexibility. Please read this manual thoroughly before installation and use to ensure safe and correct operation.
2. Safety Information
WARNING: Failure to read and follow all instructions may result in personal injury, property damage, or voiding of your warranty. Improper installation can lead to serious injury or damage.
- Ensure the mounting surface can safely support the combined weight of the mount and your TV.
- Do not exceed the maximum weight capacity specified for this mount.
- Always use a stud finder to locate wall studs for secure mounting. If mounting into concrete or brick, use appropriate anchors (not always included).
- Professional installation is recommended if you are unsure about the installation process.
- Keep children and pets away during installation.
- Check all connections and fasteners periodically to ensure they remain secure.
3. Package Contents
Please verify that all components are present and undamaged before beginning installation. If any parts are missing or defective, contact customer support.
- TV Wall Mount Assembly (Main Arm and Wall Plates)
- VESA TV Brackets
- Mounting Hardware Kit (various screws, washers, spacers, wall anchors)
- Instruction Manual
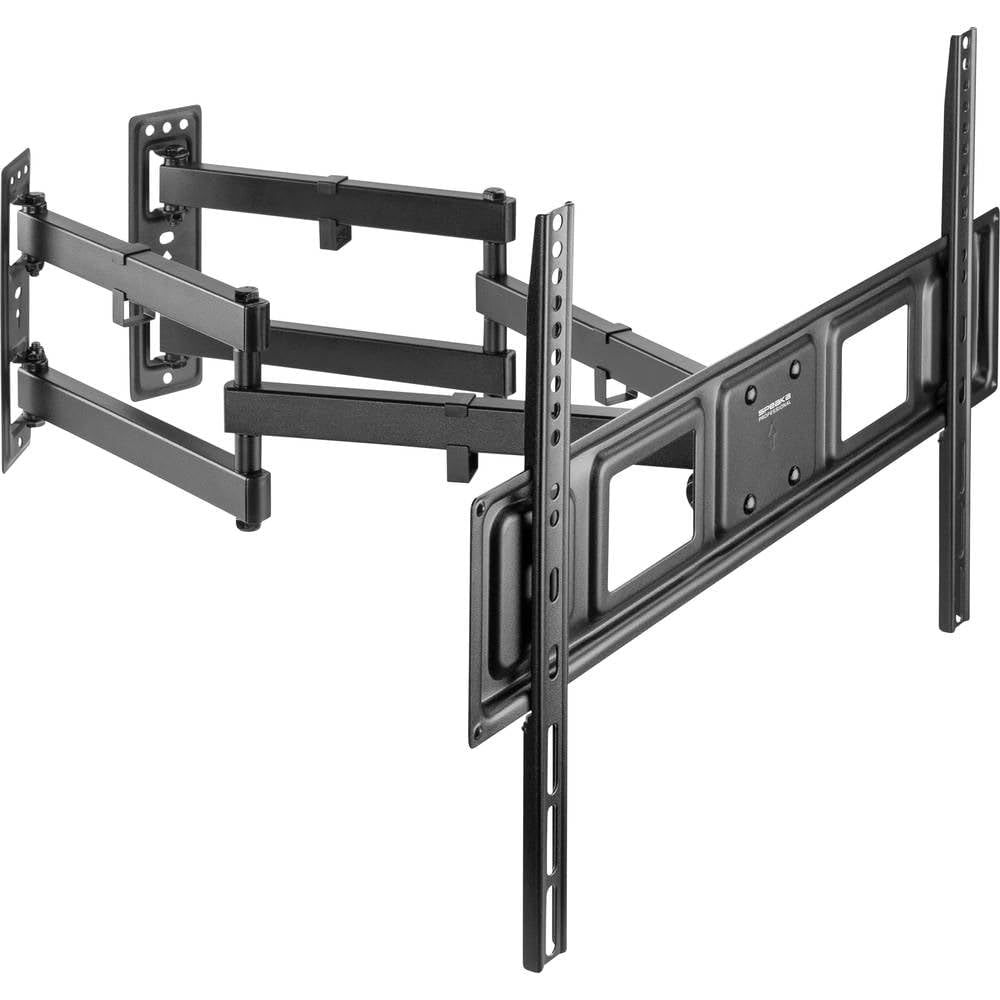
Image 1: Overview of the Speaka Professional Corner TV Mount components.
4. Setup and Installation
This mount is designed for flexible installation on either corner walls or a flat wall. Follow these steps carefully.
4.1 Attaching TV Brackets to Your TV
- Carefully place your TV face-down on a soft, clean surface to prevent screen damage.
- Identify the VESA mounting holes on the back of your TV.
- Select the appropriate screws, washers, and spacers from the hardware kit that fit your TV's VESA pattern.
- Attach the two VESA TV brackets to the back of your TV, ensuring they are securely fastened and level.

Image 2: Front view of the TV mount, showing the VESA brackets ready for TV attachment.
4.2 Mounting the Wall Plate Assembly
The split wall plate design allows for corner installation on two adjacent walls or a single flat wall.
- Determine the desired height and position for your TV.
- For Corner Installation: Position each half of the split wall plate on an adjacent wall, ensuring they are level and aligned. Mark the drilling holes.
- For Flat Wall Installation: Position both halves of the wall plate together on a single flat wall. Mark the drilling holes.
- Drill pilot holes at the marked locations. Ensure you drill into wall studs for wood stud walls or use appropriate anchors for concrete/brick walls.
- Securely attach the wall plate assembly to the wall using the provided lag bolts and washers.

Image 3: Rear view of the TV mount, illustrating the split wall plates for corner or flat wall installation.
4.3 Hanging the TV
- With assistance, carefully lift the TV with the attached VESA brackets.
- Hook the VESA brackets onto the main arm of the wall mount.
- Secure the TV to the mount using the safety screws or locking mechanisms provided.

Image 4: Side view of the articulated TV mount, demonstrating its extension and swivel capabilities.
5. Operating Instructions
This mount offers flexible viewing options:
- Swivel: Gently push or pull the TV to the desired left or right angle. The swivel arm provides maximum flexibility for viewing from different positions in the room.
- Tilt: Loosen the tilt adjustment knobs (if present) on the VESA brackets, adjust the TV to the desired upward or downward tilt, and then re-tighten the knobs to secure the position. This helps reduce glare and optimize viewing.
- Height Compensation: The integrated height compensation feature allows for minor vertical adjustments after installation to achieve a perfectly level screen. Refer to the specific mechanism on your mount for details.
6. Maintenance
Regular maintenance ensures the longevity and safe operation of your TV mount.
- Cleaning: Wipe the mount with a soft, dry cloth. Avoid abrasive cleaners or solvents that could damage the finish.
- Inspection: Periodically check all screws, bolts, and connections to ensure they are tight and secure. Re-tighten if necessary.
- Movement: If the swivel or tilt mechanisms become stiff, apply a small amount of silicone-based lubricant to the moving parts. Do not use oil-based lubricants.
7. Troubleshooting
If you encounter issues with your TV mount, refer to the following common problems and solutions:
- TV is not level: Check the wall plate installation with a spirit level. Use the integrated height compensation feature for minor adjustments. Ensure VESA brackets are evenly attached to the TV.
- Mount feels loose: Immediately remove the TV and re-check all wall mounting bolts and TV bracket screws. Ensure they are securely fastened into appropriate wall studs or anchors.
- Difficulty moving the TV (swivel/tilt): Check for any obstructions. Ensure tilt adjustment knobs are loosened before attempting to tilt, and re-tightened afterward. If still stiff, apply lubricant as per maintenance instructions.
- Missing parts: Refer to the package contents list. Contact customer support for replacement parts.
8. Specifications
| Feature | Specification |
|---|---|
| Model Number | SP-9430156 |
| Brand | Speaka Professional |
| Compatible TV Sizes | 32 - 70 inches (81.3 cm - 177.8 cm) |
| Mount Type | Wall Mount |
| Movement Type | Tiltable, Swivel |
| Compatible Devices | Television |
| Item Weight | 5.02 Kilograms |
9. Warranty and Support
For warranty information or technical support, please refer to the documentation provided with your purchase or visit the official Speaka Professional website. Keep your proof of purchase for any warranty claims.


