1. Introduction
Thank you for choosing the BONTEC Mobile TV Stand. This stand is designed to provide a versatile and stable solution for displaying your flat or curved TV, offering mobility, height adjustment, and tilting features. Please read this manual carefully before assembly and use to ensure safe and proper operation. Keep this manual for future reference.
Safety Information
- Ensure all parts are present and undamaged before assembly. Do not use if any parts are missing or defective.
- Do not exceed the maximum weight capacity of 20 kg (44 lbs).
- Ensure your TV's VESA pattern is compatible with the stand (75x75mm, 100x100mm, 100x200mm, 200x100mm, 200x200mm).
- Assemble the stand on a soft, clean surface to prevent scratches.
- Always tighten all screws securely. Periodically check for loose connections.
- Keep children and pets away during assembly.
- Use caution when moving the stand, especially with a TV mounted. Ensure wheels are unlocked before moving and locked when stationary.
2. Product Overview
The BONTEC Mobile TV Stand is a robust and adaptable solution for various environments, including homes, offices, and public spaces. It supports TVs from 13 to 49 inches and offers flexible viewing options.

Figure 2.1: The BONTEC Mobile TV Stand with a television mounted, highlighting its sleek design and portability.
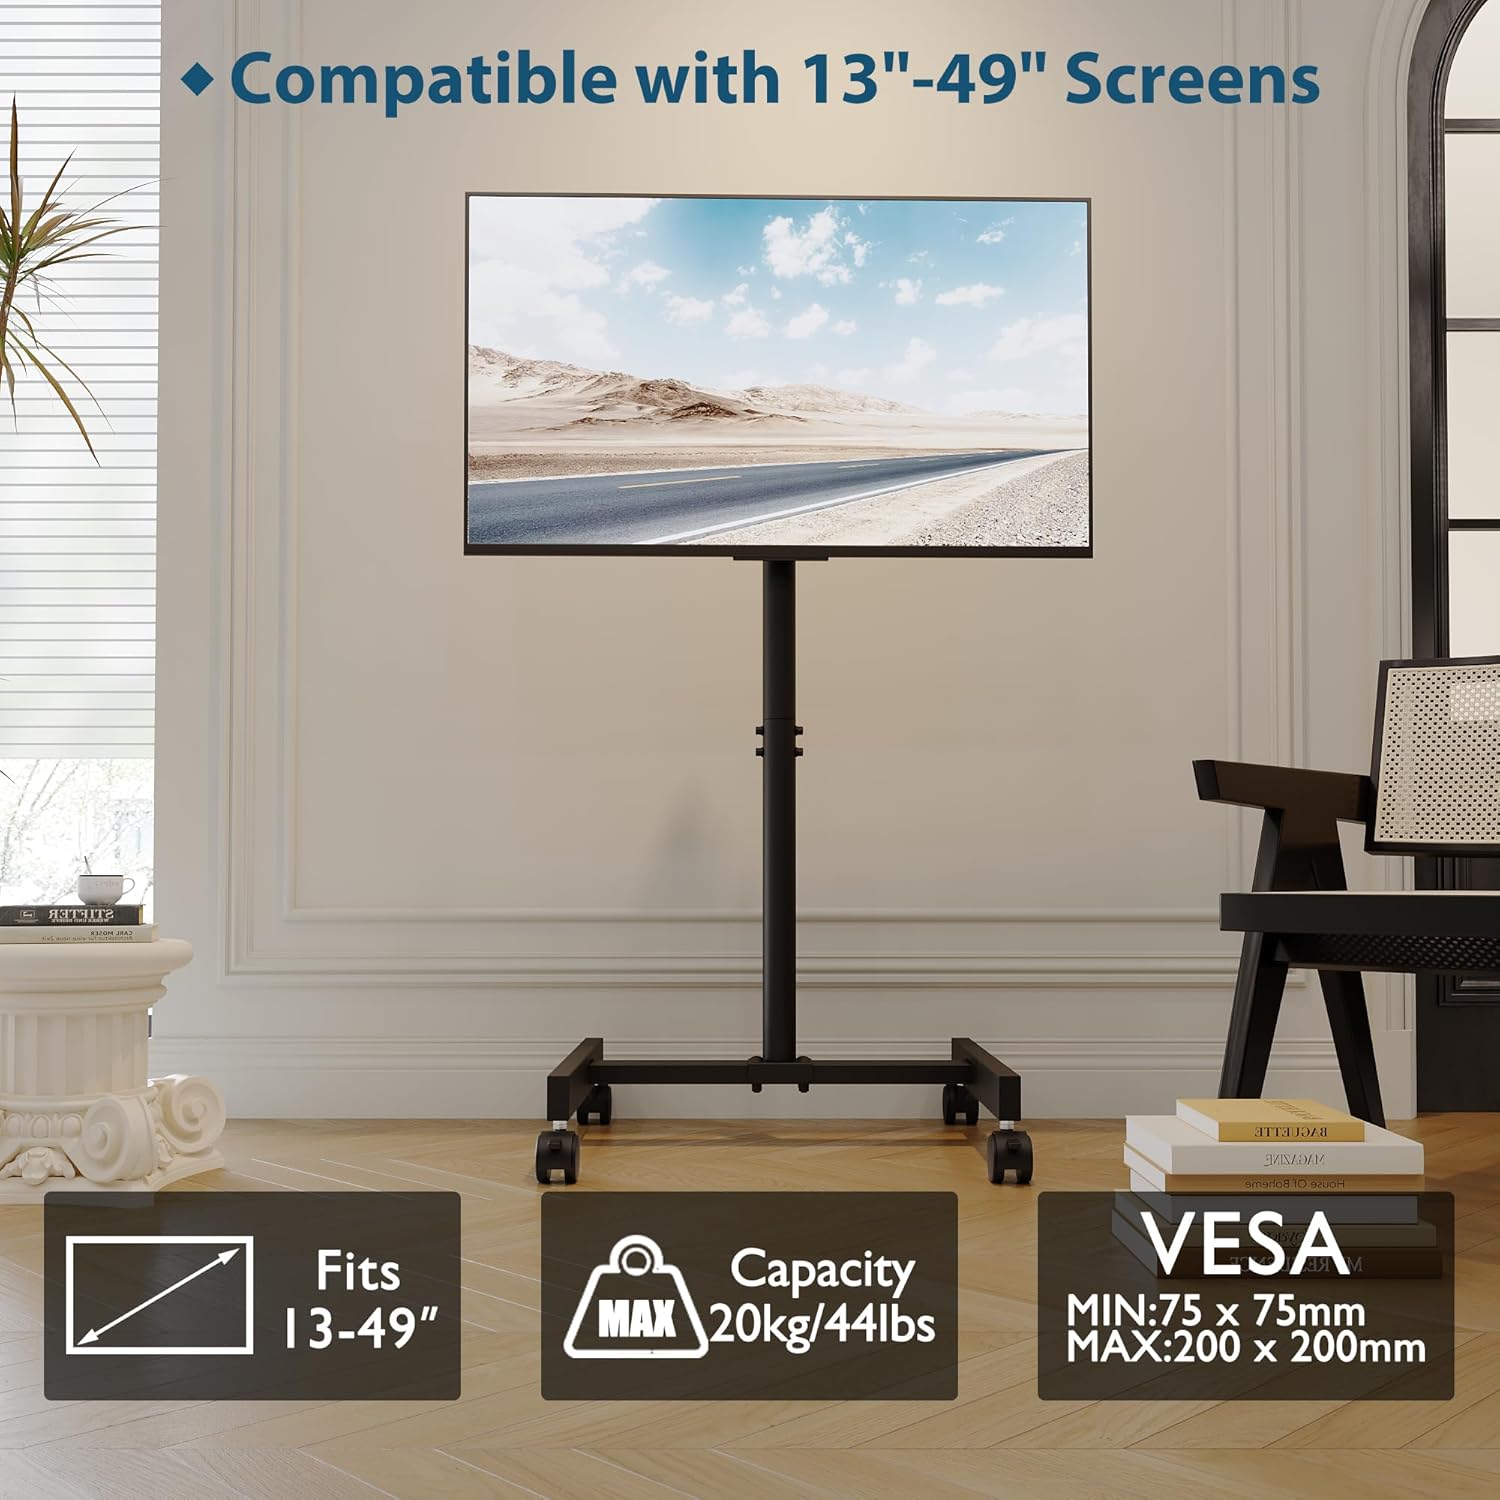
Figure 2.2: Compatibility details for screen sizes, weight capacity, and VESA mounting patterns.
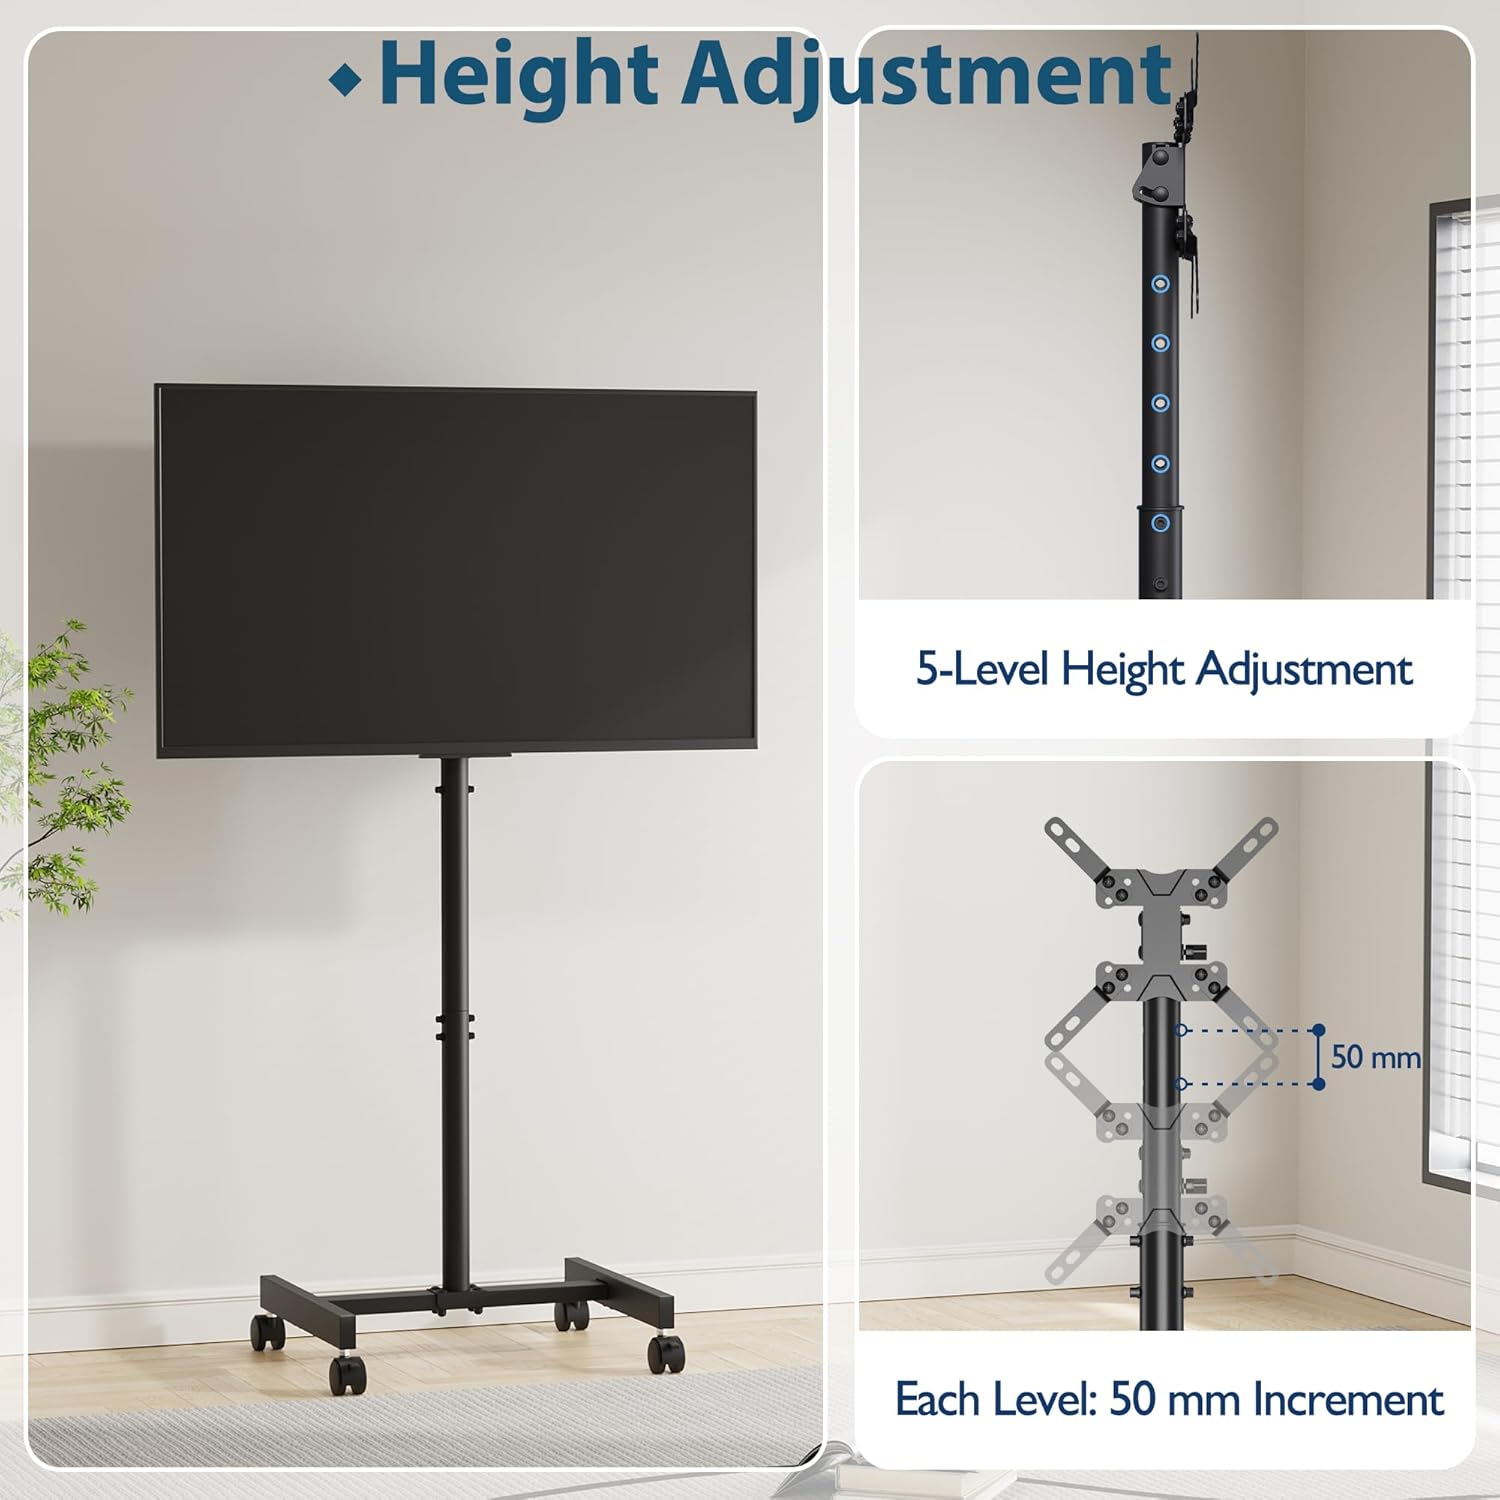
Figure 2.3: The stand offers 5 levels of height adjustment, each changing the height by 50mm.

Figure 2.4: The TV stand can be tilted upwards by 30 degrees for optimal viewing angles.

Figure 2.5: Equipped with four 360-degree silent wheels for easy movement and portability.

Figure 2.6: Detailed product specifications and dimensions.
3. Setup and Assembly
The BONTEC Mobile TV Stand is designed for quick and easy installation. All necessary hardware components and a clear instruction manual are included. Please follow the steps below carefully.
Assembly Steps
- Unpack and Identify Parts: Carefully unpack all components and lay them out on a soft, clean surface. Refer to the included parts list to ensure all pieces are present. The hardware is typically organized in labeled bags (e.g., A, B, C) to correspond with assembly steps. Do not open all bags at once.
- Assemble the Base: Attach the vertical support column to the wheeled base. Ensure all screws are aligned and tightened securely.
- Install the TV Mounting Bracket: Secure the TV mounting bracket to the top of the vertical support column. This bracket is designed to accommodate various VESA patterns.
- Attach TV Brackets to TV: Attach the two vertical TV brackets to the back of your television using the appropriate screws and spacers provided. Ensure the brackets are securely fastened and level. Note: Some users have reported that the provided screws for TV attachment might be too short for certain TV models. Please ensure the screws are long enough to securely engage with your TV's mounting holes without damaging internal components.
- Mount the TV: Carefully lift your TV and hook the attached TV brackets onto the mounting bracket on the stand. Ensure the TV is securely seated and locked into place.
- Adjust Height and Tilt: Once the TV is mounted, you can adjust the height and tilt as desired (refer to Section 4 for detailed instructions).
Video 3.1: Demonstration of the 5-level height adjustment mechanism. The stand can be adjusted in 50mm increments to achieve the desired viewing height.
Video 3.2: Demonstration of the upward tilting feature, allowing the screen to be angled up to 30 degrees for improved viewing from various positions.
Video 3.3: Demonstration of the lockable wheels, showing how to engage and disengage the wheel locks for secure positioning or easy mobility.
Video 3.4: Illustration of the space-saving design, demonstrating how the stand can be positioned close to a wall or desk.
4. Operating Instructions
Height Adjustment
The TV stand offers 5 height levels, with each level differing by 50mm, ranging from 910mm to 1160mm. To adjust the height:
- Ensure the TV is securely mounted.
- Loosen the height adjustment screws on the main column.
- Carefully raise or lower the TV to the desired height. It is recommended to have assistance when adjusting the height with a TV mounted.
- Once at the desired height, securely tighten the height adjustment screws to lock the position.
Tilting Feature
The TV stand allows for an upward tilt of up to 30 degrees to achieve an optimal viewing angle.
- Locate the tilting mechanism on the TV mounting bracket.
- Adjust the tilt angle by loosening the tilt locking knobs, setting the desired angle, and then securely tightening the knobs.
Mobility and Locking Wheels
The stand is equipped with four 360-degree silent wheels for easy movement. Each wheel has a locking mechanism for stability.
- To Move: Ensure all wheel locks are disengaged (unlocked). Gently push the stand to its new location.
- To Secure: Once the stand is in the desired position, press down on the locking lever on each wheel to engage the lock. This will prevent the stand from moving unintentionally.
5. Maintenance
Regular maintenance will help prolong the life of your BONTEC Mobile TV Stand.
- Cleaning: Wipe the stand with a soft, dry cloth. For stubborn marks, a slightly damp cloth can be used, followed by drying. Avoid abrasive cleaners or solvents.
- Check Connections: Periodically check all screws and bolts to ensure they remain tight. Loose connections can affect stability and safety.
- Wheel Inspection: Ensure the wheels are free of debris and roll smoothly. Lubricate if necessary.
6. Troubleshooting
| Problem | Possible Cause | Solution |
|---|---|---|
| Stand is unstable or wobbly. | Screws are loose; TV weight exceeds capacity; uneven floor. | Tighten all assembly screws. Verify TV weight is within 20 kg (44 lbs). Move stand to a level surface. |
| TV cannot be mounted or seems loose. | Incorrect VESA pattern; TV brackets not properly hooked; wrong screws used. | Verify TV's VESA pattern matches stand's compatibility. Ensure TV brackets are fully engaged with the stand's mounting plate. Use correct screw length for your TV. |
| Wheels do not roll smoothly or lock. | Debris in wheels; lock mechanism jammed. | Clean wheels of any hair or debris. Check if the locking mechanism is obstructed. |
| Difficulty adjusting height or tilt. | Adjustment screws/knobs are too tight or loose. | Loosen adjustment screws/knobs sufficiently before attempting to adjust. Tighten firmly after adjustment. |
7. Specifications
| Feature | Specification |
|---|---|
| Model Number | XXSA253 |
| Compatible Screen Sizes | 13 - 49 inches |
| Maximum Weight Capacity | 20 kg (44 lbs) |
| VESA Compatibility | 75x75mm, 100x100mm, 100x200mm, 200x100mm, 200x200mm |
| Height Adjustment Range | 910 mm to 1160 mm (5 levels, 50mm increments) |
| Tilt Angle | Up to 30 degrees upward |
| Material | Alloy Steel |
| Product Dimensions (L x W x H) | 42.3 x 42.5 x 116 cm (max height) |
| Product Weight | 4.39 kg |
8. Warranty and Support
BONTEC products are manufactured with high-quality materials and undergo strict quality control. This product comes with a standard manufacturer's warranty against defects in materials and workmanship. For specific warranty details, please refer to the warranty card included with your product or contact BONTEC customer support.
Customer Support
If you have any questions, require assistance with assembly, or encounter any issues not covered in this manual, please contact our customer support team:
- Website: www.bontec.com (Example Link)
- Email: support@bontec.com (Example Email)
- Phone: +1-800-XXX-XXXX (Example Number)
Please have your model number (XXSA253) and purchase information ready when contacting support.


