Oster OPOP250
Oster Electric Popcorn Maker
Model: OPOP250
1. Important Safeguards
When using electrical appliances, basic safety precautions should always be followed to reduce the risk of fire, electric shock, and/or injury to persons, including the following:
- Read all instructions before operating this appliance.
- Do not touch hot surfaces. Use handles or knobs.
- To protect against electrical shock, do not immerse cord, plugs, or appliance in water or other liquid.
- Close supervision is necessary when any appliance is used by or near children.
- Unplug from outlet when not in use and before cleaning. Allow to cool before putting on or taking off parts.
- Do not operate any appliance with a damaged cord or plug or after the appliance malfunctions or has been damaged in any manner.
- The use of accessory attachments not recommended by the appliance manufacturer may cause injuries.
- Do not use outdoors.
- Do not let cord hang over edge of table or counter, or touch hot surfaces.
- Do not place on or near a hot gas or electric burner, or in a heated oven.
- Extreme caution must be used when moving an appliance containing hot oil or other hot liquids.
- To disconnect, turn any control to "off", then remove plug from wall outlet.
- Do not use appliance for other than intended use.
- This appliance has an overheating protection device for safe operation.
2. Product Overview
The Oster Electric Popcorn Maker is designed for convenient and oil-free popcorn preparation. It features a removable popcorn holder for easy serving and a measuring lid for precise portions.
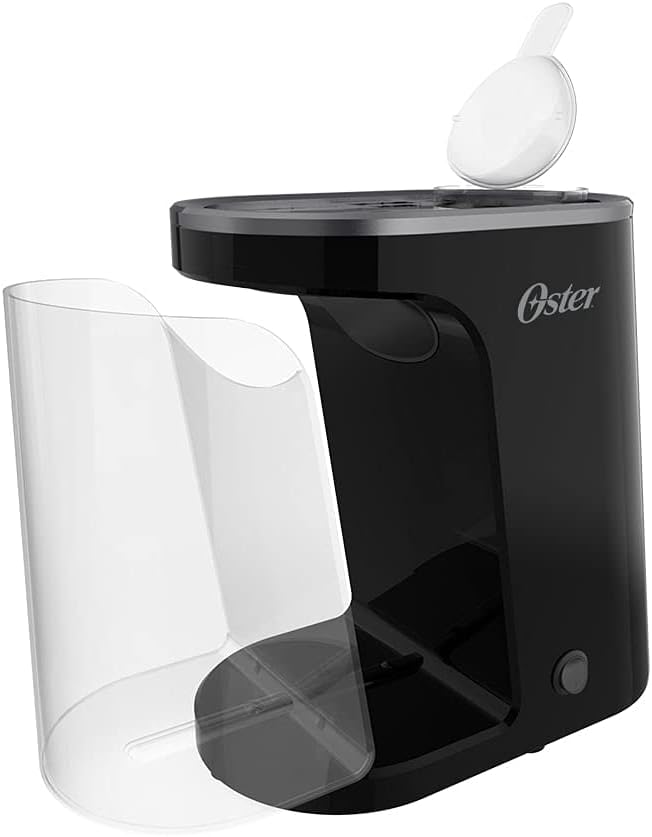
Image: The Oster Electric Popcorn Maker showing its main components: the main unit, the transparent removable popcorn holder, and the measuring lid placed on top.
Components:
- Main Unit: Houses the heating element and motor.
- Removable Popcorn Holder: A transparent container that collects the popped corn and can be detached for serving.
- Measuring Lid: Used to measure the correct amount of popcorn kernels and can also be used to melt butter.
3. Setup
- Unpacking: Carefully remove all packaging materials and inspect the popcorn maker for any damage.
- Initial Cleaning: Before first use, wipe the exterior of the main unit with a damp cloth. Wash the removable popcorn holder and measuring lid with warm, soapy water. Rinse thoroughly and dry completely.
- Placement: Place the popcorn maker on a stable, flat, heat-resistant surface, away from walls and cabinets to allow for proper ventilation. Ensure the power cord is not obstructed.
4. Operating Instructions
Follow these steps to prepare popcorn:
- Measure Kernels: Use the provided measuring lid to measure one full portion of popcorn kernels. Do not overfill or underfill.
- Add Kernels: Remove the measuring lid and pour the measured popcorn kernels into the popping chamber of the main unit.
- Position Holder: Place the removable popcorn holder securely onto the main unit. Ensure it is properly seated to collect the popped corn.
- Melt Butter (Optional): If desired, place butter in the measuring lid and position the lid back onto the popcorn holder. The heat from the popping process will melt the butter.
- Start Popping: Plug the appliance into a 127V electrical outlet. The popcorn maker will begin to heat up and pop the kernels. No oil is required for popping.
- Wait for Completion: Popcorn will begin to emerge from the popping chamber into the removable holder. Allow the machine to operate until popping stops, typically a few minutes.
- Serve: Once popping has ceased, unplug the appliance. Carefully remove the popcorn holder (it may be hot) and pour the popcorn into a serving bowl. Add melted butter, salt, or other seasonings as desired.
- Cool Down: Allow the appliance to cool completely before cleaning or storing.

Image: The Oster Electric Popcorn Maker actively popping corn, with the transparent holder full of freshly popped kernels.
5. Maintenance and Cleaning
Regular cleaning ensures optimal performance and longevity of your popcorn maker.
- Unplug and Cool: Always ensure the appliance is unplugged from the power outlet and has cooled down completely before cleaning.
- Clean Removable Parts: The removable popcorn holder and measuring lid can be washed with warm, soapy water. Rinse thoroughly and dry completely. These parts are not dishwasher safe.
- Clean Main Unit: Wipe the exterior of the main unit with a damp cloth. For the popping chamber, use a soft, dry cloth to remove any unpopped kernels or residue. Do not immerse the main unit in water or any other liquid.
- Storage: Store the clean and dry popcorn maker in a cool, dry place.
6. Troubleshooting
If you encounter issues with your Oster Electric Popcorn Maker, refer to the following common problems and solutions:
| Problem | Possible Cause | Solution |
|---|---|---|
| Popcorn not popping or few kernels pop. | Incorrect kernel quantity; old/dry kernels; appliance not heating. | Ensure correct measurement. Use fresh, high-quality popcorn kernels. Check if the appliance is plugged in and turned on. Allow adequate pre-heating time. |
| Popcorn burns. | Overfilling; prolonged operation after popping stops. | Do not exceed the recommended kernel quantity. Unplug the appliance immediately once popping has ceased. |
| Appliance stops during operation. | Overheating protection activated. | Unplug the appliance and allow it to cool down for at least 10-15 minutes before attempting to use it again. This is a safety feature. |
| Popcorn flies out of the holder. | Popcorn holder not properly seated. | Ensure the removable popcorn holder is securely and correctly placed on the main unit before starting. |
7. Specifications
| Feature | Detail |
|---|---|
| Brand | Oster |
| Model | OPOP250 |
| Color | Black |
| Material | Stainless Steel |
| Product Dimensions (L x W x H) | 15 x 26 x 27 cm |
| Product Weight | 1.15 kg (1150 Grams) |
| Special Features | Removable Popcorn Holder, Measuring Lid, Overheating Protection |
| Power | 1200W (as per product description) |
| Voltage | 127V (as per product title) |
8. Warranty and Support
Oster products are manufactured to high-quality standards. For warranty information, technical support, or service inquiries, please refer to the warranty card included with your purchase or visit the official Oster website. Keep your purchase receipt as proof of purchase for warranty claims.

Image: Safety certification logo indicating compliance with INMETRO and SGS standards.
Ask a question about this manual
Ask about setup, troubleshooting, compatibility, parts, safety, or missing instructions. Manuals+ will review the question and use this page’s manual context to help answer it.