1. Introduction
Thank you for choosing the GODOX V860III-N Speedlite Light. This advanced camera flash is designed for Nikon cameras, offering versatile lighting solutions with its I-TTL II autoflash and manual flash capabilities. It features 2.4G high-speed sync, a powerful 7.2V/2600mAh Li-ion battery, and several enhanced functionalities to meet diverse photographic needs.
The V860III-N builds upon the success of its predecessors, incorporating improvements such as a modeling light, a quick switch button for manual and TTL functions, and enhanced battery performance. This manual provides detailed instructions for setup, operation, and maintenance to ensure optimal use of your speedlite.
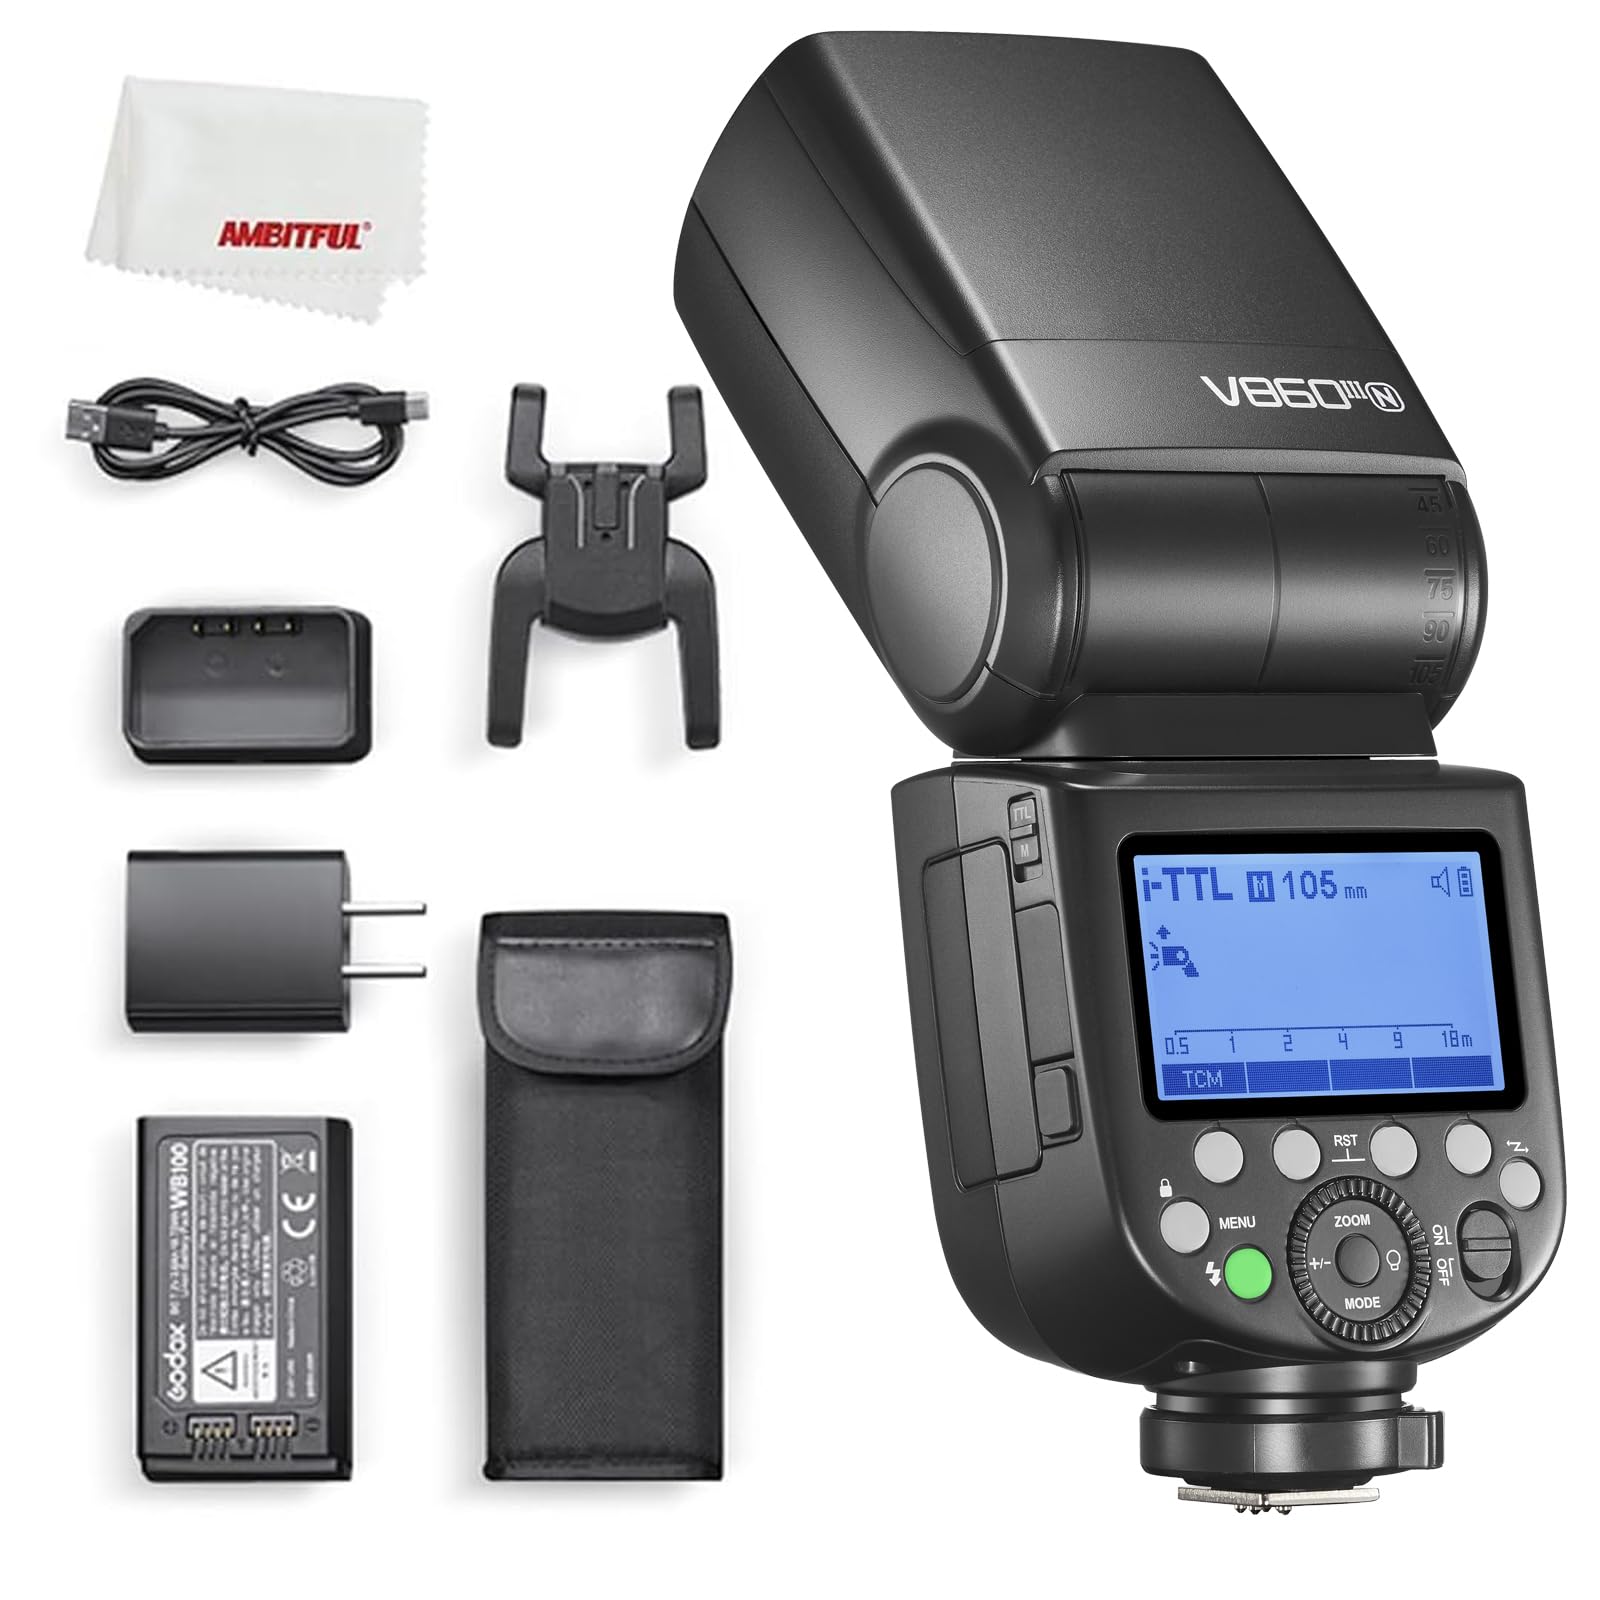
Image: The GODOX V860III-N Speedlite Light, a powerful and versatile camera flash unit.
2. Product Features
- Modeling Light: An integrated modeling light at the front assists with pre-visualization and blending with ambient light. Its brightness is dimmable across 10 levels.
- Quick Button for Manual and TTL Function Switch: A dedicated quick button on the side allows for rapid switching between manual and TTL flash modes.
- Enhanced Battery Performance: Equipped with an upgraded 7.2V/2600mAh Li-ion battery, offering a fast 1.5s recycle time and approximately 450 full-power flashes. The battery is interchangeable with the Godox V1 series.
- Flexible Flash Coverage: Adjustable from 20 to 200mm, with auto-zoom functionality to match the lens focal length and image size. Manual zoom is also available. The flash head can swing/tilt from 0 to 330° horizontally and -7° to 120° vertically for bounce flash.
- Quick Release Lock: Features an updated quick lever lock for secure and easy attachment/detachment to your camera's hotshoe.

Image: The GODOX V860III-N Speedlite, highlighting the front-facing modeling light.
3. Getting Started (Setup)
3.1. Battery Installation
To install or replace the battery, locate the battery compartment on the side of the flash unit. Press the battery release button and slide the battery out. Insert the 7.2V/2600mAh Li-ion battery, ensuring the contacts align correctly, then push it firmly until it clicks into place.

Image: The GODOX V860III-N Speedlite with its Li-ion battery removed, showing the battery compartment.
3.2. Mounting on Camera
Slide the speedlite's hotshoe foot into your camera's hotshoe. Ensure it is fully inserted. Use the quick release lock lever to secure the flash firmly in position. To remove, unlock the lever and slide the flash out.

Image: The GODOX V860III-N Speedlite mounted on a Nikon camera, viewed from the front.

Image: The GODOX V860III-N Speedlite mounted on a Nikon camera, viewed from the rear, showing the control panel.
4. Operating Instructions
4.1. Power On/Off
Slide the power switch to turn the unit on or off. The flash defaults to TTL mode upon powering on.
4.2. Modeling Light Operation
Press the dedicated modeling light button (often indicated by a light bulb icon) to activate the modeling light. Turn the dial to adjust its brightness across 10 levels. Press the 'MODEL' button on the display to toggle the modeling light on/off during flashing.
4.3. Mode Selection (TTL, Manual, Multi)
Press the 'MODE' button to cycle through TTL (Through-The-Lens), Manual (M), and Multi (Stroboscopic) flash modes. The V860III-N also features a quick button on the side to rapidly switch between Manual and TTL modes.

Image: Close-up of the quick button on the side of the flash for switching between TTL and Manual modes.
4.4. Exposure Compensation (FEC)
In TTL mode, press the '+/-' button and turn the dial to adjust the flash exposure compensation value. Press the setting button to confirm. This allows you to fine-tune the flash output relative to the camera's automatic metering.
4.5. Zoom Adjustment
Press the 'ZOOM' button and turn the dial to manually adjust the focal distance of the light head (flash coverage) from 20mm to 200mm. Press the setting button to confirm. The flash also supports auto-zoom.

Image: Close-up of the control dial for zoom and mode selection on the GODOX V860III-N.
4.6. Wireless Connectivity (2.4G X System)
The V860III-N features a built-in Godox 2.4G Wireless X System for remote control. To use it as a receiver unit, press the 'MENU' button, navigate to 'CH' and 'ID' settings, set the channel (e.g., 18) and ID (e.g., 01), and confirm. Then, select the receiver unit mode (RX). To use it as a transmitter unit, select the transmitter unit mode (TX) and set the channel and ID to match your receiver flashes. You can adjust group settings (e.g., Group B) on the transmitter to control receiver flashes.
The flash is compatible with other Godox flashes and triggers that have the built-in Godox 2.4G Wireless X system.
Video: GODOX V860III Camera Flash Operation Guide. This video demonstrates various operational aspects including wireless connectivity setup.
4.7. S1/S2 Optical Slave Modes
In Manual mode, press the 'S1/S2' button on the display to select S1 or S2 flash mode. These modes allow the V860III-N to be triggered by another flash unit optically. S1 mode triggers the flash upon sensing the first flash from a master unit. S2 mode ignores the pre-flash of a TTL master unit and triggers on the main flash.
4.8. High-Speed Sync (HSS) and Rear-Curtain Sync
Press the 'SYNC' button on the display to activate High-Speed Sync (HSS) or Rear-Curtain Sync modes. HSS allows you to use flash at shutter speeds faster than your camera's native flash sync speed, useful for overpowering ambient light. Rear-Curtain Sync fires the flash just before the second curtain closes, creating motion blur behind a moving subject.
4.9. Locking the Control Panel
Long-press the 'MENU' button to lock or unlock the control panel. This prevents accidental changes to your settings during use.
4.10. Resetting Settings
To reset the flash parameters to their default settings, long-press the second and third buttons simultaneously (often 'SYNC' and 'FEB') until 'RESET' appears on the display.
4.11. Clearing Menu Settings
To clear the menu settings, long-press the 'CLEAR' button (often the 'RST' button) indicated on the display until 'OK' appears.
4.12. Custom Functions (C.Fn) Menu Navigation
Access the Custom Functions menu by pressing the 'MENU' button. Use the dial to navigate through options such as:
- m/Ft: Distance indicator (meters/feet)
- AF: Auto-focus assist beam (on/off)
- STBY: Auto standby (on/off, timer settings like 60min/30min)
- RX STBY: Receiver unit auto power off timer (60min/30min)
- SCAN: Scan free channel (off/start to scan)
- CH: Channel selection
- ID: ID setting
- BEEP: Beep sound (on/off)
- LIGHT: Backlight time (e.g., 12 seconds/off/on)
- LCD: Contrast of LCD panel (from -3 to 3)
- FEB ACL: FEB auto clear (on/off)
- TX: Transmitter flash (off/on)
5. Specifications
| Feature | Detail |
|---|---|
| Package Dimensions | 9.06 x 8.19 x 4.13 inches |
| Item Weight | 2.31 pounds |
| ASIN | B09DD536WN |
| Item Model Number | Godox V860IIIN Flash for Nikon Camera |
| Brand | GODOX |
| Compatible Mountings | Nikon |
| Camera Flash Type | Hotshoe |
| Flash Sync Speed | [EST] 1/200 or 1/250 |
| Connectivity Technology | Wired (Hotshoe) / 2.4G Wireless |
6. Maintenance
To ensure the longevity and optimal performance of your GODOX V860III-N Speedlite, follow these maintenance guidelines:
- Cleaning: Use a soft, dry cloth to clean the flash unit. For stubborn dirt, a slightly damp cloth can be used, followed by immediate drying. Avoid harsh chemicals or abrasive materials.
- Battery Care: Always use the provided charger for the Li-ion battery. Do not overcharge or completely drain the battery. Store the battery in a cool, dry place when not in use for extended periods.
- Storage: Store the flash unit in a dry, dust-free environment, away from extreme temperatures and direct sunlight. Use the protective pouch or case provided.
- Handling: Handle the flash with care, especially when mounting or dismounting from the camera. Avoid dropping the unit or subjecting it to strong impacts.
7. Troubleshooting
If you encounter issues with your GODOX V860III-N Speedlite, consider the following common troubleshooting steps:
- Flash Not Firing:
- Check if the flash is powered on and fully charged.
- Ensure the flash is securely mounted on the camera's hotshoe or properly connected wirelessly.
- Verify that the camera's flash settings are correct (e.g., external flash enabled).
- If using wireless mode, ensure channels and IDs match between transmitter and receiver.
- Incorrect Exposure:
- Adjust Flash Exposure Compensation (FEC) in TTL mode.
- In Manual mode, adjust the flash power output.
- Check the flash zoom setting to ensure it matches your lens's focal length.
- Slow Recycle Time:
- Ensure the battery is fully charged.
- Reduce the flash power output.
- The battery offers a 1.5s recycle time at full power; extreme usage may temporarily increase this.
- Control Panel Locked:
- Long-press the 'MENU' button to unlock the control panel.
- Settings Not Saving/Unexpected Behavior:
- Try resetting the flash to default settings (refer to section 4.10).
- Clear menu settings (refer to section 4.11).
8. Warranty and Support
GODOX products are manufactured to high-quality standards. For warranty information, please refer to the warranty card included with your product or visit the official GODOX website. Keep your purchase receipt as proof of purchase for any warranty claims.
For technical support, troubleshooting assistance, or service inquiries, please contact GODOX customer service or your authorized dealer. Ensure you have your product model number and serial number available when seeking support.


