Hconcet D6E
Hconcet D6E STD Overhaul Rebuild Kit Instruction Manual
Model: D6E | Brand: Hconcet
1. Product Overview
The Hconcet D6E STD Overhaul Rebuild Kit is a comprehensive solution designed for the complete overhaul of Volvo D6E Engines, specifically compatible with EC210B Excavators. This kit provides all necessary components to restore engine performance and extend its lifespan. It is manufactured with high-quality metal and rubber materials to ensure durability and proper fitment.

Image 1.1: Overview of the complete Hconcet D6E STD Overhaul Rebuild Kit, showing all major components including gaskets, liners, pistons, and bearings.
Key features include:
- Part Number: D6E
- Condition: 100% new components
- Material: High-quality Metal & Rubber
- Compatibility: Specifically designed for Volvo D6E Engine EC210B Excavator
2. Package Contents
The Hconcet D6E STD Overhaul Rebuild Kit includes the following components:
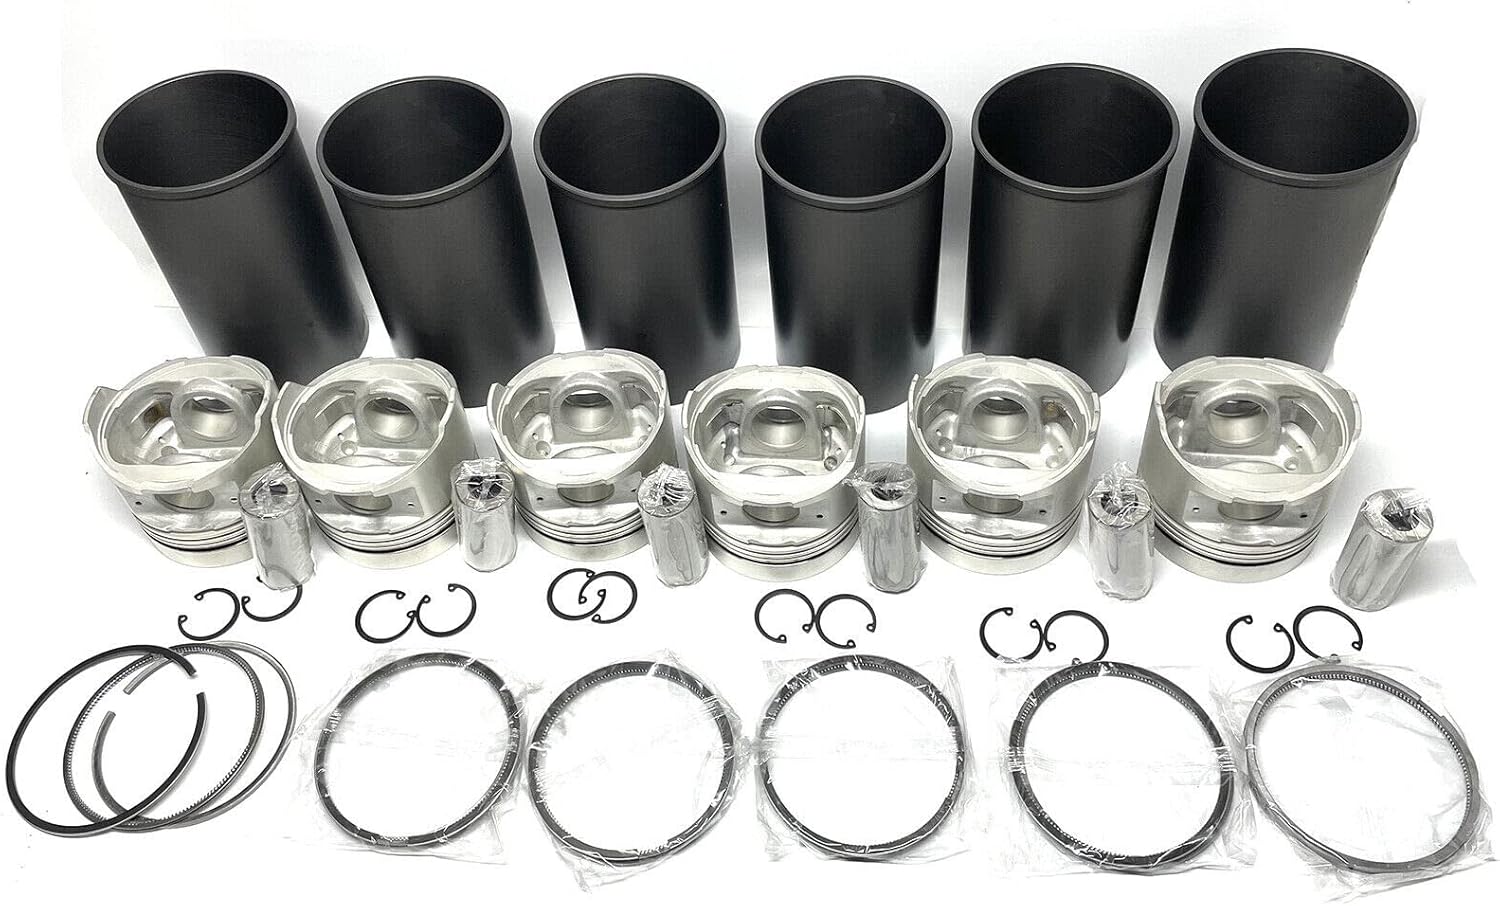
Image 2.1: A closer view of several key components from the kit, such as cylinder liners, pistons, piston rings, and various bearings.
- 1 Set Full Gasket Kit with Head Gasket
- 6 Pieces STD Cylinder Liners (Semi-finished)
- 6 Pieces STD Piston
- 6 Sets STD Piston Rings
- 6 Pieces STD Piston Pin
- 6 Pairs STD Piston Clip
- 12 Pieces Valve Guides
- 6 Pieces Intake Valves
- 6 Pieces Exhaust Valves
- 6 Pieces Intake Valves Seats
- 6 Pieces Exhaust Valves Seats
- 1 Set STD Crankshaft / Main Bearing
- 1 Set STD Connecting Con Rod Bearing
- 1 Set STD Thrust Washer / Bearing

Image 2.2: The full gasket kit, including the head gasket and various seals, essential for a complete engine rebuild.

Image 2.3: Six semi-finished STD cylinder liners, ready for installation into the engine block.

Image 2.4: A collection of pistons, piston rings, piston pins, and various engine bearings, crucial for the rotating assembly.
3. Compatibility
This Hconcet D6E STD Overhaul Rebuild Kit is specifically designed and compatible with the Volvo D6E Engine found in the EC210B Excavator. It is crucial to verify your engine model and excavator type before purchasing and installation to ensure proper fitment and function.
4. Important Notes
- Part Verification: Before purchasing and beginning any work, please double-check that this product fits your specific engine and vehicle. Verify the part number and compare with provided photos.
- Color Variation: Due to differences in display and lighting effects, the actual color of components may vary slightly from the images shown. This does not affect product functionality.
- Professional Installation Recommended: Engine overhaul requires specialized knowledge, tools, and experience. It is highly recommended that installation be performed by a qualified and certified mechanic to ensure correct assembly and optimal engine performance.
- Cleanliness: Maintain a clean working environment. Any dirt or debris introduced during assembly can severely impact engine longevity and performance.
- Torque Specifications: Always refer to the official Volvo D6E engine service manual for precise torque specifications for all fasteners. Incorrect torque can lead to component failure.
5. Setup and Installation
This section provides general guidance for the installation process. For detailed, step-by-step instructions, always consult the official Volvo D6E Engine Service Manual. This kit is intended for use by experienced professionals.
- Engine Disassembly: Carefully disassemble the engine, following manufacturer's guidelines. Document and label all removed parts.
- Inspection and Cleaning: Thoroughly inspect all engine components for wear, damage, or cracks. Clean all parts meticulously, ensuring no old gasket material, carbon, or debris remains.
- Cylinder Liner Installation: Install the new STD cylinder liners. Ensure proper seating and alignment.
- Crankshaft and Bearing Installation: Install the new crankshaft/main bearings and the crankshaft. Apply appropriate assembly lubricant.
- Connecting Rod and Piston Assembly: Assemble the new pistons with piston pins, clips, and piston rings. Ensure rings are correctly oriented and gapped. Install the new connecting rod bearings and attach the piston/rod assemblies to the crankshaft.
- Cylinder Head Components: Install new valve guides, intake and exhaust valves, and valve seats into the cylinder head. Ensure proper valve seating and clearances.
- Gasket Kit Application: Use the full gasket kit for reassembly. Apply sealants where specified by the engine manufacturer. Pay particular attention to the head gasket installation, ensuring the block and head surfaces are perfectly clean and flat.
- Torque Specifications: Adhere strictly to all torque specifications provided in the official service manual for all bolts and fasteners, especially for the cylinder head bolts. Follow the correct tightening sequence.
- Final Assembly: Reassemble all remaining engine components, ensuring all connections are secure and hoses/wires are properly routed.
6. Operating Considerations (Post-Installation)
After a complete engine overhaul, proper break-in and initial operation are critical for the longevity and performance of the rebuilt engine.
- Initial Start-up: Ensure the engine is properly primed with oil before the first start. Monitor oil pressure immediately upon start-up.
- Break-in Period: Follow the engine manufacturer's recommended break-in procedure. This typically involves varying engine speeds and loads, avoiding prolonged idling, and refraining from heavy loads for the initial operating hours.
- Fluid Levels: Regularly check all fluid levels (engine oil, coolant, hydraulic fluid) during the break-in period and thereafter.
- Leak Checks: Continuously inspect for any oil, coolant, or fuel leaks during initial operation and subsequent uses. Address any leaks immediately.
- Performance Monitoring: Pay attention to engine sounds, temperature, and overall performance. Any unusual noises or indications should be investigated promptly.
7. Maintenance
Regular maintenance is essential to ensure the long-term reliability and performance of your Volvo D6E engine after an overhaul. Adhere to the manufacturer's recommended service intervals.
- Oil and Filter Changes: Perform oil and filter changes at recommended intervals using the correct grade of engine oil. The first oil change after an overhaul is often recommended sooner than usual to remove any break-in contaminants.
- Coolant System: Regularly check coolant levels and condition. Flush and replace coolant according to the manufacturer's schedule.
- Air Filter: Inspect and replace the air filter as needed to ensure proper air intake and prevent contaminants from entering the engine.
- Fuel System: Replace fuel filters at recommended intervals to maintain fuel quality and protect injectors.
- Valve Clearances: Check and adjust valve clearances as specified in the service manual.
- Belt and Hose Inspection: Periodically inspect all belts and hoses for signs of wear, cracking, or leaks. Replace as necessary.
8. Troubleshooting
This section addresses common issues that may arise during or after an engine overhaul. Always consult a professional mechanic if you are unsure about any repair.
| Problem | Possible Cause | Solution |
|---|---|---|
| Low Oil Pressure After Start-up | Improper oil pump installation, clogged oil passages, incorrect bearing clearances, insufficient oil. | Immediately shut off engine. Check oil level. Re-inspect oil pump, oil passages, and bearing clearances. |
| Engine Overheating | Improper coolant fill, air in cooling system, faulty thermostat, incorrect head gasket installation, restricted coolant flow. | Check coolant level and bleed air. Verify head gasket installation. Inspect cooling system components. |
| Excessive Smoke from Exhaust | Incorrect piston ring installation, worn valve guides/seals (if not replaced), incorrect fuel timing. | Verify piston ring orientation and gap. Check valve stem seals. Consult service manual for fuel system timing. |
| Unusual Engine Noises (Knocking, Tapping) | Incorrect bearing clearances, loose components, improper valve lash adjustment, piston slap. | Immediately shut off engine. Re-check all clearances and torque specifications. Adjust valve lash. |
| Oil or Coolant Leaks | Improper gasket installation, damaged seals, loose fasteners, cracked components. | Identify source of leak. Re-install gaskets/seals correctly, tighten fasteners to spec, replace damaged components. |
9. Specifications
Key specifications for the Hconcet D6E STD Overhaul Rebuild Kit and related product information:
| Specification | Detail |
|---|---|
| Manufacturer | Hconcet |
| Brand | Hconcet |
| Manufacturer Part Number | D6E |
| ASIN | B09D8LWPCF |
| Date First Available | August 20, 2021 |
10. Warranty and Support
For specific warranty information regarding your Hconcet D6E STD Overhaul Rebuild Kit, please refer to the documentation provided with your purchase or contact the seller directly. Generally, products are covered against manufacturing defects.
If you encounter any issues or have questions regarding the compatibility, components, or performance of this kit, please contact Hconcet customer support or the authorized reseller from whom you purchased the product. Provide your purchase details and the product's part number (D6E) for faster assistance.
Contact Information: Please refer to your purchase invoice or the seller's contact details on the platform where the product was acquired.