1. Product Overview
The HollyView Hollyland Lark 150 is a compact 2.4GHz dual-channel wireless lavalier microphone system designed for high-fidelity audio capture. It features two lightweight transmitters (TX) and one receiver (RX), offering broadcast-level sound quality with a wide frequency response of 20Hz-20KHz. The system supports stable transmission up to 100 meters with a low latency of less than 5ms, ensuring audio and video synchronization. Key features include intelligent noise cancellation, multiple recording modes (Mono, Stereo, Safe Track), and real-time audio monitoring. The system comes with a portable charging case for convenience and automatic power management.

Image 1.1: Overview of the HollyView Hollyland Lark 150 Wireless Lavalier Microphone System, showing the transmitters, receiver, and charging case.
2. Setup Guide
2.1. Unboxing and Initial Inspection
Carefully unpack all components from the box. Verify that all items are present:
- 2 x Transmitters (TX)
- 1 x Receiver (RX)
- 1 x Portable Charging Case
- 2 x Lavalier Microphones
- 2 x Furry Windshields
- 1 x 3.5mm TRS to TRS Cable
- 1 x USB-C Charging Cable
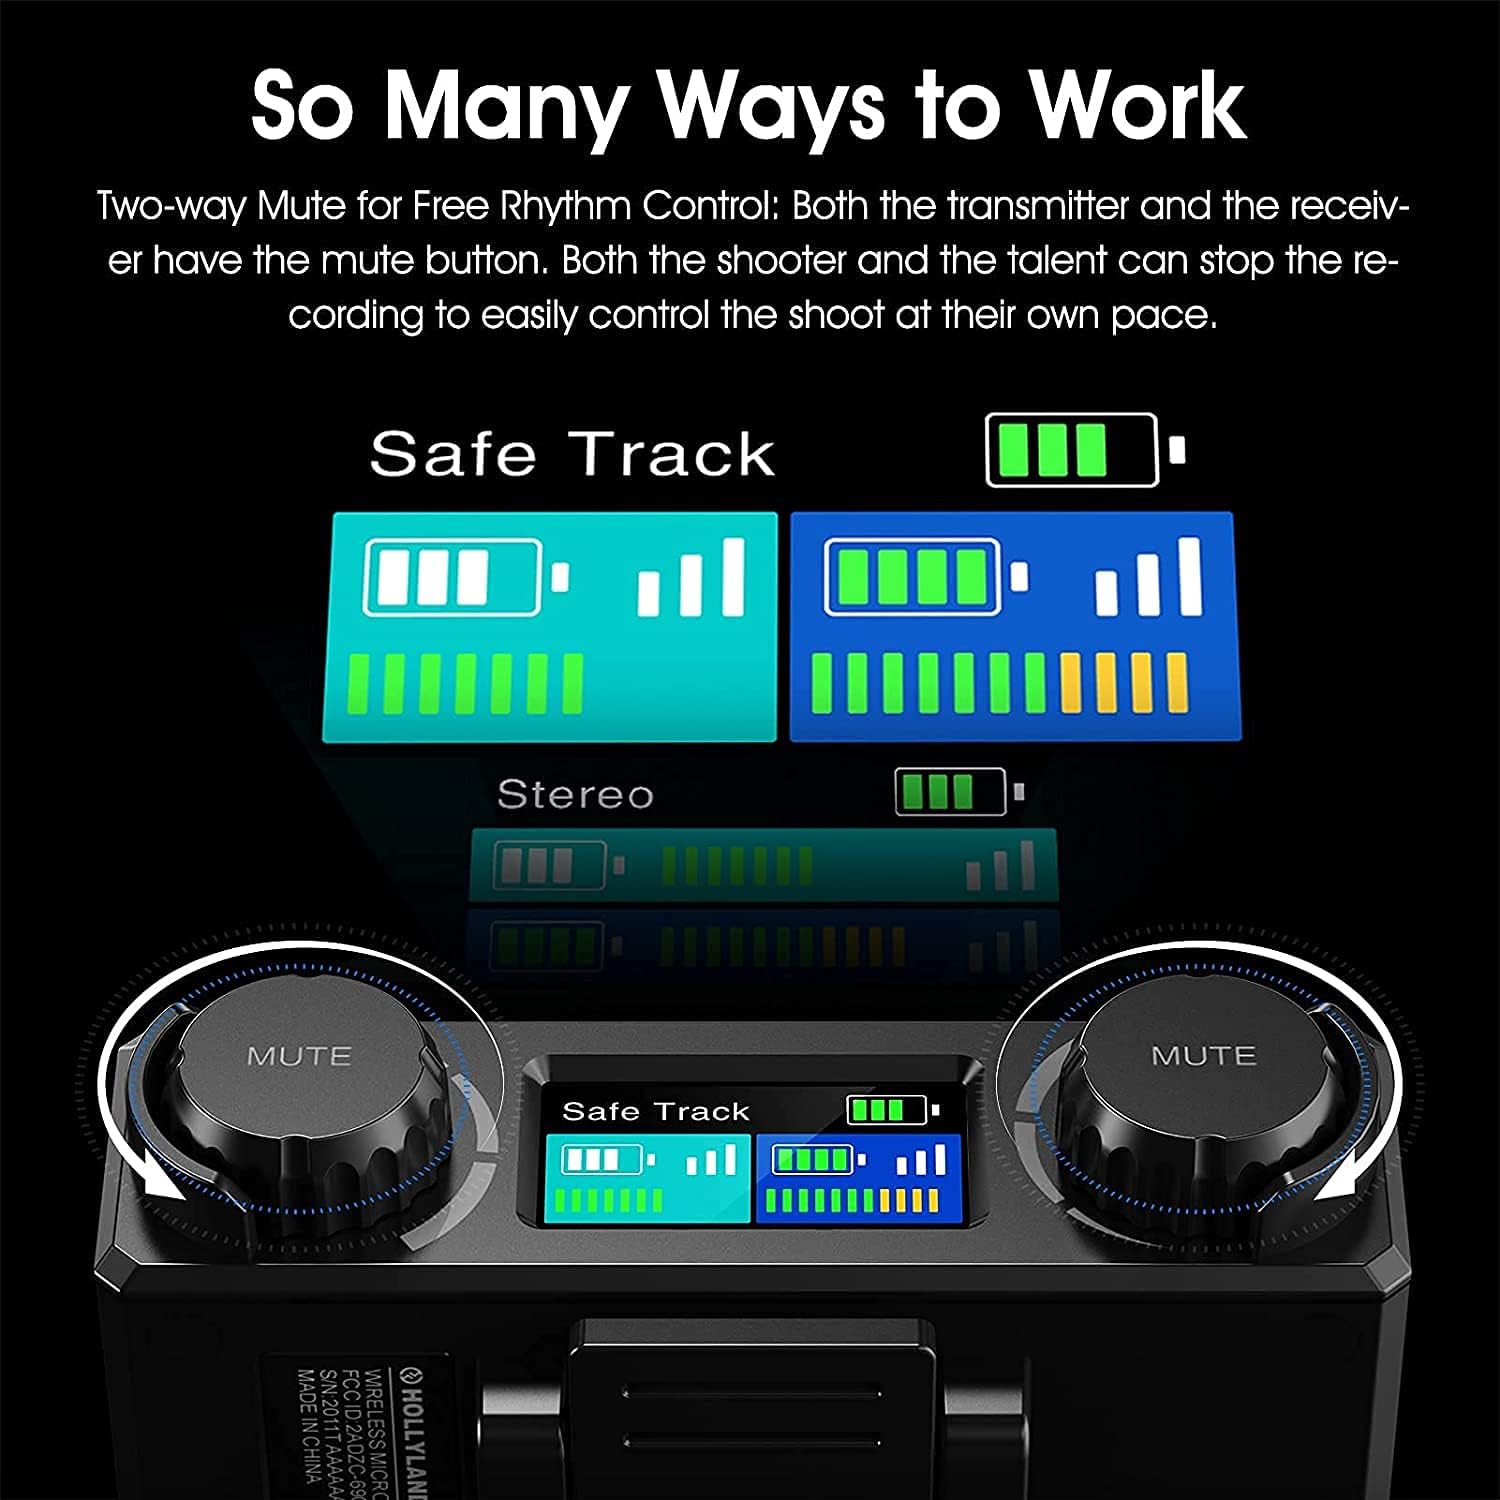
Image 2.1: All components included in the HollyView Hollyland Lark 150 package.
2.2. Charging the System
Place the transmitters and receiver into the portable charging case. The units will automatically begin charging. The charging case itself can be charged via the provided USB-C cable. When units are placed into the case, they automatically power off and begin charging if needed. When removed, they automatically power on.

Image 2.2: The portable charging case with transmitters and receiver, illustrating contact charging and auto-pairing.
2.3. Automatic Pairing
The Lark 150 system features automatic pairing. When the transmitters and receiver are removed from the charging case, they will automatically power on and attempt to pair with each other within seconds. Ensure they are within close proximity for initial pairing.
2.4. Connecting to Recording Devices
Connect the receiver to your recording device (camera, smartphone, laptop, etc.) using the appropriate cable. The system includes a 3.5mm TRS to TRS cable for cameras. For other devices, optional patch cables may be required:
- Camera: Use the 3.5mm TRS cable.
- Android Smartphone: Requires a USB-C to TRRS cable and a TRRS to TRS cable (optional accessories).
- Apple iPhone/iPad: Requires a Lightning to TRRS cable and a TRRS to TRS cable (optional accessories).
- Laptop: Requires a TRRS to TRS cable (optional accessory).
- Audio Switcher: Requires a TRS to XLR cable (optional accessory).

Image 2.3: Guide to connecting the Lark 150 receiver to various devices using optional patch cables.
3. Operating Instructions
3.1. Power On/Off
The transmitters and receiver automatically power on when removed from the charging case and power off when placed back into the case.
3.2. Recording Modes
The Lark 150 offers three recording modes, selectable on the receiver:
- Mono Mode: Combines both transmitter audio signals into a single mono track. Ideal for single-person recordings or when a combined audio track is desired.
- Stereo Mode: Records each transmitter's audio signal to a separate channel (left and right) for individual control in post-production. Suitable for two-person interviews or distinct audio sources.
- Safe Track Mode: Records the main audio signal on one channel and a secondary backup track on the other channel at a lower volume (typically -6dB). This helps prevent audio clipping or distortion in case the main track's volume is too high.

Image 3.1: Display on the receiver showing selection between Mono, Stereo, and Safe Track modes.

Image 3.2: Receiver interface demonstrating two-way mute functionality and track mode selection.
3.3. Mute Function
Both the transmitters (TX) and the receiver (RX) are equipped with mute buttons. This allows either the speaker or the operator to pause audio recording as needed, providing flexible control during a shoot.
3.4. Real-time Audio Monitoring
The receiver features a 3.5mm headphone jack for real-time audio monitoring. Connect headphones to this jack to listen to the audio being recorded and adjust settings as necessary.
3.5. Intelligent Noise Cancellation (DSP)
The Lark 150 incorporates DSP (Digital Signal Processing) technology for intelligent noise reduction. This function helps filter out low-frequency environmental noise, ensuring clearer and more focused audio recordings. This feature can be toggled on or off via the receiver settings.

Image 3.3: Illustration of the DSP Intelligent Noise Reduction function and switchable tracks.
3.6. Signal Transmission
The system operates on a 2.4GHz frequency, providing a stable transmission range of up to 100 meters (line of sight). The smart signal processing ensures a reliable connection, automatically adapting to environmental conditions.

Image 3.4: Visual representation of the smart signal processing maintaining connection stability.
4. Maintenance
Proper maintenance ensures the longevity and optimal performance of your Lark 150 system.
- Cleaning: Use a soft, dry cloth to clean the transmitters, receiver, and charging case. Avoid using liquid cleaners or solvents.
- Storage: Store the system in its charging case when not in use to protect it from dust and physical damage. Keep it in a cool, dry place away from direct sunlight and extreme temperatures.
- Battery Care: For optimal battery life, fully charge the system before extended storage and recharge it periodically (e.g., every three months) if not used for a long time.
- Microphone Care: Handle the lavalier microphones gently. Use the furry windshields to protect them from wind noise and moisture when recording outdoors.
5. Troubleshooting
If you encounter issues with your Lark 150 system, refer to the following troubleshooting tips:
- No Sound Output:
- Ensure both transmitters and receiver are powered on and paired.
- Check all cable connections between the receiver and your recording device.
- Verify that the transmitters and receiver are not muted.
- Confirm the recording device's audio input is correctly selected and its volume is up.
- Check battery levels of all units.
- Poor Audio Quality (Static, Dropouts, Low Volume):
- Ensure transmitters and receiver are within the optimal operating range (up to 100m line of sight).
- Minimize obstructions between TX and RX.
- Check for strong 2.4GHz interference from other devices (Wi-Fi routers, other wireless systems).
- Adjust the input gain on the receiver and/or your recording device.
- Ensure the lavalier microphone is securely connected to the transmitter and positioned correctly.
- Activate the Intelligent Noise Cancellation feature if background noise is an issue.
- Units Not Pairing:
- Place transmitters and receiver back into the charging case, then remove them to trigger automatic pairing.
- Ensure units are fully charged.
- Perform a factory reset if available (refer to manufacturer's specific instructions if this option exists).
6. Specifications
Technical specifications for the HollyView Hollyland Lark 150 Wireless Lavalier Microphone System:
| Feature | Specification |
|---|---|
| Brand | HollyView |
| Model Number | Lark 150 |
| Connectivity Technology | 2.4GHz Wireless |
| Connector Type | 3.5 mm Jack |
| Frequency Response | 20 Hz - 20 KHz |
| Transmission Range | Up to 100m (line of sight) |
| Latency | Less than 5ms |
| Polar Pattern | Omnidirectional |
| Power Source | Battery Powered |
| Item Weight | 1.6 pounds (total package) |
| Compatible Devices | Camera, Smartphone, Laptop, Radio |
| Included Components | Microphone System (Transmitters, Receiver, Charging Case, Lavalier Mics, Cables) |
7. Warranty and Support
For warranty information and technical support, please refer to the official HollyView website or contact their customer service directly. Keep your purchase receipt as proof of purchase for warranty claims.
Official HollyView Website: www.hollyland-tech.com