1. Introduction
The homgee X3 Portable Ultra Mini Digital Camera is designed for ease of use and portability, making it suitable for various applications including business, home security, education, and travel. This compact device is capable of shooting videos, taking pictures, and recording voice. It supports TF cards up to 32GB and features a time setting function, along with the ability to charge while recording. This manual provides essential information for operating and maintaining your X3 Mini Digital Camera.
2. Product Overview
2.1 Package Contents
- 1 x Portable Ultra Mini Camera
- 1 x USB Cable
- 1 x English / Chinese User Manual
2.2 Camera Components
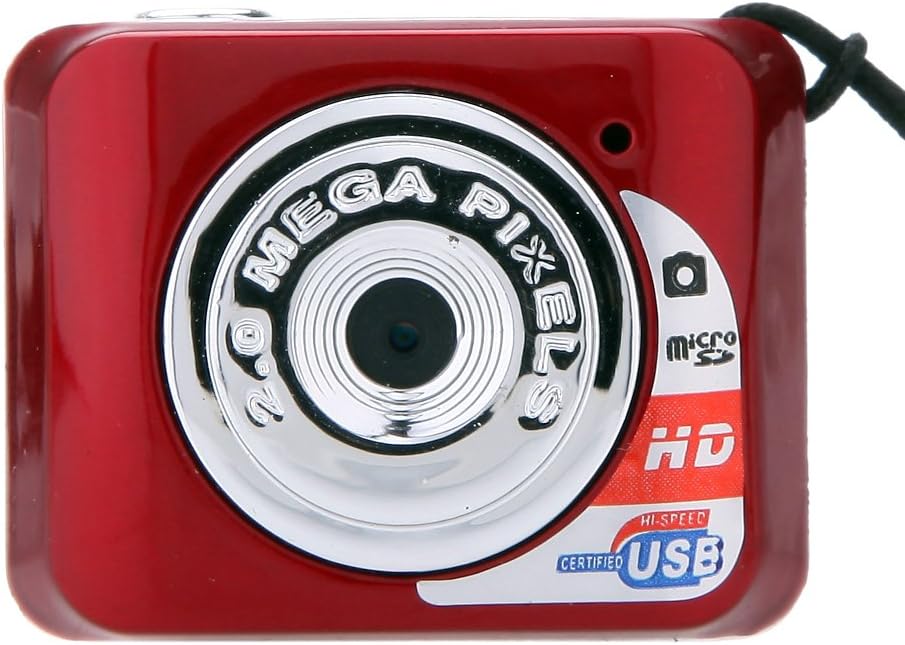
Figure 1: Front View. This image displays the front of the X3 Mini Digital Camera, highlighting the central lens, surrounded by a chrome ring with "2.0 MEGA PIXELS" inscribed. To the right of the lens, there are indicators for "micro SD" and "HD", along with a "HI-SPEED CERTIFIED USB" logo.

Figure 2: Top View. This image shows the top side of the X3 Mini Digital Camera, featuring a prominent circular button, which serves as the power and mode control.

Figure 3: Side View. This image illustrates the side of the X3 Mini Digital Camera, revealing the Mini 8 Pin USB port on the left and the TF (MicroSD) card slot on the right.

Figure 4: Size Comparison. This image shows the X3 Mini Digital Camera resting in the palm of a hand, emphasizing its extremely compact and portable design.
3. Setup
3.1 Charging the Battery
- Connect the provided USB cable to the camera's Mini 8 Pin USB port.
- Connect the other end of the USB cable to a USB power adapter (DC-5V) or a computer's USB port.
- The indicator light will illuminate during charging. Once fully charged, the indicator light will change or turn off (refer to specific light behavior in the original manual if available, otherwise keep generic).
- Allow approximately 2-3 hours for a full charge.
Note: The camera supports charging while in video recording state.
3.2 Inserting the TF Card (MicroSD)
- Locate the TF card slot on the side of the camera (refer to Figure 3).
- Gently insert a TF card (MicroSD card, up to 32GB capacity) into the slot with the gold contacts facing down, until it clicks into place.
- To remove the card, gently push it in again until it springs out.
Important: Ensure the camera is powered off before inserting or removing the TF card to prevent data corruption.
4. Operating Instructions
4.1 Power On/Off
- Power On: Press and hold the ON/OFF button (refer to Figure 2) for approximately 3 seconds. The indicator light will illuminate, indicating the camera is powered on and in standby mode.
- Power Off: Press and hold the ON/OFF button for approximately 5 seconds. The indicator light will turn off, indicating the camera is powered off.
4.2 Video Recording
- Ensure the camera is powered on and in standby mode.
- Press the ON/OFF button briefly to start video recording. The indicator light will flash during recording.
- To stop recording, press the ON/OFF button briefly again. The camera will save the video file and return to standby mode.
Note: Video resolution is 640*480 or 720*480 at 30 frames per second. Videos are saved in AVI format (MJPEG codec).
4.3 Taking Pictures
- Ensure the camera is powered on and in standby mode.
- Press the ON/OFF button completely down and release quickly. The indicator light will flash once, indicating a picture has been taken.
- The camera will save the image file and remain in standby mode.
Note: Picture resolution is 1280*720 or 1280*1024. Images are saved in JPG format.
4.4 Connecting to a Computer
- Data Transfer (U Disk Mode): Connect the camera to your computer using the USB cable. The camera will be recognized as a removable disk, allowing you to access and transfer recorded videos and pictures.
- PC Camera Mode: While connected to the computer in U disk mode, press the ON/OFF button briefly. The camera will switch to PC camera (webcam) mode, enabling its use for video conferencing or other webcam applications.
Compatibility: Supports Windows 7/2000/XP/2003/Vista, Mac OS 10.4, and Linux.
4.5 Time Setting
The camera supports time setting. Specific instructions for setting the time are typically found in the included user manual (physical copy). Generally, this involves creating a text file on the TF card with a specific format (e.g., "YYYYMMDDHHMMSS Y/N" for date/time and timestamp display on/off) and then powering on the camera.
5. Maintenance
- Cleaning: Use a soft, dry cloth to clean the camera body. For the lens, use a specialized lens cleaning cloth. Avoid using liquid cleaners or abrasive materials.
- Storage: Store the camera in a cool, dry place away from direct sunlight, extreme temperatures, and high humidity.
- Battery Care: To prolong battery life, avoid fully discharging the battery frequently. If storing for an extended period, charge the battery to about 50% and recharge every few months.
- Avoid Drops: The camera is a delicate electronic device. Avoid dropping it or subjecting it to strong impacts.
6. Troubleshooting
| Problem | Possible Cause | Solution |
|---|---|---|
| Camera does not power on. | Low battery. | Charge the camera fully. |
| Camera does not record video/take pictures. | No TF card inserted or card is full/corrupted. | Insert a TF card, ensure it has sufficient space, or format the card (this will erase all data). |
| Computer does not recognize the camera. | Faulty USB cable or port; driver issue. | Try a different USB cable or port. Restart the computer. Ensure the camera is in U disk mode. |
| Poor video/picture quality. | Insufficient lighting; dirty lens. | Ensure adequate lighting. Clean the camera lens. |
7. Specifications
| Model Number | X3 |
| Data Transfer Interface | Mini 8 Pin USB |
| Charge Voltage | DC-5V |
| Color | Red |
| Item Size (L*W*H) | 3.5 * 2.5 * 1.8 cm / 1.38 * 0.98 * 0.71 in |
| Item Weight | 13 g / 0.48 oz |
| Video Resolution | 640*480 or 720*480, 30 fps |
| Picture Resolution | 1280*720 or 1280*1024 |
| Supported TF Card | Up to 32GB (MicroSD) |
| Battery Type | High capacity lithium polymer battery |
| CPU | A9-CORETEX kernel |
| Video Decoding | H.263 accelerate |
| Video Code | MJPEG (AVI format) |
| Picture Mode | JPG |
| Supported Systems | Win7/2000/XP/2003/Vista; Mac OS 10.4; Linux |
8. Warranty and Support
For detailed warranty information and customer support, please refer to the warranty card included with your product package or visit the official homgee website. Keep your purchase receipt as proof of purchase for any warranty claims.
If you encounter issues not covered in this manual, please contact homgee customer service for assistance.