1. Introduction
This manual provides detailed instructions for the setup, operation, and maintenance of your EASEGMER Wireless Retro Game Console (Model HD100-01). Please read this manual thoroughly before using the product to ensure proper functionality and to maximize your gaming experience.
2. Package Contents
Verify that all items listed below are included in your package:
- 1 x EASEGMER Wireless Retro Game Stick (HD100-01)
- 2 x 2.4G Wireless Game Controllers
- 1 x USB Power Cable
- 1 x 32GB TF Card (pre-installed in game stick)
- 1 x User Manual (this document)
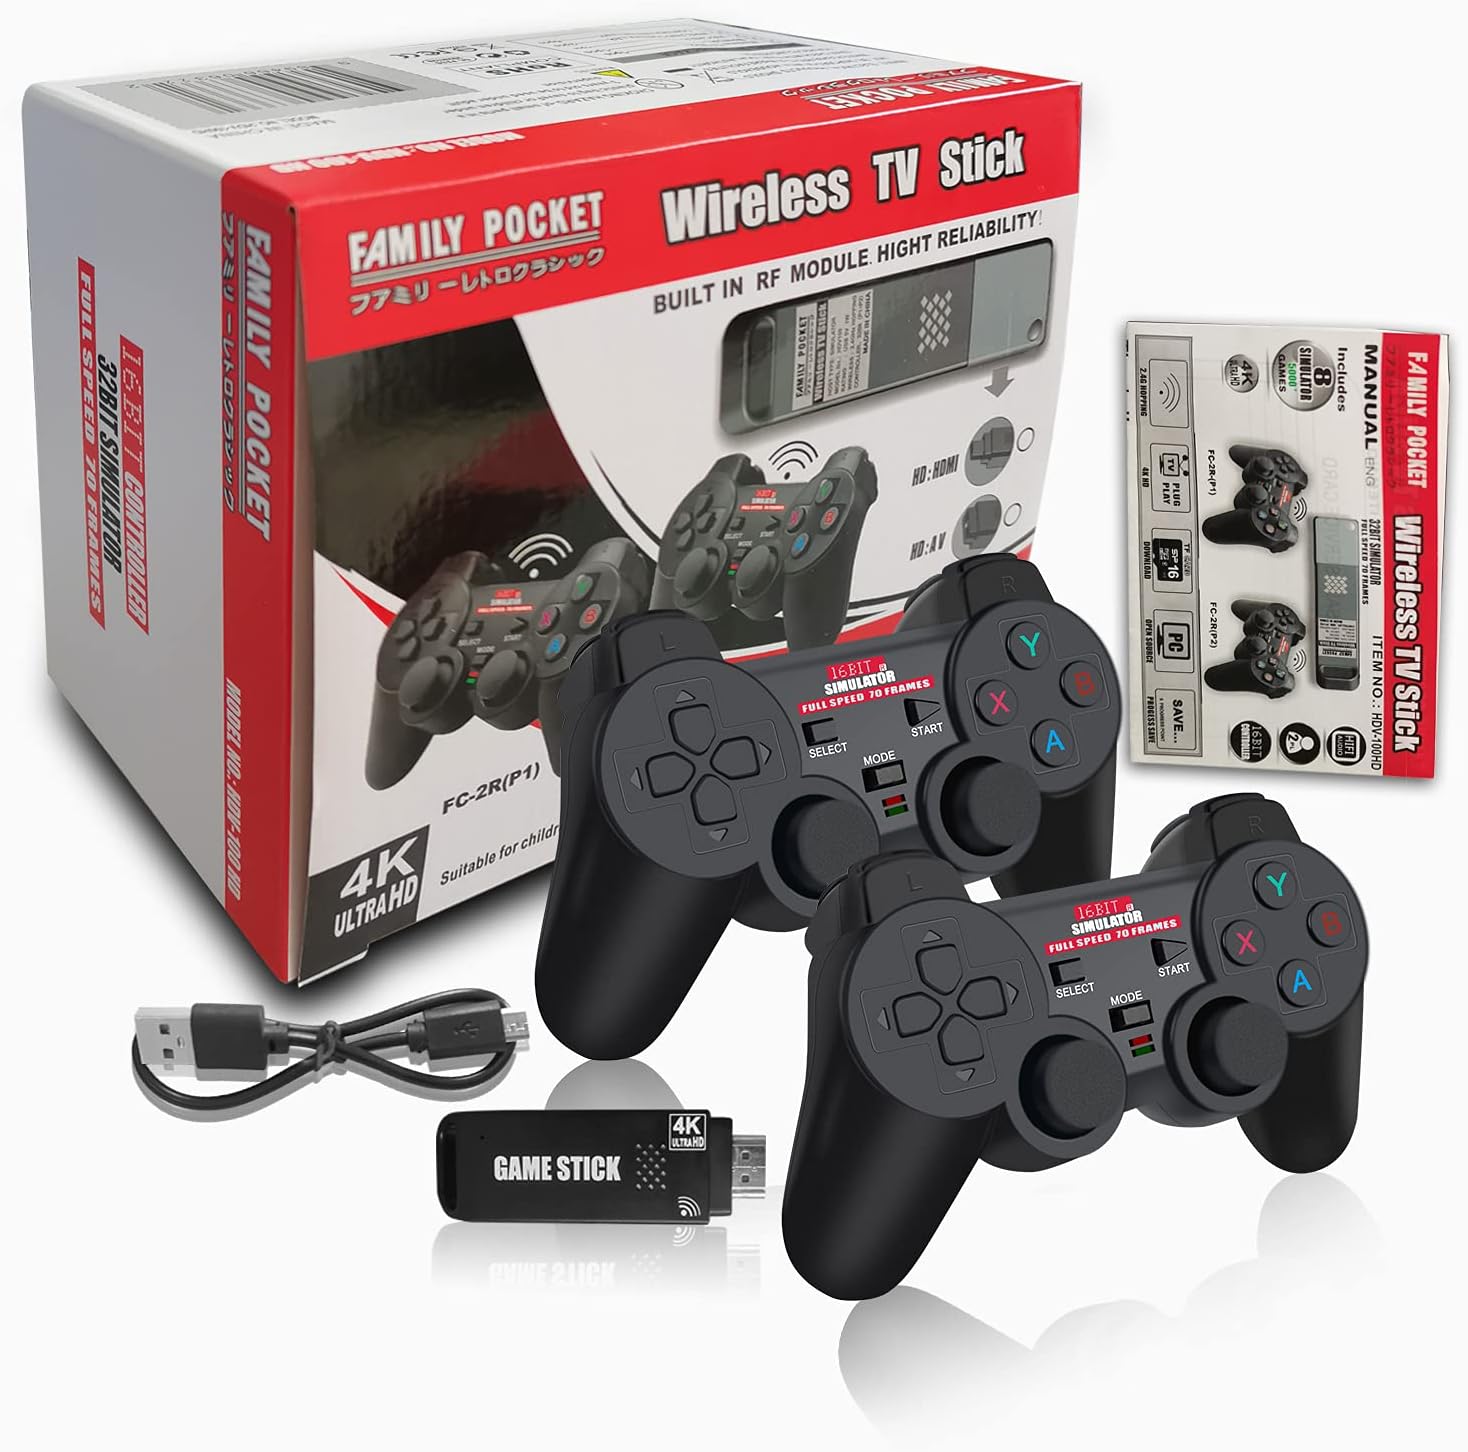
Image: EASEGMER Wireless Retro Game Console package contents.
3. Setup Instructions
3.1. Connect the Game Stick
- Locate an available HDMI input port on your TV, PC monitor, or projector.
- Insert the EASEGMER Game Stick directly into the HDMI port.
- Connect the provided USB power cable to the Micro-USB port on the game stick and then to a USB power source (e.g., TV USB port, USB wall adapter). The game stick will power on, indicated by a green light.

Image: EASEGMER Game Stick overview with HDMI and USB ports.

Image: Game Stick connected to a display via HDMI and powered by USB.
3.2. Install Controller Batteries
Each wireless controller requires 3x AAA batteries (not included). Open the battery compartment on the back of each controller and insert the batteries, ensuring correct polarity. Close the compartment securely.
Video: This video demonstrates the unboxing, setup, and battery installation for the EASEGMER Wireless Retro Game Console, followed by a brief overview of the game menu and gameplay examples.
3.3. Select Input Source
On your TV, PC monitor, or projector, use the remote control or device menu to select the correct HDMI input source to which the game stick is connected.
4. Operating Instructions
4.1. Navigating the Menu
Once powered on, the console will display the main menu. Use the directional pad (D-pad) or left joystick on your controller to navigate through the emulator categories (AR, FC, SFC, GBC, GB, GG, CPS, MD). Press the 'A' button to select a category.

Image: Main menu displaying emulator options.
4.2. Starting a Game
Within an emulator category, use the D-pad or joystick to scroll through the list of available games. Press the 'A' button to start the selected game.
4.3. Saving Game Progress
During gameplay, you can typically access the game's internal save feature if available. Additionally, the console supports saving game states. Refer to the on-screen prompts or the video demonstration for specific instructions on how to save and load game progress using the controller's menu functions.
4.4. Adding New Games
The console comes with a 32GB TF card. You can download additional games and add them to the TF card. Ensure that the downloaded game's file extension matches the supported emulator format (e.g., .nes for FC, .sfc for SFC). Connect the TF card to a computer using a card reader to transfer game files.
5. Controller Usage
5.1. Wireless Connection
The 2.4G wireless controllers automatically connect to the game stick when powered on. They offer a stable connection range of 8-10 meters (26-32 feet).

Image: Wireless controllers in use, highlighting the 2.4G connection.
5.2. Controller Layout
The controllers feature dual 3D joysticks, a D-pad, and standard action buttons (A, B, X, Y), along with 'Start', 'Select', and 'Mode' buttons. Familiarize yourself with the button layout for optimal gameplay.

Image: Detailed diagram of the wireless controller buttons and joysticks.
5.3. Two-Player Mode
The console supports two-player gameplay. Both controllers will automatically connect. In-game, players can typically join or quit multiplayer sessions as supported by the specific game.
6. Troubleshooting
- No Signal on TV:
Ensure the game stick is fully inserted into the HDMI port and the USB power cable is connected to a working power source. Verify that your TV/monitor is set to the correct HDMI input channel. Check if the green indicator light on the game stick is on. - Controllers Not Responding:
Check if the AAA batteries in the controllers are correctly installed and have sufficient charge. Ensure the controllers are within the 8-10 meter operating range of the game stick. Re-insert the batteries to reset the connection if necessary. - Game Freezes or Crashes:
Some older games or emulators may occasionally encounter issues. Try restarting the game stick by unplugging and re-plugging the USB power cable. Ensure game files added to the TF card are compatible with the respective emulators. - Poor Image Quality:
While the console supports 4K output, the actual game resolution depends on the original game and emulator. Ensure your display device supports 1080P HD or 4K resolution for the best visual experience. - Cannot Save Game Progress:
Ensure there is sufficient space on the 32GB TF card. Some games may have specific in-game save mechanisms that need to be followed. Refer to the game's original instructions or the console's save state feature.
7. Specifications
| Feature | Specification |
|---|---|
| Model Number | HD100-01 |
| Built-in Games | 5000+ HD Classic Games |
| Supported Emulators | AR, FC, SFC, GBC, GB, GG, CPS, MD |
| Storage | 32GB TF Card (included) |
| Video Output | 4K HDMI Output (1080P HD image quality) |
| Controller Type | 2.4G Wireless Gamepad (2 included) |
| Controller Power | 3x AAA Batteries per controller (not included) |
| Wireless Range | 8-10 meters (26-32 feet) |
| Hardware Interface | USB |
| Item Weight | 0.4 Kilograms (14.1 ounces) |
| Package Dimensions | 7.44 x 6.38 x 4.29 inches |
| UPC | 884016954577 |
8. Maintenance
- Keep the game stick and controllers in a dry environment, away from direct sunlight and extreme temperatures.
- Clean the devices with a soft, dry cloth. Do not use liquid cleaners or abrasive materials.
- Remove batteries from controllers if they will not be used for an extended period to prevent leakage.
- Avoid dropping or subjecting the devices to strong impacts.
9. Warranty and Support
For warranty information or technical support, please refer to the contact details provided with your purchase or visit the official EASEGMER website. Keep your purchase receipt as proof of purchase for any warranty claims.


