1. Introduction
This document provides essential instructions for the setup and basic operation of your Easytry123 Replacement Remote Control. This remote is designed to function with various Yamaha Home Theater Systems, including models WY92530, BRX-750, WY92500, MCR-750, and BRX-610. Please note that as a replacement unit, some advanced or specific functions of your original remote may operate differently or not be supported.
For comprehensive details on your Yamaha Home Theater System's features, please refer to its original instruction manual.
2. Product Overview
The Easytry123 Replacement Remote Control is an infrared (IR) device designed for ease of use with compatible Yamaha Home Theater Systems. Its ergonomic design ensures comfortable handling.

Figure 2.1: Front view of the Easytry123 Replacement Remote Control, showing all buttons and their labels.

Figure 2.2: Angled view of the remote control, highlighting its ergonomic shape.
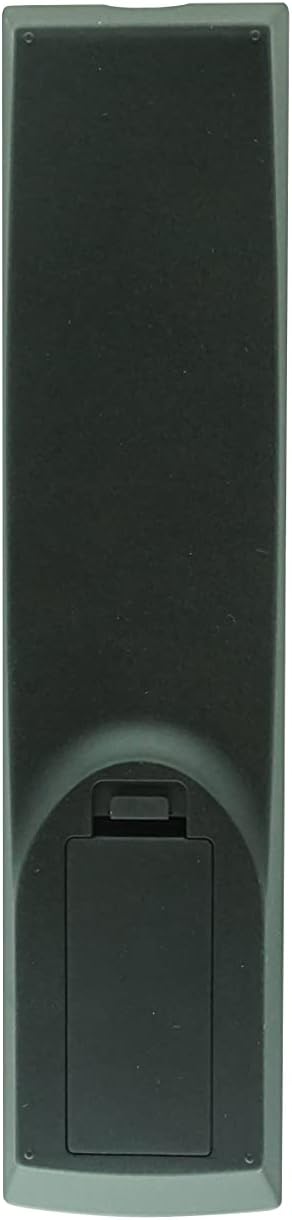
Figure 2.3: Back view of the remote control, showing the battery compartment cover.
3. Setup
3.1 Battery Installation
The remote control requires two (2) AA batteries (not included). Follow these steps to install them:
- Locate the battery compartment on the back of the remote control (refer to Figure 2.3).
- Press down on the tab and slide the battery compartment cover downwards to open it.
- Insert two (2) AA batteries, ensuring the positive (+) and negative (-) terminals align correctly with the markings inside the compartment.
- Slide the battery compartment cover back into place until it clicks securely.
Note: Always use new batteries and replace both batteries at the same time. Do not mix old and new batteries or different types of batteries.
4. Operating Instructions
This remote control operates using infrared (IR) signals. Ensure there is a clear line of sight between the remote's IR emitter and your Yamaha Home Theater System's IR receiver. Point the remote directly at the system when pressing buttons.
4.1 Basic Functions
- Power (Red Button): Turns the system on or off.
- Number Buttons (0-9): Used for direct input, such as selecting tracks or radio presets.
- Volume (+/-): Adjusts the audio output level.
- Mute: Silences the audio output.
- Input Selection (e.g., DISC, TV, AUX, TUNER, USB/NET): Selects the desired audio/video input source.
4.2 Navigation and Menu Control
- Directional Pad (Up, Down, Left, Right) and ENTER: Used to navigate menus and confirm selections on your system's display.
- TOP MENU / POP-UP/MENU: Accesses the main menu or context-sensitive menus.
- RETURN: Goes back to the previous screen or menu.
- ON SCREEN: Displays on-screen information or menus.
- SETUP: Accesses the system's setup menu.
- DISPLAY: Changes the information displayed on the system's screen.
4.3 Playback and Media Control
- Playback Buttons (Play, Pause, Stop, Fast Forward, Rewind, Skip Forward, Skip Back): Controls media playback.
- SHUFFLE: Activates random playback.
- REPEAT: Repeats the current track or playlist.
- A/B: Repeats a specific section of media.
- PIP (Picture-in-Picture): If supported by your system, controls the PIP function.
4.4 Advanced and System-Specific Functions
- PROGRAM: Used for programming functions, such as radio presets.
- MARKER / DIGEST / ZOOM: Specific functions related to disc playback or display.
- SLEEP / TIMER: Sets sleep timers or other timed functions.
- SURROUND: Adjusts surround sound modes.
- DIMMER: Adjusts display brightness.
- STATUS: Displays system status information.
- SUBTITLE / AUDIO: Controls subtitle and audio track options during playback.
- MEMORY: Stores or recalls settings.
- iPod: Activates iPod control mode if your system has an iPod dock.
Important: Due to the nature of replacement remotes, some functions may not be identical to your original remote or may require specific system settings. Refer to your Yamaha system's manual for detailed function explanations.
5. Troubleshooting
| Problem | Possible Cause | Solution |
|---|---|---|
| Remote is not responding. |
|
|
| Some functions do not work as expected. |
|
|
6. Maintenance
- Cleaning: Wipe the remote control with a soft, dry cloth. Do not use abrasive cleaners or solvents.
- Battery Care: If the remote will not be used for an extended period, remove the batteries to prevent leakage and potential damage.
- Storage: Store the remote in a cool, dry place away from direct sunlight and extreme temperatures.
7. Specifications
- Brand: Easytry123
- Compatible Devices: Yamaha Home Theater Systems (Models: WY92530, BRX-750, WY92500, MCR-750, BRX-610)
- Connectivity Technology: Infrared (IR)
- Controller Type: Button Control
- Special Feature: Ergonomic design
- Batteries Required: 2 x AA (not included)
8. Warranty and Support
As a third-party replacement remote control, specific warranty details are typically provided by the seller at the time of purchase. Please retain your purchase receipt for any warranty claims.
For technical support or inquiries regarding this Easytry123 replacement remote, please contact the seller directly through your purchase platform.


