1. Introduction
Thank you for choosing the HOMCOM Work Bench Tool Stand. This manual provides essential information for the safe assembly, operation, and maintenance of your new workbench. Please read these instructions carefully before use and retain them for future reference.
2. Safety Information
Always observe the following safety precautions to prevent injury or damage to the workbench:
- Read All Instructions: Familiarize yourself with the assembly and operation procedures before using the workbench.
- Weight Capacity: Do not exceed the maximum load capacity of 220 lbs (100 kg). Overloading can cause instability and damage.
- Stable Surface: Always place the workbench on a firm, level, and stable surface. Ensure all anti-slip feet are properly positioned.
- Secure Clamping: Ensure all workpieces are securely clamped before beginning any work.
- Personal Protective Equipment: Wear appropriate safety gear, such as safety glasses, gloves, and hearing protection, when working.
- Children and Pets: Keep children and pets away from the workbench during use.
- Inspection: Before each use, inspect the workbench for any loose, damaged, or missing parts. Do not use if any components are compromised.
3. Assembly Instructions
Assembly of the HOMCOM Work Bench is required. Follow the steps below carefully. It is recommended to have a rubber mallet and basic hand tools available.
- Unpack Components: Carefully remove all parts from the packaging and verify against the parts list (not provided in this document, refer to your product packaging for a complete list).
- Assemble Frame: Connect the steel frame components according to the diagrams provided in your product packaging. Ensure all bolts and nuts are securely tightened.
- Attach Worktop: Secure the MDF worktop boards to the frame. Pay attention to the orientation of the boards, ensuring the ruler and protractor markings are correctly positioned.
- Install Adjustment Mechanisms: Attach the height and angle adjustment mechanisms, including the crank arms and locking pins.
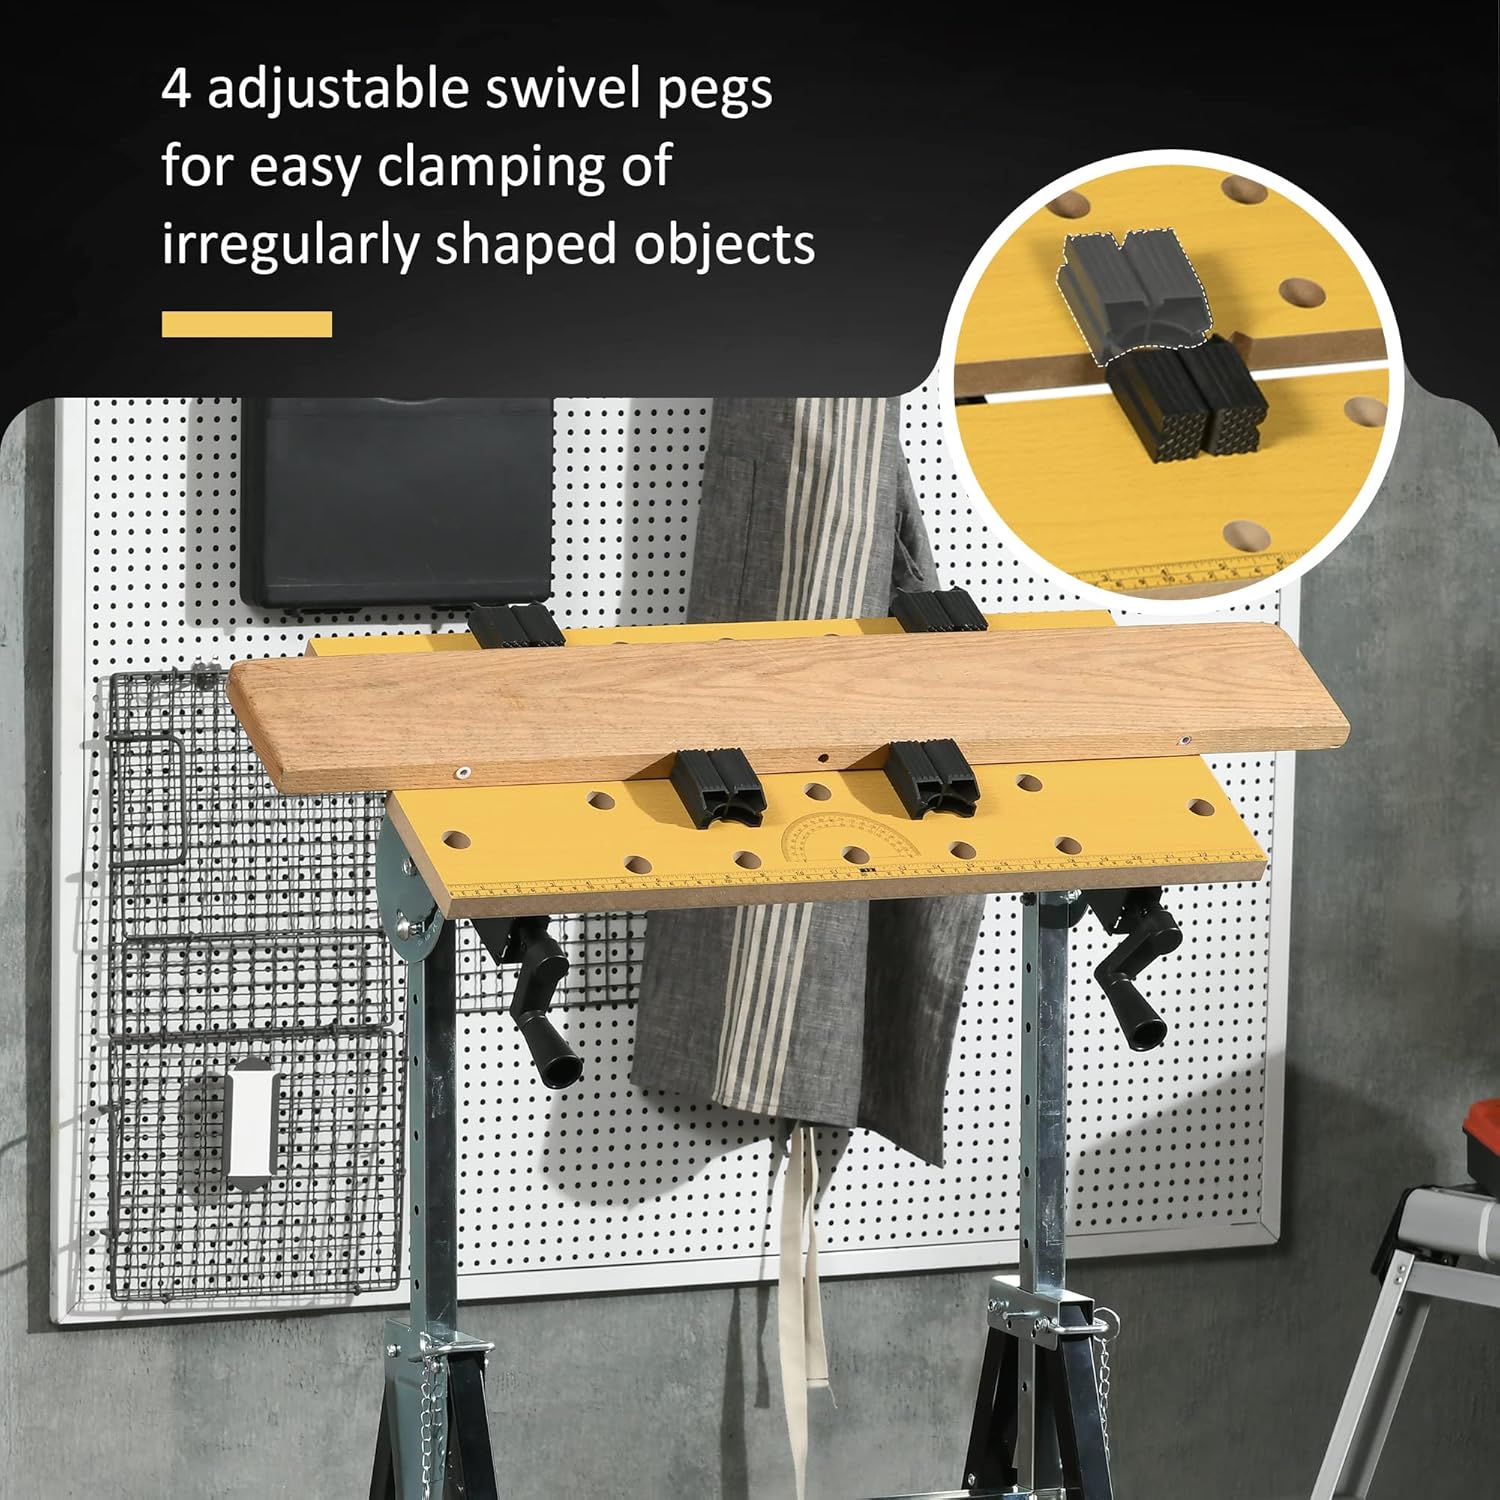
- Insert Swivel Pegs: Place the four adjustable swivel pegs into the designated holes on the worktop.
- Final Check: Once assembled, ensure all connections are tight and the workbench is stable.

4. Operating Instructions
The HOMCOM Work Bench offers versatile functionality for various projects.
4.1. Adjusting Height
The workbench height can be adjusted to suit different tasks and user preferences.
- Locate the height adjustment pins on the legs of the workbench.
- Carefully lift the worktop and pull out the pins.
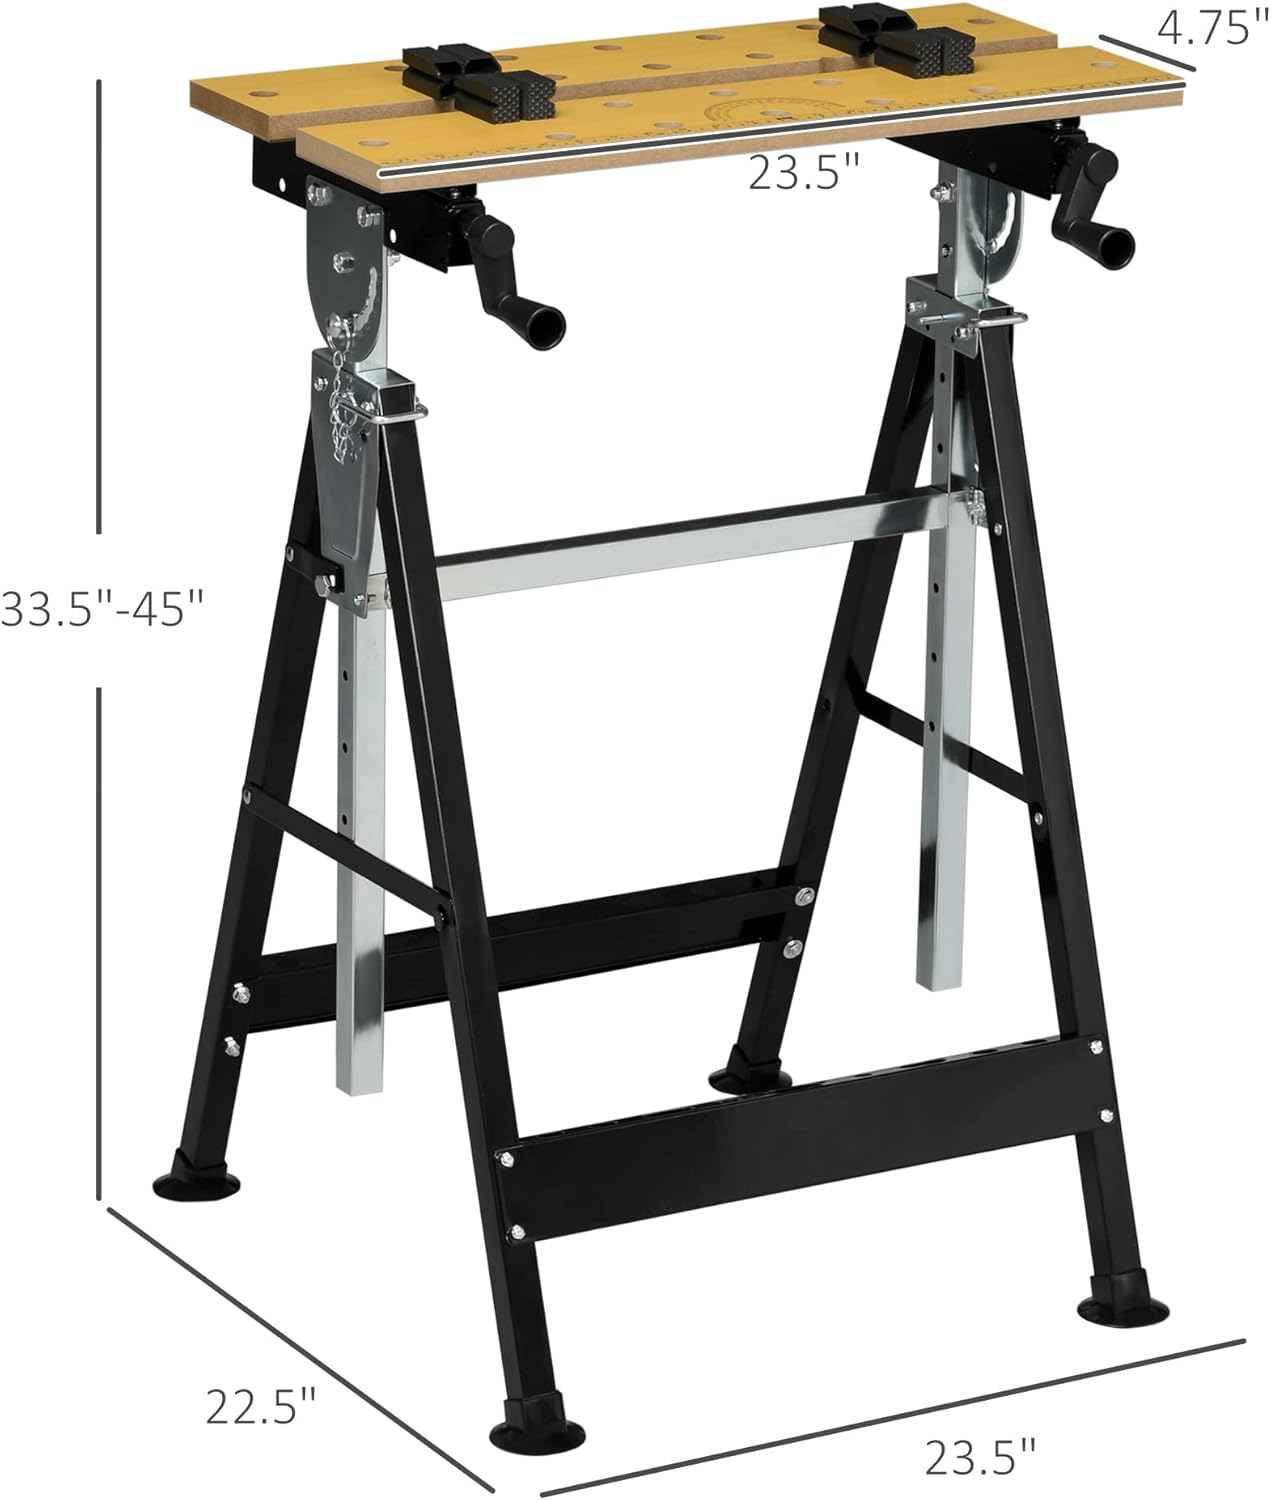
- Adjust the legs to the desired height, ranging from 33.5 inches to 45 inches.
- Reinsert the pins securely into the corresponding holes to lock the height. Ensure both sides are locked at the same level for stability.
4.2. Adjusting Worktop Angle
The worktop can be tilted to various angles for specialized tasks.
- Locate the angle adjustment mechanism on the side of the worktop support.
- Release the locking mechanism (usually a pin or lever).
- Adjust the worktop to one of the available angles: 15°, 30°, 45°, 60°, 75°, or 90°.
- Securely lock the mechanism to fix the worktop at the chosen angle.

4.3. Using the Clamping System
The workbench features a versatile clamping system for securing various workpiece shapes.
- Adjusting Worktop Boards: Use the crank arms located beneath the worktop to adjust the distance between the two MDF boards. The distance can be adjusted from 0 to 3.25 inches. Turn the crank clockwise to close the gap and counter-clockwise to open it.
- Swivel Pegs: Insert the four adjustable swivel pegs into the holes on the worktop. These pegs can be repositioned to accommodate irregularly shaped objects, providing additional clamping points.


4.4. Integrated Tools
- Ruler and Protractor: The worktop includes an integrated ruler and protractor for convenient measurements and angle marking.
- Tool Rack: Multiple slots on the frame provide a convenient storage area for hand tools.
5. Maintenance
Regular maintenance ensures the longevity and safe operation of your workbench.
- Cleaning: Wipe down the worktop and frame with a damp cloth after each use to remove dust and debris. Avoid harsh chemicals that may damage the finish.
- Lubrication: Periodically apply a light lubricant to moving parts, such as the height and angle adjustment mechanisms and clamping screws, to ensure smooth operation.
- Fastener Check: Regularly check all bolts, nuts, and screws for tightness. Retighten as necessary to maintain structural integrity.
- Storage: When not in use, store the workbench in a dry, clean environment. The workbench can be partially folded for space-saving storage.
6. Troubleshooting
If you encounter issues with your HOMCOM Work Bench, refer to the following common solutions:
- Difficulty Adjusting Height/Angle: Ensure locking pins or levers are fully disengaged before attempting to adjust. Check for any obstructions or debris in the adjustment mechanisms. Lubricate moving parts if stiff.
- Worktop Not Clamping Securely: Verify that the crank arms are fully tightened. Ensure swivel pegs are correctly inserted and positioned to provide even pressure on the workpiece.
- Workbench Instability: Confirm that the workbench is placed on a flat, level surface. Check that all height adjustment pins are fully engaged and all frame fasteners are tight. Ensure anti-slip feet are intact and making full contact with the floor.
- Missing or Damaged Parts: If parts were missing or damaged upon arrival, contact customer support immediately for assistance.
7. Specifications
| Feature | Detail |
|---|---|
| Model Number | B71-051V80 |
| Material | Steel, MDF |
| Overall Dimensions (L x W x H) | 23.5" x 22.5" x 33.5" - 45" |
| Adjustable Height Range | 33.5" - 45" |
| Adjustable Angle Settings | 15°, 30°, 45°, 60°, 75°, 90° |
| Clamping Range | 0" - 3.25" |
| Load Capacity | 220 lbs (100 kg) |
| Item Weight | 15.8 lbs |
| Frame Material | Alloy Steel |
| Finish Type | Powder Coated |
| Assembly Required | Yes |

8. Warranty and Support
This product is subject to the return policy of the retailer from which it was purchased. For specific warranty details or to inquire about product support, please refer to your purchase documentation or contact the retailer directly. For general inquiries about HOMCOM products, you may visit the official HOMCOM store online or contact their customer service.