1. Introduction
The RED WOLF 16-Pin ISO Radio Wiring Harness Adapter is designed to simplify the installation of aftermarket car stereos in various heavy-duty trucks and select passenger vehicles. This adapter provides a direct plug-and-play solution, eliminating the need to cut or splice factory wiring, ensuring a clean and reliable connection. It is engineered for compatibility with a range of popular aftermarket radio brands and specific vehicle models.
2. Product Features
- Easy Installation: Designed for direct connection without cutting any OEM wiring harness.
- Wide Compatibility: Compatible with various vehicle models including Freightliner, Volvo, Peterbilt, Mack, Land Rover, Sprinter, and Mercedes Benz.
- Aftermarket Radio Support: Fits Pioneer, Kenwood, JVC, Alpine, and Sony aftermarket radios.
- Quality Materials: Constructed with a pure copper core and Polyvinyl Chloride (PVC) material for good electrical conductivity, durability, and long life.
- Pre-stripped Wires: Wires are pre-stripped for quick and efficient connection to your aftermarket radio's harness.


3. Compatibility
This wiring harness adapter is designed for specific vehicle models and aftermarket radio brands. Please verify your vehicle and radio's compatibility before installation.
3.1 Vehicle Compatibility (13-Pin Male Connector Note)
NOTE: The male connector features 13 pins. Ensure your vehicle's factory harness matches this configuration.
- Freightliner: 2004-2021 Freightliner Cascadia (with Delphi stereo), 2002-2009 Freightliner Columbia.
- Peterbilt: 2006-2018 Peterbilt 579/567/386/379.
- Mack Truck: 2012-2018 models.
- Volvo: 2004-2016 Volvo VNL.
- Land Rover: 2000-2006 Land Rover Freelander/Discovery 2.
- Sprinter: 2005-2013 Sprinter.
- Mercedes Benz: C Class 1998-2004, CLK 2001-2005, SL500 1997-2003, E320 1997-1999, ML320/ML500/W163/Ml320/Ml55 2000-2005, G500/G55/W463 2002-2003.


3.2 Aftermarket Radio Compatibility
- Pioneer: AVH, AVH-P, AVH-X, MVH, DVH, NEX series (e.g., AVH-100DVD, 110BT, 120BT, 160DVD, 170DVD, 180DVD, 190DVD, 200BT, 200EX, 201EX, 210EX, 211EX, 220EX, 221EX, 270BT, 271BT, 280BT).
- Kenwood: DDX, DMX, DNX, KVT series (e.g., DNX6190HD, DNX7190HD, DNX570HD, DNX690HD, DNN770HD, DNX9990HD, DNX890HD, DNN990HD, DDX770, DDX470, DDX370).
- JVC: KW-NT510HDT, KW-NT810HDT, KW-NT310, KW-NSX700, KW-NSX600, KW-NSX1, KW-AV71BT, KW-AV61BT, KW-ADV65BT, KW-AV61, KD-AVX77, KW-ADV793, KW-ADV794, KW-AVX640, KW-AVX720, KW-AVX740, KW-AVX830, KW-AVX840, KW-NT1, KW-NT3HD, KW-NT30HD, KW-NT3HDT, KW-NT50HDT.
- Alpine: ILX, INE, IXA-W407, IVA-W205, X009-FD1, X009-FD2, X009-TND, INA-W900BT, INA-W910, INE-W957HD, IVA-W200, IVA-D310, IXA-W409, X009U, IVA-D105, IVA-D205, IVA-D106R, X009-GM, IVA-W505, IVA-D106, X009-WRA, X109-WRA, IVE-W535HD, IVEW535HD, IVE-W530, INE-W967HD, CM2396.

4. Installation Instructions (Setup)
Follow these steps for a successful installation of your RED WOLF wiring harness adapter. Professional installation is recommended if you are unfamiliar with car audio wiring.
- Disconnect Power: Before starting, disconnect the vehicle's battery to prevent electrical shorts.
- Remove Old Radio: Carefully remove your existing factory radio from the dashboard. Refer to your vehicle's service manual for specific instructions on dashboard disassembly.
- Identify Factory Harness: Locate the factory wiring harness connected to your old radio. Ensure it matches the 16-pin ISO male connector of the RED WOLF adapter.
- Connect Adapter to Aftermarket Radio: Connect the RED WOLF adapter's female connector to the corresponding male connector on your new aftermarket radio's wiring harness. The wires are pre-stripped for easy connection. Match wire colors according to standard ISO wiring conventions or your aftermarket radio's manual.
- Connect Adapter to Vehicle: Plug the RED WOLF adapter's male connector into the vehicle's factory wiring harness.
- Test Connections: Before fully reassembling the dashboard, reconnect the vehicle battery and test the aftermarket radio's functionality (power, audio, memory settings, etc.).
- Secure Wiring and Reassemble: Once confirmed working, neatly secure all wiring to prevent rattles or interference. Reassemble the dashboard components.

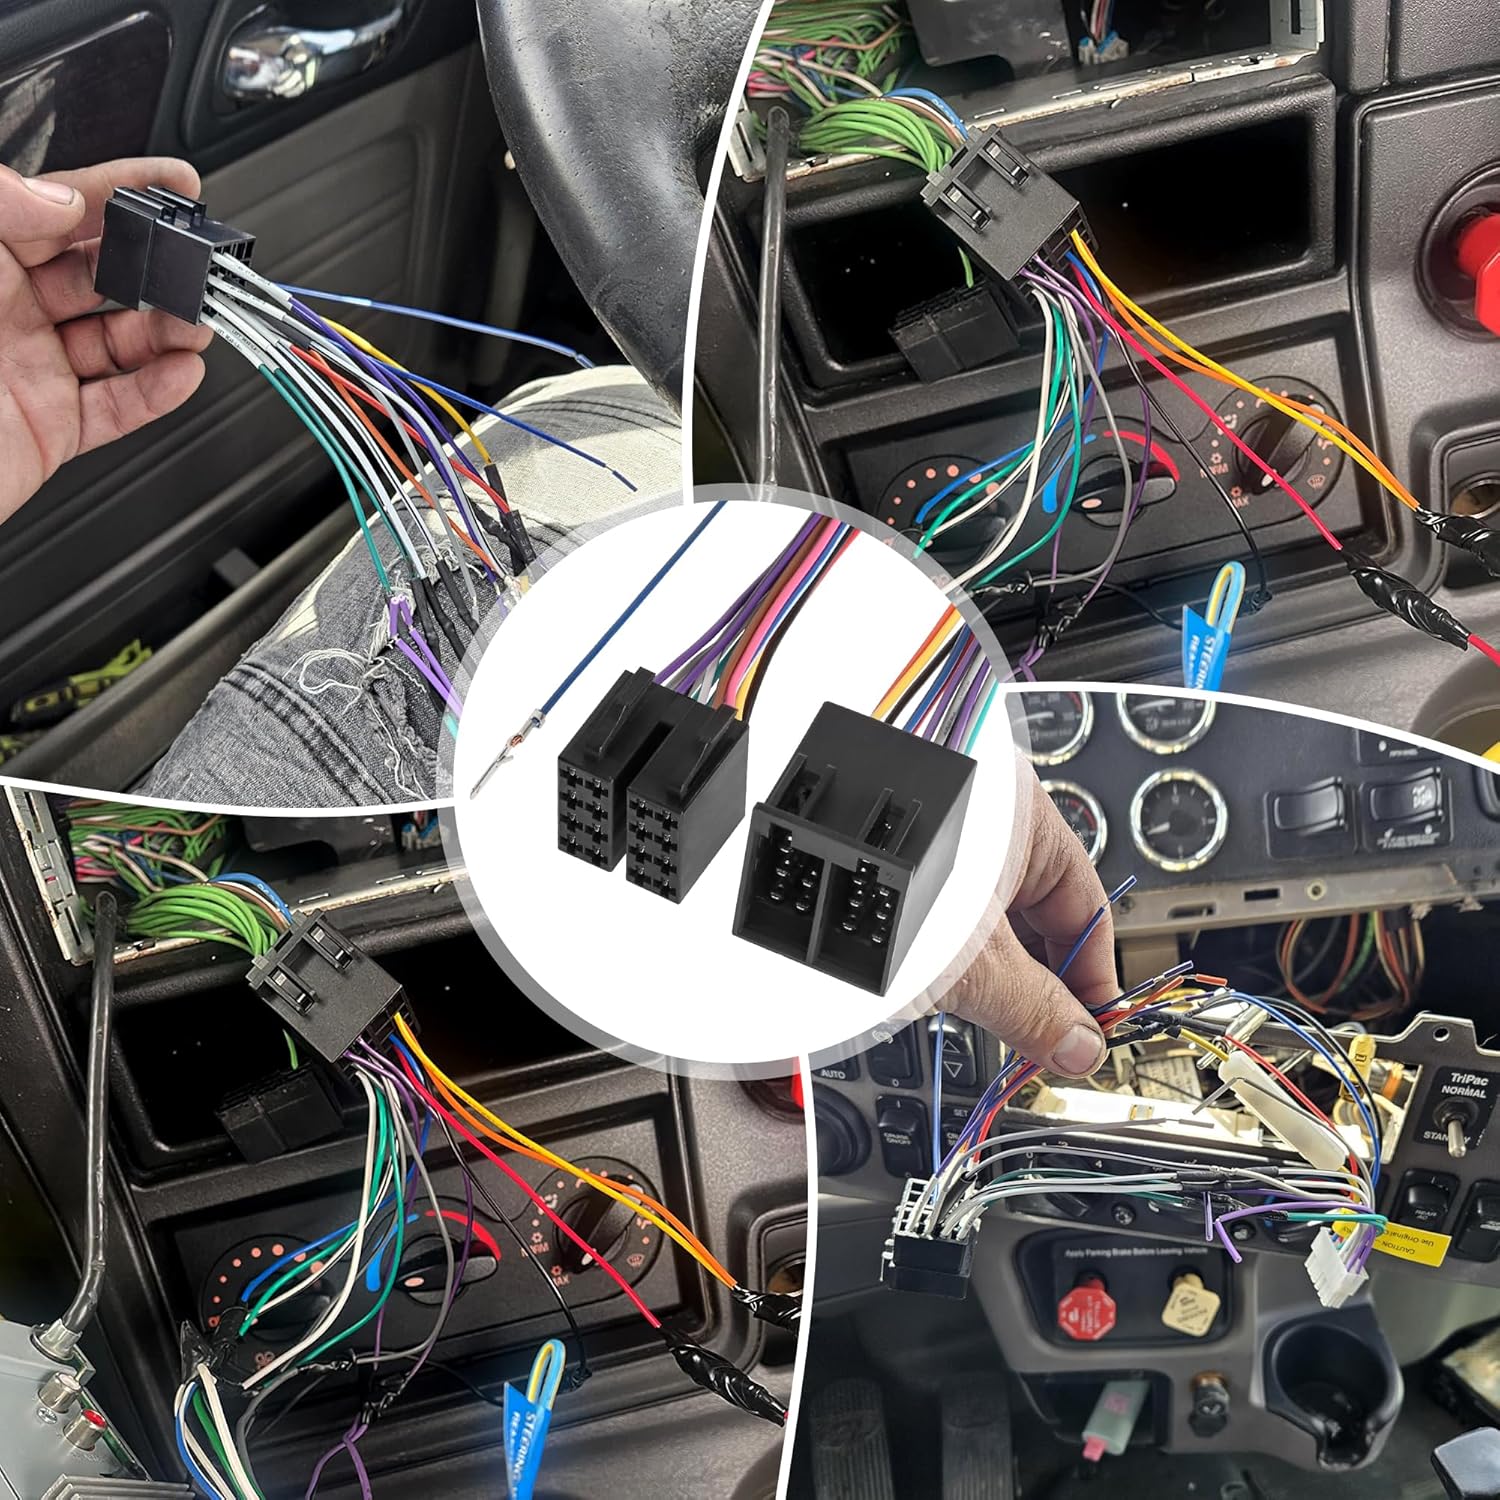
Video 4.1: This video demonstrates the RED WOLF 16-Pin ISO Radio Wiring Harness Adapter, showing its male and female connectors, pre-stripped wires, and how it connects to an aftermarket radio. It highlights the ease of installation without cutting OEM wiring.
5. Operating (Wiring Overview)
The RED WOLF 16-Pin ISO Radio Wiring Harness Adapter facilitates the connection between your vehicle's factory wiring and an aftermarket radio. The harness is designed to match standard ISO pin assignments, which typically include connections for power (constant 12V, ignition 12V), ground, and four speaker outputs. The pre-stripped wires on the adapter's end are ready to be connected to your aftermarket radio's harness, usually by crimping or soldering, following the color-coded scheme provided by your aftermarket radio manufacturer.
It is crucial to consult your aftermarket radio's installation manual for its specific wiring diagram and match the functions (e.g., constant power, ignition power, ground, speaker channels) to the corresponding wires on the RED WOLF adapter. While the adapter simplifies the physical connection, correct wire-to-wire matching is essential for proper radio operation.
6. Maintenance
The RED WOLF wiring harness adapter is designed for durability and requires minimal maintenance once installed correctly. To ensure long-term performance:
- Secure Connections: Ensure all connections are firm and properly insulated to prevent shorts or disconnections due to vehicle vibration.
- Avoid Stress: Do not pull or put excessive stress on the wires or connectors.
- Keep Dry: Protect the wiring from moisture and extreme temperatures.
- Regular Checks: Periodically inspect the wiring during other vehicle maintenance for any signs of wear or damage.
7. Troubleshooting
If you encounter issues after installing the wiring harness, consider the following troubleshooting steps:
- No Power to Radio:
- Check vehicle fuses.
- Verify the constant 12V (usually yellow wire) and ignition 12V (usually red wire) connections. In some vehicles (e.g., 2018 Freightliner Cascadia), these wires may need to be reversed. Test with a multimeter.
- Ensure the ground wire is securely connected to a chassis ground.
- Radio Loses Settings (Memory) When Vehicle is Off:
- This often indicates that the constant 12V (memory wire) and ignition 12V wires are swapped. Correctly identify and connect the constant 12V wire to the radio's memory input.
- No Sound from Speakers:
- Check all speaker wire connections for proper polarity and secure contact.
- Ensure the amplifier remote turn-on wire (if applicable) is connected.
- Verify the radio's fader/balance settings.
- Intermittent Operation:
- Inspect all connections for looseness or poor contact.
- Check for any pinched or damaged wires.
If problems persist, consult a professional car audio installer or contact RED WOLF customer support.
8. Specifications
| Specification | Detail |
|---|---|
| Brand | RED WOLF |
| Model Number | XC07-2106+XC07-2097 |
| Connector Type | 16-Pin ISO Male & Female |
| Material | Copper, Polyvinyl Chloride (PVC) |
| Item Weight | 0.07 Kilograms (approx. 2.39 ounces) |
| First Available Date | August 17, 2021 |
9. Warranty and Support
RED WOLF products are manufactured to high-quality standards. For warranty information or technical support, please refer to the contact details provided with your purchase or visit the official RED WOLF website. Keep your proof of purchase for warranty claims.


