1. Introduction
Thank you for choosing the RCBDBSM 2100W 6-Speed Electric Hand Mixer. This powerful and versatile tool is designed for efficient mixing of various medium-viscosity materials. Please read this manual carefully before operation to ensure safe and effective use of the product.
1.1 Intended Use
This multifunctional electric mixer is suitable for quickly and efficiently mixing materials such as concrete, paint, cement, liquid paste, mortar, plaster, putty powder, flour cream, meat filling, and other liquid or powdered materials. It is designed for professional and DIY applications requiring consistent mixing.
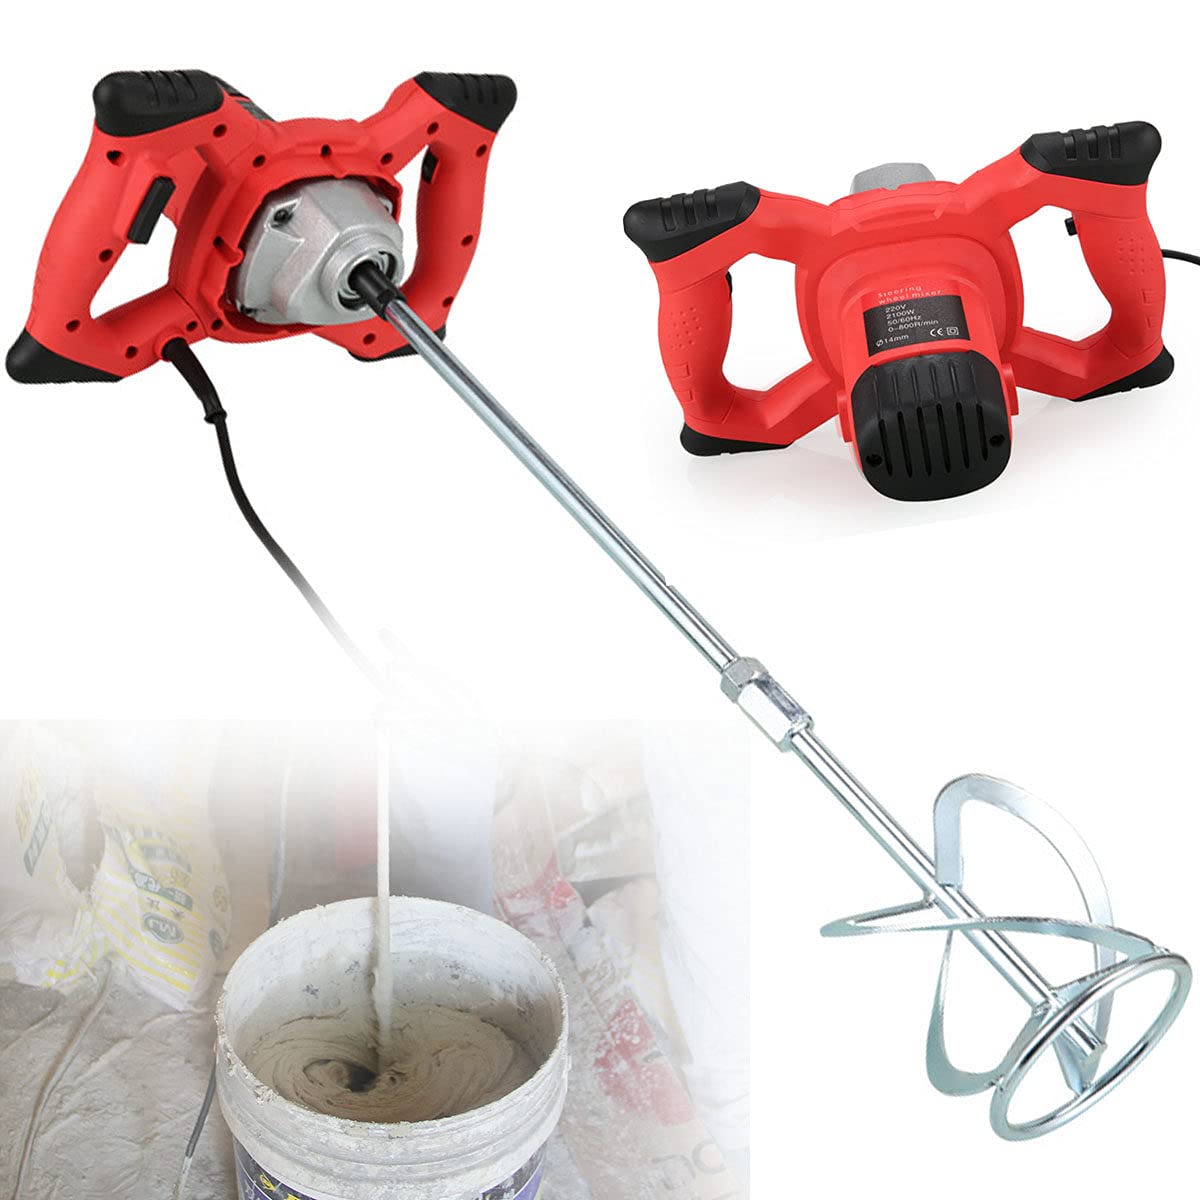
Image 1.1: The mixer is suitable for various materials including pigment, paint, cement, concrete, putty powder, poultry feed, mortar, and ink.
2. Safety Instructions
Always observe basic safety precautions to reduce the risk of fire, electric shock, and personal injury when operating this power tool.
2.1 General Safety
- Read all instructions: Familiarize yourself with the controls and proper use of the tool.
- Electrical Safety: Ensure the power supply matches the specifications (220V, 50/60Hz). Do not use in wet conditions or expose to rain. Always use a residual current device (RCD) for added protection.
- Work Area: Keep your work area clean and well-lit. Cluttered or dark areas invite accidents.
- Children and Bystanders: Keep children and bystanders away while operating a power tool.
- Personal Protective Equipment: Always wear safety glasses, hearing protection, and appropriate gloves. A dust mask is recommended when mixing powdered materials.
- Secure Grip: Always maintain a firm grip on the mixer handles during operation to control torque.
- Unplug When Not In Use: Disconnect the mixer from the power source before making any adjustments, changing accessories, or storing the tool.
3. Product Components
The RCBDBSM Electric Hand Mixer consists of the following main components:

Image 3.1: Labeled diagram of the electric mixer showing its main parts.
- Copper Wire Motor: High-power 2100W motor for stable and long-lasting performance.
- Aluminum Head Gearbox: Durable gearbox for efficient power transmission.
- 6-Speed Dial: For adjusting mixing speed.
- Stirring Rod Connecting Shaft: Connects the motor unit to the stirring rod.
- Stir Bar (Shaft): The main shaft of the mixing paddle.
- Mixing Head (Paddle): S-type spiral design for efficient and uniform mixing.
- Switch (ON/OFF): Power activation switch.
- Non-slip Handle: Ergonomically designed for comfortable and secure grip, reducing vibration.
- Safety Power Cord: For connecting to a 220V power supply.

Image 3.2: Close-up view of key components including the threaded mixing rod, variable switch, S-type mixing head, 6-speed dial, two-stage stirring rod, and threaded connector.
4. Setup and Assembly
The electric mixer requires simple assembly before first use.
- Attach the Stirring Rod: Insert the stirring rod into the motor unit's connecting shaft.
- Align and Secure: Align the two holes on the stirring rod and the motor unit. Insert the provided screws and tighten them securely. Ensure the connection is firm and stable.
- Check Connections: Verify that all connections are tight before plugging in the mixer.
The stirring rod is an M14 threaded rod, 60 cm in length, designed for efficient and delicate mixing.
5. Operation
Follow these steps for safe and effective operation of your electric hand mixer.
5.1 Powering On/Off and Lock Function
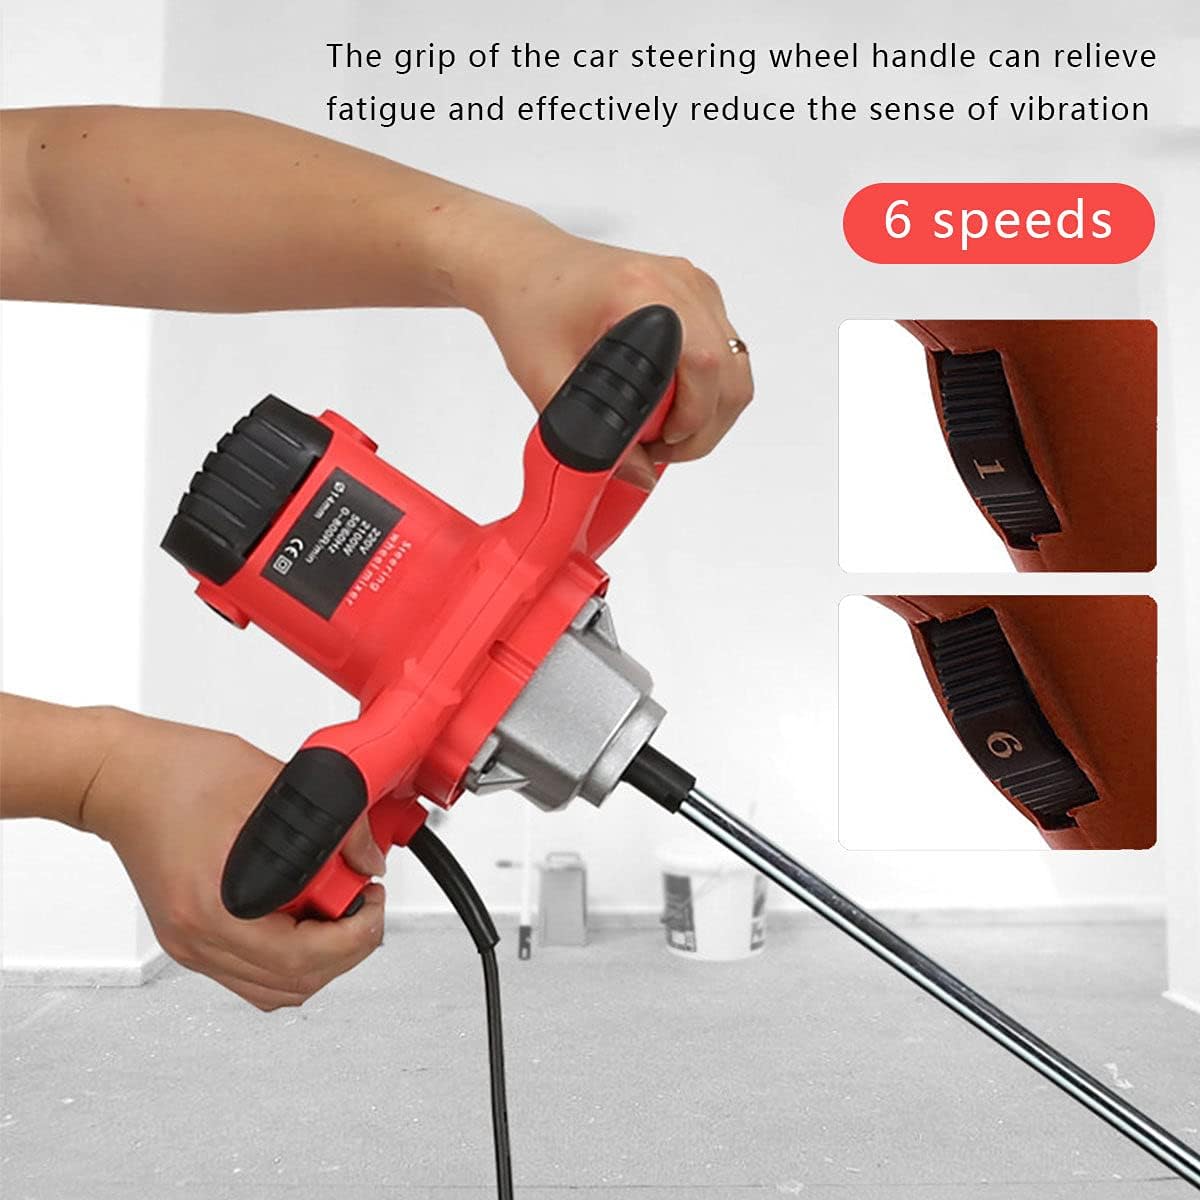
Image 5.1: Location of the ON/OFF switch and the lock switch for continuous operation.
- To Turn On: Press the ON/OFF switch. The mixer will start operating.
- To Turn Off: Release the ON/OFF switch.
- Lock Function (for continuous operation): For extended mixing tasks, press the ON/OFF switch and then simultaneously press the lock switch. You can then release the ON/OFF switch, and the mixer will continue to operate, reducing finger fatigue.
- To Release Lock: Press the ON/OFF switch again to disengage the lock and stop the mixer.
5.2 Speed Adjustment

Image 5.2: The ergonomic handle and the 6-speed adjustment dial.
- The mixer features a 6-level adjustable speed control, ranging from 0 to 800 RPM.
- Rotate the speed dial to select the desired mixing speed. Lower speeds (1-2) are suitable for thicker, heavier materials, while higher speeds (5-6) are for lighter, more fluid mixtures.
- Adjust the speed according to the material's viscosity and desired consistency.
5.3 Mixing Techniques
- Always start mixing at a low speed to prevent splashing, especially with liquid materials.
- Gradually increase the speed as the material begins to mix.
- Move the mixer paddle through the material in a circular motion to ensure thorough and uniform mixing.
- Avoid forcing the mixer. Let the tool do the work.
6. Maintenance
Proper maintenance ensures the longevity and optimal performance of your mixer.
6.1 Cleaning
- Always unplug the mixer before cleaning.
- Immediately after use, clean the stirring rod and mixing head to prevent material from hardening. Use water and a brush for water-based materials, or appropriate solvents for oil-based materials.
- Wipe the main body of the mixer with a damp cloth. Do not immerse the motor unit in water.
- Ensure all ventilation openings are clear of debris to prevent overheating.
6.2 Storage
- Store the mixer in a clean, dry place, away from direct sunlight and moisture.
- Keep out of reach of children.
- If storing for extended periods, ensure the mixer is clean and dry.
7. Troubleshooting
Refer to this section for common issues and their solutions.
| Problem | Possible Cause | Solution |
|---|---|---|
| Mixer does not start | No power supply; Faulty switch; Power cord damaged | Check power outlet and connection; Ensure switch is fully pressed; Inspect power cord for damage. If damaged, seek professional repair. |
| Loss of power during operation | Overload; Loose connection; Motor overheating | Reduce load on the mixer; Check power cord connection; Allow motor to cool down. Ensure ventilation is not blocked. |
| Excessive vibration or noise | Stirring rod not properly secured; Damaged mixing head; Internal mechanical issue | Ensure stirring rod is tightly assembled; Inspect mixing head for damage and replace if necessary; If issue persists, discontinue use and seek professional inspection. |
| Mixing is uneven | Incorrect speed setting; Insufficient mixing time; Material too thick | Adjust speed appropriately for the material; Increase mixing duration; If material is too thick, consider adding appropriate liquid or reducing batch size. |
If you encounter problems not listed here or if solutions do not resolve the issue, please contact customer support.
8. Specifications
Technical data for the RCBDBSM Electric Hand Mixer:
| Feature | Specification |
|---|---|
| Brand | RCBDBSM |
| Model Number | Mortar Mixer |
| Materials | ABS + Metal |
| Output Power | 2100 W |
| Rated Frequency | 50/60 Hz |
| Rated Voltage | 220 V |
| Rated Speed | 0 – 800 rpm |
| Speed Control | 6 adjustable levels |
| Stirring Rod Shaft | M14 |
| Stirring Rod Length | 60 cm |
| Host Dimensions | 300 x 188 mm |
| Mixer Weight | 3.2 kg |
| Package Dimensions | 34 x 24 x 21 cm |
| Package Weight | 5 kg |
| Power Type | Corded Electric |
9. Warranty and Support
Information regarding product warranty is not explicitly provided in the product details. Please refer to your purchase documentation or contact the retailer for specific warranty terms and conditions.
9.1 Customer Support
For technical assistance, spare parts, or any inquiries regarding your RCBDBSM Electric Hand Mixer, please contact the seller or manufacturer through the platform where the product was purchased. Provide your model number (Mortar Mixer) and ASIN (B09CL7F1ND) for faster service.