1. Introduction
This manual provides essential information for the installation, operation, and maintenance of your GROHE QUICKFIX Start Kitchen Sink Mixer, model 30531DC1. Please read these instructions carefully before beginning installation or use to ensure proper function and longevity of the product.

Image 1.1: The GROHE QUICKFIX Start Kitchen Sink Mixer, featuring a pull-out dual spray and Supersteel finish.
Product Features:
- Pull-Out Dual Spray: Offers both a splash-free laminar spray and a powerful jet spray for versatile use. The spray automatically returns to laminar when the tap is turned off.
- 90° Swivel Area: The spout can swivel 90 degrees, providing flexibility in tight kitchen spaces.
- GROHE SilkMove Cartridge: Ensures smooth and precise control of water temperature and flow.
- GROHE StarLight Coating: A durable, easy-to-clean finish that is highly scratch-resistant.
- GROHE Zero Isolated Inner Waterways: Ensures water within the tap is lead and nickel-free.
- QuickMount Installation System: Designed for easy, tool-free single-hole installation.
2. Setup and Installation
The GROHE QUICKFIX Start mixer is designed for single-hole deck mounting. A minimum water pressure of 1.0 bar is recommended for optimal performance. The QuickMount system facilitates a straightforward installation process.
Installation Steps:
- Prepare the Mounting Hole: Ensure your sink or countertop has a single mounting hole of the appropriate diameter (typically 34mm).
- Insert the Faucet: Place the faucet body into the mounting hole, ensuring the base gasket is correctly seated.
- Secure with QuickMount: From underneath the sink, slide the QuickMount fastening nut onto the threaded shaft of the faucet. Hand-tighten the nut to secure the faucet firmly to the surface. No tools are typically required for this step.
- Connect Water Supply Lines: Attach the hot and cold water supply lines to the corresponding connections on the faucet. Ensure all connections are tight to prevent leaks.
- Install Pull-Out Hose Weight: Attach the counterweight to the pull-out spray hose. This weight ensures the spray head retracts smoothly back into the spout after use. Position the weight according to the manufacturer's guidelines for optimal retraction.
- Test for Leaks: Turn on the water supply and check all connections for any leaks.

Image 2.1: A hand securing the QuickMount fastening nut from beneath the sink.

Image 2.2: The QuickMount fastening nut fully tightened, securing the faucet.
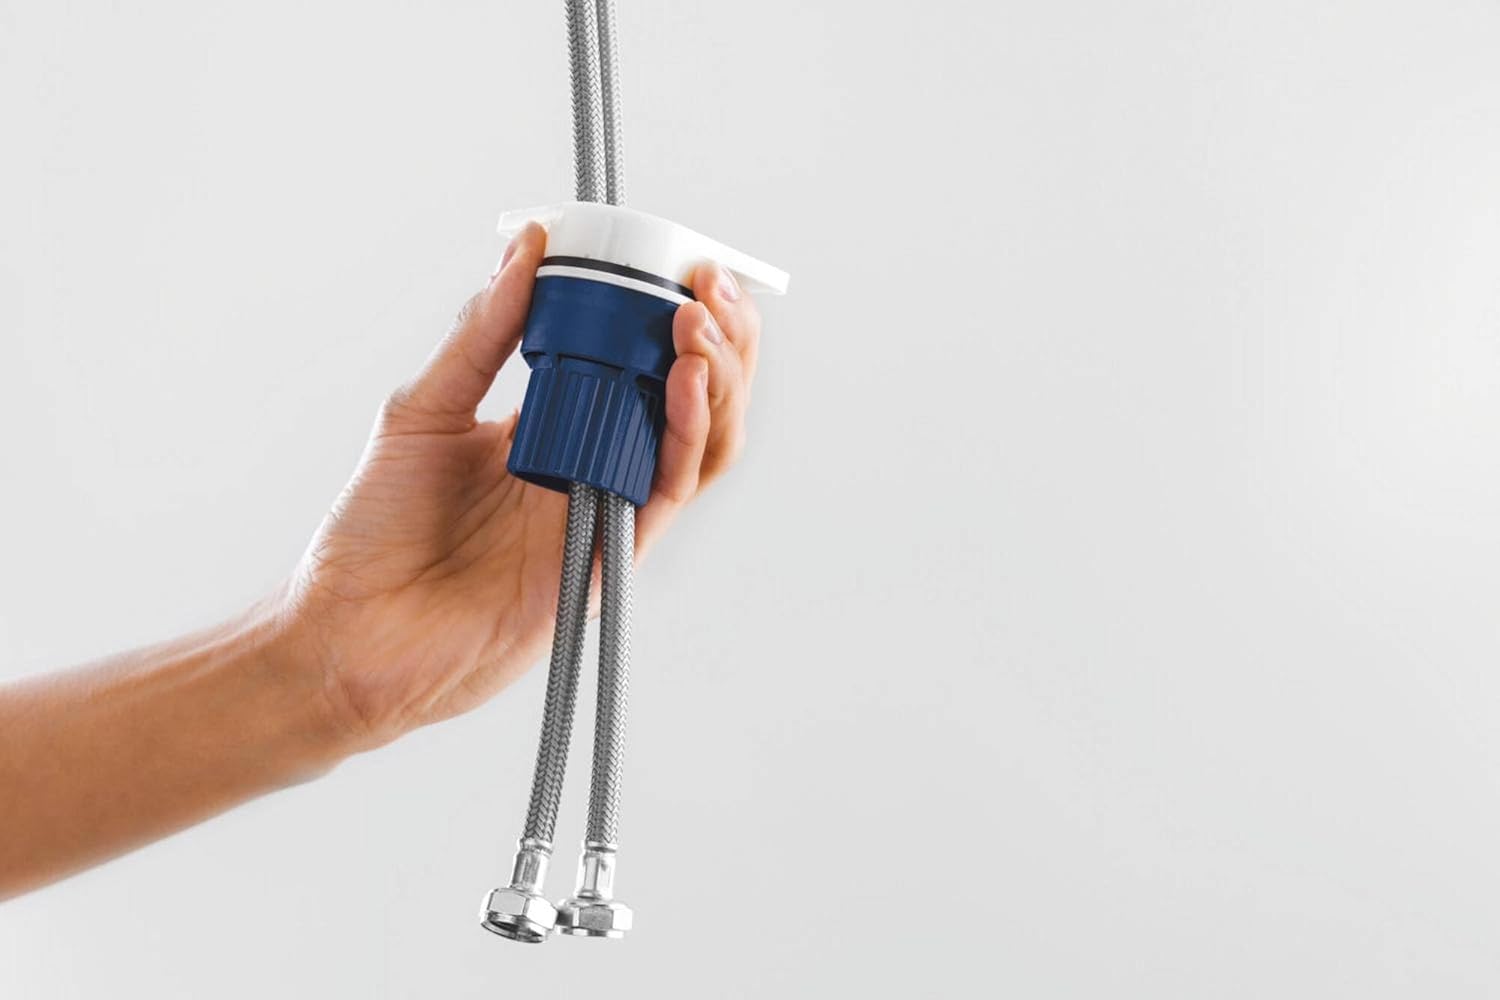
Image 2.3: Water supply hoses being connected to the faucet's base.

Image 2.4: Attaching the counterweight to the pull-out hose for proper retraction.

Image 2.5: The counterweight correctly installed on the pull-out spray hose.
Dimensions and Technical Drawing:
Refer to the technical drawing below for detailed dimensions and installation clearances.

Image 2.6: Technical drawing illustrating the dimensions and swivel range of the faucet.
3. Operating Instructions
Your GROHE QUICKFIX Start Kitchen Sink Mixer is designed for intuitive and efficient operation.
Water Flow and Temperature Control:
- Single-Lever Handle: The single lever controls both water flow and temperature.
- Flow Adjustment: Lift the handle upwards to increase water flow. Push downwards to decrease or turn off the flow.
- Temperature Adjustment: Move the handle to the left for hot water and to the right for cold water.
Pull-Out Dual Spray Function:
- Extend Spray Head: Gently pull the spray head out from the spout. The hose provides ample reach for various tasks.
- Switch Spray Modes: Press the button on the spray head to toggle between the laminar (aerated, splash-free) spray and the powerful jet spray.
- Automatic Return: When the water flow is turned off, the spray head automatically reverts to the laminar spray mode.
- Retract Spray Head: After use, guide the spray head back into the spout. The counterweight will assist in smooth retraction.
Spout Swivel Function:
- The spout can be smoothly swiveled up to 90 degrees to accommodate different sink basins or to move it out of the way when not in use.
4. Maintenance
Regular cleaning and proper care will ensure the longevity and aesthetic appeal of your GROHE faucet.
Cleaning the Finish:
- The GROHE StarLight coating is designed for easy maintenance. To clean, simply wipe the surface with a soft, damp cloth.
- For stubborn spots, use a mild soap solution. Avoid abrasive cleaners, scouring pads, or harsh chemicals, as these can damage the finish.
- Rinse thoroughly with clean water and dry with a soft cloth to prevent water spots.
Internal Components:
- The GROHE SilkMove ceramic cartridge is designed for maintenance-free operation and durability.
- The GROHE Zero isolated inner waterways ensure the water remains free of lead and nickel, requiring no special maintenance.
5. Troubleshooting
If you encounter issues with your faucet, consider the following common solutions:
- Low Water Flow: Check if the main water supply valves are fully open. Ensure there are no kinks in the supply lines. The aerator on the spray head might be clogged; unscrew and clean it if necessary.
- Leaking: Check all connections for tightness. If leaks persist from the faucet body, contact customer support.
- Spray Head Not Retracting: Ensure the counterweight on the pull-out hose is correctly positioned and not obstructed by items under the sink.
- Temperature Issues: Verify that both hot and cold water supplies are active. If only one temperature is available, check the corresponding supply line.
For persistent problems or issues not covered here, please contact GROHE customer support.
6. Specifications
| Feature | Specification |
|---|---|
| Brand | GROHE |
| Model Name | Start |
| Part Number | 30531DC1 |
| Color | Stainless Steel |
| Mounting Type | Deck Mount |
| Installation Type | Single Hole |
| Number of Handles | 1 |
| Material | Ceramic (Handle) |
| Finish Type | Chrome (Product description mentions Supersteel, but specifications list chrome. Assuming Supersteel is the specific finish for this variant.) |
| Spout Design | Low-arc pull-down swivel |
| Spout Height | 139 Millimeters |
| Item Weight | 2.25 Kilograms (4.95 pounds) |
| Product Dimensions | 17.91 x 9.25 x 3.15 inches |
| Special Feature | Lead Free |
| Recommended Uses | Kitchen Faucet |
7. Warranty and Support
Manufacturer's Warranty:
The GROHE QUICKFIX Start Kitchen Sink Mixer comes with a standard 5-year manufacturer's warranty. This warranty can be extended by an additional 1 year, totaling 6 years, upon product registration. Please refer to the GROHE official website for details on how to register your product and for full warranty terms and conditions.
Customer Support:
For technical assistance, spare parts, or any inquiries regarding your GROHE product, please visit the official GROHE website or contact their customer service department. Contact information can typically be found on the GROHE website or on your product packaging.